


paper:https://arxiv.org/abs/2003.12063
code:https://github.com/Scalsol/mega.pytorch
目录
1.1 创建cuda10.0+pytorch1.3.0+python3.7环境
1.环境创建
1.1 创建cuda10.0+pytorch1.3.0+python3.7环境
docker容器配置指定深度学习环境cuda+python+pytorch_qq_44716044的博客-CSDN博客
1.2 安装其他工具包
conda install ipython pip

# mega and coco api dependencies
pip install ninja yacs cython matplotlib tqdm opencv-python scipy


export INSTALL_DIR=$PWD

# install pycocotools
cd $INSTALL_DIR
git clone https://github.com/cocodataset/cocoapi.git
cd cocoapi/PythonAPI
python setup.py build_ext install

# install cityscapesScripts
cd $INSTALL_DIR
git clone https://github.com/mcordts/cityscapesScripts.git
cd cityscapesScripts/
python setup.py build_ext install

# install apex
cd $INSTALL_DIR
git clone https://github.com/NVIDIA/apex.git
cd apex
python setup.py install --cuda_ext --cpp_ext

# install PyTorch Detection
cd $INSTALL_DIR
git clone https://github.com/Scalsol/mega.pytorch.git
cd mega.pytorch

# the following will install the lib with
# symbolic links, so that you can modify
# the files if you want and won't need to
# re-build it
python setup.py build develop

pip install 'pillow<7.0.0'

unset INSTALL_DIR

# or if you are on macOS
# MACOSX_DEPLOYMENT_TARGET=10.9 CC=clang CXX=clang++ python setup.py build develop
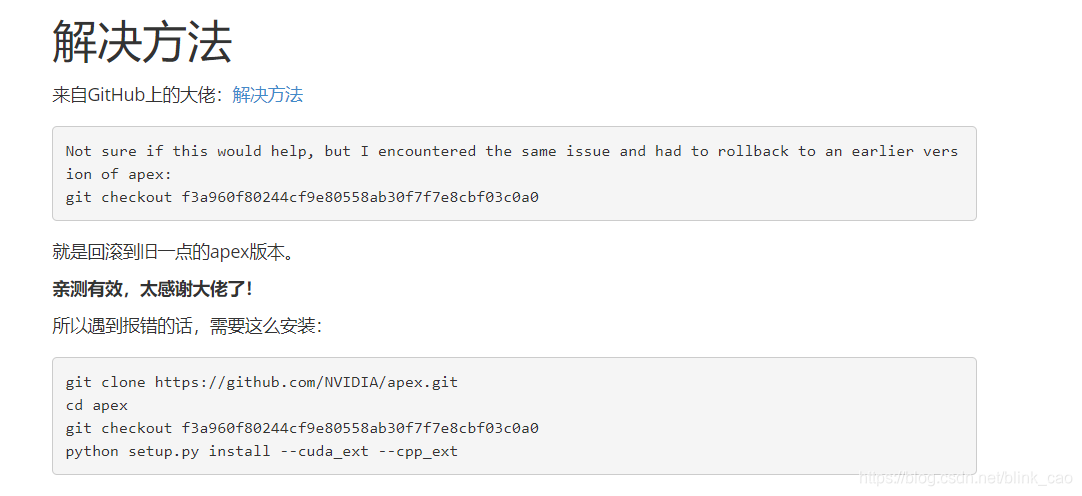
【注意】如果不严格按照作者所述的cuda10.0+python3.7+pytorch1.3.0环境配置,在后续安装apex的时候可能会报错
Cuda extensions are being compiled with a version of Cuda that does not match the verson【以下为错误尝试】
将apex的安装代码
pip install -v --no-cache-dir --global-option="--cpp_ext" --global-option="--cuda_ext" ./修改为
pip install -v --no-cache-dir ./但是后续运行时仍会报错
AttributeError: module 'torch.cuda' has no attribute 'amp'但是如果安装apex报错: Error: command ‘/usr/local/cuda-10.0/bin/nvcc’ failed with exit status 1
参考:http://www.cxyzjd.com/article/qq_22565865/107532012
2.制作自己的数据集
参考作者提供的customize.md文件
2.1 数据集格式
datasets
├── vid_custom
|   |── train
|   |   |── video_snippet_1
|   |   |   |── 000000.JPEG
|   |   |   |── 000001.JPEG
|   |   |   |── 000002.JPEG
|   |   |   ...
|   |   |── video_snippet_2
|   |   |   |── 000000.JPEG
|   |   |   |── 000001.JPEG
|   |   |   |── 000002.JPEG
|   |   |   ...
|   |   ...
|   |── val
|   |   |── video_snippet_1
|   |   |   |── 000000.JPEG
|   |   |   |── 000001.JPEG
|   |   |   |── 000002.JPEG
|   |   |   ...
|   |   |── video_snippet_2
|   |   |   |── 000000.JPEG
|   |   |   |── 000001.JPEG
|   |   |   |── 000002.JPEG
|   |   |   ...
|   |   ...
|   |── annotation
|   |   |── train
|   |   |   |── video_snippet_1
|   |   |   |   |── 000000.xml
|   |   |   |   |── 000001.xml
|   |   |   |   |── 000002.xml
|   |   |   |   ...
|   |   |   |── video_snippet_2
|   |   |   |   |── 000000.xml
|   |   |   |   |── 000001.xml
|   |   |   |   |── 000002.xml
|   |   |   |   ...
|   |   ...
|   |   |── val
|   |   |   |── video_snippet_1
|   |   |   |   |── 000000.xml
|   |   |   |   |── 000001.xml
|   |   |   |   |── 000002.xml
|   |   |   |   ...
|   |   |   |── video_snippet_2
|   |   |   |   |── 000000.xml
|   |   |   |   |── 000001.xml
|   |   |   |   |── 000002.xml
|   |   |   |   ...
|   |   ...
【注意事项】
1.图片编号是从0开始的6位数字;
2.annotation内的xml文件与train、val钟文件一一对应。
2.2 xml文件格式
参考:ImageNet VID数据集介绍 - 知乎 (zhihu.com)


【注意事项】
1.xml文件内的name名称对应于标准ImageNetVID的类别,一个编号对应于一个类别,也可以在代码中找到(后续参数更改提到);
2.更多详细介绍请参照上述链接。
2.3 训练和测试文档准备
1.VID_train_15frames.txt
train/ILSVRC2015_VID_train_0000/ILSVRC2015_train_00000000 1 10 300
train/ILSVRC2015_VID_train_0000/ILSVRC2015_train_00000000 1 30 300
train/ILSVRC2015_VID_train_0000/ILSVRC2015_train_00000000 1 50 300
train/ILSVRC2015_VID_train_0000/ILSVRC2015_train_00000000 1 70 300
train/ILSVRC2015_VID_train_0000/ILSVRC2015_train_00000000 1 90 300
train/ILSVRC2015_VID_train_0000/ILSVRC2015_train_00000000 1 110 300
train/ILSVRC2015_VID_train_0000/ILSVRC2015_train_00000000 1 130 300
train/ILSVRC2015_VID_train_0000/ILSVRC2015_train_00000000 1 150 300
train/ILSVRC2015_VID_train_0000/ILSVRC2015_train_00000000 1 170 300
train/ILSVRC2015_VID_train_0000/ILSVRC2015_train_00000000 1 190 300
train/ILSVRC2015_VID_train_0000/ILSVRC2015_train_00000000 1 210 300
train/ILSVRC2015_VID_train_0000/ILSVRC2015_train_00000000 1 230 300
train/ILSVRC2015_VID_train_0000/ILSVRC2015_train_00000000 1 250 300
train/ILSVRC2015_VID_train_0000/ILSVRC2015_train_00000000 1 270 300
train/ILSVRC2015_VID_train_0000/ILSVRC2015_train_00000000 1 290 300
train/ILSVRC2015_VID_train_0000/ILSVRC2015_train_00001000 1 1 48
train/ILSVRC2015_VID_train_0000/ILSVRC2015_train_00001000 1 4 48
train/ILSVRC2015_VID_train_0000/ILSVRC2015_train_00001000 1 8 48
train/ILSVRC2015_VID_train_0000/ILSVRC2015_train_00001000 1 11 48
train/ILSVRC2015_VID_train_0000/ILSVRC2015_train_00001000 1 14 48
train/ILSVRC2015_VID_train_0000/ILSVRC2015_train_00001000 1 17 48
train/ILSVRC2015_VID_train_0000/ILSVRC2015_train_00001000 1 20 48
train/ILSVRC2015_VID_train_0000/ILSVRC2015_train_00001000 1 24 48
train/ILSVRC2015_VID_train_0000/ILSVRC2015_train_00001000 1 27 48
train/ILSVRC2015_VID_train_0000/ILSVRC2015_train_00001000 1 30 48
train/ILSVRC2015_VID_train_0000/ILSVRC2015_train_00001000 1 33 48
train/ILSVRC2015_VID_train_0000/ILSVRC2015_train_00001000 1 36 48
train/ILSVRC2015_VID_train_0000/ILSVRC2015_train_00001000 1 40 48
train/ILSVRC2015_VID_train_0000/ILSVRC2015_train_00001000 1 43 48
train/ILSVRC2015_VID_train_0000/ILSVRC2015_train_00001000 1 46 48
...
【说明】
(1)作者的解释:每一行4列依次代表:video folder, no meaning(just ignore it),frame number,video length;
(2)需要注意的是video length可以看作某个视频文件夹内的图片总数,frame number可以人为设置,只要满足在一个视频文件夹内选择15帧作为关键帧即可。
2.VID_val_frames.txt
val/ILSVRC2015_val_00000000/000000 1
val/ILSVRC2015_val_00000000/000001 2
val/ILSVRC2015_val_00000000/000002 3
val/ILSVRC2015_val_00000000/000003 4
val/ILSVRC2015_val_00000000/000004 5
val/ILSVRC2015_val_00000000/000005 6
但是在训练的时候使用这个文档会报错:AttributeError: 'VIDMEGADataset' object has no attribute 'frame_seg_len' ,所以最终使用的是下面的文档
3.VID_val_videos.txt(较简单,不再叙述)
以上三个文档具体参考源MEGA代码中datasets\ILSVRC2015\ImageSets提供的文档。
2.4 参数修改
1.mega_core/data/datasets/vid.py修改VIDDataset内classes和classes_map:
classes=['__background__',#alwaysindex0

'car']

classes_map=['__background__',#alwaysindex0

'n02958343']
2.mega_core/config/paths_catalog.py
(1)修改 DatasetCatalog.DATASETS
"vid_custom_train":{

    "img_dir":"vid_custom/train",

    "anno_path":"vid_custom/annotation",

    "img_index":"vid_custom/VID_train_15frames.txt"

},

    "vid_custom_val":{

    "img_dir":"vid_custom/val",

    "anno_path":"vid_custom/annotation",

    "img_index":"vid_custom/VID_val_frames.txt"

}
(2)修改if函数下if语句,添加上vid条件
if("DET"inname)or("VID"inname)or("vid"inname):3.修改configs/BASE_RCNN_4gpu.yaml(取决于你用几张gpu训练)
num_classes:2#(物体类别数+背景)

TRAIN: ("vid_custom_train",)#记得加“,”
  TEST: ("vid_custom_val",)#记得加“,”
3.训练和测试代码
1.训练代码(训练脚本会自动在训练完成进行测试,如果不想测试可注释掉测试代码)
python -m torch.distributed.launch --nproc_per_node=4 tools/train_net.py --master_port=$((RANDOM + 10000)) --config-file configs/MEGA/vid_R_101_C4_MEGA_1x.yaml OUTPUT_DIR training_dir/MEGA_R_101_1x
2.测试代码
python -m torch.distributed.launch --nproc_per_node 4 tools/test_net.py --config-file configs/MEGA/vid_R_101_C4_MEGA_1x.yaml MODEL.WEIGHT training_dir/MEGA_R_101_1x/model_final.pth【注意】上述提供的测试和训练代码与作者提供的稍有不同,都删去了---motion-specific参数。
如果不删去该参数会报错:IndexError: list index out of range,具体原因是添加上述参数时代码会加载一个测试模型(大概可以这么说?),与自己制作的的数据集不配适,故删去。(以上只是自己的粗略推测,仅供参考,如果有人知道具体原因,望告知)
4.报错汇总
(1)FileNotFoundError: [Errno 2] No such file or directory: 'configs/BASE_RCNN_3gpu.yaml'
解决:作者只提供了1或4个GPU的训练配置文件,改一下训练代码里的--nproc_per_node参数为1或4即可。
(2)FileNotFoundError: [Errno 2] No such file or directory: 'datasets/ILSVRC2015/Annotations/DET/train/ILSVRC2014_train_0000/ILSVRC2014_train_00000663.xml'
解决:检查自己的数据集路径是否错误。
(3)ValueError: Type mismatch (<class 'tuple'> vs. <class 'str'>) with values (() vs. vid_custom_train) for config key: DATASETS.TRAIN
FileNotFoundError: [Errno 2] No such file or directory: 'datasets/ILSVRC2015/ImageSets/DET_train_30classes.txt'
FileNotFoundError: [Errno 2] No such file or directory: 'datasets/ILSVRC2015/ImageSets/VID_train_15frames.txt'
解决:两个yml文件里需要修改训练参数,并在最后加上两个逗号
TRAIN: ("vid_custom_train",)
  TEST: ("vid_custom_val",)
(4)RuntimeError: copy_if failed to synchronize: device-side assert triggered
解决:num_classes参数设置错误,类别应该是1+1,需要加上背景
(5)xml.etree.ElementTree.ParseError: mismatched tag: line 197, column 14
解决:检查自己的xml文件,一般出错的应该是每个文件夹的第一个或者最后一个。
(6)RuntimeError: Error(s) in loading state_dict for GeneralizedRCNN
解决:训练时使用的时4个gpu,但是测试时使用的是1个gpu,故可以修改测试代码(如下)或者修改BASE_RCNN_1gpu.yaml。
args=parser.parse_args()
cfg.merge_from_file("configs/BASE_RCNN_4gpu.yaml")#改为4gpu,因为1gpu没改配置文件
cfg.merge_from_file(args.config)
cfg.merge_from_list(["MODEL.WEIGHT",args.checkpoint])
(7)AttributeError: 'VIDMEGADataset' object has no attribute 'frame_seg_len'
解决:如前所述,更改验证文档
(8)使用--motion-specific参数报错
  for i in range(len(motion_ious['motion_iou']))])
Evaluating motion iou range 0.0 - 1.0
Traceback (most recent call last):
  File "tools/train_net.py", line 226, in <module>
    main()
  File "tools/train_net.py", line 222, in main
    run_test(cfg, model, args.distributed, args.motion_specific)
  File "tools/train_net.py", line 137, in run_test
    output_folder=output_folder,
  File "/workspace/mega2/mega.pytorch/mega_core/engine/inference.py", line 132, in inference
    **extra_args)
  File "/workspace/mega2/mega.pytorch/mega_core/data/datasets/evaluation/__init__.py", line 29, in evaluate
    return vid_evaluation(**args)
  File "/workspace/mega2/mega.pytorch/mega_core/data/datasets/evaluation/vid/__init__.py", line 15, in vid_evaluation
    logger=logger,
  File "/workspace/mega2/mega.pytorch/mega_core/data/datasets/evaluation/vid/vid_eval.py", line 51, in do_vid_evaluation
    use_07_metric=False
  File "/workspace/mega2/mega.pytorch/mega_core/data/datasets/evaluation/vid/vid_eval.py", line 149, in eval_detection_vid
    motion_range=motion_range,
  File "/workspace/mega2/mega.pytorch/mega_core/data/datasets/evaluation/vid/vid_eval.py", line 180, in calc_detection_vid_prec_rec
    if motion_iou[gt_index] < motion_range[0] or motion_iou[gt_index] > motion_range[1]:
IndexError: list index out of range
(9)subprocess.CalledProcessError: Command '['/usr/bin/python', '-u', 'tools/train_net.py', '--local_rank=3', '--master_port=36874', '--config-file', 'configs/MEGA/vid_R_101_C4_MEGA_1x.yaml', '--motion-specific', 'OUTPUT_DIR', 'training_dir/MEGA_R_101_1x']' returned non-zero exit status 1.
未解决,但是只要其他没问题,这条报错也不会出现
【参考】
2021-06-30 MEGA论文阅读+代码复现_qq_42068904的博客-CSDN博客


 885
885

 被折叠的 条评论
为什么被折叠?
被折叠的 条评论
为什么被折叠?
 到【灌水乐园】发言


