


——基于电商领域的文本情感分析与LDA主题分析——
一、情感分析
1.1词典导入
import os
import numpy as np
import pandas as pd
import matplotlib.pyplot as plt
import seaborn as sns
from matplotlib.pylab import style #自定义图表风格
style.use('ggplot')
from IPython.core.interactiveshell import InteractiveShell
InteractiveShell.ast_node_interactivity = "all"
plt.rcParams['font.sans-serif'] = ['Simhei'] # 解决中文乱码问题
import re
import jieba.posseg as psg
import itertools
#conda install -c anaconda gensim
from gensim import corpora,models #主题挖掘,提取关键信息
# pip install wordcloud
from wordcloud import WordCloud,ImageColorGenerator
from collections import Counter
from sklearn.feature_extraction.text import CountVectorizer
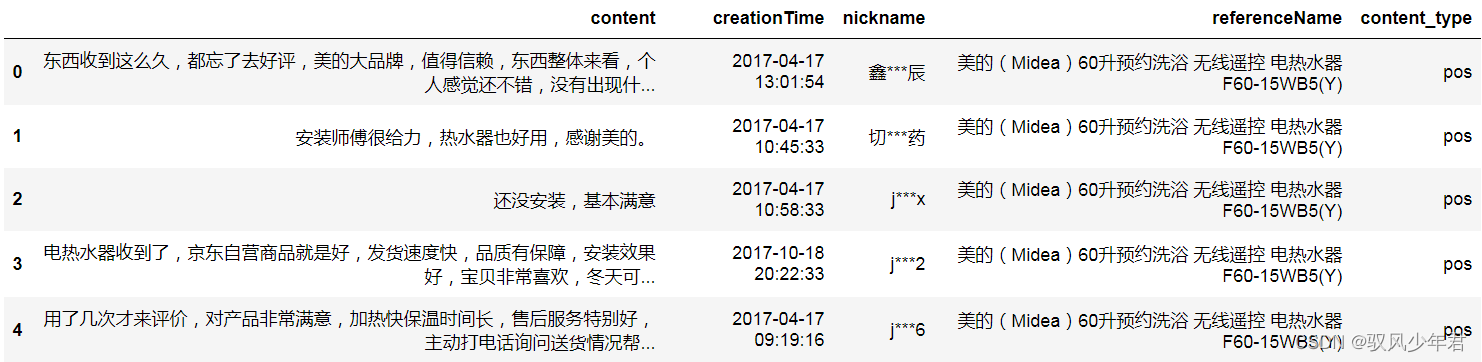
review_long_clean = pd.read_excel('1_review_long_clean.xlsx') #导入处理后的数据集
导入评价情感词典
#来自知网发布的情感分析用词语集

pos_comment=pd.read_csv('./正面评价词语(中文).txt',header=None,sep='\n',encoding='utf-8')
neg_comment=pd.read_csv('./负面评价词语(中文).txt',header=None,sep='\n',encoding='utf-8')

pos_emotion=pd.read_csv('./正面情感词语(中文).txt',header=None,sep='\n',encoding='utf-8')
neg_emotion=pd.read_csv('./负面情感词语(中文).txt',header=None,sep='\n',encoding='utf-8')
查看一下正负情感词典分布
print('正面评价词语:',pos_comment.shape)
print('负面评价词语:',neg_comment.shape)

print('正面情感词语:',pos_emotion.shape)
print('负面情感词语:',neg_emotion.shape)
正面评价词语: (3743, 1)
负面评价词语: (3138, 1)
正面情感词语: (833, 1)
负面情感词语: (1251, 1)
#将正面和负面的合并
pos=pd.concat([pos_comment,pos_emotion],axis=0)
print('正面合并后:',pos.shape)

neg=pd.concat([neg_comment,neg_emotion],axis=0)
print('负面合并后:',neg.shape)
正面合并后: (4576, 1)
负面合并后: (4389, 1)
1.2 增加新词
#判断在不在词典中
c='点赞'
print(c in pos.values)

d='歇菜'
print(d in neg.values)
False
False
不在就添加进词典
#不在就添加进词典

new_pos=pd.Series(['点赞'])
new_neg=pd.Series(['歇菜'])

positive=pd.concat([pos,new_pos],axis=0)
print(positive.shape)

negative=pd.concat([neg,new_neg],axis=0)
print(negative.shape)
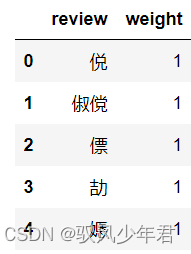
#将情感词存入,Dataframe中,并且正面词赋予权重1
positive.columns=['review']
positive['weight']=pd.Series([1]*len(positive))
positive.head()
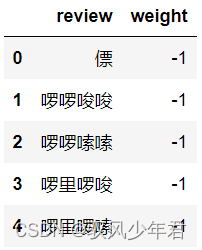
#将情感词存入,Dataframe中,并且负面词赋予权重-1
negative.columns=['review']
negative['weight']=pd.Series([-1]*len(negative))
negative.head()
#将正负情感词合并
pos_neg=pd.concat([positive,negative],axis=0)
pos_neg.shape
(8967, 2)
1.3合并到review_long_clean中
#表联接
#清洗赶紧的数据,赋值给data
data=review_long_clean.copy()
print('data原始shape:',data.shape)

#将data和情感词两个表合并在一块,按照data的word列,情感数据按照review
review_mltype=pd.merge(data,pos_neg,how='left',left_on='word',right_on='review')
review_mltype.shape
print('表联接合并后:',review_mltype.shape)
print('----------完成评论中的情感词赋值------------')
print('review_mltype:')
review_mltype.head()
data原始shape: (25172, 6)
表联接合并后: (25172, 8)
----------完成评论中的情感词赋值------------
review_mltype:

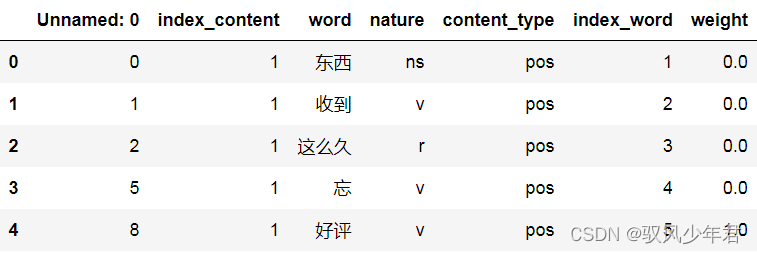
#删除情感值列,同时赋予不是情感词的词,权重为0
review_mltype=review_mltype.drop(['review'],axis=1)
review_mltype=review_mltype.replace(np.nan,0)
review_mltype.head()
1.4 修正情感倾向
如有多重否定,那么奇数否定是否定,偶数否定是肯定
看该情感词前2个词,来判罚否定的语气。如果在句首,则没有否词,如果在句子的第二次词,则看前1个词,来判断否定的语气。
#读取否定词词典,新建一列为freq
notdict=pd.read_csv('./not.csv')
notdict.shape

notdict['freq']=[1]*len(notdict)
notdict.head()

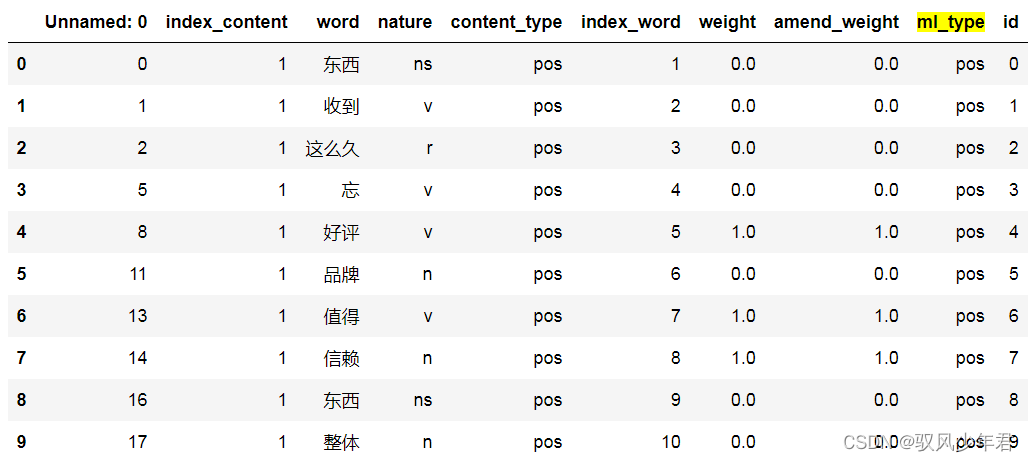
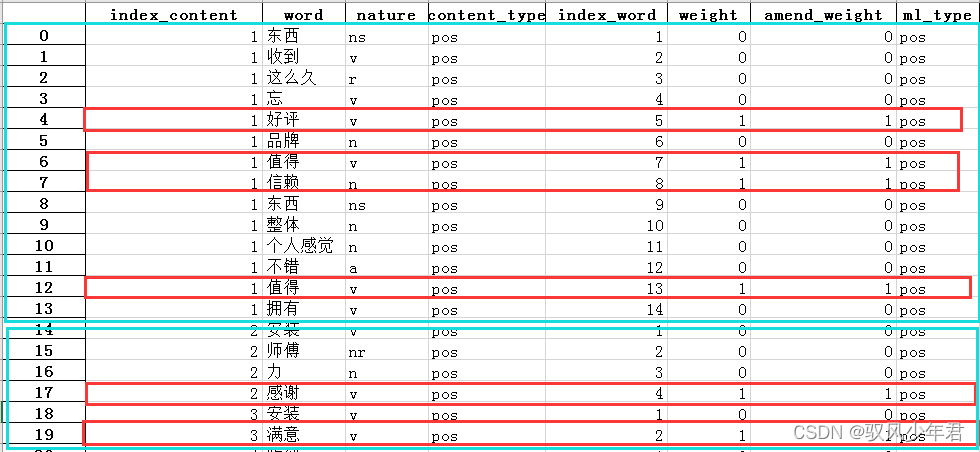
#准备一,构建amend_weight列,其值与情感权重值相同
review_mltype['amend_weight']=review_mltype['weight']
#创建,id列,初始化值为0-到最后一个的,顺序值
review_mltype['id']=np.arange(0,review_mltype.shape[0])
review_mltype.head(10)
review_mltype是整理后有情感权重的,全部评论数据
只取出有情感值的文本
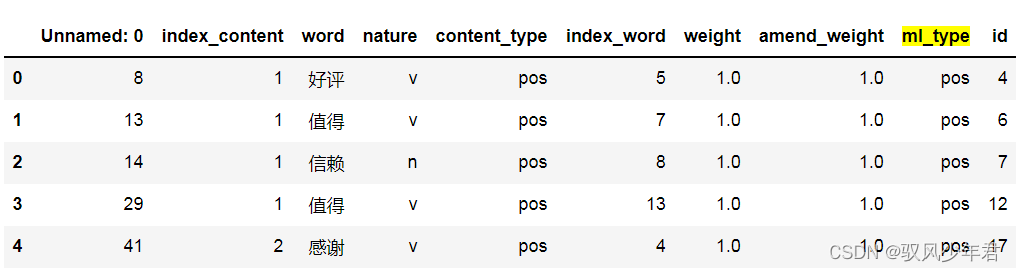
# 准备二,只取出有情感值的行
only_review_mltype=review_mltype[review_mltype['weight']!=0]

#只保留有情感值的索引
only_review_mltype.index=np.arange(0,only_review_mltype.shape[0]) #索引重置

print(only_review_mltype.shape)
only_review_mltype.head()
(1526, 10)
看该情感词前2个词,来判罚否定的语气。如果在句首,则没有否词,如果在句子的第二次词,则看前1个词,来判断否定的语气。
#看该情感词前2个词,来判罚否定的语气。如果在句首,则没有否词,如果在句子的第二次词,则看前1个词,来判断否定的语气。

index=only_review_mltype['id']

for i in range(0,only_review_mltype.shape[0]):

    review_i=review_mltype[review_mltype['index_content']==only_review_mltype['index_content'][i]] #第i个情感词的评论
    review_i.index=np.arange(0,review_i.shape[0])#重置索引后,索引值等价于index_word
    word_ind = only_review_mltype['index_word'][i] #第i个情感值在该条评论的位置

    #第一种,在句首。则不用判断
    #第二种,在评论的第2个为位置
    if word_ind==2:
        ne=sum( [ review_i['word'][word_ind-1] in notdict['term']  ] )
        if ne==1:
            review_mltype['amend_weight'][index[i]] = -( review_mltype['weight'][index[i]] )
    #第三种,在评论的第2个位置以后
    elif word_ind > 2:
        ne=sum( [ word in notdict['term'] for word in review_i['word'][[word_ind-1,word_ind-2]]  ] ) # 注意用中括号[word_ind-1,word_ind-2]
        if ne==1:
            review_mltype['amend_weight'][index[i]]=- ( review_mltype['weight'][index[i]] )
review_mltype.shape
review_mltype[(review_mltype['weight']-review_mltype['amend_weight'])!=0] #说明两列值一样
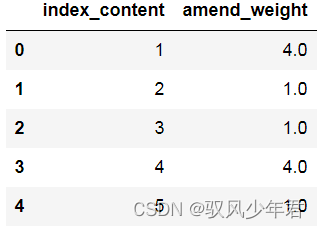
1.5计算每条评论的情感值
将一条文本中所有情感值计算,在相加到一块。
emotion_value=review_mltype.groupby('index_content',as_index=False)['amend_weight'].sum()
emotion_value.head()
emotion_value.to_csv('./1_emotion_value.csv',index=True,header=True)
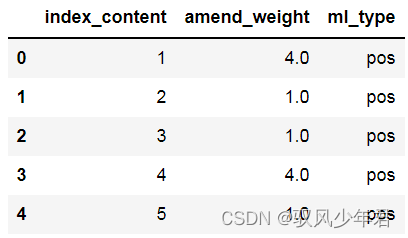
1.6 查看情感分析效果
#每条评论的amend_weight总和不等于零

content_emotion_value=emotion_value.copy()
content_emotion_value.shape

#取出不等于0的的文本
content_emotion_value=content_emotion_value[content_emotion_value['amend_weight']!=0]

#设置情感倾向
content_emotion_value['ml_type']=''
content_emotion_value['ml_type'][content_emotion_value['amend_weight']>0]='pos'
content_emotion_value['ml_type'][content_emotion_value['amend_weight']<0]='neg'

content_emotion_value.shape
content_emotion_value.head()
二、情感分析效果
读取原始数据
#读取原始数据
raw_data=pd.read_csv('./reviews.csv')
raw_data.head()
方法缺陷:
#每条评论的amend_weight总和等于零
#这个方法其实不好用,有一半以上的评论区分不出正、负情感。

content_emotion_value0=emotion_value.copy()
content_emotion_value0=content_emotion_value0[content_emotion_value0['amend_weight']==0]
content_emotion_value0.head()

raw_data.content[6]
raw_data.content[7]
raw_data.content[8]
2.1 将数据合并
将情感分析结果,和原始数据集合并:
#合并到大表中

content_emotion_value=content_emotion_value.drop(['amend_weight'],axis=1)

review_mltype.shape

review_mltype=pd.merge(review_mltype,content_emotion_value,how='left',left_on='index_content',right_on='index_content')
review_mltype=review_mltype.drop(['id'],axis=1)
review_mltype.shape
review_mltype.head()

review_mltype.to_csv('./1_review_mltype',index=True,header=True)
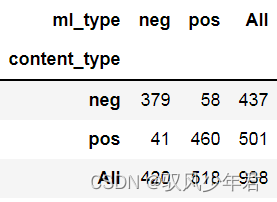
2.2 结果对比
与真实值对比下,情感分析结果的准确性:
cate=['index_content','content_type','ml_type']
data_type=review_mltype[cate].drop_duplicates()

confusion_matrix=pd.crosstab(data_type['content_type'],data_type['ml_type'],margins=True)
confusion_matrix
data=data_type[['content_type','ml_type']]
data=data.dropna(axis=0)
print( classification_report(data['content_type'],data['ml_type']) )
precision recall f1-score support
     neg       0.90      0.87      0.88       437
     pos       0.89      0.92      0.90       501
accuracy 0.89 938
macro avg 0.90 0.89 0.89 938
weighted avg 0.89 0.89 0.89 938
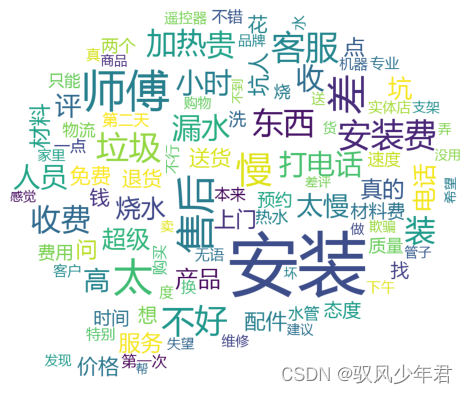
2.3 情感词云
将文本按照情感分类,然后统计词云
data=review_mltype.copy()

word_data_pos=data[data['ml_type']=='pos']
word_data_neg=data[data['ml_type']=='neg']

font=r"C:\Windows\Fonts\msyh.ttc"

background_image=plt.imread('./pl.jpg')
wordcloud = WordCloud(font_path=font, max_words = 100, mode='RGBA' ,background_color='white',mask=background_image) #width=1600,height=1200
wordcloud.generate_from_frequencies(Counter(word_data_pos.word.values))

plt.figure(figsize=(15,7))
plt.imshow(wordcloud)
plt.axis('off')
plt.show()

background_image=plt.imread('./pl.jpg')
wordcloud = WordCloud(font_path=font, max_words = 100, mode='RGBA' ,background_color='white',mask=background_image) #width=1600,height=1200
wordcloud.generate_from_frequencies(Counter(word_data_neg.word.values))

plt.figure(figsize=(15,7))
plt.imshow(wordcloud)
plt.axis('off')
plt.show()

三、基于LDA模型的主题分析
优点:不需要人工调试,用相对少的迭代找到最优的主题结构。
3.1建立词典、语料库
data=review_mltype.copy()

word_data_pos=data[data['ml_type']=='pos']
word_data_neg=data[data['ml_type']=='neg']
#建立词典,去重

pos_dict=corpora.Dictionary([ [i] for i in word_data_pos.word]) #shape=(n,1)
neg_dict=corpora.Dictionary([ [i] for i in word_data_neg.word])
#建立语料库
pos_corpus=[ pos_dict.doc2bow(j) for j in [ [i] for i in word_data_pos.word] ] #shape=(n,(2,1))
neg_corpus=[ neg_dict.doc2bow(j) for j in [ [i] for i in word_data_neg.word] ]
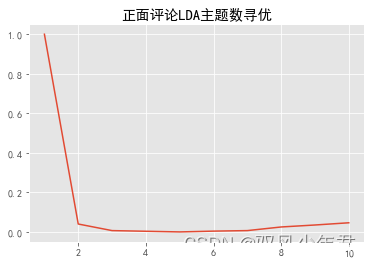
3.2主题数寻优
#构造主题数寻优函数

def cos(vector1,vector2):
    '''
    函数功能:余玄相似度函数
    '''
    dot_product=0.0
    normA=0.0
    normB=0.0
    for a,b in zip(vector1,vector2):
        dot_product +=a*b
        normA +=a**2
        normB +=b**2
    if normA==0.0 or normB==0.0:
        return None
    else:
        return ( dot_product/((normA*normB)**0.5) )
#主题数寻优
#这个函数可以重复调用,解决其他项目的问题

def LDA_k(x_corpus,x_dict):
    '''
    函数功能:
    '''
    #初始化平均余玄相似度
    mean_similarity=[]
    mean_similarity.append(1)

    #循环生成主题并计算主题间相似度
    for i in np.arange(2,11):
        lda=models.LdaModel(x_corpus,num_topics=i,id2word=x_dict) #LDA模型训练

        for j in np.arange(i):
            term=lda.show_topics(num_words=50)

        #提取各主题词
        top_word=[] #shape=(i,50)
        for k in np.arange(i):
            top_word.append( [''.join(re.findall('"(.*)"',i)) for i in term[k][1].split('+')]) #列出所有词

        #构造词频向量
        word=sum(top_word,[]) #列车所有词
        unique_word=set(word) #去重

        #构造主题词列表,行表示主题号,列表示各主题词
        mat=[] #shape=(i,len(unique_word))
        for j in np.arange(i):
            top_w=top_word[j]
            mat.append( tuple([ top_w.count(k) for k in unique_word ])) #统计list中元素的频次,返回元组

        #两两组合。方法一
        p=list(itertools.permutations(list(np.arange(i)),2)) #返回可迭代对象的所有数学全排列方式。
        y=len(p) # y=i*(i-1)
        top_similarity=[0]

        for w in np.arange(y):
            vector1=mat[p[w][0]]
            vector2=mat[p[w][1]]
            top_similarity.append(cos(vector1,vector2))

#        #两两组合,方法二
#        for x in range(i-1):
#            for y in range(x,i):

        #计算平均余玄相似度
        mean_similarity.append(sum(top_similarity)/ y)
    return mean_similarity
#计算主题平均余玄相似度

pos_k=LDA_k(pos_corpus,pos_dict)
neg_k=LDA_k(neg_corpus,neg_dict)

pos_k
neg_k
[1,
0.04,
0.006666666666666667,
0.0033333333333333335,
0.0,
0.004,
0.006666666666666666,
0.025000000000000015,
0.03500000000000002,
0.046222222222222234]
[1,
0.02,
0.0,
0.0,
0.0,
0.0026666666666666666,
0.002857142857142857,
0.0035714285714285718,
0.01333333333333334,
0.022222222222222233]
pd.Series(pos_k,index=range(1,11)).plot()
plt.title('正面评论LDA主题数寻优')
plt.show()
<matplotlib.axes._subplots.AxesSubplot at 0x1de4b888>
Text(0.5, 1.0, ‘正面评论LDA主题数寻优’)
pd.Series(neg_k,index=range(1,11)).plot()
plt.title('负面评论LDA主题数寻优')
plt.show()
matplotlib.axes._subplots.AxesSubplot at 0x1d077ac8>
Text(0.5, 1.0, ‘负面评论LDA主题数寻优’)
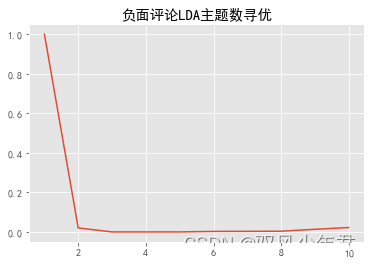
确定正负面主题数目都为3
pos_lda=models.LdaModel(pos_corpus,num_topics=2,id2word=pos_dict)
neg_lda=models.LdaModel(neg_corpus,num_topics=2,id2word=neg_dict)

pos_lda.print_topics(num_topics=10)
neg_lda.print_topics(num_topics=10)
[(0,
‘0.085*“安装” + 0.036*“满意” + 0.019*“服务” + 0.018*“不错” + 0.015*“好评” + 0.012*“客服” + 0.011*“人员” + 0.010*“物流” + 0.009*“送” + 0.008*“家里”’),
(1,
‘0.024*“师傅” + 0.021*“送货” + 0.019*“很快” + 0.016*“值得” + 0.013*“售后” + 0.012*“信赖” + 0.012*“东西” + 0.009*“太” + 0.009*“购物” + 0.009*“电话”’)]
[(0,
‘0.089*“安装” + 0.018*“师傅” + 0.015*“慢” + 0.013*“装” + 0.011*“打电话” + 0.011*“太慢” + 0.008*“坑人” + 0.008*“服务” + 0.007*“配件” + 0.007*“问”’),
(1,
‘0.021*“垃圾” + 0.019*“太” + 0.019*“差” + 0.016*“安装费” + 0.015*“售后” + 0.014*“东西” + 0.013*“不好” + 0.013*“客服” + 0.012*“加热” + 0.012*“小时”’)]


 972
972

 被折叠的 条评论
为什么被折叠?
被折叠的 条评论
为什么被折叠?
 到【灌水乐园】发言


