


 本文详细介绍了ShardingSphere-Proxy的安装过程,包括二进制包和Docker方式,以及如何在SpringBoot项目中集成并实现读写分离和负载均衡。通过步骤和配置示例,展示了如何配置数据源和启用SQL日志。
ShardingSphere-Proxy基本使用
一、ShardingSphere-Proxy安装
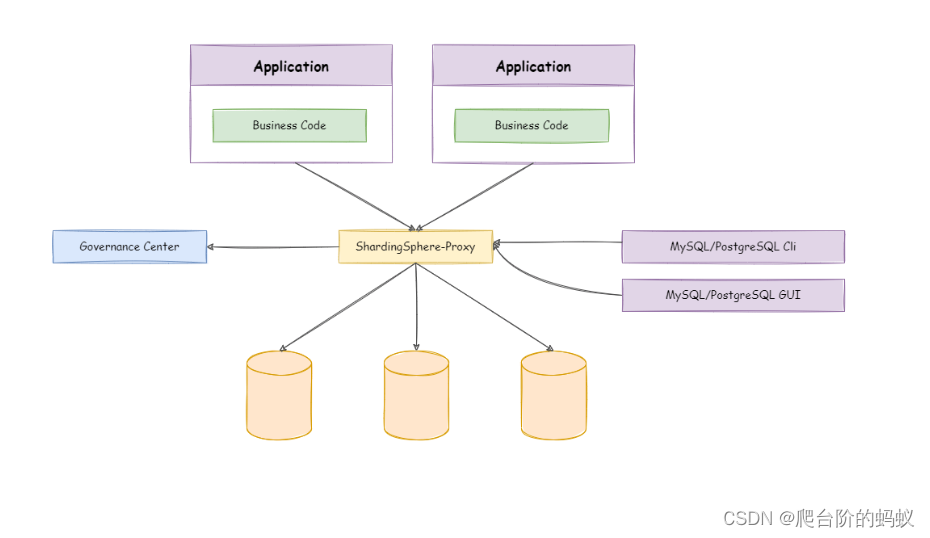
1.概念及使用结构
概念: ShardingSphere-Proxy 定位为透明化的数据库代理端,通过实现数据库二进制协议,对异构语言提供支持。 目前提供 MySQL 和 PostgreSQL 协议,透明化数据库操作,对 DBA 更加友好。
2.二进制包安装
二进制包既可以Linux系统运行,又可以在windows系统运行
step1:解压二进制包
apache-shardingsphere-5.1.1-shardingsphere-proxy-bin.tar.gz
windows:使用解压软件解压文件
Linux:将文件上传至/opt目录,并解压
tar -zxvf apache-shardingsphere-5.1.1-shardingsphere-proxy-bin.tar.gz
step2:MySQL驱动
mysql-connector-java-8.0.22.jar
将MySQl驱动放至解压目录中的ext-lib目录
spte3:修改配置conf/server.yaml
rules:
  - !AUTHORITY
    users:
      - root@%:root
    provider:
      type: ALL_PRIVILEGES_PERMITTED

props:
  sql-show: true
配置详解:
-!AUTHORITY
users:
-root@%:root:连接proxy时开启权限认证,用户名密码为root/root
spte4:启动ShardingSphere-Proxy
Linux 操作系统请运行 bin/start.sh
Windows 操作系统请运行 bin/start.bat
指定端口号和配置文件目录:bin/start.bat ${proxy_port} ${proxy_conf_directory}
step5:远程连接ShardingSphere-Proxy
远程访问
mysql -h192.168.80.93 -P3307 -uroot -p
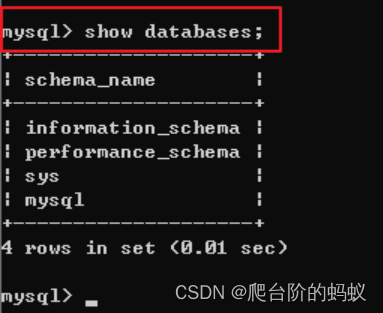
step6:访问测试
show databases;
3.docker安装
step1:启动Docker容器
docker run -d \
-v /app/server/proxy-a/conf:/opt/shardingsphere-proxy/conf \
-v /app/server/proxy-a/ext-lib:/opt/shardingsphere-proxy/ext-lib \
-e ES_JAVA_OPTS="-Xmx256m -Xms256m -Xmn128m" \
-p 3307:3307 \
--name server-proxy-a \
apache/shardingsphere-proxy:5.1.1
step2:上传MySQL驱动
将MySQl驱动上传至/app/server/proxy-a/ext-lib目录
spte3:修改配置server.yaml
rules:
  - !AUTHORITY
    users:
      - root@%:root
    provider:
      type: ALL_PRIVILEGES_PERMITTED

props:
  sql-show: true
将配置文件上传至/app/server/proxy-a/conf目录
spte4:重启容器
docker restart server-proxy-a
step5:远程连接ShardingSphere-Proxy
ShardingSphere-Proxy容器中默认情况下没有mysql命令行客户端的安装,因此需要远程访问
mysql -h192.168.80.130 -P3307 -uroot -p
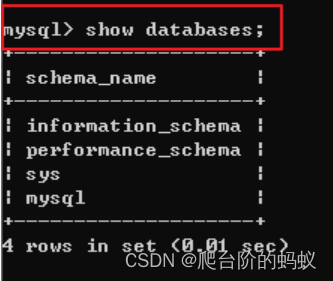
step6:访问测试
show databases;
常见问题:docker容器无法远程连接
容器可以成功的创建并启动,但是无法远程连接。排除防火墙和网络等问题后,看看是不是因为容器内存不足导致。
原因:容器可分配内存不足
查看办法:进入容器后查看ShardingSphere-Proxy的日志,如有有cannot allocate memory,则说明容器内存不足
docker exec -it server-proxy-a env LANG=C.UTF-8 /bin/bash
cd /opt/shardingsphere-proxy/logs
tail stdout.log
二、ShardingSphere-Proxy使用
1.创建项目
项目类型:Spring Initializr
SpringBoot脚手架:http://start.aliyun.com
项目名:sharding-proxy-demo
SpringBoot版本:2.3.7.RELEASE
2.添加依赖
<dependencies>
    <dependency>
        <groupId>org.springframework.boot</groupId>
        <artifactId>spring-boot-starter-web</artifactId>
    </dependency>

    <dependency>
        <groupId>org.apache.shardingsphere</groupId>
        <artifactId>shardingsphere-jdbc-core-spring-boot-starter</artifactId>
        <version>5.1.1</version>
    </dependency>

    <dependency>
        <groupId>mysql</groupId>
        <artifactId>mysql-connector-java</artifactId>
        <scope>runtime</scope>
    </dependency>

    <dependency>
        <groupId>com.baomidou</groupId>
        <artifactId>mybatis-plus-boot-starter</artifactId>
        <version>3.3.1</version>
    </dependency>

    <dependency>
        <groupId>org.projectlombok</groupId>
        <artifactId>lombok</artifactId>
        <optional>true</optional>
    </dependency>

    <dependency>
        <groupId>org.springframework.boot</groupId>
        <artifactId>spring-boot-starter-test</artifactId>
        <scope>test</scope>
        <exclusions>
            <exclusion>
                <groupId>org.junit.vintage</groupId>
                <artifactId>junit-vintage-engine</artifactId>
            </exclusion>
        </exclusions>
    </dependency>
</dependencies>
3.java代码
@TableName("t_user")
@Data
public class User {
    @TableId(type = IdType.AUTO)
    private Long id;
    private String uname;
}

@Mapper
public interface UserMapper extends BaseMapper<User> {
}
4.配置
application.properties:
# 应用名称
spring.application.name=sharging-proxy-demo
# 开发环境设置
spring.profiles.active=dev
# 内存模式
spring.shardingsphere.mode.type=Memory

# 配置真实数据源
spring.shardingsphere.datasource.names=master,slave1,slave2

# 配置第 1 个数据源
spring.shardingsphere.datasource.master.type=com.zaxxer.hikari.HikariDataSource
spring.shardingsphere.datasource.master.driver-class-name=com.mysql.jdbc.Driver
spring.shardingsphere.datasource.master.jdbc-url=jdbc:mysql://192.168.80.1:3306/db_user
spring.shardingsphere.datasource.master.username=root
spring.shardingsphere.datasource.master.password=123456

# 配置第 2 个数据源
spring.shardingsphere.datasource.slave1.type=com.zaxxer.hikari.HikariDataSource
spring.shardingsphere.datasource.slave1.driver-class-name=com.mysql.jdbc.Driver
spring.shardingsphere.datasource.slave1.jdbc-url=jdbc:mysql://192.168.80.2:3306/db_user
spring.shardingsphere.datasource.slave1.username=root
spring.shardingsphere.datasource.slave1.password=123456

# 配置第 3 个数据源
spring.shardingsphere.datasource.slave2.type=com.zaxxer.hikari.HikariDataSource
spring.shardingsphere.datasource.slave2.driver-class-name=com.mysql.jdbc.Driver
spring.shardingsphere.datasource.slave2.jdbc-url=jdbc:mysql://192.168.80.3:3306/db_user
spring.shardingsphere.datasource.slave2.username=root
spring.shardingsphere.datasource.slave2.password=123456

# 读写分离类型,如: Static,Dynamic
spring.shardingsphere.rules.readwrite-splitting.data-sources.myds.type=Static
# 写数据源名称
spring.shardingsphere.rules.readwrite-splitting.data-sources.myds.props.write-data-source-name=master
# 读数据源名称,多个从数据源用逗号分隔
spring.shardingsphere.rules.readwrite-splitting.data-sources.myds.props.read-data-source-names=slave1,slave2

# 负载均衡算法名称
spring.shardingsphere.rules.readwrite-splitting.data-sources.myds.load-balancer-name=alg_round

# 负载均衡算法配置
# 负载均衡算法类型
spring.shardingsphere.rules.readwrite-splitting.load-balancers.alg_round.type=ROUND_ROBIN
spring.shardingsphere.rules.readwrite-splitting.load-balancers.alg_random.type=RANDOM
spring.shardingsphere.rules.readwrite-splitting.load-balancers.alg_weight.type=WEIGHT
spring.shardingsphere.rules.readwrite-splitting.load-balancers.alg_weight.props.slave1=1
spring.shardingsphere.rules.readwrite-splitting.load-balancers.alg_weight.props.slave2=2

# 打印SQl
spring.shardingsphere.props.sql-show=true
5.测试
@SpringBootTest
class ReadwriteTest {

    @Autowired
    private UserMapper userMapper;

    /**
     * 写入数据的测试
     */
    @Test
    public void testInsert(){

        User user = new User();
        user.setUname("张三丰");
        userMapper.insert(user);
    }


	/**
	     * 读数据测试
	     */
	@Test
	public void testSelectAll(){
	    List<User> users = userMapper.selectList(null);
	    List<User> users = userMapper.selectList(null);//执行第二次测试负载均衡
	    users.forEach(System.out::println);
	}
}


 889
889


 被折叠的 条评论
为什么被折叠?
被折叠的 条评论
为什么被折叠?
 到【灌水乐园】发言


