


1.前期准备
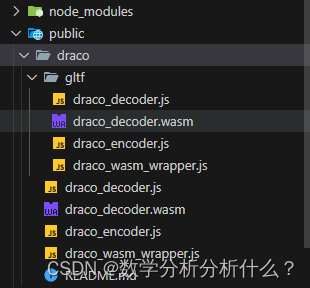
1.1 需要从依赖中复制出draco相关代码(避坑!)
在three.js中需要使用loader.load()方法对模型进行加载,若直接使用import引入loader无法使用。
需要从three.js的依赖中按路径three/examples/jsm/lib查找,从中找出draco文件夹后复制整个文件夹,将其粘贴至根目录的public文件夹下。
1.2 若有模型文件,则亦可放置在public文件夹下。
2.编码
2.1 视图层
<div id="threeRef"></div>
2.2 逻辑层
1.引入相关方法
import * as THREE from "three";
import { OrbitControls } from "three/examples/jsm/controls/OrbitControls";
import { GLTFLoader } from "three/examples/jsm/loaders/GLTFLoader";
import { DRACOLoader } from "three/examples/jsm/loaders/DRACOLoader";
2.对1.1中的loader方法进行处理
// loader相关代码处理,需要将其从依赖中当初放在public文件夹在重新解压解码
const loader = new GLTFLoader();
const dracoLoader = new DRACOLoader();
dracoLoader.setDecoderPath("./draco/");
// 使用js方式解压
dracoLoader.setDecoderConfig({ type: "js" });
// 初始化_initDecoder 解码器
dracoLoader.preload();
loader.setDRACOLoader(dracoLoader);
3.视图初始化方法
const scene = ref(null);
const renderer = ref(null);
const camera = ref(null);
const threeRef = ref(null);

// 初始化并创建视图
function initThree() {
  //创建一个三维场景
  const scene = new THREE.Scene();
  scene.value = scene;
  //创建一个透视相机
  const width = window.innerWidth;
  const height = window.innerHeight;
  const camera = new THREE.PerspectiveCamera(45, width / height, 1, 3000);
  //设置相机位置
  camera.position.set(200, 100, 200);
  //设置相机方向
  camera.lookAt(0, 0, 0);
  camera.value = camera;
  // antialias:是否执行抗锯齿
  //创建一个WebGL渲染器
  const renderer = new THREE.WebGLRenderer({ antialias: true });
  renderer.setSize(width, height);
  renderer.render(scene, camera);
  // 开启阴影
  renderer.shadowMap.enabled = true;
  renderer.value = renderer;
  // 开始渲染
  // 渲染写法以下二选一均可
  document.getElementById("threeRef")?.appendChild(renderer.value.domElement);
  // threeRef.value.appendChild(renderer.value.domElement);
}
4.加载glb模型
// 加载glb模型
function initModels(scene) {
  // 模型列表
  const carModel = [
    {
      name: "modelOne",
      path: "./models/modelOne.glb",
    },
    {
      name: "modelTwo",
      path: "./models/modelTwo.glb",
    },
  ];

  // 模型材质设置
  const setMesh = (
    model,
    color = "0xf3f2f8",
    meta = 1.1,
    rough = 0.8,
    clearcoat = 0.5,
    clearcoatRough = 0.1
  ) => {
    // 遍历模型的所有子对象,修改材质
    model.traverse((child) => {
      if (child.isMesh) {
        // 设置新的材质
        const newMaterial = new THREE.MeshPhysicalMaterial({
          color: color,
          metalness: meta,// 金属度
          roughness: rough,// 粗糙度
          clearcoat: clearcoat,// 清漆层属性
          clearcoatRoughness: clearcoatRough,// 清漆层粗糙度
        });
        child.material = newMaterial;
      }
    });
  };

  // 依次添加模型
  carModel.forEach((item) => {
    loader.load(item.path, (gltf) => {
      const model = gltf.scene;
      scene.add(model);
      // 放大50倍
      model.scale.set(50, 50, 50);
      if (item.name == "modelOne") {
        setMesh(model, "0x494949", 1.3, 0.8, 0, 1);
      } else {
        setMesh(model);
      }
    });
  });
}
5.设置光源
function initLight(scene, renderer) {
  //添加光源
  const ambient = new THREE.AmbientLight(0xffffff, 0.5);
  const light1 = new THREE.PointLight(0xffffff, 0.6);
  const light2 = new THREE.PointLight(0xffffff, 0.6);
  scene.add(ambient);
  light1.position.set(200, 300, 400);
  scene.add(light1);
  light2.position.set(-200, -300, -400);
  scene.add(light2);

  // 添加聚光灯
  const spotLight = new THREE.SpotLight(0xffffff, 1);
  spotLight.position.set(0, 400, 0);
  // 照射范围
  spotLight.angle = Math.PI / 10;
  // 边界
  spotLight.penumbra = 0.2;
  scene.add(spotLight);
  // 聚光灯辅助线
  const spotLightHelper = new THREE.SpotLightHelper(spotLight);
  scene.add(spotLightHelper);
  // 开启阴影
  spotLight.castShadow = true;

  // 添加平行光
  const dirLight = new THREE.DirectionalLight(0xffffff, 1);
  dirLight.name = "Dir light";
  dirLight.position.set(0, 10, 0);
  scene.add(dirLight);
}
6.鼠标控制
function initMouseTool(camera, scene, renderer) {
  // 鼠标控制相机
  // 设置相机控件轨道控制器OrbitControls
  const controls = new OrbitControls(camera, renderer.domElement);
  // 如果OrbitControls改变了相机参数,重新调用渲染器渲染三维场景
  controls.addEventListener("change", () => {
    //监听鼠标、键盘事件
    //执行渲染操作
    renderer.render(scene, camera);
  });
}
7.辅助坐标轴
function initTool(scene) {
  //创建辅助坐标轴
  const axesHelper = new THREE.AxesHelper(150);
  scene.add(axesHelper);
}
8.平面
// 平面
function initPlat(scene) {
  const planeGeometry = new THREE.PlaneGeometry(300, 400);
  const planeMaterial = new THREE.MeshPhongMaterial({
    color: 0x808080,
    side: THREE.DoubleSide,
  });
  const plane = new THREE.Mesh(planeGeometry, planeMaterial);
  // 平面旋转
  plane.rotation.x = -Math.PI / 2;
  // 平面位置
  plane.position.set(0, 0, 0);
  // 开启阴影
  plane.castShadow = true;
  scene.add(plane);
}
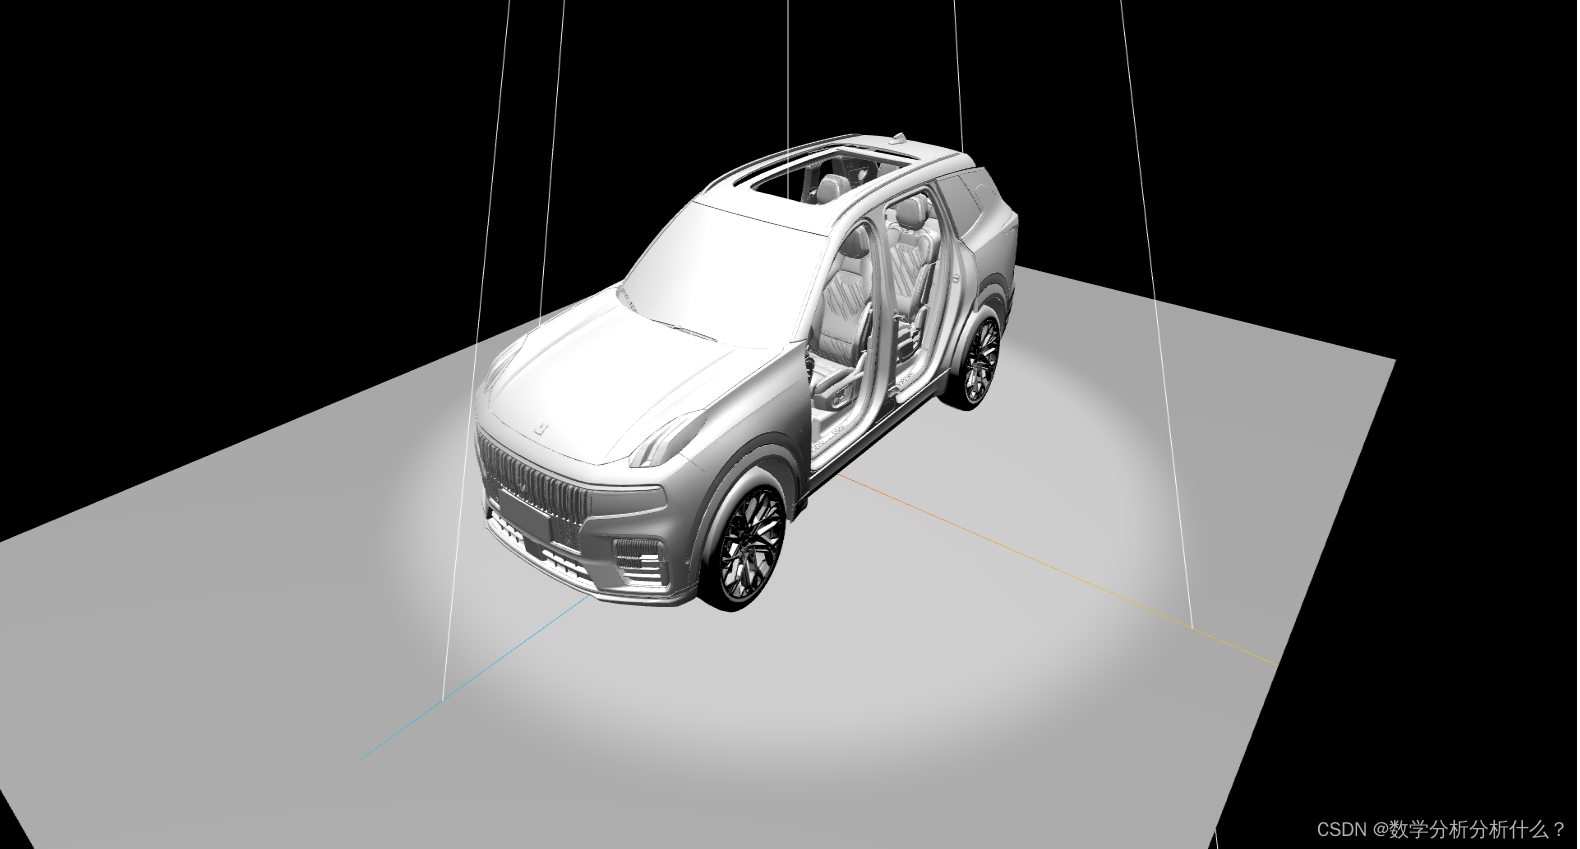
步骤3以后的代码,均可在步骤3 初始化并创建视图方法 initThree()里的渲染执行document.getElementById("threeRef")...前调用。
另外需要注意的是,直接运行上述代码,渲染后模型未立即出现,鼠标在页面内拖拽后模型才出现。目前还未找到相关原因,可以在 document.getElementById("threeRef")...后使用以下代码临时处理,后续找到原因与解决方案后再更新。
// 防止未出现模型,需要找到原因
  setTimeout(() => {
    renderer.render(scene.value, camera.value);
  }, 1500);
3.实现效果
参考文档
1.Three.js中文网文档:https://guolongbang.github.io/pages/f24993/;
2.three.js基础案例系列文章:https://blog.csdn.net/qq_46056472/article/details/134802692?spm=1001.2014.3001.5502;
3.three.js-加载glb模型(含踩坑) - Garrison’s Blog:https://garrison.wang/2024/02/29/3th-3/。


 5486
5486

 被折叠的 条评论
为什么被折叠?
被折叠的 条评论
为什么被折叠?
 到【灌水乐园】发言


