


IOpaint github地址:https://github.com/Sanster/IOPaint
模型下载链接:https://www.iopaint.com/models/erase/lama
lama模型下载:
https://github.com/Sanster/models/releases/download/add_big_lama/big-lama.pt
人脸修复模型下载:
https://github.com/TencentARC/GFPGAN/releases/download/v1.3.0/GFPGANv1.4.pth
https://github.com/xinntao/facexlib/releases/download/v0.1.0/detection_Resnet50_Final.pthhttps://github.com/xinntao/facexlib/releases/download/v0.2.2/parsing_parsenet.pth
超分模型下载:
https://github.com/xinntao/Real-ESRGAN/releases/download/v0.1.1/RealESRNet_x4plus.pth
背景擦除:指定目录后自行会下载 。
操作之前先拉去镜像:
docker pull python:3.10

#如果是nvidia启动需要指定NVIDIA环境变量,要不然容器中nvidia-smi无法看到cuda版本
docker run -itd   --name cc_mb_cf_bj_torch212 -p 8080:8080 -w /iopaint python:3.10   bash
注:最终启动命令
iopaint start --model=lama --model-dir=models --device=cpu --port=8080 --host 0.0.0.0 --enable-gfpgan --enable-realesrgan --realesrgan-model RealESRGAN_x4plus --enable-remove-bg --realesrgan-device cpu1、图像鼠标擦除(去水印)
#安装环境,根据github中文档安装
pip install torch==2.1.2 torchvision==0.16.2
pip install iopaint

#启动iopain,默认为启动地址为127.0.0.1,docker外部映射后无法访问,需指定为--host 0.0.0.0
iopaint start --model=lama --model-dir=models --device=cuda  --port=8080 --host 0.0.0.0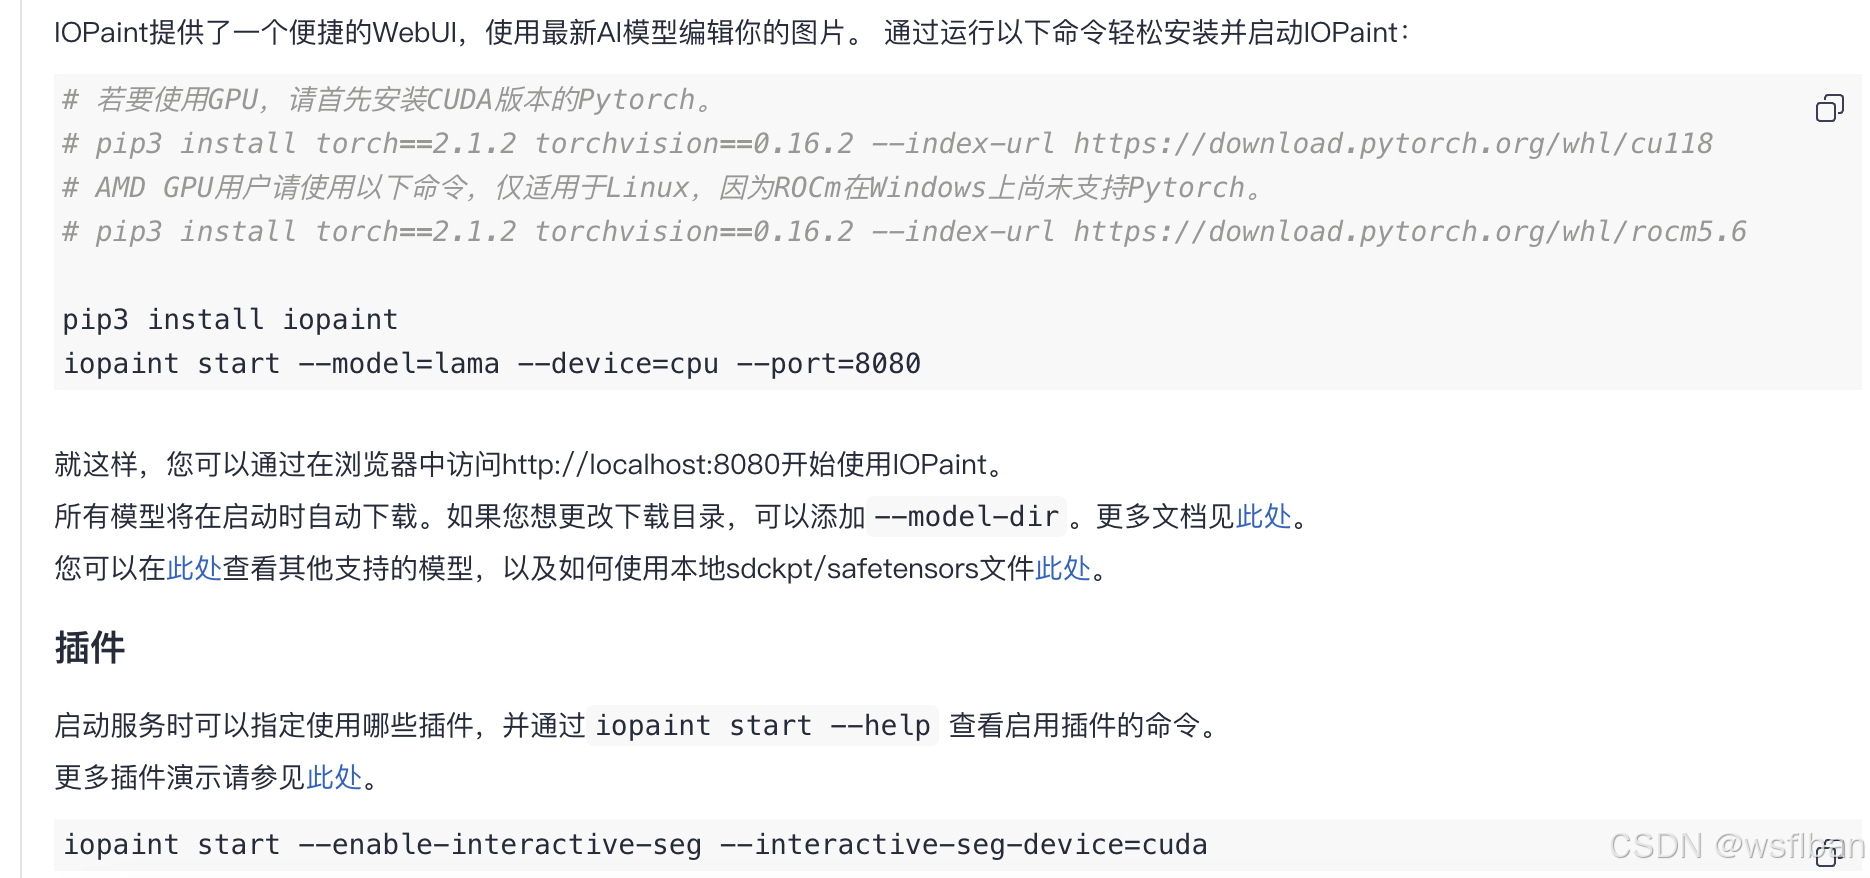
2、人脸修复
#安装环境
pip install facexlib
pip install tb-nightly -i https://mirrors.aliyun.com/pypi/simple
pip install gfpgan
#安装完成后,直接启动,本人使用gpu服务器,所以指定  --device=cuda --gfpgan-device cuda
iopaint start --model=lama --model-dir=models --device=cuda  --port=8080 --host 0.0.0.0 --enable-gfpgan --gfpgan-device cuda
3、超分
#安装环境
pip install realesrgan
#启动命令,启动是会弹出启动日志,需查看是否正常调用gpu
iopaint start --model=lama --model-dir=models --device=cuda --port=8080 --host 0.0.0.0 --enable-realesrgan --realesrgan-model RealESRGAN_x4plus --realesrgan-device cuda
4、背景移除
#安装环境
pip install rembg
pip install huggingface
set HF_ENDPOINT=https://hf-mirror.com
#启动命令
iopaint start --model=lama --model-dir=models --device=cuda --port=8080 --host 0.0.0.0 --enable-remove-bg


 1万+
1万+

 被折叠的 条评论
为什么被折叠?
被折叠的 条评论
为什么被折叠?
 到【灌水乐园】发言


