


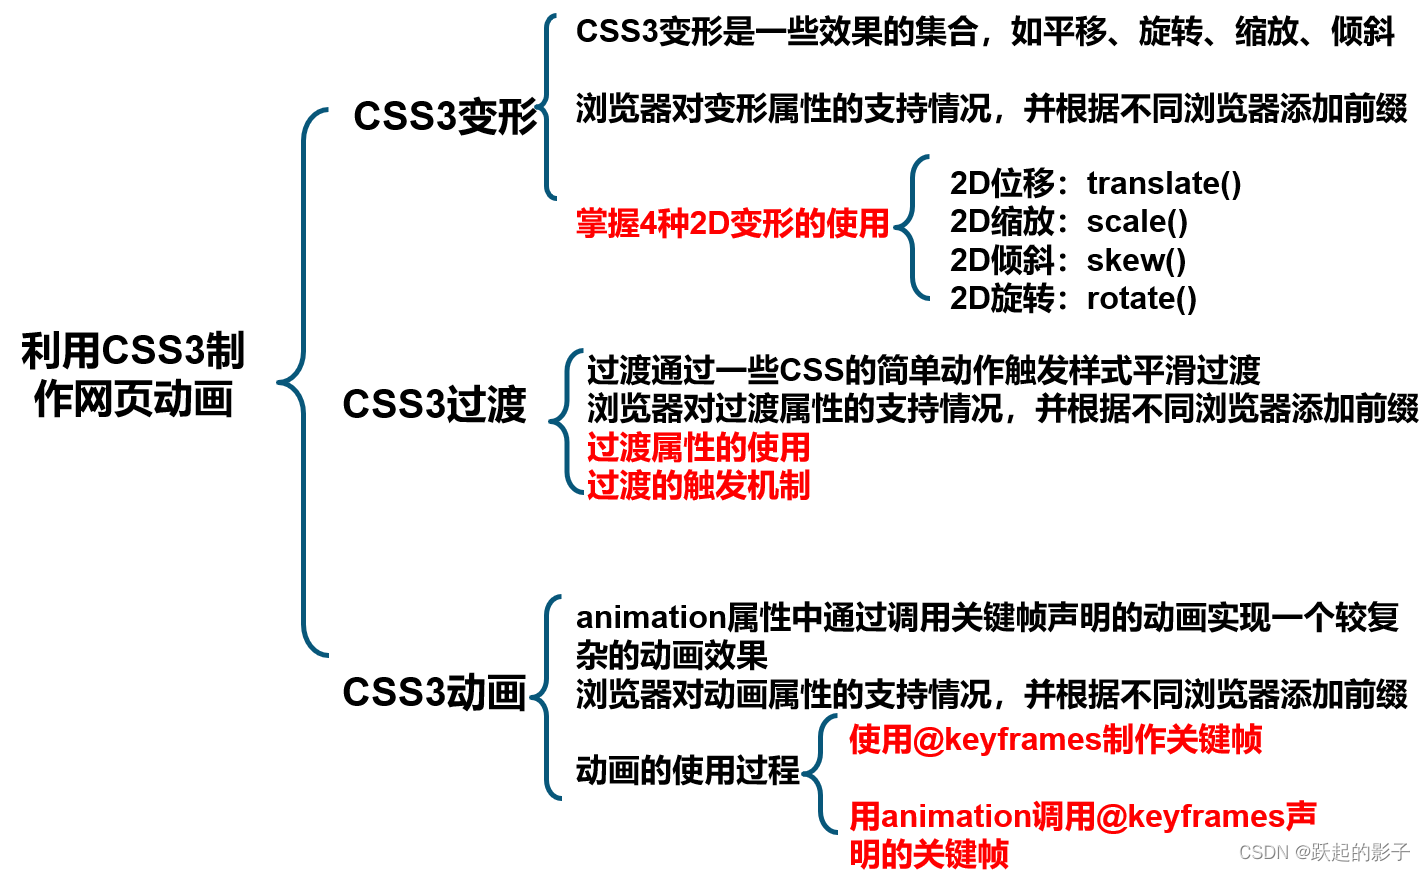
CSS3变形
CSS3变形是一些效果的集合
如平移、旋转、缩放、倾斜效果
每个效果都可以称为变形(transform),它们可以分别操控元素发生平移、旋转、缩放、倾斜等变化
transform:[transform-function] *;
变形函数
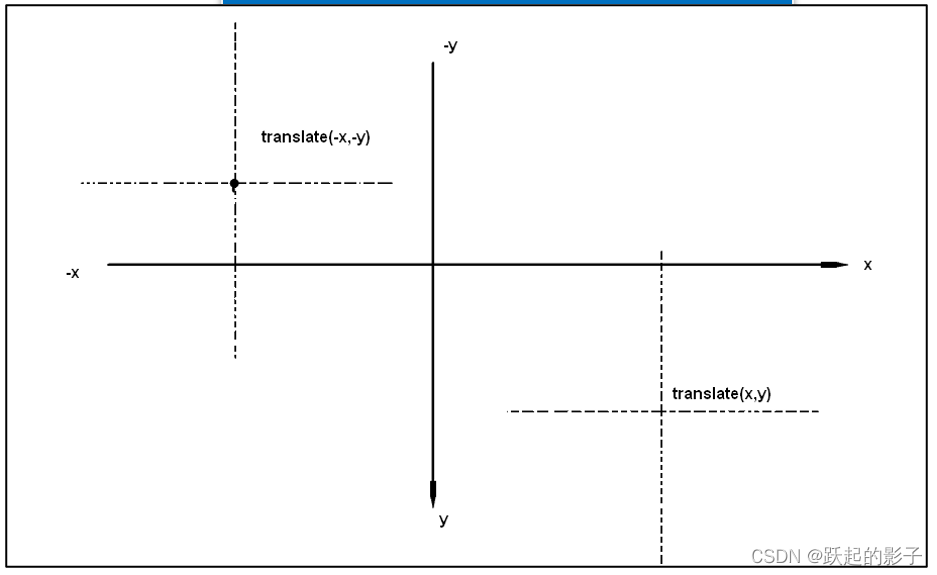
translate():平移函数,基于X、Y坐标重新定位元素的位置
scale():缩放函数,可以使任意元素对象尺寸发生变化
rotate():旋转函数,取值是一个度数值
skew():倾斜函数,取值是一个度数值
- 平移函数——translate
li a:hover{
            background: rgba(242, 88, 6, 0.87);
            border-radius: 6px;
            /* 设置a元素在鼠标移入时向右下角移动4px,8px*/
            transform: translate(4px,8px);
            -webkit-transform: translate(4px,8px);
            -o-transform: translate(4px,8px);
            -moz-transform: translate(4px,8px);

            transform: translateX(4px);
            transform: translateY(8px);
        }
translateX(tx)
表示只设置X轴的位移
/* 两者等同 */
transform:translate(100px,0)
transform:translateX(100px)
translateY(ty)
表示只设置Y轴的位移
/* 两者等同 */
transform:translate(0,100px)
transform:translateY(100px)
- 2D缩放函数——scale
<!--scale(sx,sy);
sx为横向坐标(宽度)方向的缩放量
sy为纵轴坐标(高度)方向的缩放量
-->
li a:hover{
            background: rgba(242, 88, 6, 0.87);
            border-radius: 6px;
            /*设置a元素在鼠标移入时放大1.5倍显示*/
            transform: scale(1.5);
            -webkit-transform: scale(1.5);
            -moz-transform: scale(1.5);
            -o-transform: scale(1.5);
        }
scale()函数可以只接收一个值,也可以接收两个值,只有一个值时,第二个值默认和第一个值相等
scaleX(sx):表示只设置X轴的缩放
<!--两者相同-->
transform:scale(2,0)
transform:scaleX(2)
scaleY(sy):表示只设置Y轴的缩放
<!--两者相同-->
transform:scale(0,2)
transform:scaleY(2)
- 2D倾斜——skew
<!--skew(ax, ay);
水平方向(X轴)的倾斜角度
垂直方向(Y轴)的倾斜角度
-->
li a:hover{
            background: rgba(242, 88, 6, 0.87);
            border-radius: 6px;
            /*设置a元素在鼠标移入时向左下角倾斜*/
            /*transform: skew(40deg,-20deg);*/
            /*-webkit-transform: skew(40deg,-20deg);*/
            /*-moz-transform: skew(40deg,-20deg);*/
            /*-o-transform: skew(40deg,-20deg);*/
            transform: skewX(40deg);
            -webkit-transform: skewX(40deg);
            -moz-transform: skewX(40deg);
            -o-transform: skewX(40deg);
        }

可以仅设置沿着X轴或Y轴方向倾斜
skewX(ax):表示只设置X轴的倾斜
skewY(ay):表示只设置Y轴的倾斜
- 2D旋转——rotate

img:hover {
            /*定义动画的状态,鼠标移入旋转并放大图片*/
            transform: rotate(-90deg) scale(2);
            -webkit-transform: rotate(-90deg) scale(2);
            -moz-transform: rotate(-90deg) scale(2);
            -o-transform: rotate(-90deg) scale(2);
        }
注意:
rotate( )函数只是旋转,而不会改变元素的形状
skew( )函数是倾斜,元素不会旋转,会改变元素的形状
CSS3过渡
transition呈现的是一种过渡,是一种动画转换的过程,如渐现、渐弱、动画快慢等
CSS3 transition的过渡功能更像是一种“黄油”,通过一些CSS的简单动作触发样式平滑过渡
transition:[transition-property transition-duration transition-timing-function transition-delay ]
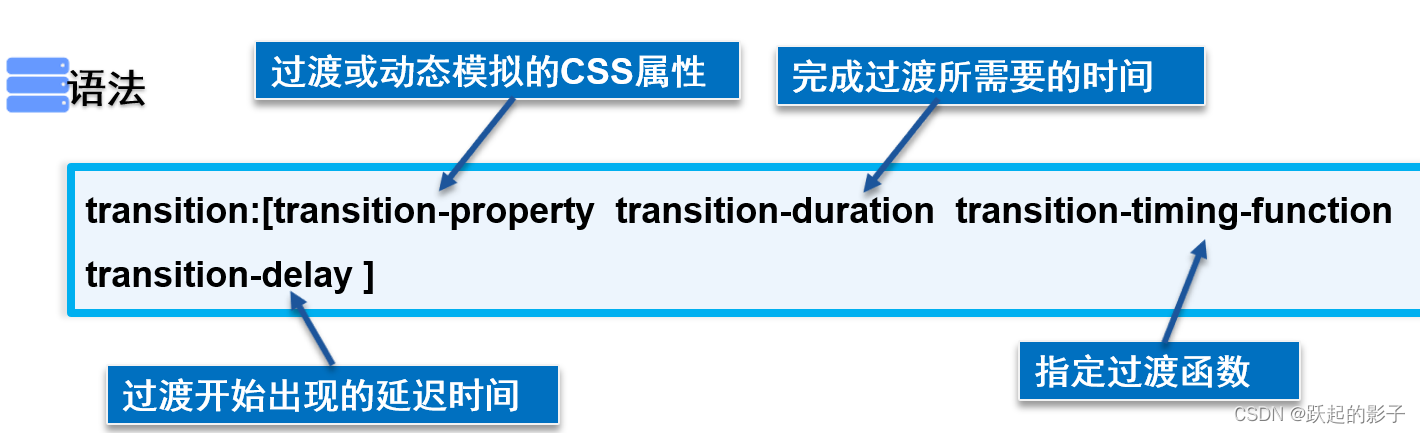
- 过渡属性——transition-property
定义转换动画的CSS属性名称
IDENT:指定的CSS属性(width、height、background-color属性等)
all:指定所有元素支持transition-property属性的样式,一般为了方便都会使用all - 过渡所需时间——transition-duration
定义转换动画的时间长度,即从设置旧属性到换新属性所花费的时间,单位为秒(s) - 过渡动画函数——transition-timing-function
指定浏览器的过渡速度,以及过渡期间的操作进展情况,通过给过渡添加一个函数来指定动画的快慢方式
ease:速度由快到慢(默认值)
linear:速度恒速(匀速运动)
ease-in:速度越来越快(渐显效果)
ease-out:速度越来越慢(渐隐效果)
ease-in-out:速度先加速再减速(渐显渐隐效果) - 过渡延迟时间——transition-delay
指定一个动画开始执行的时间,当改变元素属性值后多长时间去执行过渡效果
正值:元素过渡效果不会立即触发,当过了设置的时间值后才会被触发
负值:元素过渡效果会从该时间点开始显示,之前的动作被截断
0:默认值,元素过渡效果立即执行 - 过渡触发机制(即单纯transform不能触发动画,需要配合其他触发)
伪类触发
:hover
:active
:focus
:checked
媒体查询
通过@media属性判断设备的尺寸,方向等
JavaScript触发
用JavaScript脚本触发
示例:旋转按钮
<!DOCTYPE html>
<html>
<head lang="en">
<meta charset="UTF-8">
<title>旋转按钮</title>
<style type="text/css">
ul li {
float: left;
margin: 10px;
list-style: none;
}
#box img {
-moz-transition: all 0.8s ease-in-out;
-webkit-transition: all 0.8s ease-in-out;
-o-transition: all 0.8s ease-in-out;
transition: all 0.8s ease-in-out;
}
#box img:hover {
-moz-transform: rotate(360deg) scale(1.5);
-webkit-transform: rotate(360deg) scale(1.5);
-o-transform: rotate(360deg) scale(1.5);
-ms-transform: rotate(360deg) scale(1.5);
transform: rotate(360deg) scale(1.5);
}
</style>
</head>
<body>
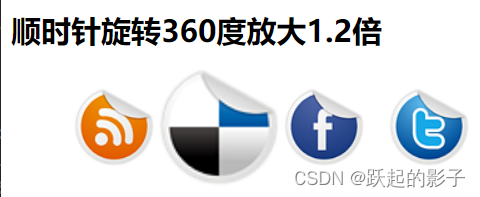
<h2>顺时针旋转360度放大1.2倍</h2>
<ul id="box">
<li><a href="#"><img src="images/rss.png" /></a></li>
<li><a href="#"><img src="images/delicious.png" /></a></li>
<li><a href="#"><img src="images/facebook.png" /></a></li>
<li><a href="#"><img src="images/twitter.png"/></a></li>
<li><a href="#"><img src="images/yahoo.png" /></a></li>
</ul>
</body>
</html>
CSS3动画
animation动画简介
animation实现动画主要由两个部分组成
通过类似Flash动画的关键帧来声明一个动画
在animation属性中调用关键帧声明的动画实现一个更为复杂的动画效果
注意:
写兼容的时候浏览器前缀是放在@keyframes中间
例如:@-webkit-keyframes、@-moz- keyframes
<!--例子-->
@keyframes  IDENT  {
   from {/*CSS样式写在这里*/}
   percentage {/*CSS样式写在这里*/}
   to {/*CSS样式写在这里*/}
}
<!--实际-->
@keyframes spread {
   0% {width:0;}
   33% {width:23px;}
   66% {width:46px;}
   100% {width:69px;}
 }
animation:animation-name  animation–duration  animation-timing-function
   animation-delay  animation-iteration-count  animation-direction
animation-play-state  animation-fill-mode;
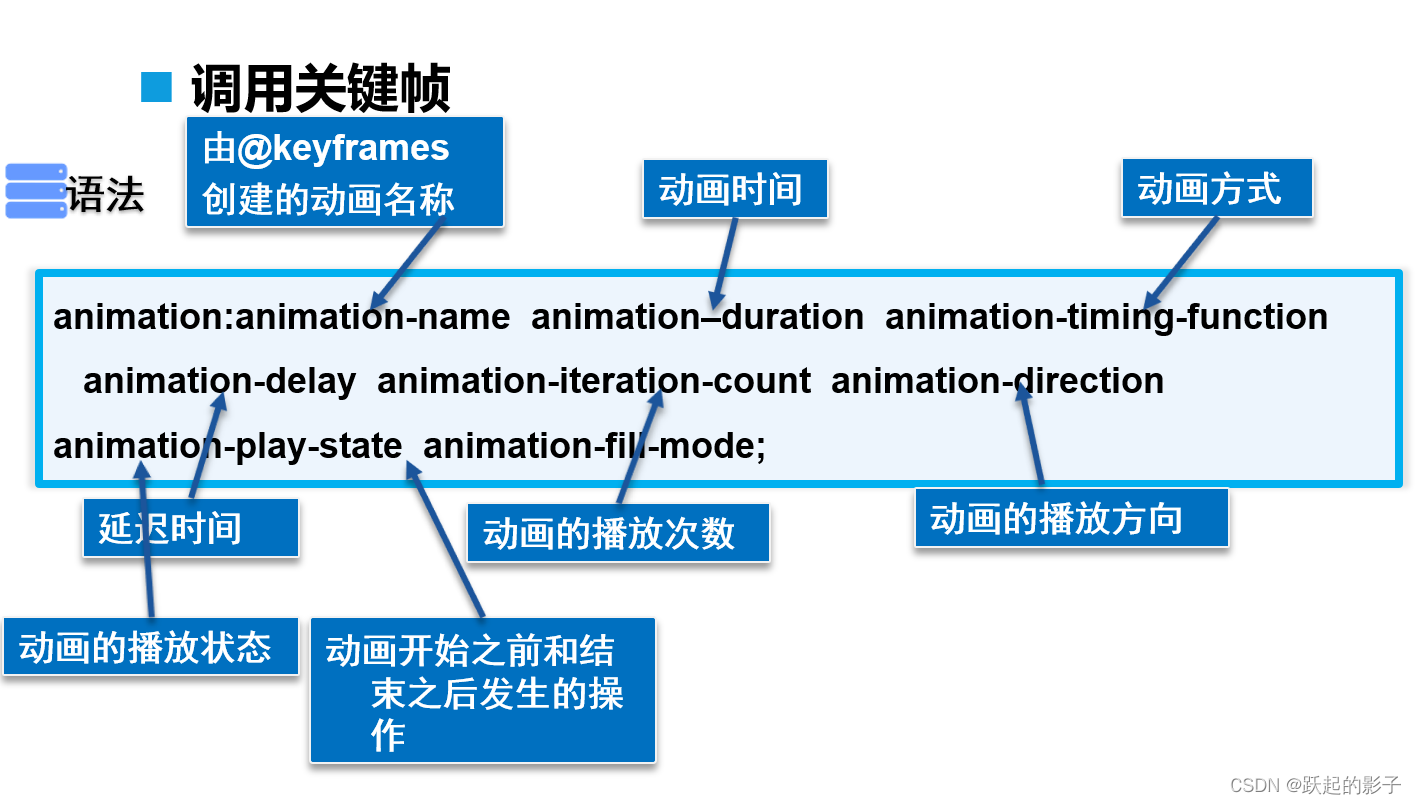
- 动画的播放次数——animation-iteration-count
值通常为整数,默认值为1
特殊值infinite,表示动画无限次播放
- 动画的播放方向——animation-direction
normal,动画每次都是循环向前播放
alternate,动画播放为偶数次则向前播放
- 动画的播放状态——animation-play-state
running将暂停的动画重新播放
paused将正在播放的元素动画停下来
- 动画发生的操作——animation-fill-mode
forwards表示动画在结束后继续应用最后关键帧的位置
backwards表示会在向元素应用动画样式时迅速应用动画的初始帧
both表示元素动画同时具有forwards和backwards的效果
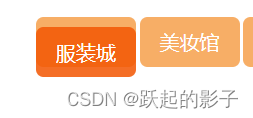
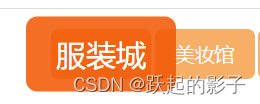
综合案例:彩贝导航
(应该是免费的)完整包下载
从这里的案例就能看出,transform需要搭配其他机制触发,在a标签里加入transform效果之后,用hover伪类触发动画效果
<!DOCTYPE html>
<html>
<head lang="en">
    <meta charset="UTF-8">
    <title>彩贝导航</title>
    <style>
        *{
            margin: 0;
            padding: 0;
        }
        body{
            padding: 20px 0 0;
        }
        a{
            text-decoration: none;
        }
        li{
            list-style: none;
        }
        .clear:after{
            content:'';
            display: block;
            clear: both;
        }
        header{
            height: 70px;
            line-height: 70px;
            background: linear-gradient(to bottom, #FFFFFF, rgba(204, 204, 204, 0.4));
        }
        .topLeft{
            float: left;
            margin-left: 120px;
            margin-top: 10px;
        }
        /*-------------------------中间导航条----------------------------------*/
        .topCenter{
            float: left;
            margin-left: 60px;
            font-size: 20px;
            position: relative;
        }
        .topCenter li{
            float: left;

        }
        .topCenter li a{
            margin: 0 10px;
            color: #000033;
        }
        .topCenter li a:hover{
            color: #dd140f;
        }
        /*赚积分图片*/
        .icon1{
            position: absolute;
            top: 0px;
            width: 40px;
            height: 20px;
            background: url("images/header_03.png") 0 0 no-repeat;
        }
        /*花积分图片*/
        .icon2{
            position: absolute;
            top: 0px;
            width: 40px;
            height: 25px;
            background: url("images/header_07.png") 0 0 no-repeat;
        }

        /*创建动画(赚积分上的动画)*/
        @keyframes spread {
            0% {width:0;}
            33% {width:23px;}
            66% {width:46px;}
            100% {width:69px;}
        }
        @-webkit-keyframes spread {
            0% {width:0;}
            33% {width:23px;}
            66% {width:46px;}
            100% {width:69px;}
        }
        @-moz-keyframes spread {
            0% {width:0;}
            33% {width:23px;}
            66% {width:46px;}
            100% {width:69px;}
        }
        @-o-keyframes spread {
            0% {width:0;}
            33% {width:23px;}
            66% {width:46px;}
            100% {width:69px;}
        }
        /*使用动画*/
        /*鼠标移入赚的图片上变为赚积分的图片,并且宽度由小变大产生动画*/
        .topCenter li a:hover .icon1 {
            animation:spread 0.3s linear both;
            -webkit-animation:spread 0.3s linear both;
            -moz-animation:spread 0.3s linear both;
            -o-animation:spread 0.3s linear both;
            background: url("images/header_05.png") 0 0 no-repeat;
        }

        .topCenter li a:hover .icon2 {
            animation:spread 0.3s linear both;
            -webkit-animation:spread 0.3s linear both;
            -moz-animation:spread 0.3s linear both;
            -o-animation:spread 0.3s linear both;
            background: url("images/header_09.png") 0 0 no-repeat;
        }
        /*-------------------------右边过渡动画----------------------------------*/
        .topRight{
            float: right;
            margin-right: 120px;
        }
        .topRight a{
            width:24px;
            height:24px;
            overflow:hidden;
            margin-left:14px;
            float:left;
            margin-top:20px;
            /*图片移动的动画*/
            transition:all 0.3s linear;
            -webkit-transition:all 0.3s linear;
            -moz-transition:all 0.3s linear;
            -o-transition:all 0.3s linear;

        }
        /*给每张图片设置背景*/
        .topRight a:nth-of-type(1){
             background: url("images/iconsB_11.gif") 0 0 no-repeat;
         }
        .topRight a:nth-of-type(2){
            background: url("images/iconsB_12.gif") 0 0 no-repeat;
        }
        .topRight a:nth-of-type(3){
            background: url("images/iconsB_13.png") 0 0 no-repeat;
        }
        /*鼠标移入图片旋转360度*/
        .topRight a:nth-of-type(1):hover,
        .topRight a:nth-of-type(2):hover,
        .topRight a:nth-of-type(3):hover{
            transform: rotate(360deg);
            -webkit-transform: rotate(360deg);
            -moz-transform: rotate(360deg);
            -o-transform: rotate(360deg);
        }

    </style>
</head>
<body>
    <header class="clear">
        <div class="topLeft">
            <h1><a href="#"><img src="images/logo_170x46.png" alt=""/></a></h1>
        </div>
        <nav class="topCenter">
            <ul class="clear">
                <li>
                    <a href="#">
                        <span class="icon1"></span>
                        返回商城
                    </a>|
                </li>
                <li>
                    <a href="#">商旅频道</a>|
                </li>
                <li>
                    <a href="#">
                        <span class="icon2"></span>
                        积分商城
                    </a>|
                </li>
                <li><a href="#">商旅频道</a>|
                </li>
                <li>
                    <a href="#">了解彩贝</a>|
                </li>
                <li>
                    <a href="#" >彩贝活动</a>|
                </li>
                <li>
                    <a href="#" >个人中心</a>
                </li>
            </ul>
        </nav>
        <div class="topRight">
            <a href="#" ></a>
            <a href="#" ></a>
            <a href="#" ></a>
        </div>
    </header>
</body>
</html>
总结


 106
106


 被折叠的 条评论
为什么被折叠?
被折叠的 条评论
为什么被折叠?
 到【灌水乐园】发言


