


5.0 版本对基础环境的要求有⼤的变化,最⼤的就是对 php 版本的要求,最低要求7.2.0 版本,对 php 扩展组件版本也有要求,详见官网文档
https://www.zabbix.com/documentation/current/manual/installation/requirements
准备好⼀台linux服务器,查看主机名和ip地址
[root@bogon ~]# hostname
bogon
[root@bogon ~]# ifconfig ens33 |awk 'NR==2{print$2}'
192.168.206.202
关闭防火墙
[root@bogon ~]# sed -i 's/SELINUX=enforcing/SELINUX=disabled/' /etc/selinux/config
[root@bogon ~]# systemctl disable --now firewalld
[root@bogon ~]# reboot
安装zabbix服务端配置
官⽹安装⽂档
https://www.zabbix.com/download?zabbix=5.0&os_distribution=red_hat_enterprise_linux&os_version=7&db=mysql&ws=apache
安装步骤
- 获取zabbix官⽅源
rpm -Uvh https://mirrors.aliyun.com/zabbix/zabbix/5.0/rhel/7/x86_64/zabbix-release-5.0-1.el7.noarch.rpm
sed -i 's#http://repo.zabbix.com#https://mirrors.aliyun.com/zabbix#' /etc/yum.repos.d/zabbix.repo
yum clean all
- 安装zabbix server和agent
yum install zabbix-server-mysql zabbix-agent -y
- 安装 Software Collections,便于后续安装⾼版本的 php,默认 yum安装的 php 版本为 5.4 过低。
SCL(Software Collections)可以让你在同⼀个操作系统上安装和使⽤多个版本的软件,⽽不会影响整个系统的安装包。软件包会安装在/opt/rh⽬录下为了避免系统⼴泛冲突,/opt/rh包安装在⽬录中,例如,这允许你在CentOS7机器上安装Python 3.5,⽽不会删除或⼲扰Python 2.7. /etc/opt/rh/软件包的所有配置⽂件都存储在⽬录中相应的⽬录中,SCL包提供了定义使⽤所包含应⽤程序所需的环境变量的shell脚本,例如,PATH,LD_LIBRARY_PATH和MANPATH ,这些脚本存储在⽂件系统中,作为/opt/rh/package-name/enable 。
yum install centos-release-scl -y
- 修改zabbix前端源
vim /etc/yum.repos.d/zabbix.repo
[zabbix-frontend]
name=Zabbix Official Repository frontend - $basearch
baseurl=https://mirrors.aliyun.com/zabbix/zabbix/5.0/rhel/7/$basearch/frontend
enabled=1   #修改这⾥
gpgcheck=1
gpgkey=file:///etc/pki/rpm-gpg/RPM-GPG-KEY-ZABBIX-A14FE591
- 安装zabbix前端环境
yum install zabbix-web-mysql-scl zabbix-apache-conf-scl -y
这一步报错的话请看
https://blog.csdn.net/qq_45748758/article/details/132212591
- 安装zabbix所需的数据库,直接⽤centos7⾃带的mariadb
yum install mariadb-server -y
- 启动数据库,且配置开机启动
systemctl enable --now mariadb
- 初始化mariadb,设置root密码,123456
mysql_secure_installation
看#后面的内容
[root@bogon ~]# mysql_secure_installation

NOTE: RUNNING ALL PARTS OF THIS SCRIPT IS RECOMMENDED FOR ALL MariaDB
      SERVERS IN PRODUCTION USE!  PLEASE READ EACH STEP CAREFULLY!

In order to log into MariaDB to secure it, we'll need the current
password for the root user.  If you've just installed MariaDB, and
you haven't set the root password yet, the password will be blank,
so you should just press enter here.

Enter current password for root (enter for none):   #此处直接回车
OK, successfully used password, moving on...

Setting the root password ensures that nobody can log into the MariaDB
root user without the proper authorisation.

Set root password? [Y/n] y  #y
New password:
Re-enter new password:
Password updated successfully!
Reloading privilege tables..
 ... Success!


By default, a MariaDB installation has an anonymous user, allowing anyone
to log into MariaDB without having to have a user account created for
them.  This is intended only for testing, and to make the installation
go a bit smoother.  You should remove them before moving into a
production environment.

Remove anonymous users? [Y/n] y   #y
 ... Success!

Normally, root should only be allowed to connect from 'localhost'.  This
ensures that someone cannot guess at the root password from the network.

Disallow root login remotely? [Y/n] n   #n
 ... skipping.

By default, MariaDB comes with a database named 'test' that anyone can
access.  This is also intended only for testing, and should be removed
before moving into a production environment.

Remove test database and access to it? [Y/n] y   #y
 - Dropping test database...
 ... Success!
 - Removing privileges on test database...
 ... Success!

Reloading the privilege tables will ensure that all changes made so far
will take effect immediately.

Reload privilege tables now? [Y/n] y   #y
 ... Success!

Cleaning up...

All done!  If you've completed all of the above steps, your MariaDB
installation should now be secure.

Thanks for using MariaDB!
- 使⽤root⽤户登录mariadb,建⽴zabbix数据库,这⾥的编码设置,⾮常
重要,否则zabbix⽆法安装
[root@bogon ~]# mysql -uroot -p
Enter password:
Welcome to the MariaDB monitor.  Commands end with ; or \g.
Your MariaDB connection id is 10
Server version: 5.5.68-MariaDB MariaDB Server

Copyright (c) 2000, 2018, Oracle, MariaDB Corporation Ab and others.

Type 'help;' or '\h' for help. Type '\c' to clear the current input statement.

MariaDB [(none)]> create database zabbix character set utf8 collate utf8_bin;
Query OK, 1 row affected (0.00 sec)

MariaDB [(none)]> create user zabbix@localhost identified by '123456';
Query OK, 0 rows affected (0.00 sec)

MariaDB [(none)]> grant all privileges on zabbix.* to zabbix@localhost;
Query OK, 0 rows affected (0.00 sec)

MariaDB [(none)]> flush privileges;
Query OK, 0 rows affected (0.00 sec)

MariaDB [(none)]> quit;
Bye
- 使⽤以下命令导⼊ zabbix 数据库,zabbix 数据库⽤户为 zabbix,密
码为123456
zcat /usr/share/doc/zabbix-server-mysql*/create.sql.gz | mysql -uzabbix -p zabbix
导入完可以登入数据库查看,会有一个zabbix数据库
MariaDB [(none)]> show databases;
+--------------------+
| Database           |
+--------------------+
| information_schema |
| zabbix             |
+--------------------+
2 rows in set (0.00 sec)
- 修改 zabbix server 配置⽂件/etc/zabbix/zabbix_server.conf ⾥
的数据库密码
[root@bogon ~]# grep '^DBPassword' /etc/zabbix/zabbix_server.conf
DBPassword=123456
- 修改 zabbix 的 php 配置⽂件 /etc/opt/rh/rh-hp72/php-fpm.d/zabbix.conf ⾥的时区
[root@bogon ~]# grep 'timezone' /etc/opt/rh/rh-php72/php-fpm.d/zabbix.conf
php_value[date.timezone] = Asia/Shanghai
- 启动相关服务
systemctl restart zabbix-server zabbix-agent httpd rh-php72-php-fpm
systemctl enable zabbix-server zabbix-agent httpd rh-php72-php-fpm
- 访问zabbix⼊⼝
http://192.168.206.202/zabbix
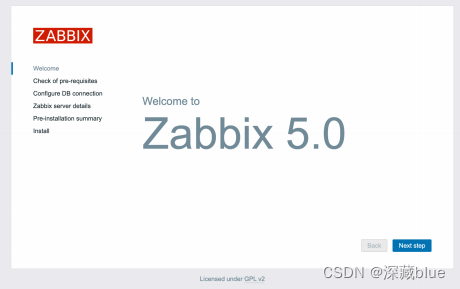
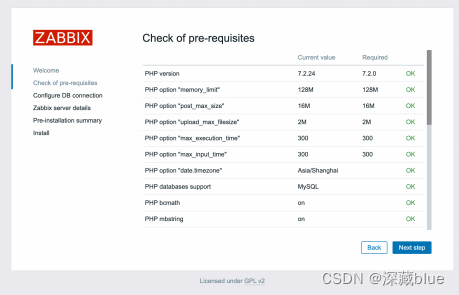
15. 检查组件是否正常
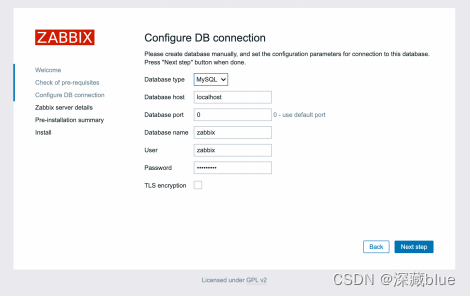
16. 输⼊配置数据库 zabbix ⽤户的密码,123456
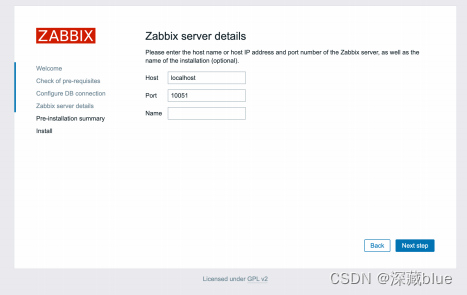
下一步
安装信息细节
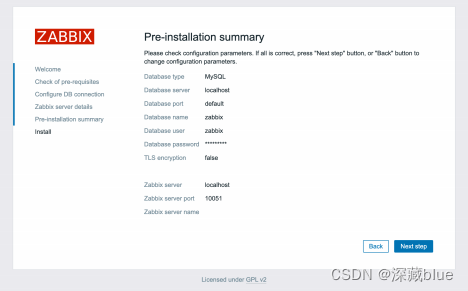
-
成功安装
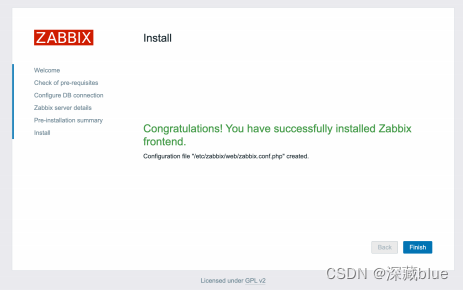
-
登录账号为 Admin,密码:zabbix,注意⼤⼩写
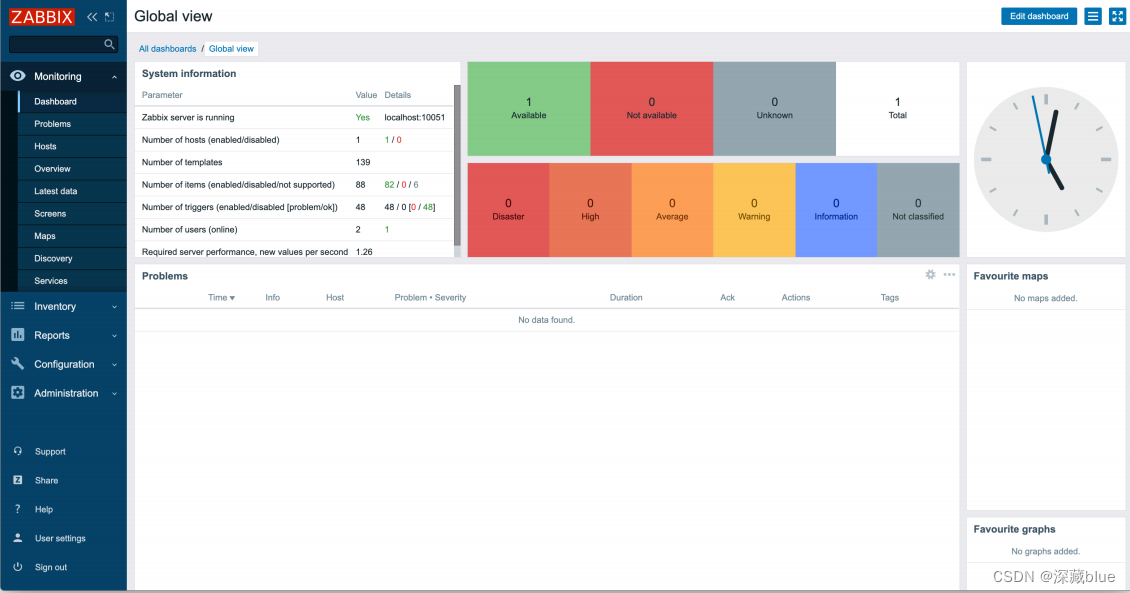
以上是服务端安装教程
客户端安装请看
https://blog.csdn.net/qq_45748758/article/details/132214085


 9896
9896


 被折叠的 条评论
为什么被折叠?
被折叠的 条评论
为什么被折叠?
 到【灌水乐园】发言


