


基于 springboot + vue 的 element-ui 的 upload 组件头像上传
为了方便我们自己本地测试使用,我们将文件上传至自己电脑的磁盘中,由于项目是前后端分离的,所以我们会直接传给前端该文件的网络地址,同时后端也会将文件地址与请求地址进行映射方便前端进行展示。
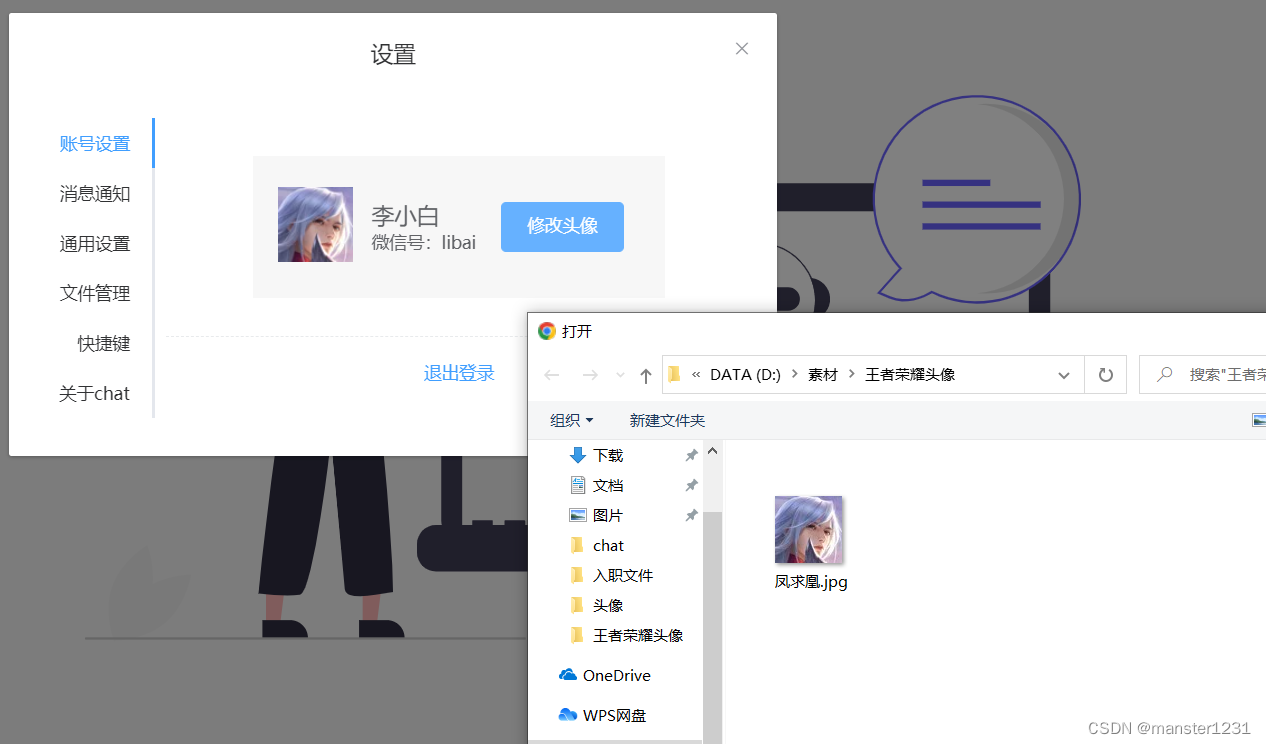
最终效果
1、后端部分
上传配置
首先我们配置后端上传文件组件
为了方便,我们使用 hutool 工具类
        <dependency>
            <groupId>cn.hutool</groupId>
            <artifactId>hutool-all</artifactId>
            <version>5.3.3</version>
        </dependency>
我们配置上传后文件所在目录位置
file:
  upload:
    dir: ${user.dir}/upload
这里表示直接在该项目文件夹下创建
upload目录来放置我们上传的文件
上传服务
然后我们首先编写文件的上传服务,关于这里我们写成一个复用的方法
- 首先我们会传入
type参数,分别对应几种文件类型- avatar:头像
- photo:群聊头像
- chatPhoto:聊天图片
- chatFile:聊天文件
- 其中关于 avatar 和 photo 其实每个用户和群聊都只有一个,所以我们需要 id 作为文件名的一部分,使用的服务端只存储一张头像
- 然后我们就根据
type字段来分别为每一种类型的文件来放置不同文件夹和命名 - 最后我们将文件所存储成功的相对项目的路径返回
package com.manster.server.service.impl;

import cn.hutool.core.date.DatePattern;
import cn.hutool.core.date.DateUtil;
import cn.hutool.core.util.StrUtil;
import com.manster.server.common.R;
import com.manster.server.service.UploadService;
import lombok.extern.slf4j.Slf4j;
import org.springframework.beans.factory.annotation.Value;
import org.springframework.stereotype.Service;
import org.springframework.web.multipart.MultipartFile;

import java.io.File;
import java.io.IOException;
import java.util.Date;

/**
 * @Author manster
 * @Date 2022/7/3
 **/
@Slf4j
@Service
public class UploadServiceImpl implements UploadService {

    //图片上传路径
    @Value("${file.upload.dir}")
    private String uploadDir;
    @Value("${server.port}")
    private String port;

    public final static String TYPE_AVATAR = "avatar";
    public final static String TYPE_PHOTO = "photo";
    public final static String TYPE_CHAT_PHOTO = "chatPhoto";
    public final static String TYPE_CHAT_FILE = "chatFile";

    @Override
    public R upload(Long id, String type, MultipartFile file) throws IOException {

        if(StrUtil.isBlank(type) || file.isEmpty()) {
            return R.error();
        }

        // 获取文件名
        String fileName = file.getOriginalFilename();
        log.info("上传的文件名为:" + fileName);
        // 获取文件的后缀名
        String suffixName = fileName.substring(fileName.lastIndexOf("."));
        log.info("上传的后缀名为:" + suffixName);
        // 文件上传后的路径
        String filePath = uploadDir;

        // 判断文件类型,分别进行操作
        if (TYPE_AVATAR.equalsIgnoreCase(type)) { // 头像
            fileName = "/avatar/avatar_" + id + suffixName;
        } else if (TYPE_PHOTO.equalsIgnoreCase(type)) { // 群聊头像
            fileName = "/avatar/photo_" + id + suffixName;
        } else if (TYPE_CHAT_PHOTO.equalsIgnoreCase(type)) { // 聊天图片
            fileName = "/chat/photo/" + DateUtil.format(new Date(), DatePattern.PURE_DATETIME_MS_PATTERN) + suffixName;
        } else if (TYPE_CHAT_FILE.equalsIgnoreCase(type)) { // 聊天文件
            fileName = "/chat/file/" + DateUtil.format(new Date(), DatePattern.PURE_DATETIME_MS_PATTERN) + suffixName;
        }

        // 拼接文件路径
        File dest = new File(filePath + fileName);
        // 检测是否存在目录
        if (!dest.getParentFile().exists()) {
            dest.getParentFile().mkdirs();
        }
        try {
            file.transferTo(dest);
            log.info("上传成功后的文件路径:" + filePath + fileName);

            String path = filePath + fileName;
            String url = "http://localhost:" + port + "/upload" + fileName;

            log.info("url ---> {}", url);

            return R.ok().data("url", url);
        } catch (IllegalStateException e) {
            e.printStackTrace();
        }

        return R.ok();

    }
}
映射配置
然后,我们要对请求路径进行映射处理,方便项目能够找到我们存储的文件
package com.manster.server.config;

import org.springframework.beans.factory.annotation.Value;
import org.springframework.context.annotation.Configuration;
import org.springframework.web.servlet.config.annotation.ResourceHandlerRegistry;
import org.springframework.web.servlet.config.annotation.WebMvcConfigurer;

/**
 * @Author manster
 * @Date 2022/7/3
 **/
@Configuration
public class MvcConfig implements WebMvcConfigurer {

    @Value("${file.upload.dir}")
    public String uploadDir;

    @Override
    public void addResourceHandlers(ResourceHandlerRegistry registry) {
        // 头像映射
        registry.addResourceHandler("/upload/avatar/**")
                .addResourceLocations("file:///" + uploadDir + "/avatar/");
        // 聊天图片映射
        registry.addResourceHandler("/upload/chat/photo/**")
                .addResourceLocations("file:///" + uploadDir + "/chat/photo/");
        // 聊天文件映射
        registry.addResourceHandler("/upload/chat/file/**")
                .addResourceLocations("file:///" + uploadDir + "/chat/file/");
    }
}
上传接口
最后我们就是编写接口,方便上传文件了
package com.manster.server.controller;

import com.manster.server.common.R;
import com.manster.server.service.UploadService;
import org.springframework.stereotype.Controller;
import org.springframework.web.bind.annotation.PostMapping;
import org.springframework.web.bind.annotation.RequestMapping;
import org.springframework.web.bind.annotation.RequestParam;
import org.springframework.web.bind.annotation.RestController;
import org.springframework.web.multipart.MultipartFile;

import javax.annotation.Resource;
import java.io.IOException;

/**
 * @Author manster
 * @Date 2022/7/3
 **/
@RestController
@RequestMapping("/upload")
public class UploadController {

    @Resource
    private UploadService uploadService;

    @PostMapping
    public R upload(@RequestParam(value = "id") Long id,
                    @RequestParam(value = "type") String avatar,
                    @RequestParam(value = "file") MultipartFile file) throws IOException {
        return uploadService.upload(id, avatar, file);
    }

}
2、前端部分
前端父组件
首先在父组件中,我们需要得到用户的 id 和 上传文件的类型
<template>
    <div class="user-set">
        <el-tabs tab-position="left" style="height: 240px;">
          <el-tab-pane label="账号设置">
            <account-pane :uploadData="{id: userInfo.id, type:'avatar'}"></account-pane>
          </el-tab-pane>
        </el-tabs>
    </div>
</template>
<script>
import accountPane from './account'
export default {
  name: 'Setting',
  components: { accountPane },
  data () {
    return {}
  },
  computed: {
    userInfo () {
      return this.$store.state.user.userInfo
    }
  }
}
</script>
然后在子组件中,我们在上传文件时就可以使用 :data="uploadData" 来增加上传的参数类型,方便我们后端进行文件的分类存储。
这里我们直接使用 action 属性进行上传接口的访问
<el-upload
           class="avatar-uploader"
           action="http://localhost:8081/upload"
           :show-file-list="false"
           :on-success="handleAvatarSuccess"
           :before-upload="beforeAvatarUpload"
           :data="uploadData">
    <el-button type="primary" style="margin-left: 20px">修改头像</el-button>
</el-upload>
import userApi from '@/api/modules/user'
export default {
  name: 'AccountPane',
  props: {
    uploadData: {
      type: Object,
      required: true
    }
  },
  ...
}
其中 beforeAvatarUpload 方法用来前端判断是否上传的文件符合我们的要求
    beforeAvatarUpload (file) {
      const isJPG = file.type === 'image/jpeg'
      const isLt2M = file.size / 1024 / 1024 < 2

      if (!isJPG) {
        this.$message.error('上传头像图片只能是 JPG 格式!')
      }
      if (!isLt2M) {
        this.$message.error('上传头像图片大小不能超过 2MB!')
      }
      return isJPG && isLt2M
    },
而 handleAvatarSuccess 则用来在将文件上传后返回的文件路径进行设置,并请求后端将头像进行修改,由于我们的图片是固定的 url ,所以在切换图片后地址是不会变的,浏览器也不会重新进行显示所以还会是之前的图片,需要强制刷新才会重新进行加载,因此我们在图片地址后加上一个随机数即可进行重新的加载。
    handleAvatarSuccess (res, file) {
      console.log('res:' + res)
      userApi.updateAvatar(this.userInfo.id, res.data.url).then((resp) => {
        this.$message({
          showClose: true,
          message: '修改成功',
          type: 'success'
        })
        this.userInfo.avatar = this.userInfo.avatar + '?' + Math.random()
      })
    },
前端子组件
<template>
    <div>
        <div class="userinfo-header" >
            <div>
                <img :src="userInfo.avatar" alt="用户头像" class="userInfoImg"/>
            </div>
            <div class="userinfo-info">
                <div style="font-size:18px">
                    <span>{{ userInfo.nickname }}</span>
                </div>
                <div>
                    <span>微信号:{{ userInfo.code }}</span><br>
                </div>
            </div>
            <div>
                <el-upload
                class="avatar-uploader"
                action="http://localhost:8081/upload"
                :show-file-list="false"
                :on-success="handleAvatarSuccess"
                :before-upload="beforeAvatarUpload"
                :data="uploadData">
                    <el-button type="primary" style="margin-left: 20px">修改头像</el-button>
                </el-upload>
            </div>
        </div>
        <el-divider></el-divider>
        <div>
            <el-button type="text" @click="logout">退出登录</el-button>
        </div>
    </div>
</template>
<script>
import userApi from '@/api/modules/user'
export default {
  name: 'AccountPane',
  props: {
    uploadData: {
      type: Object,
      required: true
    }
  },
  data () {
    return {

    }
  },
  computed: {
    userInfo () {
      return this.$store.state.user.userInfo
    }
  },
  methods: {
    // 上传成功后修改数据库用户头像
    handleAvatarSuccess (res, file) {
      // 这里的res.data.url就是后端返回的文件路径
      console.log('res:' + res)
      userApi.updateAvatar(this.userInfo.id, res.data.url).then((resp) => {
        this.$message({
          showClose: true,
          message: '修改成功',
          type: 'success'
        })
        this.$store.state.user.userInfo = resp.data.userInfo
      })
    },
    beforeAvatarUpload (file) {
      const isJPG = file.type === 'image/jpeg'
      const isLt2M = file.size / 1024 / 1024 < 2

      if (!isJPG) {
        this.$message.error('上传头像图片只能是 JPG 格式!')
      }
      if (!isLt2M) {
        this.$message.error('上传头像图片大小不能超过 2MB!')
      }
      return isJPG && isLt2M
    },
    logout () {
      this.$confirm('真的要溜了吗 ̄へ ̄', '提示', {
        confirmButtonText: '确定',
        cancelButtonText: '取消',
        type: 'warning'
      }).then(() => {
        this.$message({
          type: 'success',
          message: '注销成功O(≧口≦)O'
        })
        this.$router.replace('/login')
        this.$socket.emit('leave')
        this.$store.dispatch('user/LOGOUT')
      }).catch(() => {
        this.$message({
          type: 'info',
          message: '已取消注销 (*^▽^*)'
        })
      })
    }
  }
}
</script>
<style>
.user-set .userinfo-header {
    background-color: #f7f7f7;
    margin: 30px auto;
    padding: 25px 5px;
    width: 320px;
    display: flex;
    flex-direction: row;
    justify-content: flex-start;
    align-items: center;
}
.user-set .userInfoImg {
  margin: 0 15px;
}
.user-set .userinfo-info {
    display: flex;
    flex-direction: column;
    align-items: flex-start;
}
</style>


 2962
2962


 被折叠的 条评论
为什么被折叠?
被折叠的 条评论
为什么被折叠?
 到【灌水乐园】发言


