


回想起刚开始学习做前端项目,写的代码非常混乱。最近在学Webpack,然后想要试试能不能利用Webpack的Plugin结合LLM做一个代码评审工具。
GitHub地址
1. 事前准备
首先,需要申请LLM的API-Key,这里以阿里的通义千问为例,在https://bailian.console.aliyun.com/?tab=model#/model-market中申请。
1.查阅API参考,进入创建API-KEY的页面
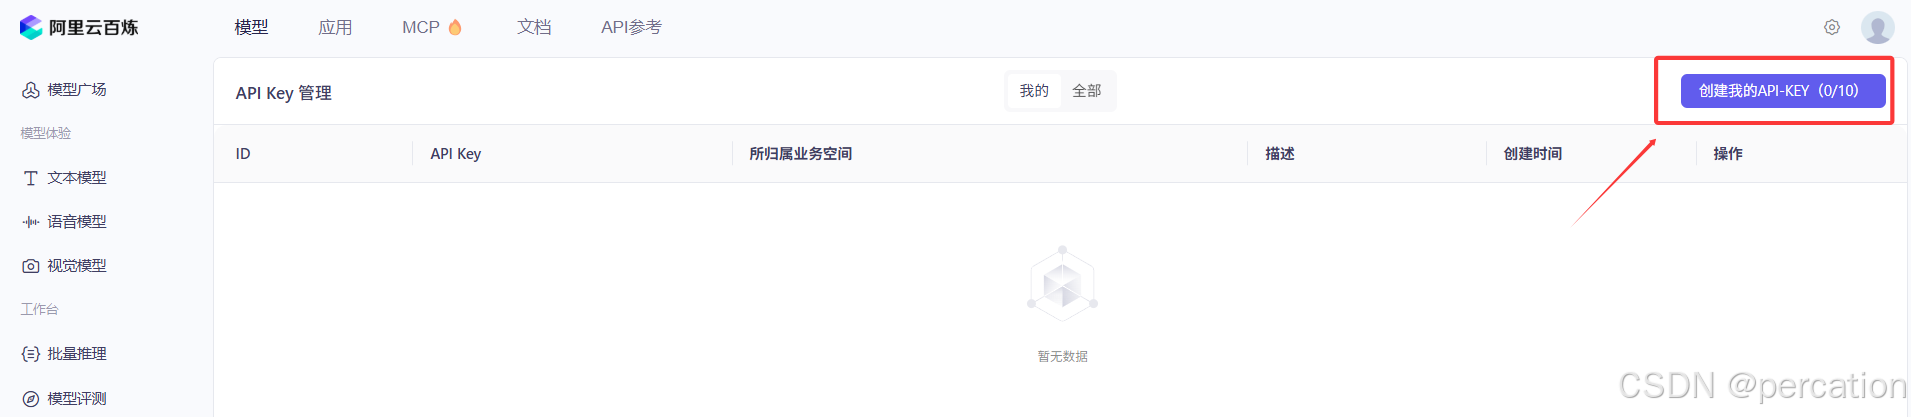

2.通过查看API-Key来获取API-Key
3.查阅文档来调用通义千问API-Key,如下图所示:
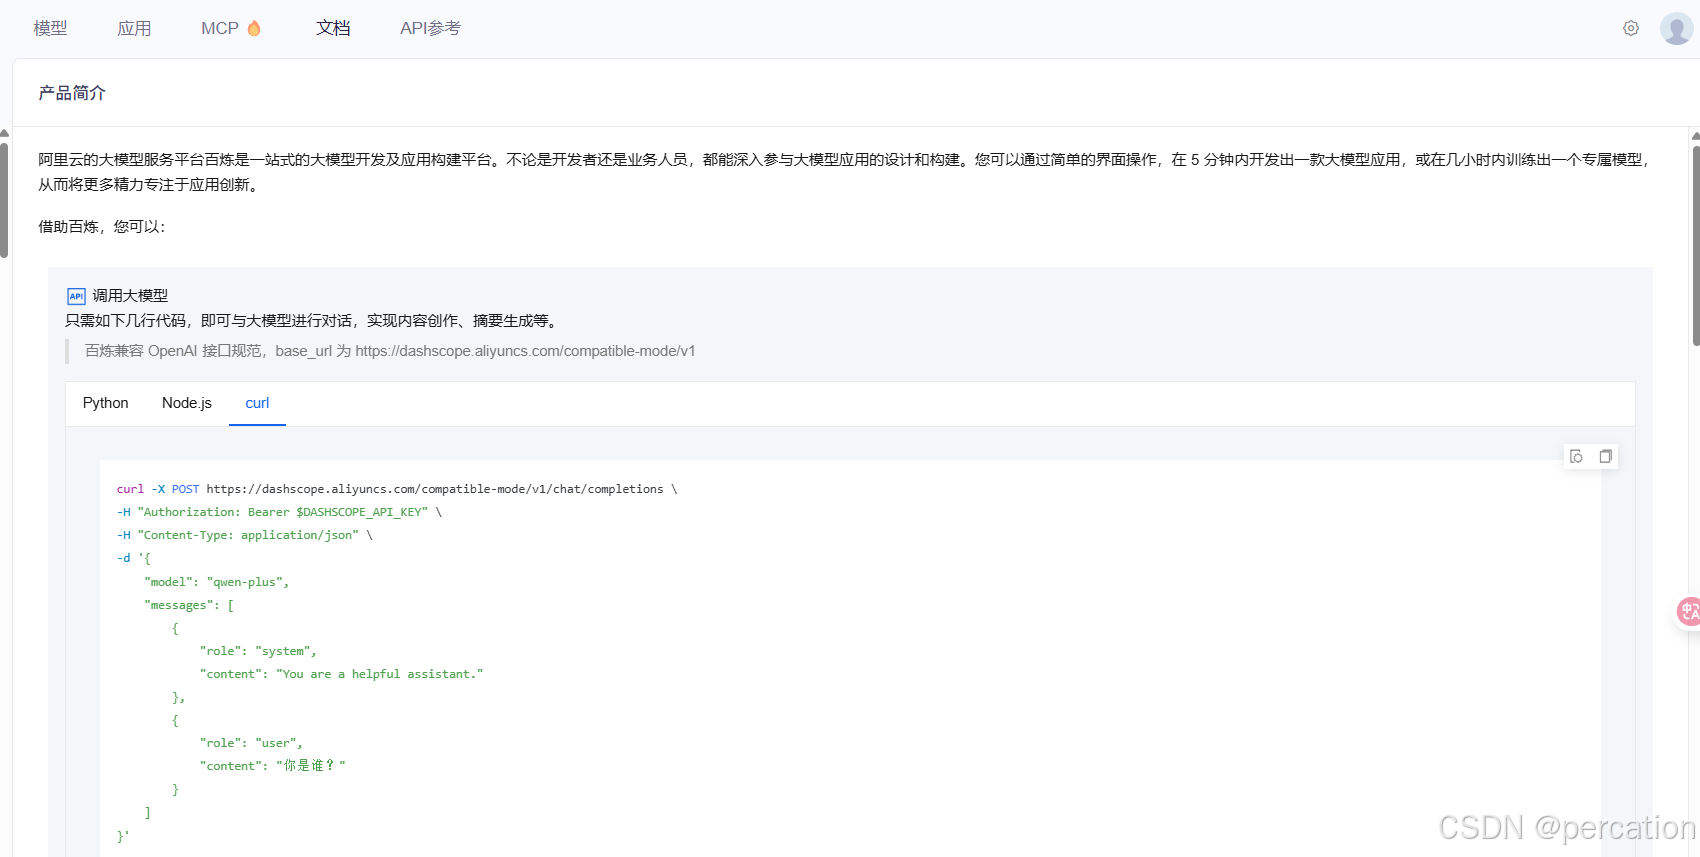
同理,其他LLMs的接口调用方式类似。
2. 编写代码
2.1 创建代码评审类
设置初始化参数
class AutoCodeReviewPlugin {
  constructor(options) {
    this.apiKey = options.apiKey;   // apiKey
    this.model = options.model || 'qwen-plus';  // 选择LLM模型
    this.maxFileLength = options.maxFileLength || 20000;  // 设置最大文件上线,避免超过LLM上下文限制
    this.reviews = [];  // 保存代码评审结果
    this.srcPath = options.srcPath || path.resolve(process.cwd(), 'src'); // 默认 src 目录
  }
}
2.2 代码评审函数(reviewCode)
此函数通过发送请求到LLM的api,获取LLM的回答,让LLM来评审代码。这里我们发送post请求,请求格式参考通义千问API调用文档(其实不同LLM的api调用方法都是一样的)。其中,如果想要代码审查效果更好的话,需要根据实际情况来对prompt进行调整。
  async reviewCode(code) {
    const fetch = (await import('node-fetch')).default;

    const prompt = `
你是一个资深代码评审专家。
请审查以下代码,指出潜在问题、优化建议和代码风格改进。
用简洁中文列出,使用Markdown无序列表(- xxx)格式。

代码:
${code}
    `.trim();

    const response = await fetch('https://dashscope.aliyuncs.com/compatible-mode/v1/chat/completions', {
      method: 'POST',
      headers: {
        'Authorization': `Bearer ${this.apiKey}`,
        'Content-Type': 'application/json'
      },
      body: JSON.stringify({
        model: this.model,
        messages: [
          { role: 'system', content: '你是一个专业的代码审查专家。' },
          { role: 'user', content: prompt }
        ]
      })
    });

    const data = await response.json();

    if (data.error) {
      console.error('大模型返回错误:', data.error.message);
      return '【模型调用出错】';
    }

    return data.choices[0].message.content.trim();
  }
借助LLMs对prompt进行优化,优化后的prompt如下:
你是一个资深前端代码评审专家,专注于React/Vue/Angular技术栈。请按照以下要求审查代码:

- **审查范围**:
  - 业务逻辑合理性
  - 性能优化点
  - 代码可维护性
  - 安全风险
  - 代码风格一致性
  - 可访问性(A11y)问题

- **输出要求**:
  - 使用中文简洁列出问题
  - 按优先级排序(严重→建议)
  - 采用Markdown无序列表格式
  - 对敏感代码使用[REDACTED]标记

- **特别注意**:
  - 接口安全验证
  - XSS/CSRF防护
  - 敏感操作日志记录
  - 权限控制缺陷

- **格式示例**:
  - [高危] 安全问题描述(具体行号)
  - [优化] 性能改进建议(具体方案)
  - [规范] 代码风格问题(推荐规范)

请提供需要审查的代码片段或文件路径(支持多文件diff对比审查)。
2.3 编写插件
apply方法是Webpack的标准入口方法,Webpack 在启动时会调用每个插件的 apply 方法并传入 compiler 对象。
beforeRun是Webpack的一个生命周期钩子,在Webpack即将开始执行构建流程前触发。因为我们是针对打包前的代码进行评审,因此将评审逻辑写在beforeRun中
apply(compiler) {
    compiler.hooks.beforeRun.tapPromise('AutoCodeReviewPlugin', async () => {
      // 编写核心逻辑
    });
  }
1. 首先遍历所有文件
这里我们过滤只检查js、jsx、ts、jsx结尾的代码,利用glob库进行文件匹配,路径通过this.srcPath传入。最终得到扫描到文件的相对路径,存入files数组中。
const pattern = '**/*.{js,jsx,ts,tsx}';
const files = glob.sync(pattern, {
    cwd: this.srcPath,
    nodir: true
});
2、遍历文件,交给LLM评审
遍历files,读取文件,得到对应的代码,调用之前编写的reviewCode函数,获取代码评审结果,将结果存入
for (const file of files) {
    const fullPath = path.join(this.srcPath, file);

    try {
        const code = fs.readFileSync(fullPath, 'utf-8');

        if (code.length > this.maxFileLength) {
            console.log(`⚠️  文件 ${file} 太大(${code.length}字节),跳过审查`);
            continue;
        }

        console.log(`🧐 正在审查 ${file}...`);

        const review = await this.reviewCode(code);

        this.reviews.push({
            fileName: file,
            review
        });
    } catch (error) {
        console.error(`❌ 审查 ${file} 失败:`, error.message);
    }
}
3. 将结果写入Markdown中
将代码评审结果写入文件中,方便查看。上一步我们已经将结果存入reviews数组中,这里我们遍历reviews数组,将结果读取出来并生成markdown格式的文档,写入markdown文件中。
if (this.reviews.length > 0) {
    let mdContent = '# 📋 自动代码审查报告\n\n';

    for (const item of this.reviews) {
        mdContent += `### 📄 ${item.fileName}\n\n`;
        mdContent += `${item.review}\n\n`;
        mdContent += `---\n\n`;
    }

    const outputPath = path.resolve(compiler.options.output.path, 'code-review-report.md');
    fs.writeFileSync(outputPath, mdContent, 'utf-8');

    console.log(`\n✅ 自动审查完成,报告已生成:${outputPath}\n`);
} else {
    console.log('📭 没有生成任何审查内容。');
}
2.4 完整代码
const fs = require('fs');
const path = require('path');
const glob = require('glob');

class AutoCodeReviewPlugin {
  constructor(options) {
    this.apiKey = options.apiKey;
    this.model = options.model || 'qwen-plus';
    this.maxFileLength = options.maxFileLength || 8000; // 只审查较短的源文件
    this.reviews = [];
    this.srcPath = options.srcPath || path.resolve(process.cwd(), 'src'); // 默认 src 目录
  }

  async reviewCode(code) {
    const fetch = (await import('node-fetch')).default;

    const prompt = `
你是一个资深代码评审专家。
请审查以下代码,指出潜在问题、优化建议和代码风格改进。
用简洁中文列出,使用Markdown无序列表(- xxx)格式。

代码:
${code}
    `.trim();

    const response = await fetch('https://dashscope.aliyuncs.com/compatible-mode/v1/chat/completions', {
      method: 'POST',
      headers: {
        'Authorization': `Bearer ${this.apiKey}`,
        'Content-Type': 'application/json'
      },
      body: JSON.stringify({
        model: this.model,
        messages: [
          { role: 'system', content: '你是一个专业的代码审查专家。' },
          { role: 'user', content: prompt }
        ]
      })
    });

    const data = await response.json();

    if (data.error) {
      console.error('大模型返回错误:', data.error.message);
      return '【模型调用出错】';
    }

    return data.choices[0].message.content.trim();
  }

  apply(compiler) {
    compiler.hooks.beforeRun.tapPromise('AutoCodeReviewPlugin', async () => {
      if (process.env.NODE_ENV !== 'production') {
        console.log('🚀 [AutoCodeReviewPlugin] 当前非生产环境,跳过代码审查。');
        return;
      }

      console.log('\n🚀 [AutoCodeReviewPlugin] 开始扫描 src 目录进行代码审查...\n');

      const pattern = '**/*.{js,jsx,ts,tsx}';
      const files = glob.sync(pattern, {
        cwd: this.srcPath,
        nodir: true
      });

      if (files.length === 0) {
        console.log('📭 没有找到需要审查的源文件。');
        return;
      }

      for (const file of files) {
        const fullPath = path.join(this.srcPath, file);

        try {
          const code = fs.readFileSync(fullPath, 'utf-8');

          if (code.length > this.maxFileLength) {
            console.log(`⚠️  文件 ${file} 太大(${code.length}字节),跳过审查`);
            continue;
          }

          console.log(`🧐 正在审查 ${file}...`);

          const review = await this.reviewCode(code);

          // console.log(`\n📝 ${file} 审查结果:\n${review}\n`);

          this.reviews.push({
            fileName: file,
            review
          });
        } catch (error) {
          console.error(`❌ 审查 ${file} 失败:`, error.message);
        }
      }

      if (this.reviews.length > 0) {
        let mdContent = '# 📋 自动代码审查报告\n\n';

        for (const item of this.reviews) {
          mdContent += `### 📄 ${item.fileName}\n\n`;
          mdContent += `${item.review}\n\n`;
          mdContent += `---\n\n`;
        }

        const outputPath = path.resolve(compiler.options.output.path, 'code-review-report.md');
        fs.writeFileSync(outputPath, mdContent, 'utf-8');

        console.log(`\n✅ 自动审查完成,报告已生成:${outputPath}\n`);
      } else {
        console.log('📭 没有生成任何审查内容。');
      }
    });
  }
}

module.exports = AutoCodeReviewPlugin;
3. 配置Webpack,引入该插件
这里我是在React中配置的插件,因此得借助craco工具来拓展Webpack。在craco.config.js中填入下列配置
const AutoCodeReviewPlugin = require('./plugins/AutoCodeReviewPlugin');

module.exports = {
  webpack: {
    plugins: [
      new AutoCodeReviewPlugin({
        apiKey: '',
        model: 'qwen-plus'
      })
      // 填入你的apiKey和模型名称
    ]
  }
};
4.插件效果
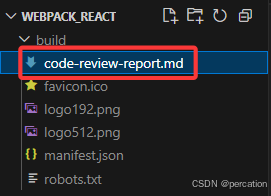
通过运行npm run build,打包结束后,审查结果是存放在build文件夹中。
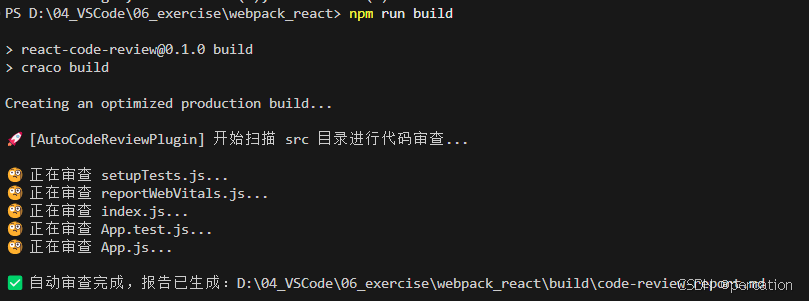
在下图查看评审报告,来作为代码自检辅助。
相关代码见GitHub


 950
950

 被折叠的 条评论
为什么被折叠?
被折叠的 条评论
为什么被折叠?
 到【灌水乐园】发言


