


需求:需要根据用户id的不同生成不同的二维码,并进行本地保存

第一步:下载插件
这里对于二维码的生成,使用的是第三方插件weapp.qrcode.min.js,主要用到的文件是 /dist/weapp-qrcode.js 文件。
github地址:https://github.com/yingye/weapp-qrcode#readme
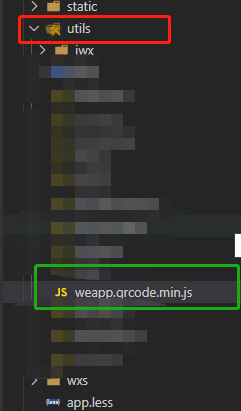
将第三方插件的文件放到项目的工具文件夹中,便于使用
第二步:引入插件
在需要的页面进行插件的引用

第三步:绘制区域在这里插入代码片

 <canvas class="code"
         canvas-id="myQrcode"
         style="background:white;
         width: 250rpx;
         height:250rpx;" />
第四步:绘制二维码
 data(){
            return{
               qrcode:"",//导出的二维码图片
               textcode:""//获取到的二维码字符串
            }
        },
 onLoad: function () {
            this.createCode()
   },
   //主要是生成二维码的字符串
   createCode(){
            let that = this;
            const userId = uni.getStorageSync('loginResult').userId
            let params = {
                    url: '/outer/dy/getAuthUri',
                    method: 'GET',
                    data: {
                        userId :userId
                    },
                    callBack: (res) => {
                        that.textcode=res
                        // 调用二维码的生成
                        this.codeqrcode()
                    }
                }
                http.request(params);
            },

//绘制二维码
  codeqrcode () {
                let that = this;
                new Promise((resolve) => {
                    wx.getImageInfo({
                        success: (res) => {
                            resolve(res.path);
                        },
                        fail: () => {
                            resolve();
                        }
                    })
                }).then((path) => {
                    let options = ('canvas', {
                        width: that.createRpx2px(250),
                        height: that.createRpx2px(250),
                        canvasId: 'myQrcode',
                        text: that.textcode,//这是绘制二维码的字符串
                        callback: (res) => {
                            // 把当前画布指定区域的内容导出生成指定大小的图片,并返回文件路径。
                            setTimeout(() => {
				              wx.canvasToTempFilePath({
				                canvasId: 'myQrcode',
				                x: 0,
				                y: 0,
				                width: that.createRpx2px(300),
				                height: that.createRpx2px(300),
				                success: (res) => {
				                  that.setData({ qrcode: res.tempFilePath });
				                }
				              })
				            }, 0);
                        }
                    })
                    QRCode(options);
                })
                },
			//该方法主要是将px单位转换为rpx
            createRpx2px (rpx) {
                return wx.getSystemInfoSync().windowWidth / 750 * rpx
                },
第五步 对生成的二维码进行本地保存
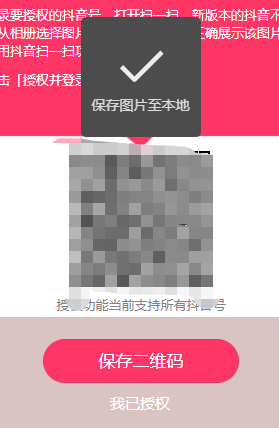
 savecode(){
                uni.saveImageToPhotosAlbum({
                filePath: this.qrcode,
                success: function () {
                    uni.showToast({
                        title:"保存图片至本地相册",
                        icon:"success"
                    })
                 },
                 fail: function() {
					uni.showModal({
						content:'您没打开获取图片功能的权限,是否去设置打开?',
						confirmText: "确认",
						cancelText:'取消',
						success: (res) => {
							if(res.confirm){
								uni.openSetting({
									success: () => {
										uni.showToast({
											title: "请重新点击保存图片~",
											icon: "none"
										});
									}
								})
							}else{
								uni.showToast({
									title: "保存失败,请打开权限功能重试",
									icon: "none"
								});
							}
						}
					})
				}
                });
            },
授权的处理
 authorization () {
      var params = {
        url: "/user/expertInfo",
        method: "GET",
        data: {
          size: this.size,
          current: this.current
        },
        callBack: (res) => {
          uni.hideLoading();
          //   如果有返回值
          if (Boolean(res)) {
            this.setData({
              nickName: res.nickName,
              pic: res.pic
            });
            uni.showToast({
              title: "授权成功",
              icon: "success",
              duration: 1000
            });
            const eventChannel = this.getOpenerEventChannel()
            let obj = {
              nickName: this.nickName,
              pic: this.pic
            }
            eventChannel.emit('acceptDataFromOpenedPage', { data: JSON.stringify(obj) });
            uni.navigateBack({
              delta: 1,
            });
          }
          else {
            uni.showToast({
              title: '授权失败',
              icon: 'error'
            })
            setTimeout(() => {
              uni.redirectTo({
                url: '/packageActivities/pages/authorization/authorization'
              });
            }, 1000)
          }
        }

      };
      http.request(params);
    }
微信小程序的长按保存方法二:

<image show-menu-by-longpress src='http://125.124.10.5:81/dfs2/group1/M00/00/35/CtosLGGAzluAABA_AAbExELpGPY989.png' class='img'></image>
 onLoad () {
    // show-menu-by-longpress核心js代码:
    //
    wx.canIUse('image.show-menu-by-longpress')

    // 获取用户系统信息的js代码:show-menu-by-longpress和基础库的版本有关系(兼容性差的)
    wx.getSystemInfo({ /* 获取系统信息 */
      success: (res) => {
        console.log('微信版本号:', res.version, ';客户端基础库版本:', res.SDKVersion, ';设备型号:', res.model, ';操作系统及版本:', res.system)
      }
    })
  },
微信小程序的长按保存方法三:
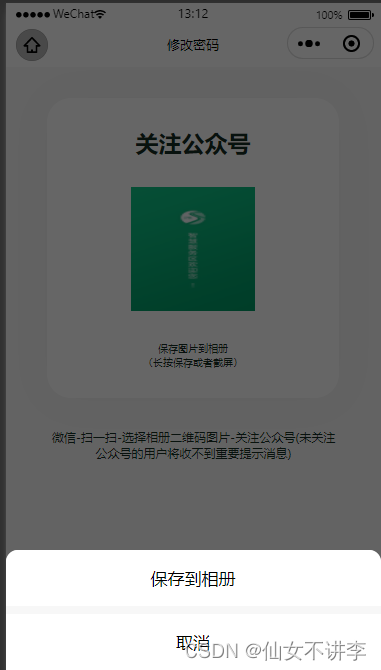
  <image @longpress="previewImage"
  data-url="https://xcx.hzxsykj.cn:1443/dfs2/group1/M00/00/35/CtosLGGAzluAABA_AAbExELpGPY989.png"  src='http://125.124.10.5:81/dfs2/group1/M00/00/35/CtosLGGAzluAABA_AAbExELpGPY989.png' class='img'></image>

 // 长按保存的兼容方案
    previewImage (e) {
      console.log(
        '长安使劲按', e
      )
      let that = this
      wx.showActionSheet({
        itemList: ['保存到相册'],
        success (res) {
          let url = e.currentTarget.dataset.url
          wx.getSetting({
            success: (res) => {
              if (!res.authSetting['scope.writePhotosAlbum']) {
                wx.authorize({
                  scope: 'scope.writePhotosAlbum',
                  success: () => {
                    // 同意授权
                    that.saveImgInner(url)
                  },
                  fail: (res) => {
                    console.log(res)
                    wx.showModal({
                      title: '保存失败',
                      content: '请开启访问手机相册权限',
                      success (res) {
                        wx.openSetting()
                      }
                    })
                  }
                })
              } else {
                // 已经授权了
                that.saveImgInner(url)
              }
            },
            fail: (res) => {
              console.log(res)
            }
          })
        },
        fail (res) {
          console.log(res.errMsg)
        }
      })
    },
    saveImgInner (url) {
      wx.getImageInfo({
        src: url,
        success: (res) => {
          let path = res.path
          wx.saveImageToPhotosAlbum({
            filePath: path,
            success: (res) => {
              console.log(res)
              wx.showToast({
                title: '已保存到相册'
              })
            },
            fail: (res) => {
              console.log(res)
            }
          })
        },
        fail: (res) => {
          console.log(res)
        }
      })
    }


 752
752


 被折叠的 条评论
为什么被折叠?
被折叠的 条评论
为什么被折叠?
 到【灌水乐园】发言


