


Access+Vs 数据库增删查改——根据如下Universtiy.mdb数据库,处理学生注册选课与授课老师的工作(不使用使用Asp.net的sqldatasource控件)
文章目录
一.题目
请根据如下Universtiy.mdb数据库,处理学生注册选课与授课老师的工作(mdb数据库会另外提供):

请不使用Asp.net的sqldatasource控件完成以下页面:
(1) 可以使用dropdownlist的方式,以选择课程名称的查询方式,将列出选修课程学生的数据。(注意:无论任何学期offering此课程)
(2) 请对于教师(faculty)的数据表,写一网页达成查询数据(查询条件:firstname、city)、新增数据、修改数据、删除数据的功能。(注意:hiredate雇用日期,由于牵涉日期的处理较麻烦,同学可选择回避)
二.涉及知识
1.Access数据库——代码连接数据库
1)数据库连接,打开,关闭
   //连接字符串
    String sqlconn = "Provider=Microsoft.Jet.OLEDB.4.0; Data Source= " + Server.MapPath("APP_Data\\UniversityDB.mdb") + "; ";
    OleDbConnection myConnection = new OleDbConnection(sqlconn);
    //打开数据库连接
    myConnection.Open();
    myConnection.Close();//连接数据库,不支持ssl连接
2)数据库GridView1,DropDownList控件绑定
1.数据库操作指令——命令
student_data:sql语句(增删查改)
OleDbCommand myCommand1 = new OleDbCommand(student_data, myConnection);
2.适配器
OleDbDataAdapter Adapter1 = new OleDbDataAdapter();
3.数据集
DataSet myDs1 = new DataSet();
4.GridView控件绑定
	  GridView1.DataSource = myDs1;
	  GridView1.DataKeyNames = new String[] {
    "StdSSN", }; //设置关键字
	  GridView1.DataBind();
5.DropDownList控件绑定
      DropDownList1.DataSource = myDs3;
      DropDownList1.DataTextField = "CrsDesc";
      DropDownList1.DataValueField = "CrsDesc";
      DropDownList1.DataBind();
6.绑定学生表GridView1 例子,绑定课程表 DropDownList1 例子
 //绑定学生表GridView1
      string student_data = "select  * from student ";
      OleDbCommand myCommand1 = new OleDbCommand(student_data, myConnection);

      OleDbDataAdapter Adapter1 = new OleDbDataAdapter();
      Adapter1.SelectCommand = myCommand1;

      DataSet myDs1 = new DataSet();
      Adapter1.Fill(myDs1, "Readers");

      GridView1.DataSource = myDs1;
      GridView1.DataKeyNames = new String[] {
    "StdSSN", };
      //GridView1.DataKeyNames = new String[] { "id" };
      GridView1.DataBind();

//绑定课程表 cousre_name DropDownList1
      string course_data = "select distinct CrsDesc from Course ";
      OleDbCommand myCommand3 = new OleDbCommand(course_data, myConnection);

      OleDbDataAdapter Adapter3 = new OleDbDataAdapter();
      Adapter3.SelectCommand = myCommand3;

      DataSet myDs3 = new DataSet();
      Adapter3.Fill(myDs3);

      DropDownList1.DataSource = myDs3;
      DropDownList1.DataTextField = "CrsDesc";
      DropDownList1.DataValueField = "CrsDesc";
      DropDownList1.DataBind();
2.数据库语句,增删查改
增:insert 不用插入时间!!!
    string F2 = "INSERT INTO Faculty(FacSSN, FacFirstName, FacLastName, FacCity, FacState, FacDept, FacRank, FacSalary, FacSupervisor, FacZipCode)"
	            + "VALUES(" + A + "," + B + "," + C + "," + D + "," + E + "," + F + "," + G + "," + H + "," + I + "," + K + ")";
    OleDbCommand myCommand = new OleDbCommand(F2, myConnection);
删:delete
	string str = "delete from faculty where FacSSN='" + GridView2.DataKeys[e.RowIndex].Value.ToString() + "'";
	OleDbCommand myCommand = new OleDbCommand(str, myConnection);
查:select
	string firstname_city = "select * from faculty ";
	OleDbCommand myCommand2 = new OleDbCommand(firstname_city, myConnection);
改:update不用修改时间!!!
	string str = "update faculty set FacFirstName = '" + B + "',FacLastName = '" + C + "', FacCity = '" + D + "', FacState = '" + E + "',FacRank = '" + F + "', FacDept = '" + G + "',FacSalary = '" + H + "', FacSupervisor = '" + I + "', FacZipCode='" + K + "'  WHERE (FacSSN ='" + A + "')";
	OleDbCommand myCommand = new OleDbCommand(str, myConnection);
三.运行截图
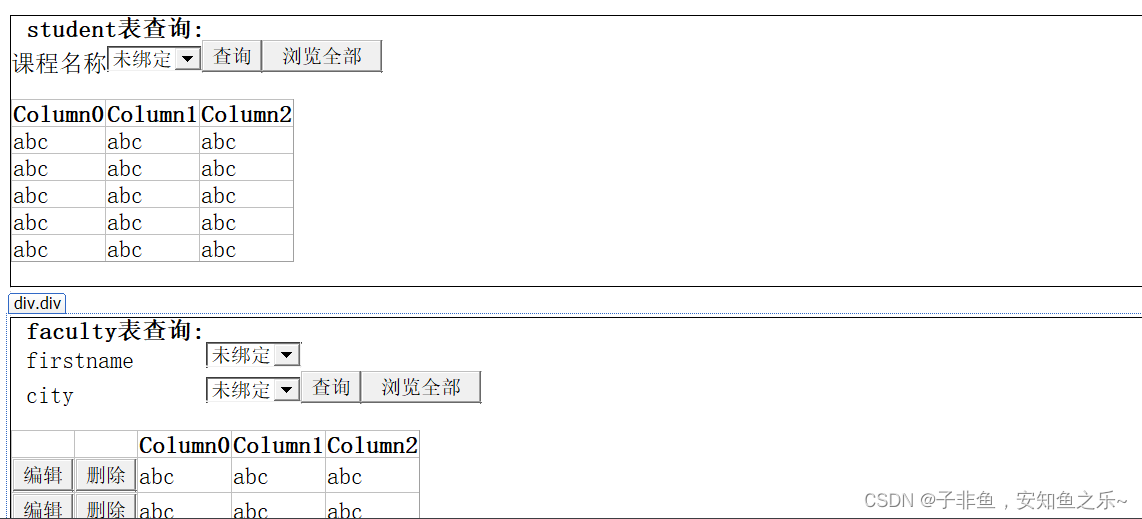
加载页面(将全部功能都放在了一个网页)
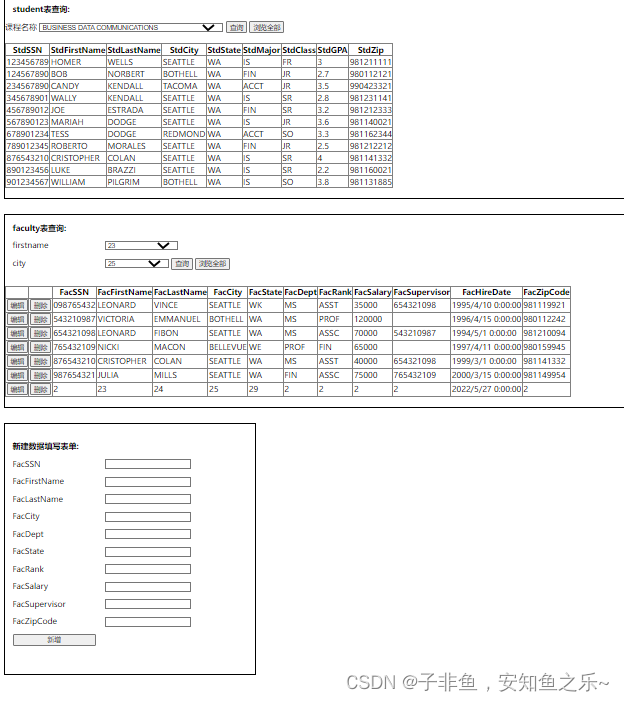
根据 课程名称 查询 选修该课程的学生

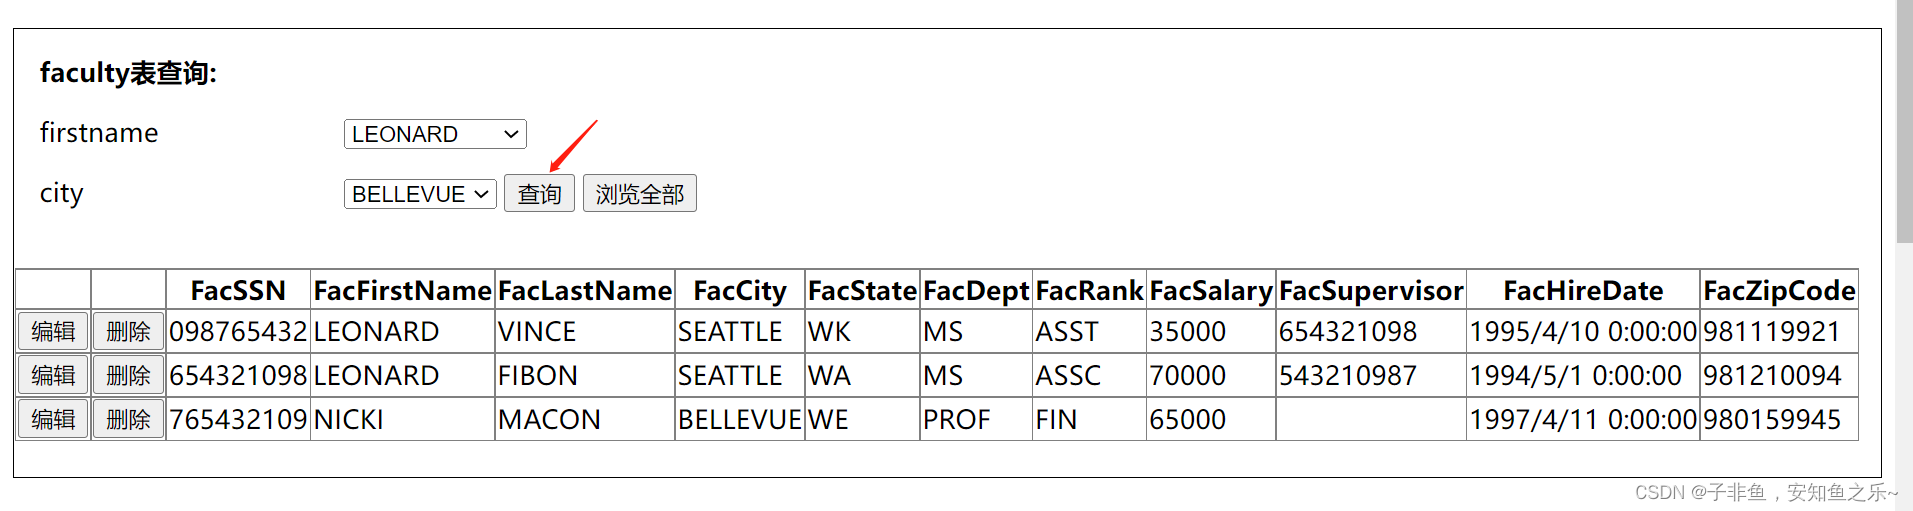
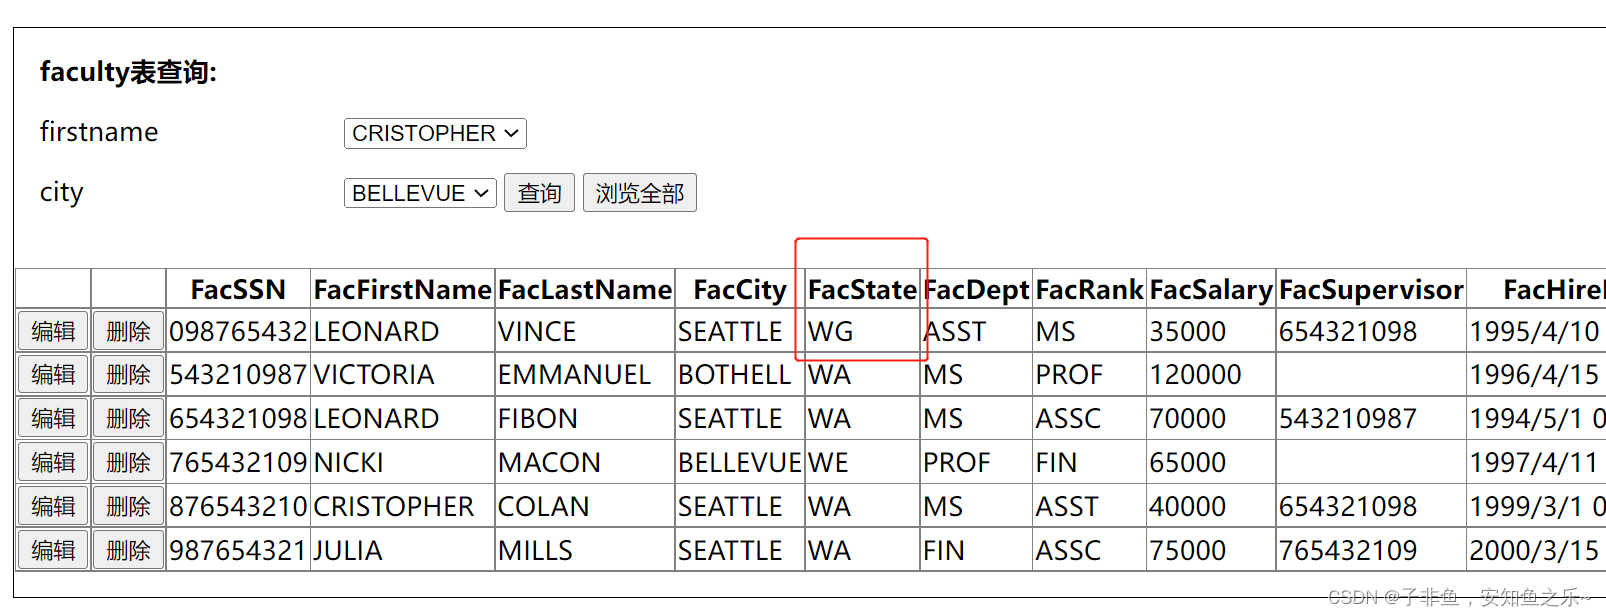
查询符合 firstname,或者city 条件的faculty数据
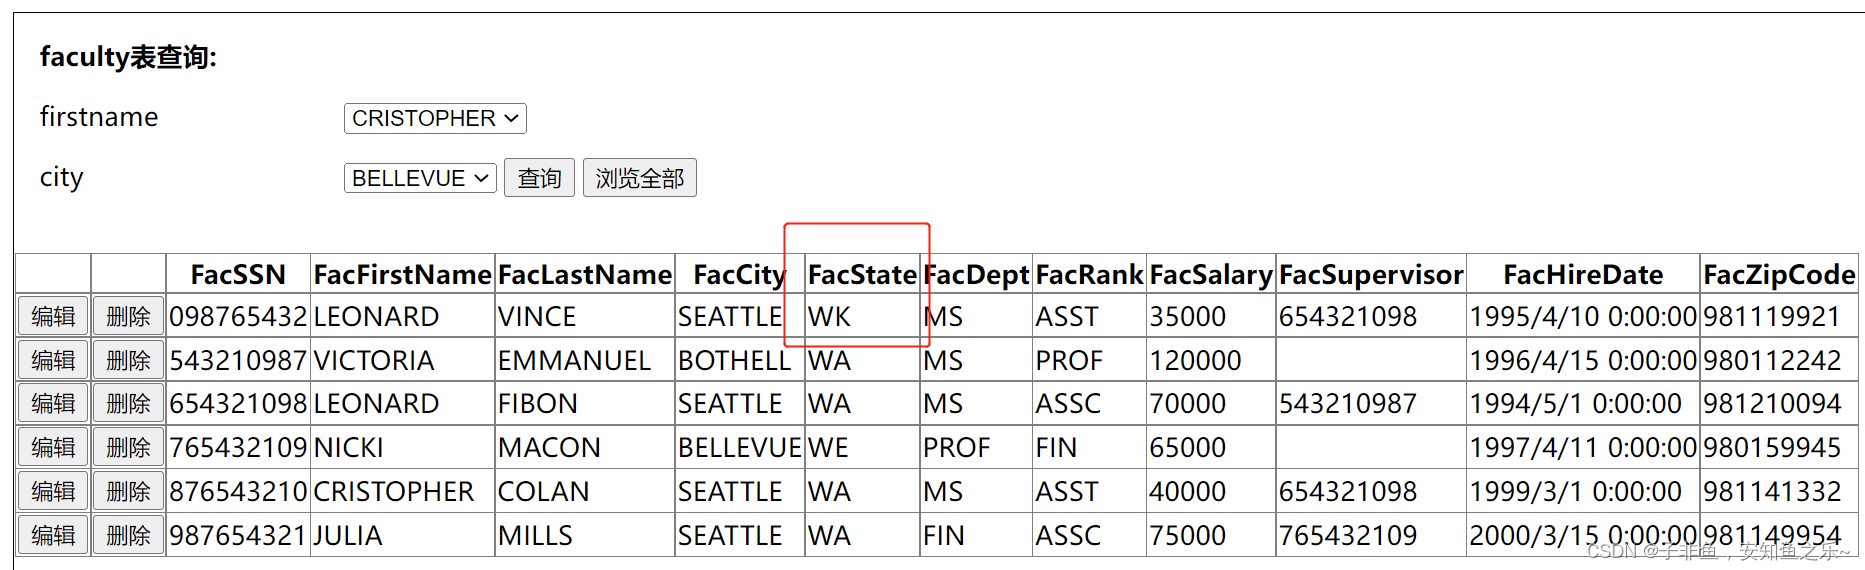
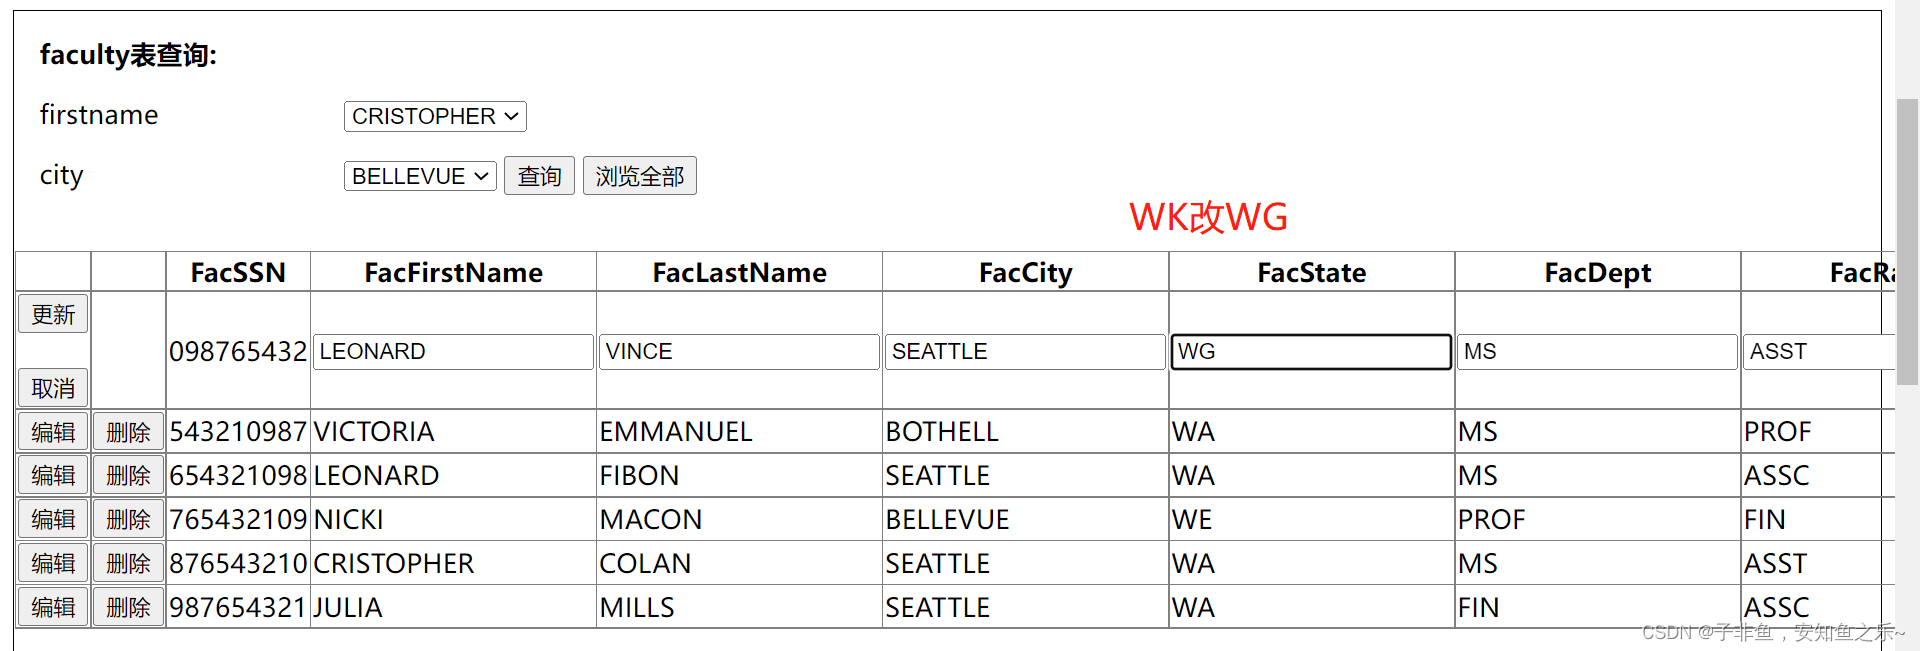
修改 faculty表 内容,编辑–>改内容–>更新
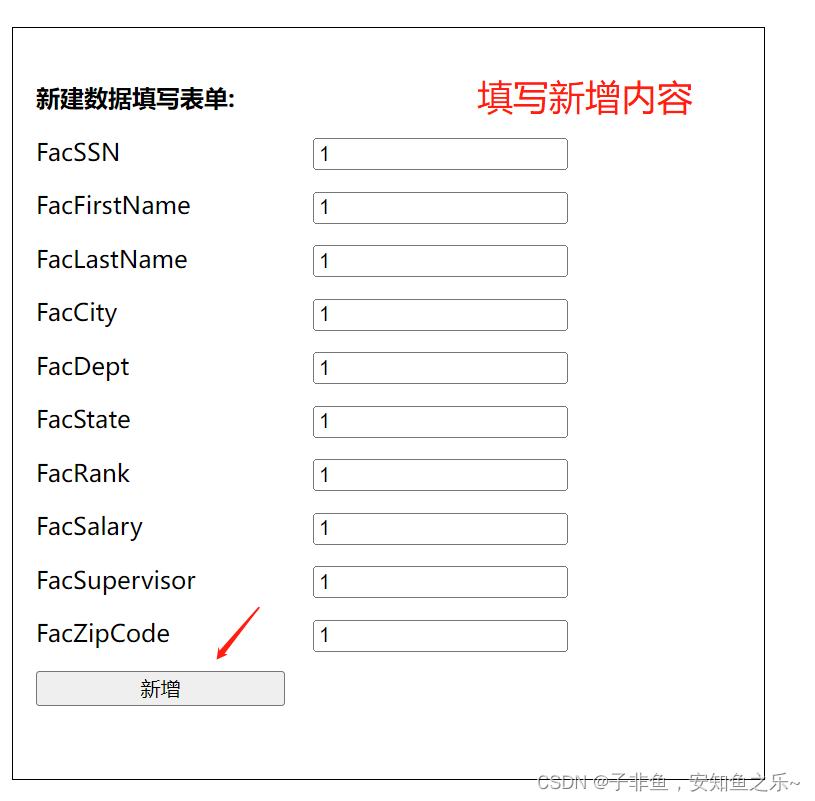
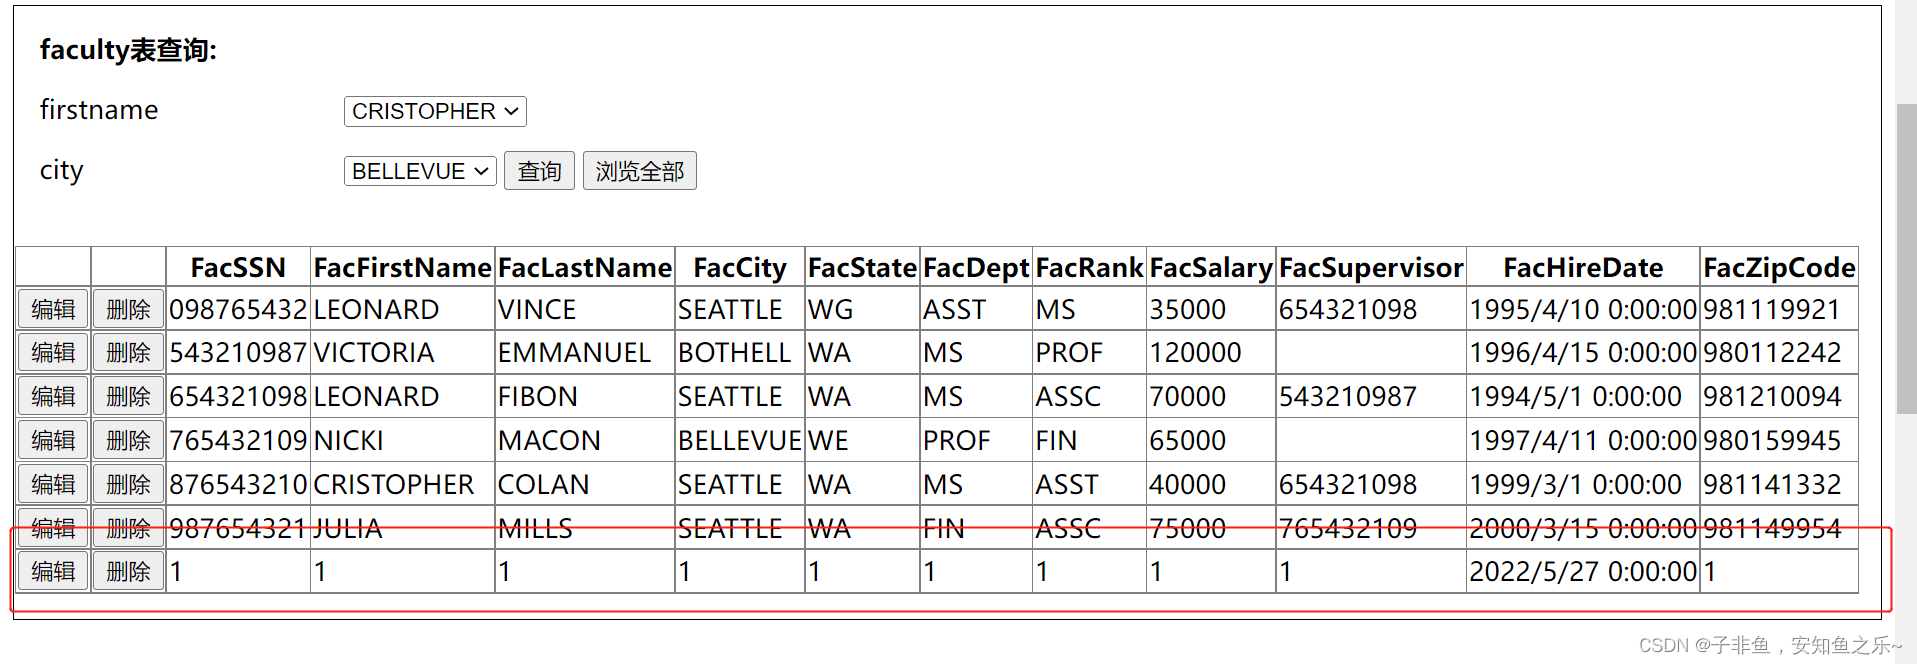
新增 faculty表内容,填写 新增数据填写表单
四.代码实现
html 代码
<%@ Page Language="C#" AutoEventWireup="true" CodeBehind="Universtiy2.aspx.cs" Inherits="homework_6.Universtiy2" %>

<!DOCTYPE html>

<html xmlns="http://www.w3.org/1999/xhtml">
<head runat="server">
<meta http-equiv="Content-Type" content="text/html; charset=utf-8"/>
    <title></title>

    <style>
        .label1_stytle
        {

            display: inline-block;
            width: 180px;
            margin-bottom: 15px;
            margin-left: 15px;
        }

         .div_add {

            border: solid #000000; /*设置边框样式跟颜色*/
            border-width: 1px; /*设置边框宽度*/
            width: 500px; /*设置div宽度*/
            margin-bottom: 30px;
            height: 500px; /*设置div高度*/

        }


        .div{

        border: solid #000000; /*设置边框样式跟颜色*/
        border-width: 1px; /*设置边框宽度*/
        width: auto; /*设置div宽度*/
        margin-bottom: 30px;
        height: auto; /*设置div高度*/

    }

    </style>
</head>
<body>
    <form id="form1" runat="server">
        <div class="div">
             <asp:Label ID="Label16" runat="server" Text="student表查询:" style="margin:15px;font-weight:bold;"  Width="198px"></asp:Label>
             <br />
            <asp:Label ID="Label1" runat="server" Text="课程名称"></asp:Label>
            <asp:DropDownList ID="DropDownList1" runat="server" >
            </asp:DropDownList>
            <asp:Button ID="Button1" runat="server" Text="查询" OnClick="Button1_Click"  />
            <asp:Button ID="Button5" runat="server" Text="浏览全部" OnClick="Button5_Click" />


            <br />
            <br />

        <asp:GridView ID="GridView1" runat="server" >

        </asp:GridView>

            <br />

            </div>

        <div class ="div">
            <div >
             <asp:Label ID="Label15" runat="server" Text="faculty表查询:" style="margin:15px;font-weight:bold;"  Width="198px"></asp:Label>
             <br />
             <asp:Label ID="Label2" runat="server" Text="firstname" class="label1_stytle"></asp:Label>

             <asp:DropDownList ID="DropDownList2" runat="server" >
             </asp:DropDownList>

            <br />
             <asp:Label ID="Label3" runat="server" Text
最低0.47元/天 解锁文章


 570
570


 被折叠的 条评论
为什么被折叠?
被折叠的 条评论
为什么被折叠?
 到【灌水乐园】发言


