


一.动态组件
1.component 标签的使用
DongTaiLuYou.vue
<template>
  <div>
    <component :is="colName"></component>
    <button @click="colName='LeftVue'">显示Left</button>
    <button @click="colName='Right'">显示Right</button>
  </div>
</template>

<script>
import LeftVue from '../../components/Left/Left.vue'
import Right from '../../components/Right/Right.vue';
export default {
    data(){
        return{
            colName:'LeftVue'
        }
    },
    components:{
        LeftVue,
        Right
    },
}
</script>

<style>

</style>
动态组件:component 标签内使用 :is 属性绑定了变量 colName ,这样可以根据 colName 的值来动态选择需要渲染的组件。在这段代码中,根据 colName 的值不同,可以渲染出 LeftVue 或 Right 组件。
在其他组件中引入DongTaiLuYou组件,运行观察效果。
2.keep-alive的使用
DongTaiLuYou.vue
用法:将component标签用keep-alive标签包裹起来
<template>
  <div>
    <keep-alive>
      <component :is="colName"></component>
    </keep-alive>

    <button @click="colName='LeftVue'">显示Left</button>
    <button @click="colName='Right'">显示Right</button>
  </div>
</template>

<script>
import LeftVue from '../../components/Left/Left.vue'
import Right from '../../components/Right/Right.vue';
export default {
    data(){
        return{
            colName:'LeftVue'
        }
    },
    components:{
        LeftVue,
        Right
    },
}
</script>

<style>

</style>
Left.vue
<template>
  <div>
    <p>Left</p>
    <button @click="getLeft" class="buttoncolor">按钮获取Left</button>
    leftcount的值是:{{ leftcount }}
    <button @click="leftcount++">leftcount++</button>
  </div>
</template>

<script>
import bus from "../../../api/eventbus";
export default {
  data() {
    return {
      msg: "Hello eventbus",
      leftcount: 0,
    };
  },
  methods: {
    getLeft() {
      bus.$emit("share", this.msg);
    },
  },
  created() {
    console.log("created函数执行了");
  },
  mounted() {
    console.log("mounted函数执行了");
  },
  activated() {
    console.log("activated...");
  },
  deactivated() {
    console.log("deactivated...");
  },
};
</script>

<style lang="less" scoped>
.buttoncolor {
  color: orange;
}
</style>
加上keep-alive标签后,增加leftcount的值,来回切换要渲染的组件,leftcount的值不变。
3.activated 和 deactivated函数的使用
在 Vue 组件生命周期中,activated 和 deactivated 是两个钩子函数,用于处理组件的激活和停用事件。它们通常在使用 组件时才会被调用。
activated 钩子函数:
当组件由非活动状态切换到活动状态时(例如,组件从栈中被缓存到 中并重新激活),activated 函数会被调用。
在 activated 钩子函数内部,你可以执行一些特定于组件激活事件的操作,例如重新加载数据、发送网络请求等。
在示例代码中,当组件被激活时,会打印出 “activated…”。
deactivated 钩子函数:
当组件由活动状态切换到非活动状态时(例如,组件离开 缓存并停用),deactivated 函数会被调用。
在 deactivated 钩子函数内部,你可以执行一些特定于组件停用事件的操作,例如清空数据、取消未完成的异步操作等。
在示例代码中,当组件被停用时,会打印出 “deactivated…”。
这两个钩子函数通常与 组件一起使用,用于处理组件在缓存中的激活和停用事件。通过监听这两个钩子函数,你可以在组件激活或停用时执行相应的操作,以满足你的业务需求。
4.include,exclude的使用
在 Vue 的 标签中,include 和 exclude 是两个属性,用于指定哪些组件应该包含或排除在动态组件中渲染。
include 属性:
include 属性可以接受一个字符串或正则表达式的数组。
当 include 属性存在时,只有与匹配的组件名称相符的组件才会被渲染。
例如,include: [‘LeftVue’, ‘Right’] 将仅渲染名称为 “LeftVue” 和 “Right” 的组件。
exclude 属性:
exclude 属性也可以接受一个字符串或正则表达式的数组。
当 exclude 属性存在时,匹配的组件将被排除在动态组件的渲染之外。
例如,exclude: [‘LeftVue’, /Right.*/] 将排除名为 “LeftVue” 和所有以 “Right” 开头的组件。
这两个属性可用于控制component标签动态渲染的组件范围。你可以使用它们来选择性地渲染特定的组件,并排除不需要的组件。注意,include 和 exclude 属性不能同时使用。
<template>
  <div>
    <keep-alive include="LeftVue">
      <component :is="colName"></component>
    </keep-alive>

    <button @click="colName='LeftVue'">显示Left</button>
    <button @click="colName='Right'">显示Right</button>
  </div>
</template>

<script>
import LeftVue from '../../components/Left/Left.vue'
import Right from '../../components/Right/Right.vue';
export default {
    data(){
        return{
            colName:'LeftVue',
        }
    },
    components:{
        LeftVue,
        Right
    },
}
</script>

<style>

</style>
二.插槽
1.插槽的基本使用
MyApp.vue
<template>
  <div class="myapp">
    <MySlot>
      <p class="myslot">我赌你的枪里没有子弹</p>
    </MySlot>
  </div>
</template>
MySlot.vue
<template>
  <div>
    <slot></slot>//这是一个匿名插槽,用于接收父组件传递过来的内容。
  </div>
</template>
2.具名插槽
2.1在子组件模板中定义具名插槽
MySlot.vue
<template>
  <div>
    <slot></slot>//匿名插槽
    <slot name="content"></slot>//具名插槽
  </div>
</template>
2.2在父组件中使用具名插槽
v-slot:content可简写为#content,content与具名插槽名称相同。
MyApp.vue
<template>
  <div class="myapp">
    <MySlot>
      <p class="myslot">我赌你的枪里没有子弹</p>
      <template #content>
      	 <!-- 插入具名插槽内容 -->
        <p>若</p>
      </template>
    </MySlot>
  </div>
</template>
3.作用域插槽
3.1在子组件模板中定义作用域插槽
<template>
  <div>
    <slot></slot>//匿名插槽
    <slot name="content" :msg="obj"></slot>//作用域插槽
  </div>
</template>
<script>
export default {
  data(){
    return{
      obj:{
        name:'王',
        age:30
      }
    }
  }
};
</script>
3.2在父组件中使用作用域插槽
<template>
  <div class="myapp">
    <MySlot>
      <p class="myslot">我赌你的枪里没有子弹</p>
      <template v-slot:content="xiaoxi">
        <p>若</p>
      </template>
    </MySlot>
  </div>
</template>
3.3在作用域插槽中使用插槽数据
<template>
  <div class="myapp">
    <MySlot>
      <p class="myslot">我赌你的枪里没有子弹</p>
      <template v-slot:content="xiaoxi">
        <p>若</p>
        {{ xiaoxi.msg.name }}{{ xiaoxi.msg.age }}
      </template>
    </MySlot>
  </div>
</template>
三.自定义指令
四.路由
1.路由的基本使用
(1)添加依赖vue-router
(2)src目录下新建router文件夹,文件夹里创建index.js:
导入Vue:import Vue from ‘vue’;
导入VueRouter:import VueRouter from ‘vue-router’;
全局注册 Vue Router 插件:Vue.use(VueRouter)
定义路由:const router= new VueRouter({routes:[]})
导出路由:export default router
导入路由组件:
第一种写法:
import Vue from 'vue';
import VueRouter from 'vue-router';
Vue.use(VueRouter)

const router = new VueRouter({
    routes:[
        {
            path: '/personcenter',
            component: r => require.ensure([], () => r(require('@/components/myblog/index')), 'index')
        }
    ]
})

export default router
这段代码是一个 Vue 路由配置中的一条路由规则,表示当路径匹配到 /personcenter 时,会加载名为 myblog/index 的组件。
解释每个参数的含义如下:
path: ‘/personcenter’: 表示该路由规则匹配的路径是 /personcenter。当用户访问该路径时,该路由规则会被触发。
component: r => require.ensure([], () => r(require(‘@/components/myblog/index’)), ‘index’):
component: 表示该路由规则对应的组件。
r => require.ensure([], () => r(require(‘@/components/myblog/index’)), ‘index’): 是一个异步加载组件的函数。它会在需要加载该组件时才进行加载,而不是在初始时就加载整个应用的所有组件。
require.ensure: 是 webpack 提供的按需加载模块的方法。它接收三个参数:依赖数组、回调函数和模块名。
[]: 依赖数组为空,表示没有其他的依赖模块。
() => r(require(‘@/components/myblog/index’)): 回调函数,使用 require() 动态地加载指定路径的组件。
‘index’: 模块名,可以理解为给该组件起一个名称,用于标识这个组件。
综上所述,这段代码的作用是定义了一个路径为 /personcenter 的路由规则,当用户访问该路径时,会异步加载 myblog/index 组件并渲染在页面上。
第二种写法:
import Vue from 'vue';
import VueRouter from 'vue-router';
import DongTaiLuYou from '../components/DongTaiLuYou/DongTaiLuYou'
Vue.use(VueRouter)

const router = new VueRouter({
    routes:[
        {
            path:'/dongtai',
            component:DongTaiLuYou
        }
    ]
})

export default router
这段代码是一个 Vue 路由配置中的一条路由规则,表示当路径匹配到 /dongtai 时,会加载 DongTaiLuYou 组件。
解释每个参数的含义如下:
path: ‘/dongtai’: 表示该路由规则匹配的路径是 /dongtai。当用户访问该路径时,该路由规则会被触发。
component: DongTaiLuYou: 表示该路由规则对应的组件是 DongTaiLuYou。
所以,这段代码的作用是定义了一个路径为 /dongtai 的路由规则,当用户访问该路径时,会加载名为 DongTaiLuYou 的组件并进行渲染。
(3)router-link
<a href="#/er">首页</a>可用<router-link to="/er">首页</router-link>代替
(4)redirect的使用
   {
           path:'/',redirect:'/er'
   },
路由的 redirect 属性用于指定当某个路径被匹配时,将用户重定向到另一个路径。例如浏览器访问http://localhost:8080后重定向到http://localhost:8080/#/er
(5)router-view是 Vue Router 中的一个组件,用于渲染匹配到的路由组件内容。它在 Vue 应用中的模板中被用作占位符,用来显示当前路由对应的组件内容。
在 Vue Router 中,我们可以通过配置路由规则来映射不同的路径到相应的组件。当用户访问某个路径时,匹配到的路由规则会将对应的组件加载到router-view中进行渲染。
2.嵌套路由
2.1子级路由和占位符
代码如下:
index.js
import Vue from 'vue';
import VueRouter from 'vue-router';
Vue.use(VueRouter)

const router = new VueRouter({
    routes:[
        {
            path: '/er',
            component: r => require.ensure([], () => r(require('@/components/owner/Base'))),
            children:[
                {
                    path: '',//路径为空
                    component: fenlei//默认子路由
                }
            ]
        }
    ]
})

export default router
这段代码定义了一个路径为 ‘/er’ 的路由,并将其对应的组件设置为 Base 组件。同时,该路由还配置了一个子路由,在父路由的视图内部通过 router-view渲染 fenlei 组件。
2.2 默认子路由
path: ‘’ 表示一个空字符串的路径。它表示父路由的默认子路由,即当用户访问父路由时,如果没有指定具体的子路径,就会渲染该默认子路由组件。
在代码中,path: ‘’ 用于定义了一个子路由,并且没有指定具体的路径。这意味着当用户访问 /er 路径时,会默认渲染 fenlei 组件。
App.vue
<template>
  <div id="app">
    <router-view></router-view>
  </div>
</template>
这段代码包含了一些router-link 声明用于导航到不同的路由。同时,在 router-view 中会根据当前路由的匹配结果动态加载对应的组件。简单地说,访问http://localhost:8080/#/personcenter,页面显示该路径对应的index.vue组件的内容
Base.vue
<template>

  <div>

    我是er
    <br/>

      ###################################################################
      <br/>
      <router-link to="/er/wenzhang/1">我是/er/wenzhang路由1</router-link>
      <router-link to="/er/wenzhang/2">我是/er/wenzhang路由2</router-link>
      <router-link to="/er/wenzhang/3?name=zs&age=24">我是/er/wenzhang路由3</router-link>

      <br/>
      <router-view></router-view>
      <br/>
      ###################################################################
  </div>


</template>
fenlei.vue
<template>
  <div>
    我是分类
  </div>
</template>
<script>
export default {
}
</script>
<style>
</style>
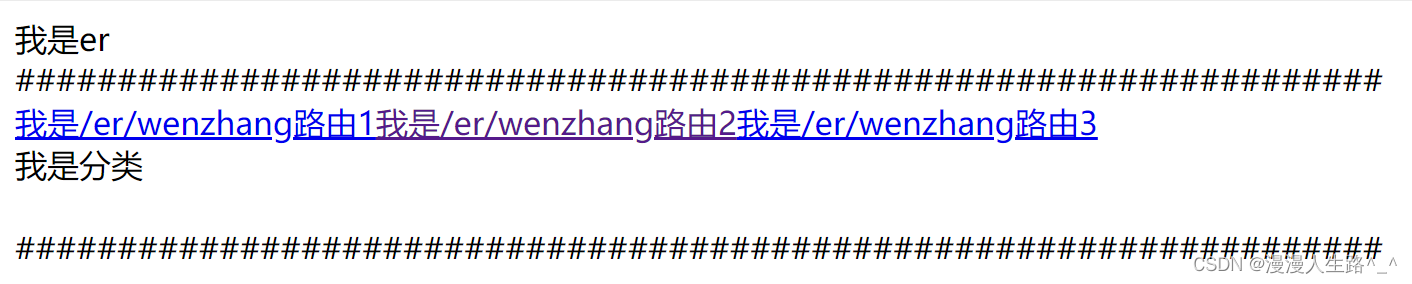
访问http://localhost:8080/#/er,效果图如下:
此处还有内容要写。。。
五.ref
六.过滤器
1.局部过滤器
在 Vue.js 中,过滤器是一种用于格式化、转换或处理数据的功能。可以在模板中使用过滤器来对绑定的数据进行处理,以便以所需的方式显示。
以下是使用 Vue.js 过滤器的基本步骤:
1.1在 Vue 实例或组件中定义过滤器
filters: {
  capitalize: function(value) {
    // 这里是过滤器的具体实现逻辑
    return value.charAt(0).toUpperCase() + value.slice(1);
  }
}
在 Vue 实例或组件的 filters 选项中定义一个过滤器对象。其中,过滤器名为 capitalize,并且它是一个函数,接收要过滤的值作为参数。
1.2在模板中使用过滤器
<p>{{ name | capitalize }}</p>
在模板中,通过使用 | 管道符号将数据 name 传递给过滤器 capitalize。
1.3注意事项
可以在同一个模板中多次使用过滤器,并按需应用于不同的绑定数据。
Vue 过滤器可以串联使用,将一个过滤器的输出作为下一个过滤器的输入。例如:{{ name | capitalize | truncate(10) }}。
需要注意的是,Vue.js 过滤器具有局部作用域,只在定义它们的组件中可用。如果希望在多个组件间共享过滤器,可以使用全局过滤器。
1.4代码
filter.vue
<template>
  <div>
    {{ message|guolv|go }}//显示AK
    <br>
    <!-- 过滤1:{{ message|capitalize }} -->
  </div>
</template>

<script>
export default {
    data(){
        return{
            message:'a我是'
        }
    },
    filters:{

        guolv(value){
            return value.charAt(0).toUpperCase();//将字符串的第一个字符转换为大写形式并返回
        },
        go(value){
            return value+"K"
        }
    }
}
</script>

<style>

</style>
2.全局过滤器
以下为一个全局过滤器,将该段代码写入main.js中即可
Vue.filter('capitalize', function (value) {
  if (!value) return ''
  value = value.toString()
  return value.charAt(0).toUpperCase() + value.slice(1)
})
main.js
import Vue from 'vue'
import MyApp from './MyApp.vue'
// import App from './App.vue'
import ElementUI from 'element-ui';
import 'element-ui/lib/theme-chalk/index.css';
// import store from '../src/store/index'
import store from '../src/store/store'
import router from './routerone';
Vue.config.productionTip = false
Vue.use(ElementUI);

import Vuecomponent from '../src/components/Vuecomponent/Vuecomponent'
Vue.component('MyVuecomponent',Vuecomponent)


Vue.filter('capitalize', function (value) {
  if (!value) return ''
  value = value.toString()
  return value.charAt(0).toUpperCase() + value.slice(1)
})


new Vue({
  render: h => h(MyApp),
  router,
  // store,
  store
}).$mount('#app')
其他组件中使用全局过滤器
<p>过滤2:{{ message1|capitalize }}</p>
七.axios
八.Vue组件通信
九.生命周期
十.props
十一.侦听器
未写完。。。


 2万+
2万+


 被折叠的 条评论
为什么被折叠?
被折叠的 条评论
为什么被折叠?
 到【灌水乐园】发言


