


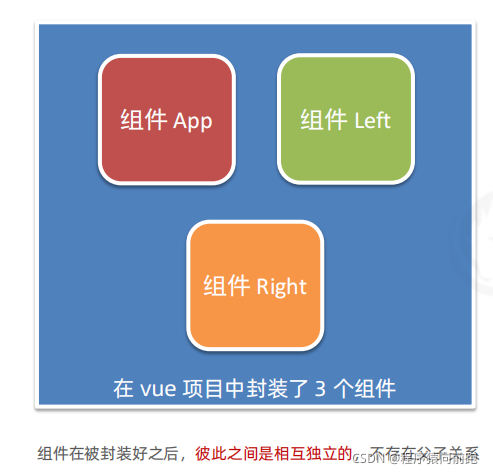
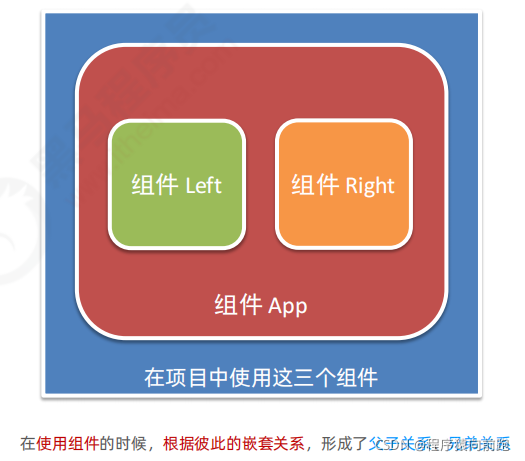
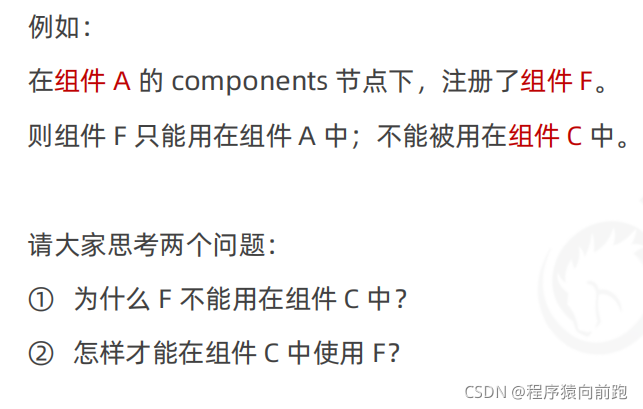
4. 组件之间的父子关系
4.1 使用组件的三个步骤
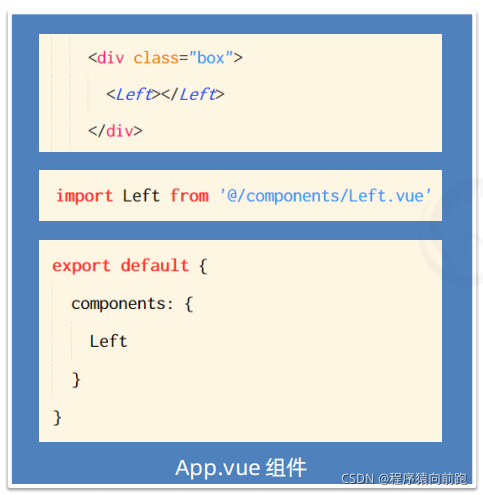
步骤3:以标签形式使用刚才注册的组件
步骤1:使用 import 语法导入需要的组件
步骤2:使用 components 节点注册组件
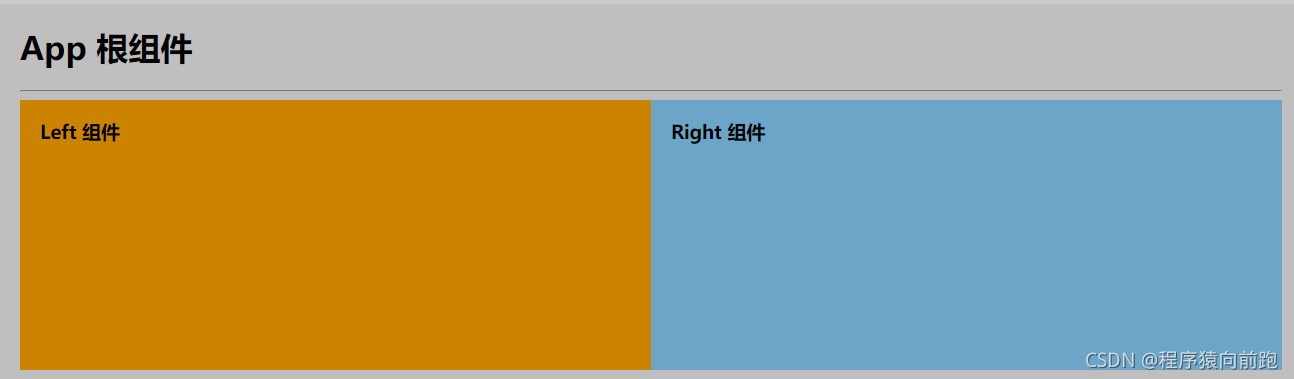
案例:
App.vue
<template>
  <div class="app-container">
    <h1>App 根组件</h1>
    <hr />

    <div class="box">
      <!-- 渲染 Left 组件和 Right 组件 -->
	  <Left></Left>
	  <Right></Right>
    </div>
  </div>
</template>

<script>
	//导入组件
import Left from '@/components/Left.vue'
import Right from '@/components/Right.vue'

export default {

	 // 2. 注册组件
	  components: {
	    Left,Right
	  }

}
</script>

<style lang="less">
.app-container {
  padding: 1px 20px 20px;
  background-color: #efefef;
}
.box {
  display: flex;
}
</style>
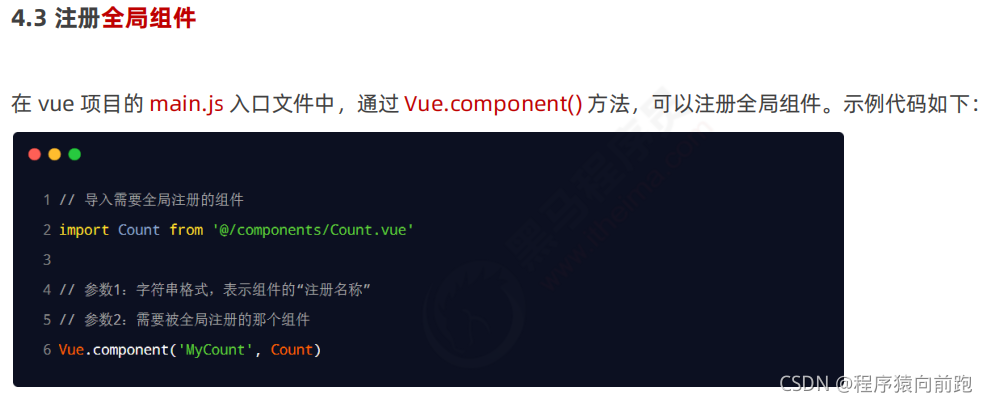
4.2 通过 components 注册的是私有子组件

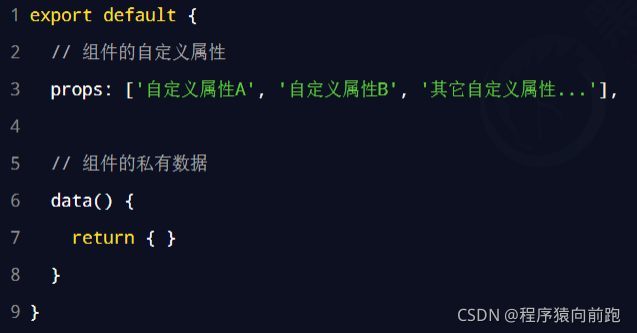

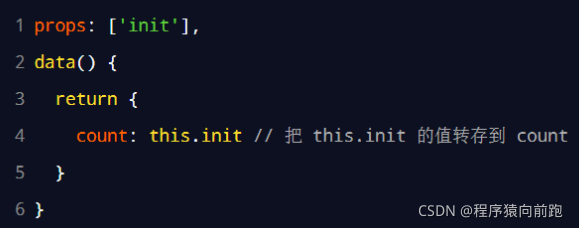
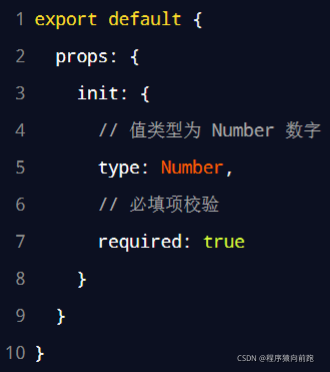
要想修改 props 的值,可以把 props 的值转存到 data 中,因为 data 中的数据都是可读可写的!


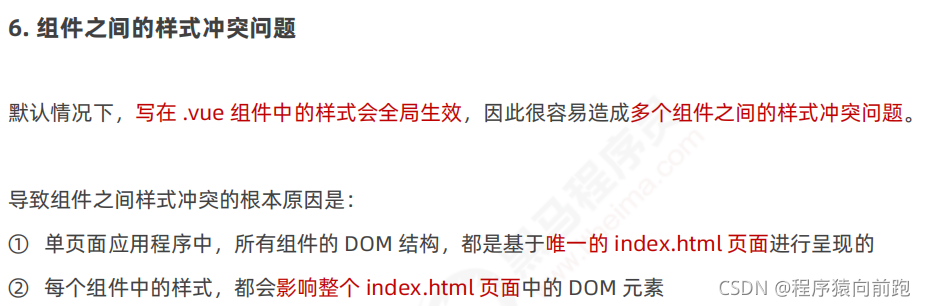
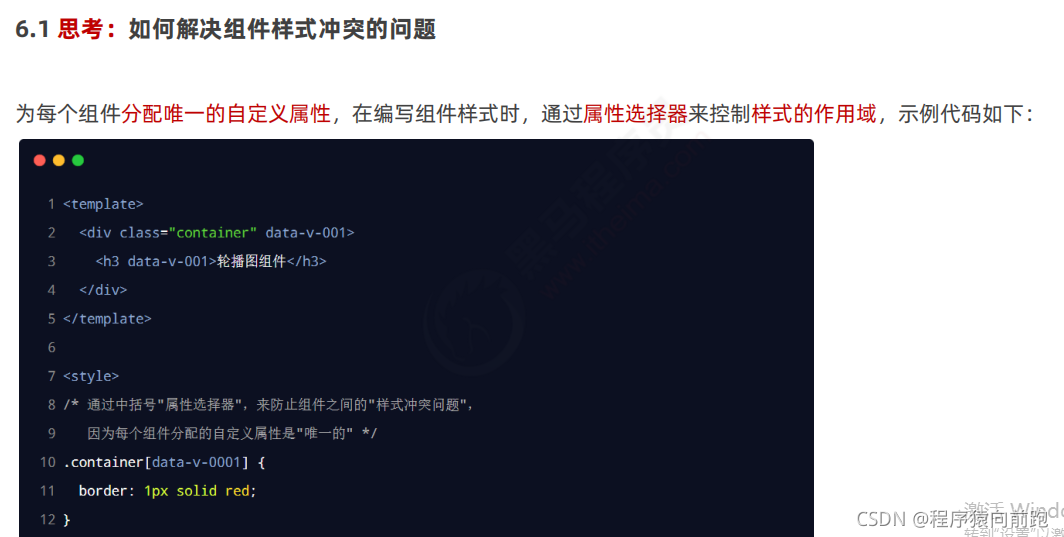
6.2 style 节点的 scoped 属性
为了提高开发效率和开发体验,vue 为 style 节点提供了 scoped 属性,从而防止组件之间的样式冲突问题:

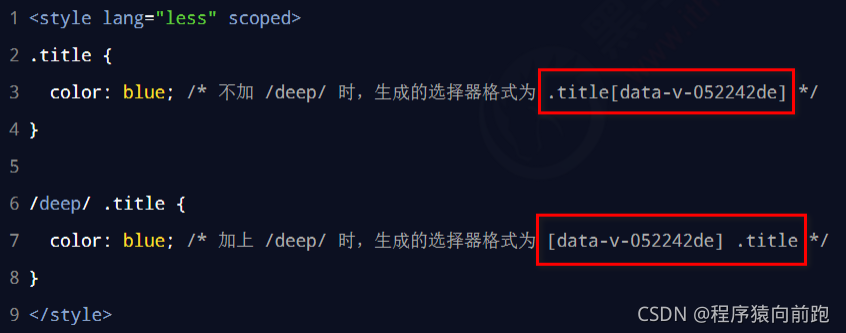
6.3 /deep/ 样式穿透
如果给当前组件的 style 节点添加了 scoped 属性,则当前组件的样式对其子组件是不生效的。如果想让某些样
式对子组件生效,可以使用 /deep/ 深度选择器。


 1万+
1万+


 被折叠的 条评论
为什么被折叠?
被折叠的 条评论
为什么被折叠?
 到【灌水乐园】发言


