


背景:这几天公司的项目因为iOS端上架问题,需要对接Apple Pay,因为也是第一次对接,记录一下过程。
配置支付
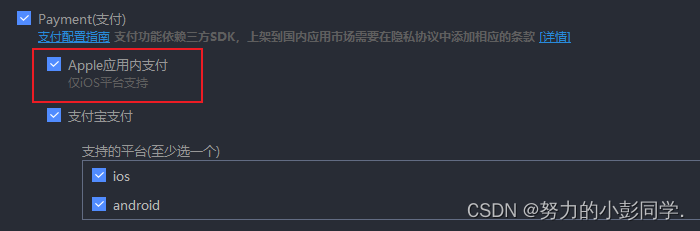
首先配置文件中需要勾选Apple内应用支付
前端代码对接
以下写法均为vue3的写法
1、调用plus.payment.getChannels获取应用内支付对象
import { ref } from 'vue';

const iosPayApp = () => {
  plus.payment.getChannels(function(channels) {
    for (let i in channels) {
      let channel = channels[i];
      // 苹果支付
      if (channel.id === 'appleiap') {
        iap.value = channel;
        requestOrder();
      }
    }

    if (iap.value === '') {
      uni.showToast({
        icon: 'none',
        title: '暂不支持苹果 iap 支付'
      });
    }
  })
}
2、发起支付前需调用requestOrder传入产品ID(productId)获取订单信息
// 商品id
const productid = ref(-1);
// 我们项目中的productid为后端把商品传过来时携带了,在选择商品时赋值即可

// 获取商品信息
const requestOrder = () => {
  let ids = [productid.value];
  // 转为字符串数组
  ids = ids.map(String);
  iap.value.requestOrder(ids, (event) => {
    iosPay(event[0].productid);
  }, (err) =>

  });
}
3、发起支付
// 开始支付
const iosPay = (id) => {
  uni.showLoading({
    title: '支付中请勿离开',
    mask: true
  })
  uni.requestPayment({
    provider: 'appleiap',
    orderInfo: {
      productid: id,
    },
    success(res) {
      uni.hideLoading();
      // 后续的操作,看自己的需求
      // 如刷新页面
      // 和后端确认是否支付成功
    },
    fail(err) {
      uni.hideLoading();
      uni.showToast({
        title: "支付已取消",
        icon: "none"
      })
      console.log(err);
    },
    complete() {
      uni.hideLoading();
    }
  })
}
以上就是本次对接过程的的一个操作,ღ( ´・ᴗ・` )


 2391
2391

 被折叠的 条评论
为什么被折叠?
被折叠的 条评论
为什么被折叠?
 到【灌水乐园】发言


