


COCO数据集介绍
COCO数据集由微软出资标注并发布的大规模数据集,它可以用于对目标检测模型的训练,同时可以用于语义分割、图像标题生成等任务。图像中的目标都经过十分准确的segmentation位置定位,COCO数据集包括90个目标标签。
Object Detection API提供了5个由COCO数据集训练出来的预训练模型,可以让我们调用完成物体检测任务,分别是:
- SSD + MobileNet
- Inception V2 + SSD
- ResNet101 + R-CNN
- ResNet101 + Faster R-CNN
- Inception-ResNet V2 + Faster R-CNN
任务目标
通过调用已经训练好的模型ssd_mobilenet_v1_coco,完成对某一张图片的物体识别。
代码实现
导入python库
分别用到以下库:numpy(用于数组计算)、tensorflow(用于神经网络学习)、matplotlib.pyplot(用于图像绘制)、PIL(用于图像处理)、utils(工具包)
# -*- coding: utf-8 -*-
#物体检测,使用预训练好的模型:ssd_mobilenet_v1_coco_2017_11_17
import numpy as np
import tensorflow as tf
import matplotlib.pyplot as plt
from PIL import Image
%matplotlib inline

from utils import label_map_util
from utils import visualization_utils as vis_util
添加常量
PATH_TO_CKPT = 'ssd_mobilenet_v1_coco_2017_11_17/frozen_inference_graph.pb'   #定义的预训练好的模型的路径
PATH_TO_LABELS = 'ssd_mobilenet_v1_coco_2017_11_17/mscoco_label_map.pbtxt'    #定义的物理类别的情况
NUM_CLASSES = 90     #类别一共有90个类
加载模型
detection_graph = tf.Graph()  #定义一个图(一个计算模型其实就是一个计算图)
with detection_graph.as_default():   #定义一个命名空间,把detection_graph这个图设置为当前的默认图
	od_graph_def = tf.GraphDef()   #再定义一个图
	with tf.gfile.GFile(PATH_TO_CKPT, 'rb') as fid:    #以二进制的方式读取打开pb文件,读取出来命名为fid
		od_graph_def.ParseFromString(fid.read())   #读取出其中的参数,存入od_graph_def
		tf.import_graph_def(od_graph_def, name='')   #把od_graph_def传入函数,完成模型的加载工作
加载分类标签数据
label_map = label_map_util.load_labelmap(PATH_TO_LABELS)   #指定路径读取分类标签数据
categories = label_map_util.convert_label_map_to_categories(label_map, max_num_classes=NUM_CLASSES, use_display_name=True) #把文件中的名词提取出来
category_index = label_map_util.create_category_index(categories) #得到一个分类的index

def load_image_into_numpy_array(image):   #一个辅助函数,将图片转化为数组
	(im_width, im_height) = image.size  #获取图片的宽高
	return np.array(image.getdata()).reshape((im_height, im_width, 3)).astype(np.uint8)  #转化为numpy习惯处理的数组形状,高x宽xRGB,再转化为整数

TEST_IMAGE_PATHS = ['test_images/image1.jpg', 'test_images/image2.jpg']#测试两张图片的路径
训练并展示结果
with detection_graph.as_default():
	with tf.Session(graph=detection_graph) as sess:   #把detection_graph传入Session,就可以开始使用ssd_mobilenet_v1_coco模型了
	    image_tensor = detection_graph.get_tensor_by_name('image_tensor:0')#把image_tensor:0这一层给拿出来,也就是他的输入
	    detection_boxes = detection_graph.get_tensor_by_name('detection_boxes:0')#detection_boxes:0模型输出的方框
	    detection_scores = detection_graph.get_tensor_by_name('detection_scores:0')#每一个box的得分
	    detection_classes = detection_graph.get_tensor_by_name('detection_classes:0')#每一个矩形对应的类别
	    num_detections = detection_graph.get_tensor_by_name('num_detections:0')  #一共识别了多少个目标检测的结果
	    for image_path in TEST_IMAGE_PATHS:  #对两张图片分别进行测试
	    	image = Image.open(image_path)  #打开一张图片
	    	image_np = load_image_into_numpy_array(image)  #使用辅助函数将这个图片转化为numpy的数组
	    	image_np_expanded = np.expand_dims(image_np, axis=0)#为这个数组扩展一下维度,变成一个四维的tensor
	    	(boxes, scores, classes, num) = sess.run(#获取模型的四个输出,输入参数为:image_np_expanded
	    		[detection_boxes, detection_scores, detection_classes, num_detections],
	    		feed_dict={image_tensor: image_np_expanded})


            #将上面获得的四个信息加到image_np上面去
	    	vis_util.visualize_boxes_and_labels_on_image_array(image_np, np.squeeze(boxes), np.squeeze(classes).astype(np.int32), np.squeeze(scores), category_index, use_normalized_coordinates=True, line_thickness=8)
	    	#把这个图片给画出来
            plt.figure(figsize=[12, 8]) #设置图片的画布
	    	plt.imshow(image_np)
	    	plt.show()
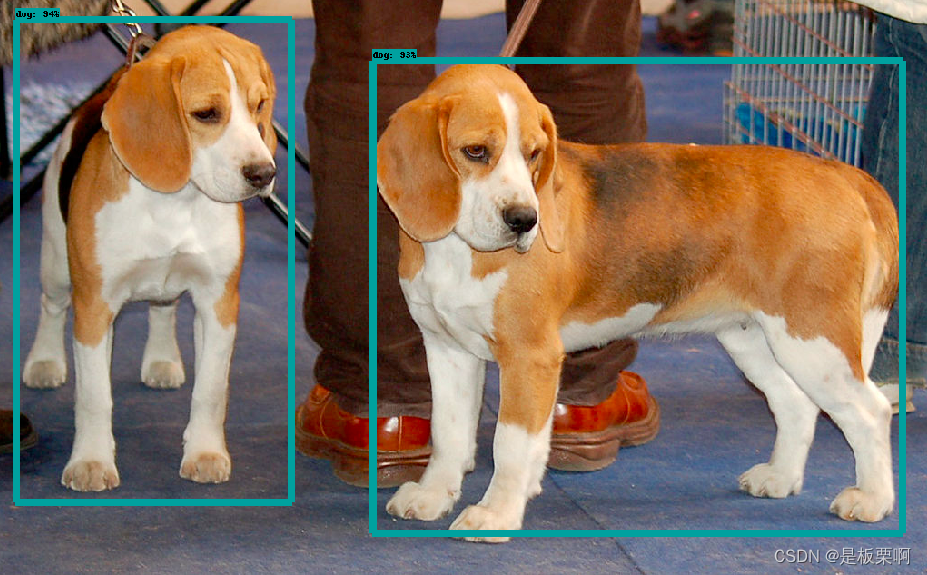
检测结果

参考资料
本文为自己的学习记录,参考文章、视频等内容链接如下:


 5261
5261


 被折叠的 条评论
为什么被折叠?
被折叠的 条评论
为什么被折叠?
 到【灌水乐园】发言


