


一、初始化阶段
一、创建项目
npm create vite@latest project

或者

yarn create vite@latest project

或者

pnpm create vite
二、遇到问题
(一)、vue3组件导入提示组件没有export
解决:vue3+ts项目vetur组件不适用,需要将vetur替换成volar
(二)、vue3+ts提示报错找不到模块“vue”
解决:打开tsconfig.json,修改"moduleResolution": "Node"
(三)、ts爆红未知的编译器选项“allowImportingTsExtensions”
解决:此选项已经被弃用,所以直接将这行删除即可
二、配置设置
通过pnpm run dev启动项目后需要手动打开网页,改成自动打开网页的方法:
打开package.json文件,修改script下的dev,将其改成dev:"vite --open"
一、eslint代码校验工具配置
(一)、安装eslint
pnpm install eslint -D(二)、生成配置文件:.eslint.cjs
npx eslint --init
(三)、.eslint.cjs配置文件
module.exports = {
    //eslint工作环境,运行环境
    "env": {
        "browser": true,
        "es2021": true
    },
    // 规则继承
    "extends": [
        //全部规则默认是关闭的,这个配置项开启推荐规则,推荐规则参照文档
        //比如:函数不能重名,对象不能出现重复key
        "eslint:recommended",
        //ts语法规则
        "plugin:@typescript-eslint/recommended",
        //vue3语法规则
        "plugin:vue/vue3-essential"
    ],
    //要为特定类型的文件指定处理器
    "overrides": [
        {
            "env": {
                "node": true
            },
            "files": [
                ".eslintrc.{js,cjs}"
            ],
            "parserOptions": {
                "sourceType": "script"
            }
        }
    ],
    //指定解析器:解析器
    //Esprima 默认解析器
    //Babel-ESLint babal解析器
    //@typescript-eslint/parser  ts解析器
    //指定解析器选项
    "parserOptions": {
        "ecmaVersion": "latest",    //校验ECMA最新版本
        "parser": "@typescript-eslint/parser",
        "sourceType": "module"  //设置为“script”(默认3),或者“module”代码在ECMAScript模块中
    },
    //ESLint支持使用第三方插件。在使用插件之前,您必须使用npm安装它
    //该eslint-plugin-前缀可以从插件名称被省略
    "plugins": [
        "@typescript-eslint",
        "vue"
    ],
    //eslint规则
    "rules": {
    }
}
1、vue3环境代码校验插件

安装指令
pnpm install -D eslint-plugin-import eslint-plugin-vue eslint-plugin-node eslint-plugin-prettier eslint-config-prettier eslint-plugin-node @babel/eslint-parser2、修改.eslint.cjs配置文件

3、.eslintignore忽略文件
4.运行脚本
package.json新增两个运行脚本:
"scripts": {
    "lint":"eslint src",
    "fix":"eslint src --fix"
  },
二、配置prettier
(一)、安装依赖
pnpm install -D eslint-plugin-prettier prettier eslint-config-prettier(二)、.prettierrc.json添加规则
{
  "singleQuote":true,
  "semi":false,
  "bracketSpacing":true,
  "htmlWhitespaceSensitivity":"ignore",
  "endOfLine":"auto",
  "tabWidth":2
}
(三)、.prettierignore忽略文件
/dist/*
/html/*
.local
/node_modules/**
**/*.svg
**/*.sh
/public/*
通过pnpm run lint去检测语法,如果出现不规范格式,通过pnpm run fix修改
三、配置stylelint:格式化css代码
安装依赖
pnpm add sass sass-loader stylelint postcss postcss-scss postcss-html stylelint-config-prettier stylelint-config-recess-order stylelint-config-recommended-scss stylelint-config-standard stylelint-config-standard-vue stylelint-scss stylelint-order stylelint-config-standard-scss -D(一).stylelintrc.cjs配置文件
官网:https://stylelint.bootcss.com/
modules.export = {
  extends:[
    'stylelint-config-standard', //配置stylelint拓展插件
    'stylelint-config-html/vue', //配置vue中template样式格式化
    'stylelint-config-standard-scss', //配置stylelint scss插件
    'stylelint-config-recommended-vue/scss', //配置vue中scss样式格式化
    'stylelint-config-recess-order', //配置stylelint css属性书写顺序插件
    'stylelint-config-prettier', //配置stylelint和prettier兼容
  ],
  overrides:[
    {
      files:['**/*.(scss|css|vue|html)'],
      customSyntax:'postcss-scss',
    },
    {
      files:['**/*.(html|vue)'],
      customSyntax:'postcss-html',
    },
  ],
  ignoreFiles:[
    '**/*.js',
    '**/*.jsx',
    '**/*.tsx',
    '**/*.ts',
    '**/*.json',
    '**/*.md',
    '**/*.yaml',
  ],
  /*
  * null     =>    关闭该规则
  * always     =>    必须
   */
  rules:{
    'value-keyword-case':null,   //在css中使用v-bind,不报错
    'no-descending-specificity':null,   // 禁止在具有较高优先级的选择器后出现被其覆盖的较低优先级的选择器
    'function-url-quotes':'always',  // 要求或禁止 URL的引号 “always(必须加上引号)”|“never(没有引号)”
    'no-empty-source':null, //关闭禁止空源码
    'selector-class-pattern':null,   //关闭强制选择器类名的格式
    'property-no-unknown':null,   // 禁止未知的属性(true为不允许)
    'block-opening-brace-space-before':'always',  //大括号之前必须有一个空格或不能有空白符
    'value-no-vendor-prefix':null,   //关闭属性值的前缀  --webkit-box
    'property-no-vendor-prefix':null,   //关闭属性前缀  --webkit-mask
    'selector-pseudo-class-no-unknown':[
      //不允许位置的选择器
      true,
      {
        ignorePseudoClasses:['global','v-deep','deep'],  // 忽略属性,修改element默认样式的时候能使用到
      }
    ]
  }
}
(二)、.stylelintignore忽略文件
/node_modules/*
/dist/*
/html/*
/public/*
(三)、运行脚本
"scripts": {
    "lint:style":"stylelint src/**/*.{css,scss,vue} --cache --fix"
}, 
四、配置husky

五、配置commitLint


六、统一包管理工具下载依赖

三、项目集成
一、集成element-plus
官网地址:https://element-plus.gitee.io/zh-CN/
pnpm install element-plus @element-plus/icons-vue

二、src路径别名配置

error:
import path from 'path',t找不到模块“path”或其相应的类型声明
解决:
pnpm install @types/node -D
其中导入模块:@/xx/xx 会出现红色的波浪线提示,是因为vetur不支持vue3部分功能,只需要将其禁用并且重启vscode
三、项目环境变量的配置
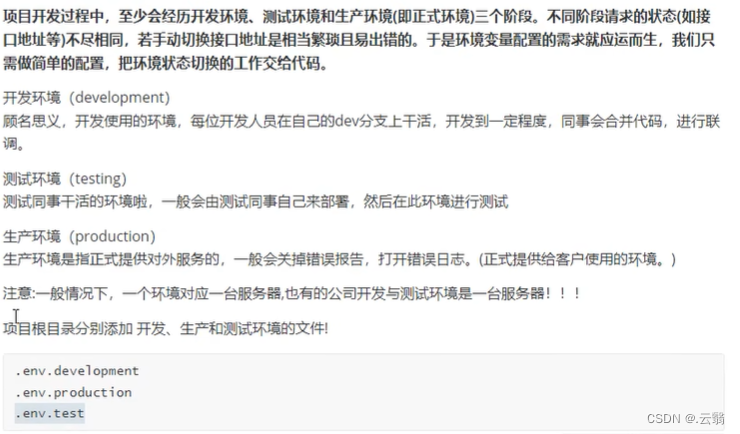
// .env.development
# 变量必须以 VITE_ 为前缀才能暴露给外部读取
NODE_ENV = "development"
VITE_APP_TITLE = "运行平台"
VITE_APP_BASE_API = "/dev-api"

// .env.production
NODE_ENV = "production"
VITE_APP_TITLE = "运行平台"
VITE_APP_BASE_API = "/prod-api"

// .env.test
# 变量必须以 VITE_ 为前缀才能暴露给外部读取
NODE_ENV = "test"
VITE_APP_TITLE = "运行平台"
VITE_APP_BASE_API = "/test-api"
四、SVG图标配置
在开发项目的时候,经常会用到svg矢量图,使用svg矢量图之后,页面上加载的不再是图片资源,很大的提升了页面性能,svg文件比img小很多,在项目中机会不占资源
安装SVG依赖插件
pnpm install vite-plugin-svg-icons -D

自定义插件注册全局组件

五、集成sass


六、mock数据
安装依赖:https://www.npmjs.com/package/vite-plugin-mock
pnpm install -D vite-plugin-mock mockjs在vite.config.js配置文件启用插件

七、axios二次封装
目的:
- 使用请求拦截器,可以在请求拦截器中处理一些业务(开始进度条、请求头携带公共参数)
- 使用相应拦截器,可以在相应拦截器中处理一些业务(进度条结束、简化服务器返回的数据、处理http网络错误)
在根目录下创建utils/request.ts
// 进行axios二次封装:使用请求与相应拦截器
import axios from 'axios'
import { ElMessage } from 'element-plus'
// 第一步:利用axios对象的create方法,去创建axios实例(其他的配置:基础路径、超过请求时间)
const request = axios.create({
  baseURL: import.meta.env.VITE_APP_BASE_API,
  timeout: 5000,
})
// 第二步:request实例添加请求与响应拦截器
request.interceptors.request.use((config) => {
  // config配置对象,headers属性请求头,经常给服务器端携带公共参数
  // 返回配置对象
  return config
})
// 第三步:相应拦截器
request.interceptors.response.use(
  (response) => {
    // 成功回调
    return response
  },
  (err) => {
    // 失败的回调:处理http网络错误
    // 定义一个变量:存储网络错误信息
    let message = ''
    // http状态码
    let status = err.response.status
    switch (status) {
      case 401:
        message = 'TOKEN过期'
        break
      case 403:
        message = '无权访问'
        break
      case 404:
        message = '请求地址错误'
        break
      case 500:
        message = '服务器出现问题'
        break
      default:
        message = '网络错误'
        break
    }
    ElMessage({
      type:'error',
      message
    })
    return Promise.reject(err)
  },
)
export default {}
API接口统一管理:创建src/api/use/index.ts以及type.ts
// 统一管理用户相关的接口
import request from "@/utils/request"
// 统一管理接口
enum API {
  LOGIN_URL = "/user",
  USERINFO_URL = '/user/info'
}
// 暴露请求函数
// 登录接口方法
export const reqLogin = (data:any)=>request.post(API.LOGIN_URL,data)
八、路由配置
安装依赖:
pnpm install vue-routersrc/router/index.ts:
// 通过vue-router插件实现模板路由配置
import {createRouter, createWebHashHistory} from 'vue-router'

// 创建路由器
let router = createRouter({
  // 路由模式
  history:createWebHashHistory(),
  routes:[
    {
      // 登录页面
      path:'/login',
      component:()=>import("@/views/login/index.vue"),
      name:'login'  //命名空间用于菜单 权限
    },
    {
      // 首页页面
      path:'/',
      component:()=>import("@/views/home/indev.vue"),
      name:'home'  //命名空间用于菜单 权限
    },
    {
      // 404页面
      path:'/404',
      component:()=>import("@/views/404/index.vue"),
      name:'404'  //命名空间用于菜单 权限
    },
    {
      path:'/:pathMatch(.*)*',
      redirect:'/404',
      name:'Any'
    }
  ]
})

export default router
简易版:src/router/index.ts
// 通过vue-router插件实现模板路由配置
import { createRouter, createWebHashHistory } from 'vue-router'
import { constantRoute } from './routes'

// 创建路由器
let router = createRouter({
  // 路由模式
  history: createWebHashHistory(),
  routes: constantRoute,
  // 滚动行为
  scrollBehavior() {
    return {
      left: 0,
      top: 0,
    }
  },
})

export default router
九、状态管理工具pinia
安装依赖:
pnpm install pinia创建文件src/store/index.ts (还要到main.ts中注册store)
// 导入大仓库
import {createPinia} from 'pinia'

// 创建大仓库
let pinia = createPinia()

// 对外暴露:入口文件需要安装仓库
export default pinia
创建文件src/store/modules/user.ts
// 创建用户相关小仓库
import {defineStore} from 'pinia'
// 创建用户小仓库
const userStore = defineStore('User',{
  // 小仓库存储状态的地方
  state:()=>{
    return {}
  },
  // 处理异步|逻辑的地方
  actions:{

  },
  getters:{

  }
})
export default userStore
使用:
import useUserStore from "@/xxx"
let useStore = useUserStore()


 1584
1584


 被折叠的 条评论
为什么被折叠?
被折叠的 条评论
为什么被折叠?
 到【灌水乐园】发言


