原型方案
像一些头像的裁剪,文件上传可能需要固定尺寸的时候,需要将裁剪好的图片上传到服务器

实现方案(简要)
初始图片预览
添加上传文件组件以及图片预览组件
<body>
    <input type="file" />
    <img class="preview">
</body>
将选择的图片通过 js 添加到img 的src属性中
const inpFile = document.querySelector('input[type="file"]');
const img = document.querySelector('img');
inpFile.onchange = e => {
    const file = e.target.files[0];
    const reader = new FileReader();
    reader.onload = e => {
        img.src = e.target.result;
    }
    reader.readAsDataURL(file);
}
选择需要裁剪的区域利用canvas绘制出裁剪后的图片
添加一个裁剪按钮
<body>
    <input type="file" />
    <img class="preview">
    <button>生成截图后的file对象</button>
</body>
在js中进行裁剪(在js中定死区域,后续可以更改让用户手动选择裁剪区域),通过canvas 画出来
const btn = document.querySelector('button');
btn.onclick = () => {
    const cutInfo = {
        x: 500, // 图片裁剪开始左上角的x坐标
        y: 500, // 图片裁剪开始左上角的y坐标
        cutWidth: 800, // 裁剪大小的宽度
        cutHeight: 800, // 裁剪大小的高度
        width: 100,  // 最后进行缩放的宽度
        height: 100  // 最后进行缩放的高度
    }
    const canvas = document.createElement('canvas');
    canvas.width = cutInfo.width
    canvas.height = cutInfo.height
    const ctx = canvas.getContext('2d');
   // canvas本身支持对图片进行裁剪
   // drawImage 的参数分别为(原图,图片裁剪开始左上角的x坐标,图片裁剪开始左上角的y坐标,裁剪大小的宽度,裁剪大小的高度
   // 裁剪后需要放在canvas画布中的位置坐标x和y,缩放的宽度,缩放的高度)
    ctx.drawImage(img, cutInfo.x, cutInfo.y, cutInfo.cutWidth, cutInfo.cutHeight, 0, 0, cutInfo.width, cutInfo
        .height);
    document.body.appendChild(canvas);
}
上传到服务器
// ...
// 将canvas转成file对象发送到服务器中
canvas.toBlob((blob) => {
    const file = new File([blob], 'avatar.jpg',{
        type:'image/jpeg',
    });
    console.log(file);
    // ajax ===》file ==》 服务器
},'image/jpeg')
整体代码
<!DOCTYPE html>
<html lang="en">

<head>
    <meta charset="UTF-8">
    <meta name="viewport" content="width=device-width, initial-scale=1.0">
    <title>图片裁剪上传</title>
</head>

<body>
    <input type="file" />
    <img class="preview">
    <button>生成截图后的file对象</button>
</body>
<script>
    const inpFile = document.querySelector('input[type="file"]');
    const img = document.querySelector('img');
    const btn = document.querySelector('button');
    inpFile.onchange = e => {
        const file = e.target.files[0];
        const reader = new FileReader();
        reader.onload = e => {
            img.src = e.target.result;
        }
        reader.readAsDataURL(file);
    }
    btn.onclick = () => {
        const cutInfo = {
            x: 500,
            y: 500,
            cutWidth: 800,
            cutHeight: 800,
            width: 100,
            height: 100
        }
        const canvas = document.createElement('canvas');
        canvas.width = cutInfo.width
        canvas.height = cutInfo.height
        const ctx = canvas.getContext('2d');
        ctx.drawImage(img, cutInfo.x, cutInfo.y, cutInfo.cutWidth, cutInfo.cutHeight, 0, 0, cutInfo.width, cutInfo
            .height);
        canvas.toBlob((blob) => {
            const file = new File([blob], 'avatar.jpg',{
                type:'image/jpeg',
            });
            console.log(file);
            // ajax ===》file ==》 服务器
        },'image/jpeg')
        document.body.appendChild(canvas);
    }
</script>

</html>
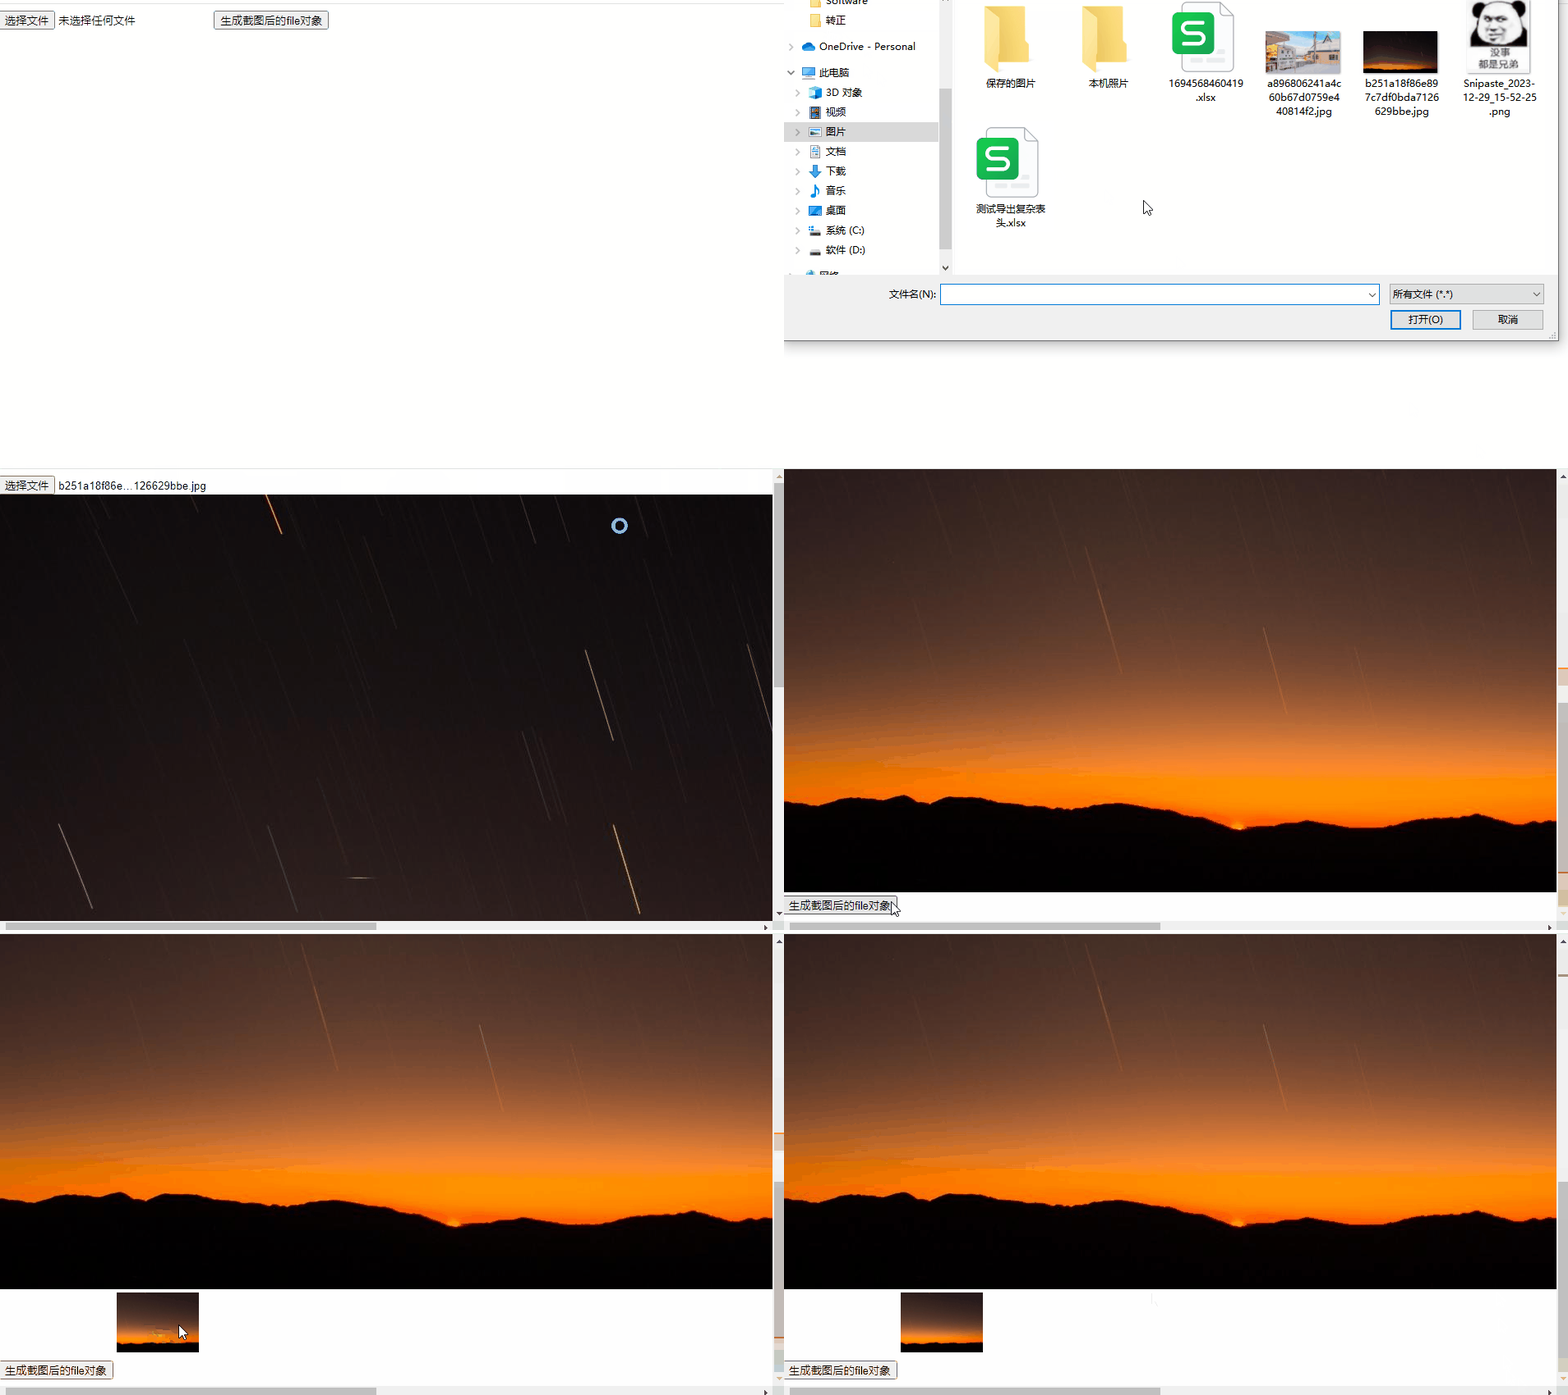
实现效果


 719
719


 被折叠的 条评论
为什么被折叠?


