


总体布局
后台管理的总体布局,采用element-plus的这个布局

<template>
    <div class="common-layout">
      <el-container>
        <el-header>Header
            <p>
            <router-link to="/toLogin">去登录页</router-link>
            </p>
        </el-header>
        <el-container>
          <el-aside width="200px">Aside</el-aside>
          <el-main>Main</el-main>
        </el-container>
      </el-container>
    </div>
  </template>
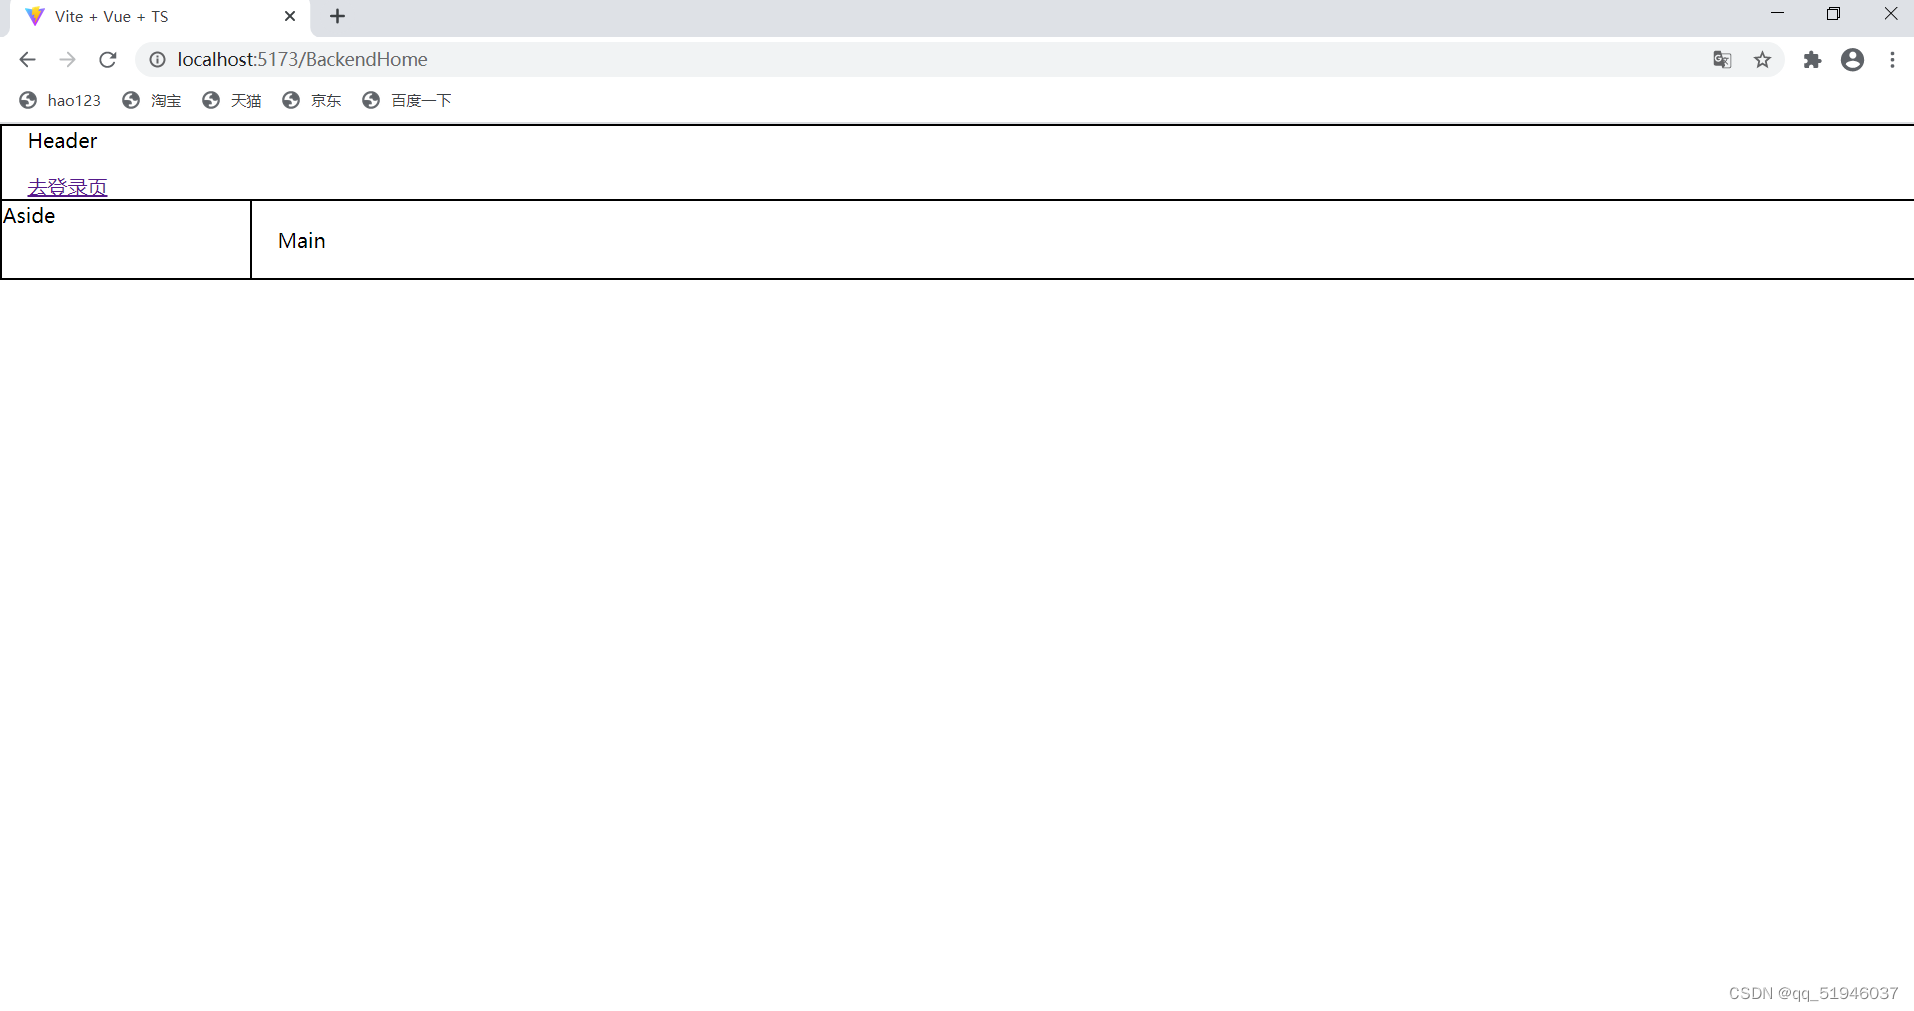
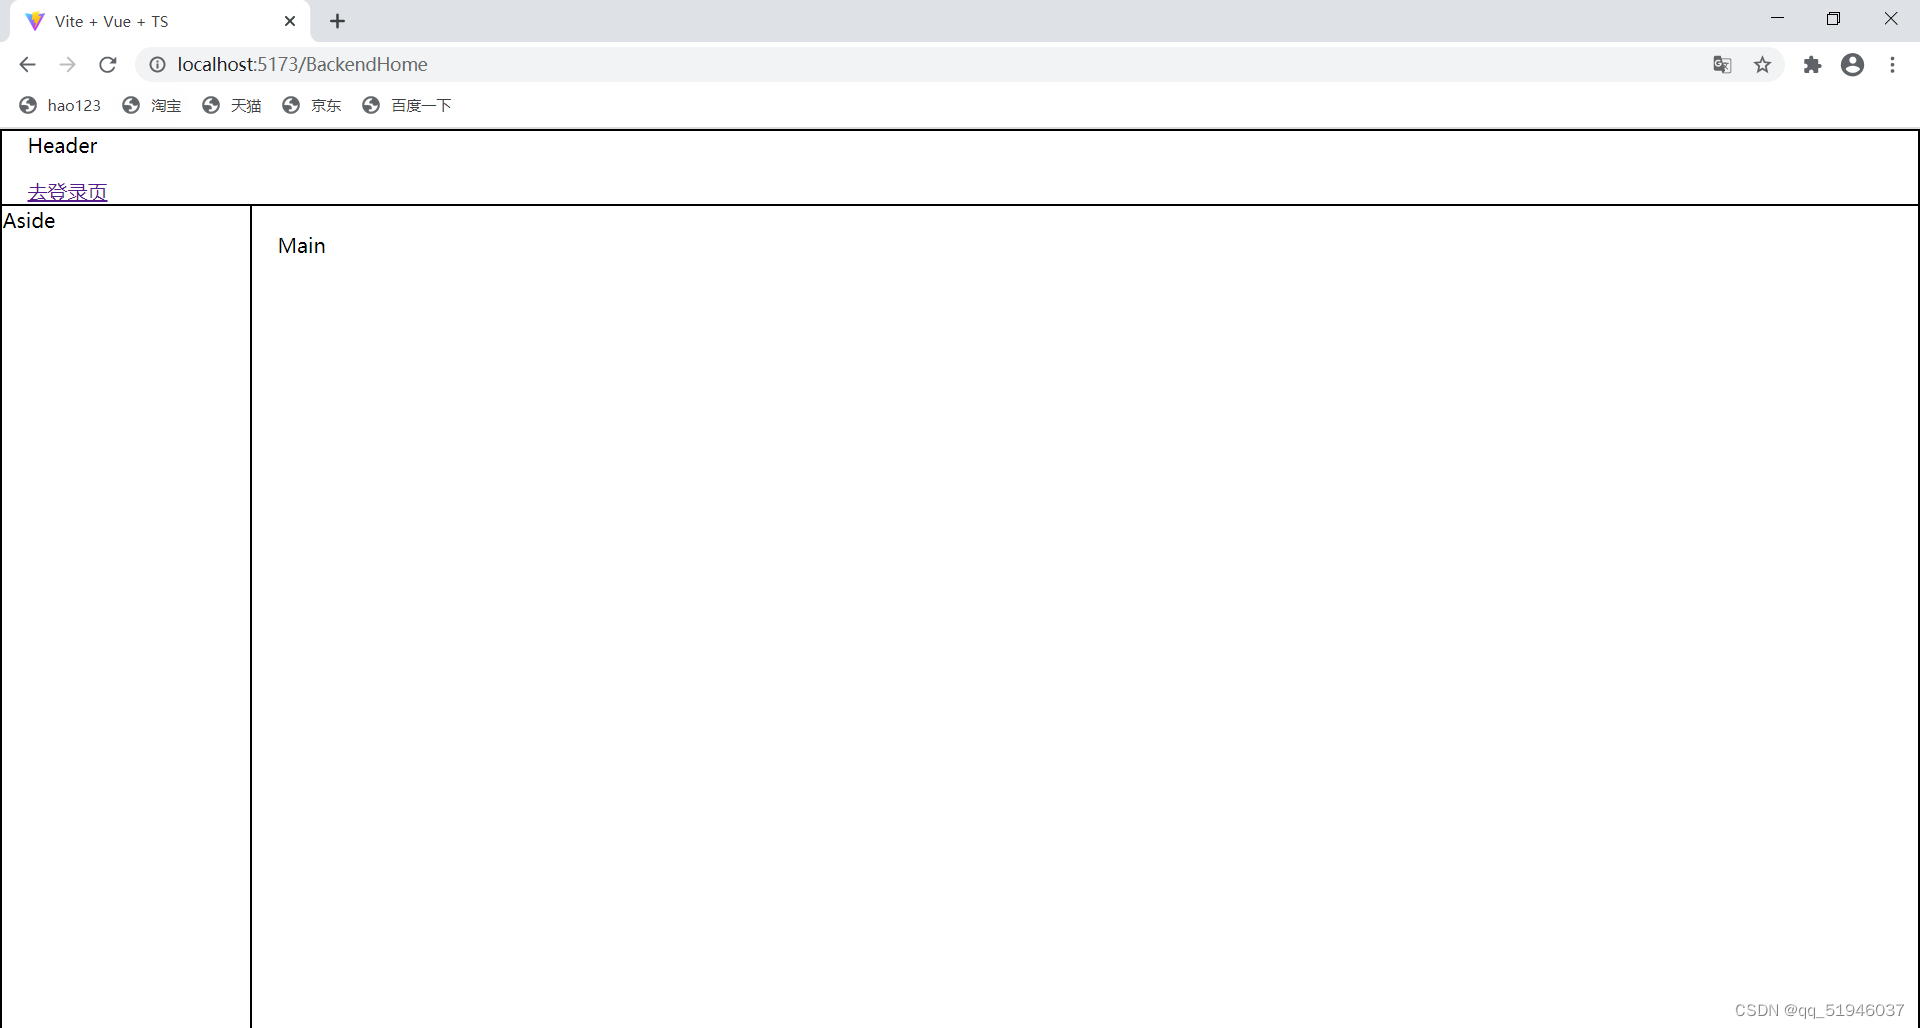
直接从elemen复制的代码不能撑满整个页面,需要加点样式
.common-layout{
    /* 令整个容器高度为窗口的100%
        vh只能用于高度设置 */
    height: 100vh;
    box-sizing: border-box;
}

.el-container{
    /*高度为父元素的100%*/
    height: 100%;
}
添加样式后效果如下
侧边栏
- 将侧边栏封装成组件
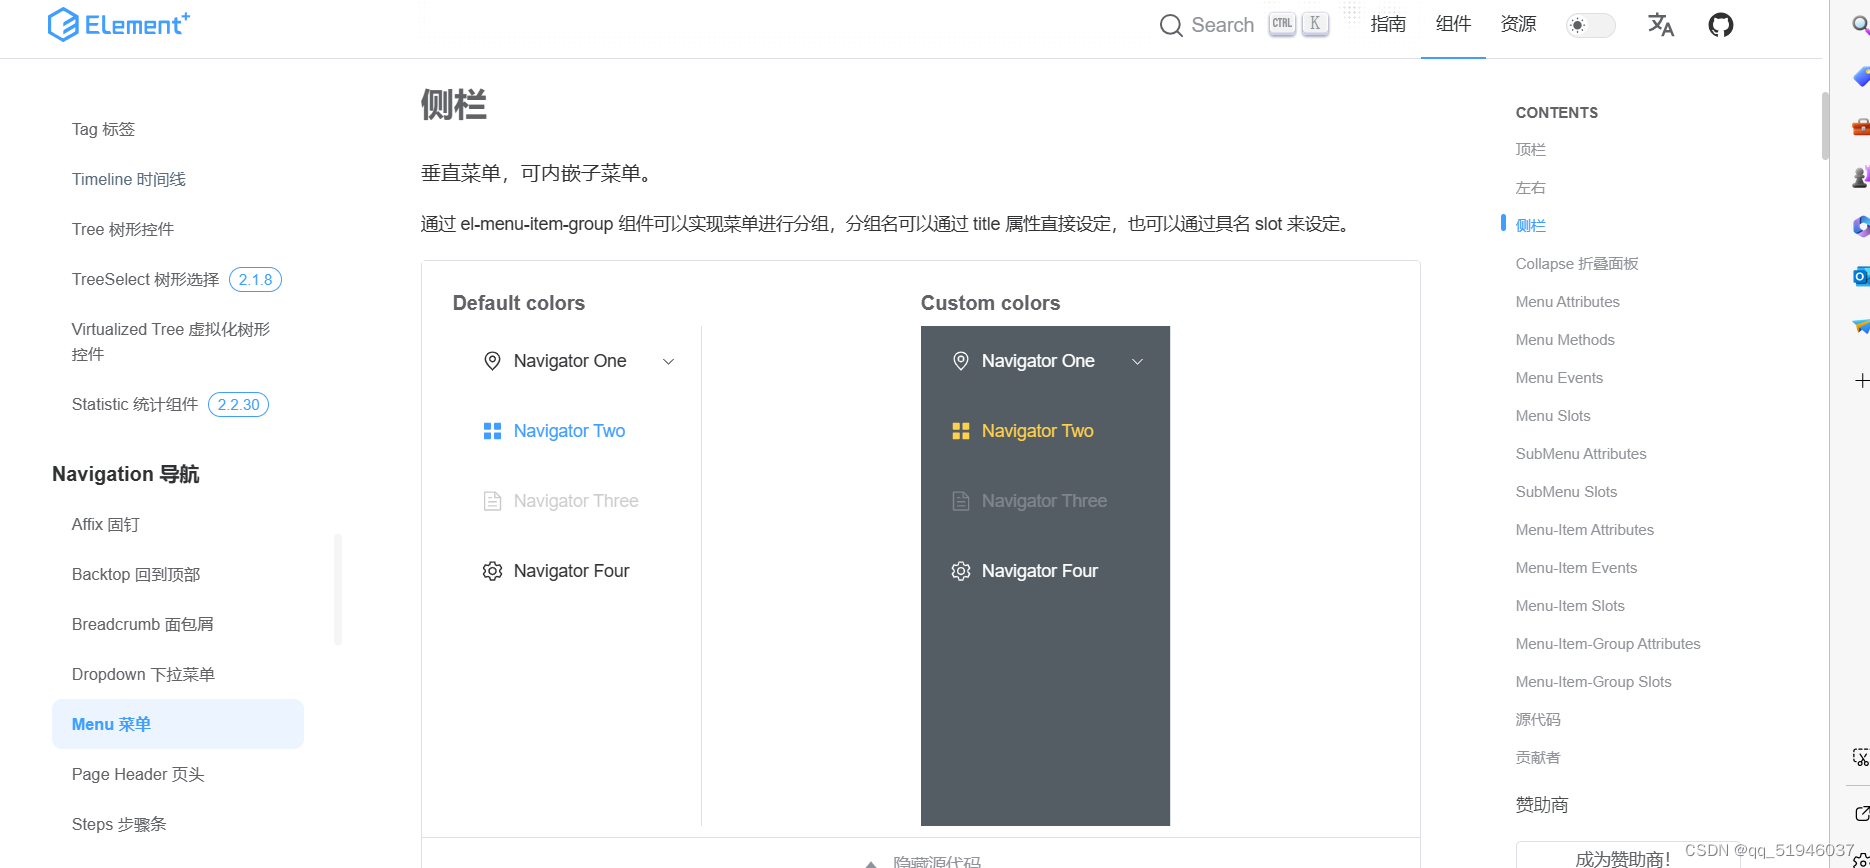
在components中新建文件夹backComponents,用于存放和后台相关的组件,新建Aside.vue,从element中复制侧边栏相关代码填入
代码如下
<template>
      <el-menu
        default-active="2"
        class="el-menu-vertical-demo"
        active-text-color="#fe6004"
        background-color="#206b52"
        text-color="#fff"
      >
        <el-sub-menu index="1">
          <template #title>
            <el-icon><location /></el-icon>
            <span>Navigator One</span>
          </template>
          <el-menu-item-group title="Group One">
            <el-menu-item index="1-1">item one</el-menu-item>
            <el-menu-item index="1-2">item two</el-menu-item>
          </el-menu-item-group>
          <el-menu-item-group title="Group Two">
            <el-menu-item index="1-3">item three</el-menu-item>
          </el-menu-item-group>
          <el-sub-menu index="1-4">
            <template #title>item four</template>
            <el-menu-item index="1-4-1">item one</el-menu-item>
          </el-sub-menu>
        </el-sub-menu>
        <el-menu-item index="2">
          <el-icon><icon-menu /></el-icon>
          <span>Navigator Two</span>
        </el-menu-item>
        <el-menu-item index="3" disabled>
          <el-icon><document /></el-icon>
          <span>Navigator Three</span>
        </el-menu-item>
        <el-menu-item index="4">
          <el-icon><setting /></el-icon>
          <span>Navigator Four</span>
        </el-menu-item>
      </el-menu>
</template>

<script setup lang="ts">

</script>

<style scoped>

</style>
- 在BackendHome.vue引入并侧边栏组件
<template>
    <div class="common-layout">
      <el-container class="myborder">
        <el-header class="myborder">Header
            <p>
            <router-link to="/toLogin">去登录页</router-link>
            </p>
        </el-header>
        <el-container>
          <el-aside class="myborder" width="200px">
            <Aside>
            </Aside>
          </el-aside>
          <el-main class="myborder">Main</el-main>
        </el-container>
      </el-container>
    </div>
  </template>

<script setup lang="ts">
import Aside from '../../components/backComponents/Aside.vue'

</script>
引入完成,效果如下

动态渲染菜单栏
需求:
- 根据路由配置,动态渲染菜单栏
- 只渲染后台管理的路由
- 有些后台管理的二级路由中还有三级路由
- 后台路由配置如下
 {
    path: '/BackendHome',
    name: 'BackendHome',
    component:BackendHome,
    children:[
      {
        path: '/BackendHome',
        name: '首页',
        component:BackHome,
      },
      {
        path: '',
        name: '博客',
        children:[
          {
            path: '/BackendHome/BlogAdd',
            name: '添加博客',
            component:BlogAdd,
          },
        ]
      },
      {
        path: '/BackendHome/UserManage',
        name: '用户管理',
        component:UserManage,
      },

    ]
  },
- el-menu读取路由列表后进行渲染
<template>
      <el-menu
        router
        default-active="2"
        class="el-menu-vertical-demo"
        active-text-color="#fe6004"
        background-color="#206b52"
        text-color="#fff"
      >

 <!-- 只渲染路由列表中的后台管理路由 -->
        <template v-for="item in $router.options.routes[2].children">
           <!-- 如果二级路由中包含三级路由 -->
          <el-sub-menu v-if="item.children != null " :index="item.path">
            <template #title>
              <span>{{ item.name }}</span>
            </template>
            <!-- 渲染三级路由 -->
            <el-menu-item v-for="t in item.children" :index="t.path">{{ t.name }}</el-menu-item>
          </el-sub-menu>
          <!-- 如果二级路由中不包含三级路由 -->
           <el-menu-item v-else :index="item.path">{{ item.name }}</el-menu-item>
        </template>

      </el-menu>
</template>
至此根据路由动态渲染菜单栏就完成了

给菜单栏添加图标
给一级菜单添加图标,因为是通过for循环渲染的菜单,所以把要添加的图标名放在一个数组中,在渲染菜单时读取渲染。
- 根据菜单渲染顺序设置图标名数组
const iconList = ref(['house','Document','user']);
- 在渲染菜单时读取图标数组
<el-menu
        router
        class="el-menu-vertical-demo"
        active-text-color="#fe6004"
        background-color="#206b52"
        text-color="#fff"
      >
           <!-- 只渲染路由列表中的后台管理路由 -->
        <template v-for="(item,index) in $router.options.routes[2].children">
           <!-- 如果二级路由中包含三级路由 -->
          <el-sub-menu v-if="item.children != null " :index="item.path">
            <template #title>
            //图标
              <el-icon>
                <component :is="iconList[index]"></component>
              </el-icon>
              <span>{{ item.name }}</span>
            </template>
            <!-- 渲染三级路由 -->
            <el-menu-item v-for="t in item.children" :index="t.path">{{ t.name }}</el-menu-item>
          </el-sub-menu>
          <!-- 如果二级路由中不包含三级路由 -->
           <el-menu-item v-else :index="item.path">
           //图标
            <el-icon>
                <component :is="iconList[index]"></component>
              </el-icon>{{ item.name }}
            </el-menu-item>
        </template>

      </el-menu>
添加效果如下
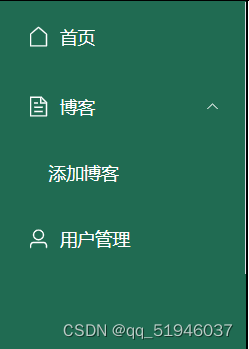
如果要给二级菜单也设置图标,那就再设置一个图标数组。


 120
120


 被折叠的 条评论
为什么被折叠?
被折叠的 条评论
为什么被折叠?
 到【灌水乐园】发言


