


一、实验目标
1、掌握服务器域名配置和临时服务器部署;
2、掌握 wx.request 接口的用法。
二、实验步骤
(列出实验的关键步骤、代码解析、截图。)
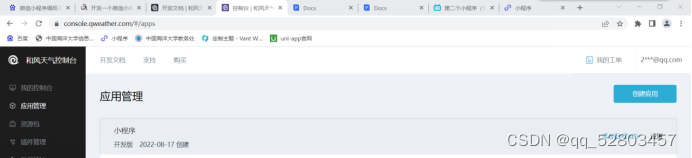
- 和风天气API密钥申请
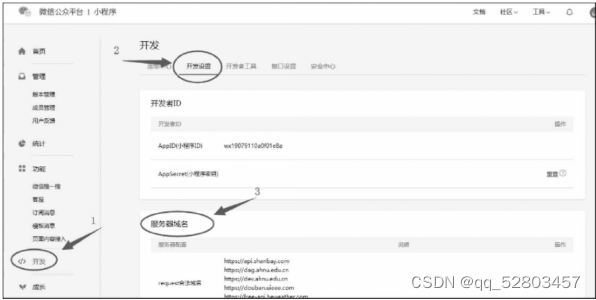
2.在微信小程序上配置服务器域名
3.创建项目并删除app.wxss、index.wxml、index.wxss、index.js中代码,删除log文件夹
4.app.json的代码
navigationBarBackgroundColor的设置使得导航栏的颜色为蓝色;
navigationBarTitleText为导航栏上所显示的文字;
navigationBarTextStyle设置导航栏上字体的颜色。
  "window":{
    "backgroundTextStyle":"light",
    "navigationBarBackgroundColor": "#3883fa",
    "navigationBarTitleText": "今日天气",
    "navigationBarTextStyle":"white"
  },
5.index.wxml的代码
使用pick、view、image、text、等组件,并通过{{}}进行数据动态绑定
<view class="container">
    <picker mode="region" bindchange="regionChange">
        <view>{{region}}</view>
    </picker>

    <text>{{weather_now.temp}}℃{{weather_now.text}}</text>

    <image src='/images/weather_icon_s1_color/{{weather_now.icon}}.png' mode='widthFix'></image>

    <view class="details">
        <view class="bar">
            <view class="box">湿度</view>
            <view class="box">气压</view>
            <view class="box">能见度</view>
        </view>
        <view class="bar">
            <view class="box">{{weather_now.humidity}}%</view>
            <view class="box">{{weather_now.pressure}}hpa</view>
            <view class="box">{{weather_now.vis}}km</view>
        </view>
        <view class="bar">
            <view class="box">风向</view>
            <view class="box">风速</view>
            <view class="box">风力</view>
        </view>
        <view class="bar">
            <view class="box">{{weather_now.windDir}}</view>
            <view class="box">{{weather_now.windSpeed}}km/h</view>
            <view class="box">{{weather_now.windScale}}级</view>
        </view>
    </view>
</view>
6.在wxss中对view、image、text进行渲染
.container{
    height: 100vh;
    display: flex;
    flex-direction: column;
    align-items: center;
    justify-content: space-around;
}

text{
    font-size: 80rpx;
    color: #3c4f81;
}

image{
    width: 220rpx;
}

.details{
    width: 100%;
    display: flex;
    flex-direction: column;
}
.bar{
    display: flex;
    flex-direction: row;
    margin: 20rpx 0;
}
.box{
    width: 33.3%;
    text-align: center;
}
7.在index.js中编写逻辑结构
数据集部分包含城市信息和和风天气请求来的天气数据
 data: {
    region:['安徽省','芜湖市','镜湖区'],
    key: '79ab60ad0xxxxxxxxxx7a937',
    city: '',
    weather_now: {},
    future: {},
    twenty_four: {},
    indices: {},
    flag: false,
    latitude_value: 1,
    longitude_value: 12,
    weather_now:{
        temp:0,
        text:'NAN',
        icon:999,
        humidity:0,
        pressure:0,
        vis:0,
        windDir:'NAN',
        windScale:0,
        windSpeed:0

    }
  },
获取天气函数
regionChange:function(e){
this.setData({
region:e.detail.value
});
this.getWeather();
},
getWeather:function(){
var that=this;
wx.request({
url: 'https://geoapi.qweather.com/v2/city/lookup',
method: 'GET',
data: {
key: "de5f78a7692f44b0b82557436bfce090",
location: that.data.region[1] //这个就是前端输入的城市名
},
success: (res) => {
console.log(res);
// return res.data.location[0].id
this.setData({
location: res.data.location[0].id //提取返回结果中的id
})
// 获取locationid后,查询当前天气,在success中发起请求
var location_id = this.data.location;
// console.log(location_id);
wx.request({
url: 'https://devapi.qweather.com/v7/weather/now',
method: 'GET',
data: {
key: "de5f78a7692f44b0b82557436bfce090",
location: location_id
},
success: (res) => {
console.log(res);
this.setData({
weather_now: res.data.now,
flag: true
})
},
});
// 获取locationid后,查询天气指数
wx.request({
url: 'https://devapi.qweather.com/v7/indices/1d',
method: 'GET',
data: {
key: "de5f78a7692f44b0b82557436bfce090",
location: location_id,
type: 3
},
success: (res) => {
console.log(res);
this.setData({
indices: res.data.daily,
flag: true
})
},
});
},
})
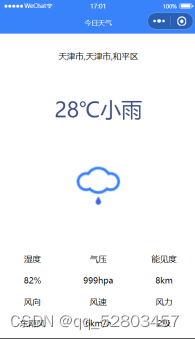
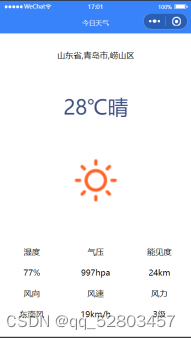
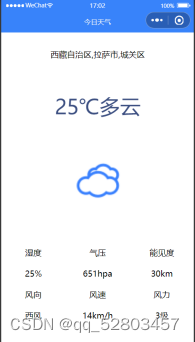
},- 程序运行结果
下图为不同城市的天气情况
四、问题总结与体会
在实验过程中,遇到最大的问题就是wx.request()请求中调用不了和风天气的数据,在查询和风天气开发者文档后发现,原教程中url地址已经不再适用,需要通过新的url地址才能获取数据,并且要使用和风天气所提供的另外一个url地址获得所在地区的locationID。


 466
466


 被折叠的 条评论
为什么被折叠?
被折叠的 条评论
为什么被折叠?
 到【灌水乐园】发言


