


配置trunk
实验: 配置trunk
- 实验目标:
1.学会配置trunk,实现端到端VLAN通信
2.配置trunk流量控制
3.修改native VLAN - 实验步骤:
1.根据拓扑所示,在SW1,SW2上创建VLAN,并命名
2.在SW1,SW2上划分端口至对应的VLAN,并配置PC的IP地址
3.使用静态trunk模式,配置SW1,SW2之间的trunk
4.测试端到端VLAN的通信
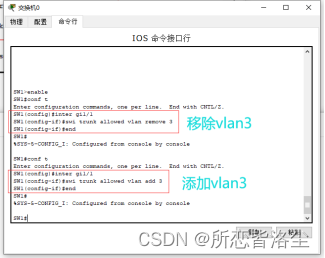
5.在trunk上移除VLAN3的流量,使用SW1,SW2的VLAN3之间不能够通信
6.在trunk上允许VLAN3的流量,使用SW1,SW2的VLAN3之间能够通信
7.修改nativeVLAN为VLAN 90
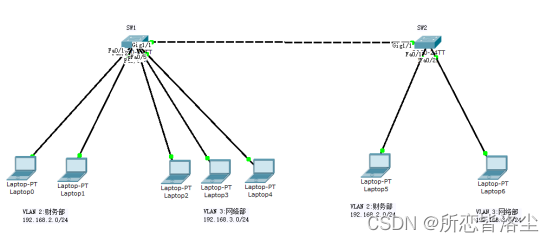
1、实验拓扑结构图如下:
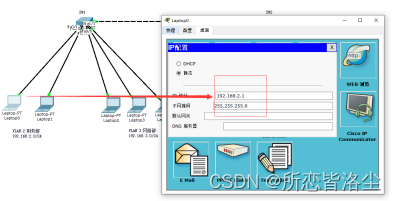
2、给每台主机配置IP地址
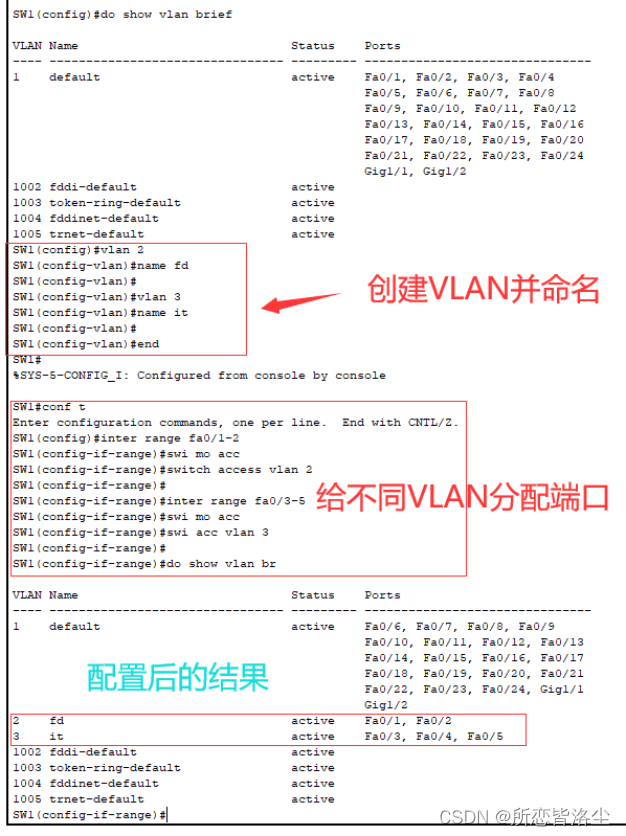
3.配置SW1
添加vlan2 和 vlan3 并且名为fd 和 it ,并且给他们分配端口
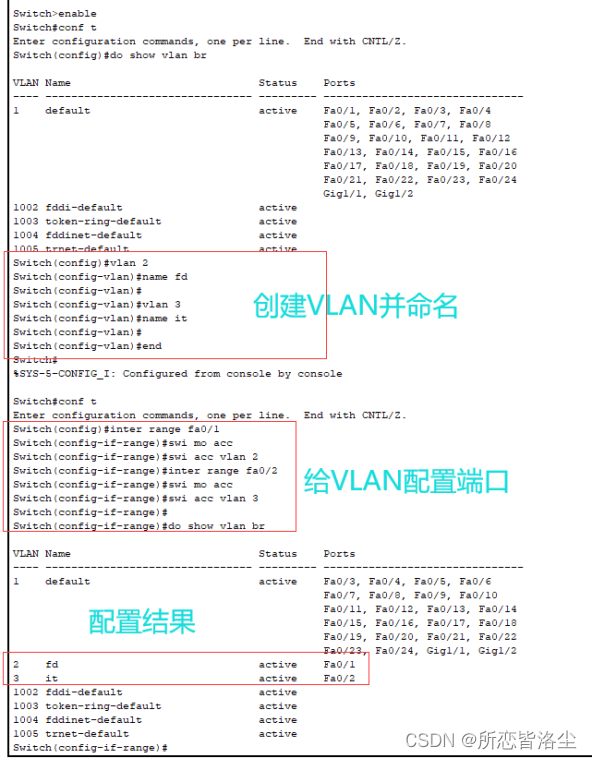
4.配置SW2
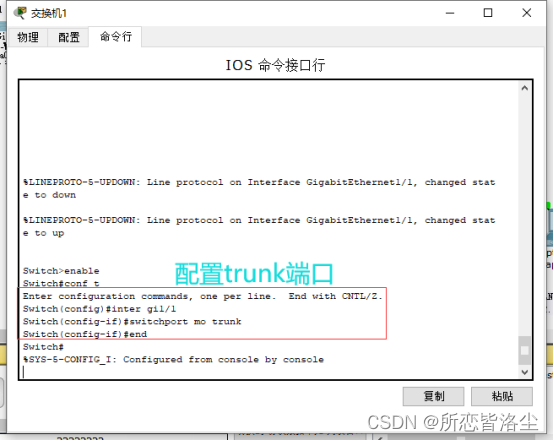
5.配置trunk端口(两个交换机都要配置)
这样不同交换机的相同vlan可以连接
6.流量控制
两个交换机都要进行配置
7.修改nativeVLAN为VLAN 90
两个交换机都要进行配置
SW1#conf t
Enter configuration commands, one per line. End with CNTL/Z.
SW1(config)#inter gi1/1
SW1(config-if)#switchport trunk native vlan 90
SW1(config-if)#end
SW1#
%CDP-4-NATIVE_VLAN_MISMATCH: Native VLAN mismatch discovered on GigabitEthernet1/1 (90), with Switch GigabitEthernet1/1 (1).
SW1#show inter trunk (查看trunk)
Port Mode Encapsulation Status Native vlan
Gig1/1 on 802.1q trunking 90
Port Vlans allowed on trunk
Gig1/1 1-1005
Port Vlans allowed and active in management domain
Gig1/1 1,2,3
Port Vlans in spanning tree forwarding state and not pruned
Gig1/1 1,2,3
SW1#


 3856
3856


 被折叠的 条评论
为什么被折叠?
被折叠的 条评论
为什么被折叠?
 到【灌水乐园】发言


