


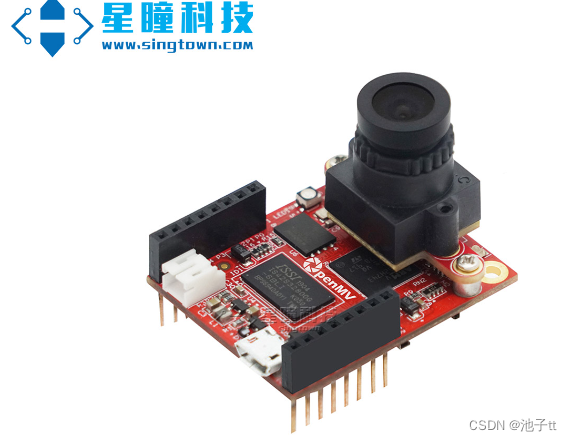
openmv是什么?:OpenMV摄像头是一款小巧,低功耗,低成本的电路板,它帮助你很轻松的完成机器视觉(machine vision)应用。你可以通过高级语言Python脚本(准确的说是 MicroPython ),而不是C/C++。Python的高级数据结构使你很容易在机器视觉算法中处理复杂的输出。但是,你仍然可以完全控制OpenMV。你可以很容易的使用外部终端触发拍摄或者或者执行算法,也可以把算法的结果用来控制IO引脚。
OpenMV摄像头的特点:
- STM32H743II ARM Cortex M7 处理器,480 MHz ,1MB RAM,2 MB flash. 所有的 I/O 引脚输出 3.3V 并且 5V 耐受。这个处理器有以下的IO接口。
- 全速 USB (12Mbs) 接口,连接到电脑。当插入OpenMV摄像头后,你的电脑会出现一个虚拟COM端口和一个“U盘”。
- μSD卡槽拥有100Mbs读写,这允许你的OpenMV摄像头录制视频,和把机器视觉的素材从SD卡提取出来。
- 一个SPI总线高达100Mbs速度,允许你简单的把图像流数据传给LCD扩展板,WiFi扩展板,或者其他控制器。
- 一个 I2C总线,CAN总线, 和2两个异步串口总线 (TX/RX) ,用来链接其他控制器或者传感器。
- 一个12-bit ADC 和一个12-bit DAC。
- 2个 I/O 引脚用于舵机控制.
- 所有的IO口都可以用于,中断和PWM(板子上有10个I/O引脚)。
- 一个RGB LED(三色), 两个高亮的 850nm IR LED(红外)。
- 32 MB 外置的 32-bit SDRAM ,100 MHz的时钟,达到 400 MB/s 的带宽。
- 32 MB 外置的 quadspi flash, 100 MHz的时钟,4-bit DDR模式达到 100 MB/s 的带宽。
-
可拆卸的摄像头模块系统,允许OpenMV Cam H7 Plus与不同的感光元件模组连接:
OpenMV4 H7 Plus默认配置的OV5640 感光元件处理2592×1944 (5MP)图像。在QVGA (320×240)及以下的分辨率时,大多数简单的算法可以运行(25~50)FPS。 - 3.7V 锂离子电池接口
1.我们先框出我们想要的区域再看界面进行调整
#识别区域
roi1 =     [(0, 17, 15, 25),        #  左  x y w h
            (65,17,15,25),# 右
            (30,0,20,15),#上
            (0,0,80,60)]#停车
2.之后用简单的if语句去判断进行判断是何路口
    f_x=0
    f_a=0
    if flag==0:
        if x<0:
            x=-x
            f_x=1
        if a<0:
            a=-a
            f_a=1

    if flag==1: #十字
        x,a,f_x,f_a=(0,0,0,1)
    if flag==2: #上左
        x,a,f_x,f_a=(0,0,1,0)
    if flag==3: #上右
        x,a,f_x,f_a=(0,0,1,1)
    if flag==4: #stop
        x,a,f_x,f_a=(1,1,1,2)
3.再while中调用函数来实现直线矫正和路口的判断走向和到点停止的指令发送。
 if (line):
        rho_err = abs(line.rho())-img.width()/2
        if line.theta()>90:
            theta_err = line.theta()-180
        else:
            theta_err = line.theta()
        #直角坐标调整
        img.draw_line(line.line(), color = 127)
        #画出直线
        #print(rho_err,line.magnitude(),rho_err)
        if line.magnitude()>8:
            #if -40<b_err<40 and -30<t_err<30:
            #rho_pid直线左右偏移的距离,theta_err角度偏移
            #rho_output = rho_pid.get_pid(rho_err,1)
            #theta_output = theta_pid.get_pid(theta_err,1)
            #output = rho_output+theta_output
            outdata=[rho_err,theta_err,0]
            print(outdata)
            outuart(rho_err,theta_err,0)
            if img.find_blobs([(96, 100, -13, 5, -11, 18)],roi=roi1[0]):  #left
                #print('left')
                left_flag=1
            if img.find_blobs([(96, 100, -13, 5, -11, 18)],roi=roi1[1]):  #right
                #print('right')
                right_flag=1
            if img.find_blobs([(96, 100, -13, 5, -11, 18)],roi=roi1[2]):  #up
                #print('up')
                up_flag=1
            #if not img.find_blobs([(96, 100, -13, 5, -11, 18)],roi=roi1[3]):  #stop
                ##print('up')
                #stop_flag=1
            if left_flag==1 and right_flag==1:
                outuart(0,0,1)
                #time.sleep_ms(5)
                print('shizi')
                continue
            if left_flag==1 and up_flag==1:
                outuart(0,0,2)
                print('up-left')
                continue
            if right_flag==1 and up_flag==1:
                outuart(0,0,3)
                print('up-right')
                continue
            #if stop_flag==1:
                #outuart(0,0,4)
                #print('stop')
                #continue


            #car.run(50+output, 50-output)
        else:
            #outuart(0,0,4)
            ##car.run(0,0)
            #print('stop')
            pass

    else:
        #car.run(50,-50)

        outuart(0,0,4)
        #if  not_stop==1:
            #time.sleep_ms(1000)
            #not_stop=0
        print('stop')
4.接下来就是串口的编写,与小车的主控来进行串口通讯。
    data = ustruct.pack("<bbhhhhb",      #格式为俩个字符俩个短整型(2字节)
                   0x2C,                      #帧头1
                   0x12,                      #帧头2
                   int(x), # up sample by 4   #数据1
                   int(a), # up sample by 4    #数据2
                   int(f_x), # up sample by 4    #数据1
                   int(f_a), # up sample by 4    #数据2
                   0x5B)
    if flag!=1:
        uart.write(data);  #必须要传入一个字节数组
    else:

        for x in range(50):
            uart.write(data);  #必须要传入一个字节数组
            time.sleep_ms(1)
主代码如下,比较简单的一个openmv巡线代码,可供参考,有误可直接评论。
THRESHOLD = (18, 61, 14, 89, -2, 63) # Grayscale threshold for dark things...
import sensor, image, time,ustruct
from pyb import UART,LED
#from pid import PID
#rho_pid = PID(p=0.4, i=0)
#theta_pid = PID(p=0.001, i=0)
import pyb
LED(1).on()
LED(2).on()
LED(3).on()

sensor.reset()
#sensor.set_vflip(True)
#sensor.set_hmirror(True)
sensor.set_pixformat(sensor.RGB565)
sensor.set_framesize(sensor.QQQVGA) # 80x60 (4,800 pixels) - O(N^2) max = 2,3040,000.
#sensor.set_windowing([0,20,80,40])
sensor.skip_frames(time = 2000)     # WARNING: If you use QQVGA it may take seconds
clock = time.clock()                # to process a frame sometimes.

uart = UART(3,115200)   #定义串口3变量
uart.init(115200, bits=8, parity=None, stop=1) # init with given parameters

#识别区域
roi1 =     [(0, 17, 15, 25),        #  左  x y w h
            (65,17,15,25),# 右
            (30,0,20,15),#上
            (0,0,80,60)]#停车


def outuart(x,a,flag):
    global uart;
    f_x=0
    f_a=0
    if flag==0:
        if x<0:
            x=-x
            f_x=1
        if a<0:
            a=-a
            f_a=1

    if flag==1: #十字
        x,a,f_x,f_a=(0,0,0,1)
    if flag==2: #上左
        x,a,f_x,f_a=(0,0,1,0)
    if flag==3: #上右
        x,a,f_x,f_a=(0,0,1,1)
    if flag==4: #stop
        x,a,f_x,f_a=(1,1,1,2)


    #frame=[0x2C,18,cx%0xff,int(cx/0xff),cy%0xff,int(cy/0xff),0x5B];
    #data = bytearray(frame)
    data = ustruct.pack("<bbhhhhb",      #格式为俩个字符俩个短整型(2字节)
                   0x2C,                      #帧头1
                   0x12,                      #帧头2
                   int(x), # up sample by 4   #数据1
                   int(a), # up sample by 4    #数据2
                   int(f_x), # up sample by 4    #数据1
                   int(f_a), # up sample by 4    #数据2
                   0x5B)
    if flag!=1:
        uart.write(data);  #必须要传入一个字节数组
    else:

        for x in range(50):
            uart.write(data);  #必须要传入一个字节数组
            time.sleep_ms(1)


p9_flag=0 #p9需检测从低变高
not_stop=0
while(True):
    clock.tick()
    img = sensor.snapshot().binary([THRESHOLD])
    line = img.get_regression([(100,100)], robust = True)
    left_flag,right_flag,up_flag=(0,0,0)
    for rec in roi1:
            img.draw_rectangle(rec, color=(255,0,0))#绘制出roi区域
    p = pyb.Pin("P9", pyb.Pin.IN)
    print(p.value())
    if p.value()==0:
        p9_flag=1
    if p.value()==1 and p9_flag==1:
        not_stop=1
        p9_flag=0


    if (line):
        rho_err = abs(line.rho())-img.width()/2
        if line.theta()>90:
            theta_err = line.theta()-180
        else:
            theta_err = line.theta()
        #直角坐标调整
        img.draw_line(line.line(), color = 127)
        #画出直线
        #print(rho_err,line.magnitude(),rho_err)
        if line.magnitude()>8:
            #if -40<b_err<40 and -30<t_err<30:
            #rho_pid直线左右偏移的距离,theta_err角度偏移
            #rho_output = rho_pid.get_pid(rho_err,1)
            #theta_output = theta_pid.get_pid(theta_err,1)
            #output = rho_output+theta_output
            outdata=[rho_err,theta_err,0]
            print(outdata)
            outuart(rho_err,theta_err,0)
            if img.find_blobs([(96, 100, -13, 5, -11, 18)],roi=roi1[0]):  #left
                #print('left')
                left_flag=1
            if img.find_blobs([(96, 100, -13, 5, -11, 18)],roi=roi1[1]):  #right
                #print('right')
                right_flag=1
            if img.find_blobs([(96, 100, -13, 5, -11, 18)],roi=roi1[2]):  #up
                #print('up')
                up_flag=1
            #if not img.find_blobs([(96, 100, -13, 5, -11, 18)],roi=roi1[3]):  #stop
                ##print('up')
                #stop_flag=1
            if left_flag==1 and right_flag==1:
                outuart(0,0,1)
                #time.sleep_ms(5)
                print('shizi')
                continue
            if left_flag==1 and up_flag==1:
                outuart(0,0,2)
                print('up-left')
                continue
            if right_flag==1 and up_flag==1:
                outuart(0,0,3)
                print('up-right')
                continue
            #if stop_flag==1:
                #outuart(0,0,4)
                #print('stop')
                #continue


            #car.run(50+output, 50-output)
        else:
            #outuart(0,0,4)
            ##car.run(0,0)
            #print('stop')
            pass

    else:
        #car.run(50,-50)

        outuart(0,0,4)
        #if  not_stop==1:
            #time.sleep_ms(1000)
            #not_stop=0
        print('stop')
    #print(clock.fps())


 3602
3602


 被折叠的 条评论
为什么被折叠?
被折叠的 条评论
为什么被折叠?
 到【灌水乐园】发言


