


一、k2代码安装步骤,详细步骤看这个链接的示例更好
Installation — icefall 0.1 documentation![]() https://k2-fsa.github.io/icefall/installation/index.html二、安装CUDA和cuDNN
https://k2-fsa.github.io/icefall/installation/index.html二、安装CUDA和cuDNN
CUDA安装方法参考:代码实践——准备阶段-CSDN博客
# 1.创建conda虚拟环境
conda create -n icefall python=3.8
conda activate icefall
# 2.安装CUDA 11.6,记得cd到专门放CUDA的文件夹里面去
# CUDA安装方法参考https://k2-fsa.github.io/k2/installation/cuda-cudnn.html#cuda-11-6
三、安装torch和torchaudio
pip install torch==1.13.0+cu116 torchaudio==0.13.0+cu116 -f https://download.pytorch.org/whl/torch_stable.html

# 验证安装
python -c "import torch; print(torch.__version__)"
#1.13.0+cu116
python -c "import torchaudio; print(torchaudio.__version__)"
#0.13.0+cu116
四、安装k2
# 从预编译的 wheel 安装 k2:https://k2-fsa.github.io/k2/installation/pre-compiled-cuda-wheels-linux/index.html
pip install k2==1.24.3.dev20230725+cuda11.6.torch1.13.0 -f https://k2-fsa.github.io/k2/cuda.html

# 验证安装
python -m k2.version
#Collecting environment information...

#k2 version: 1.24.3
#Build type: Release
#Git SHA1: 4c05309499a08454997adf500b56dcc629e35ae5
#Git date: Tue Jul 25 16:23:36 2023
#Cuda used to build k2: 11.6
#cuDNN used to build k2: 8.3.2
#Python version used to build k2: 3.8
#...(详细输出可以看一中链接示例)
五、安装lhotse
pip install git+https://github.com/lhotse-speech/lhotse

# 验证安装
python3 -c "import lhotse; print(lhotse.__version__)"
#1.16.0.dev+git.7640d66.clean
六、下载icefall并安装依赖
# 进入下载项目的地址
cd /home/chy524/project
# 克隆项目,我使用了镜像,只需要在/github.com前面加上gitclone.com就行
# 要是镜像源里面没有,可以在gitee中导入github的项目,然后克隆时将url改成gitee的地址
git clone https://gitclone.com/github.com/k2-fsa/icefall
# 进入刚刚下载的icefall文件夹
cd ./icefall
# 安装依赖
pip install -r requirements.txt
七、运行测试
因为使用亲爱的导儿的服务器需要通过sbatch进行提交,所以我写了一个run.sh脚本进行运行,便于运行和管理,run.sh脚本中的内容如下,自己租的服务器倒不用这样弄
#!/bin/bash
#SBATCH --partition=XJU
#SBATCH --nodelist=xju-aslp5
#SBATCH --gres=gpu:1
#SBATCH --output=/s6home/chy524/project/icefall/egs/yesno/ASR/icefall-prepare-%j.out

export PYTHONPATH=/s6home/chy524/project/icefall:$PYTHONPATH

# 输出 SLURM 分配的 GPU 信息
echo "SLURM_JOB_GPUS: ${SLURM_JOB_GPUS}"
# SLURM 会自动设置 CUDA_VISIBLE_DEVICES 环境变量
echo "CUDA_VISIBLE_DEVICES is ${CUDA_VISIBLE_DEVICES}"

# fix segmentation fault reported in https://github.com/k2-fsa/icefall/issues/674

bash ./prepare.sh
自己租的服务器应该是这样吧
# 数据准备
export PYTHONPATH=/s6home/chy524/project/icefall:$PYTHONPATH
cd egs/yesno/ASR
./prepare.sh
# 训练
 export CUDA_VISIBLE_DEVICES=0,1
 ./tdnn/train.py
# 解码
./tdnn/decode.py
八、Aishell训练
1、数据准备
cd egs/aishell/ASR
# 修改prepare.sh
# 将perturb_speed=false关闭数据增强
# dl_dir改为数据集存放地址
# aishell_lm可自行下载,放置在dl_dir/lm目录下
# 在prepare.sh中加入两行
# export PROTOCOL_BUFFERS_PYTHON_IMPLEMENTATION=python
# export PYTHONPATH=/s6home/chy524/project/icefall:$PYTHONPATH
bash ./prepare.sh
2、训练,像上面七、一样写一个run.sh,执行run.sh
#!/usr/bin/env bash
#SBATCH --gres=gpu:2
#SBATCH --output=/s6home/chy524/project/icefall/egs/aishell/ASR/conformer_ctc/k2-train-%j.out

# fix segmentation fault reported in https://github.com/k2-fsa/icefall/issues/674
export PROTOCOL_BUFFERS_PYTHON_IMPLEMENTATION=python
export PYTHONPATH=/s6home/chy524/project/icefall:$PYTHONPATH

python ./conformer_ctc/train.py --world-size 2 --num-epochs 50
3、在本机中使用tensorboard可视化
将conformer_ctc/exp/目录下tensorboard文件夹拉取到本机,进行可视化,在Windows自带的命令行中下载tensorboard工具
# 为tensorboard创建一个虚拟环境
conda create -n tensorboard python=3.9
conda activate tensorboard
# 下载tensorboard
pip install tensorboard
# 验证安装
tensorboard --version
# TensorFlow installation not found - running with reduced feature set.
# 2.17.0
4、在 Windows 上启动 TensorBoard,我的文件在D:\Temp\Download里
# 进入生成的日志所在目录
# Windows中,不同盘之间切换只需要打"盘符:",比如输入"d:"
(tensorboard) C:\Users\华为>d:\
(tensorboard) D:\>cd D:\Temp\Download
(tensorboard) D:\Temp\Download>tensorboard --logdir ./ --port 12598 --bind_all
# TensorFlow installation not found - running with reduced feature set.
# TensorBoard 2.17.0 at http://DESKTOP-LUSN03S:12598/ (Press CTRL+C to quit)
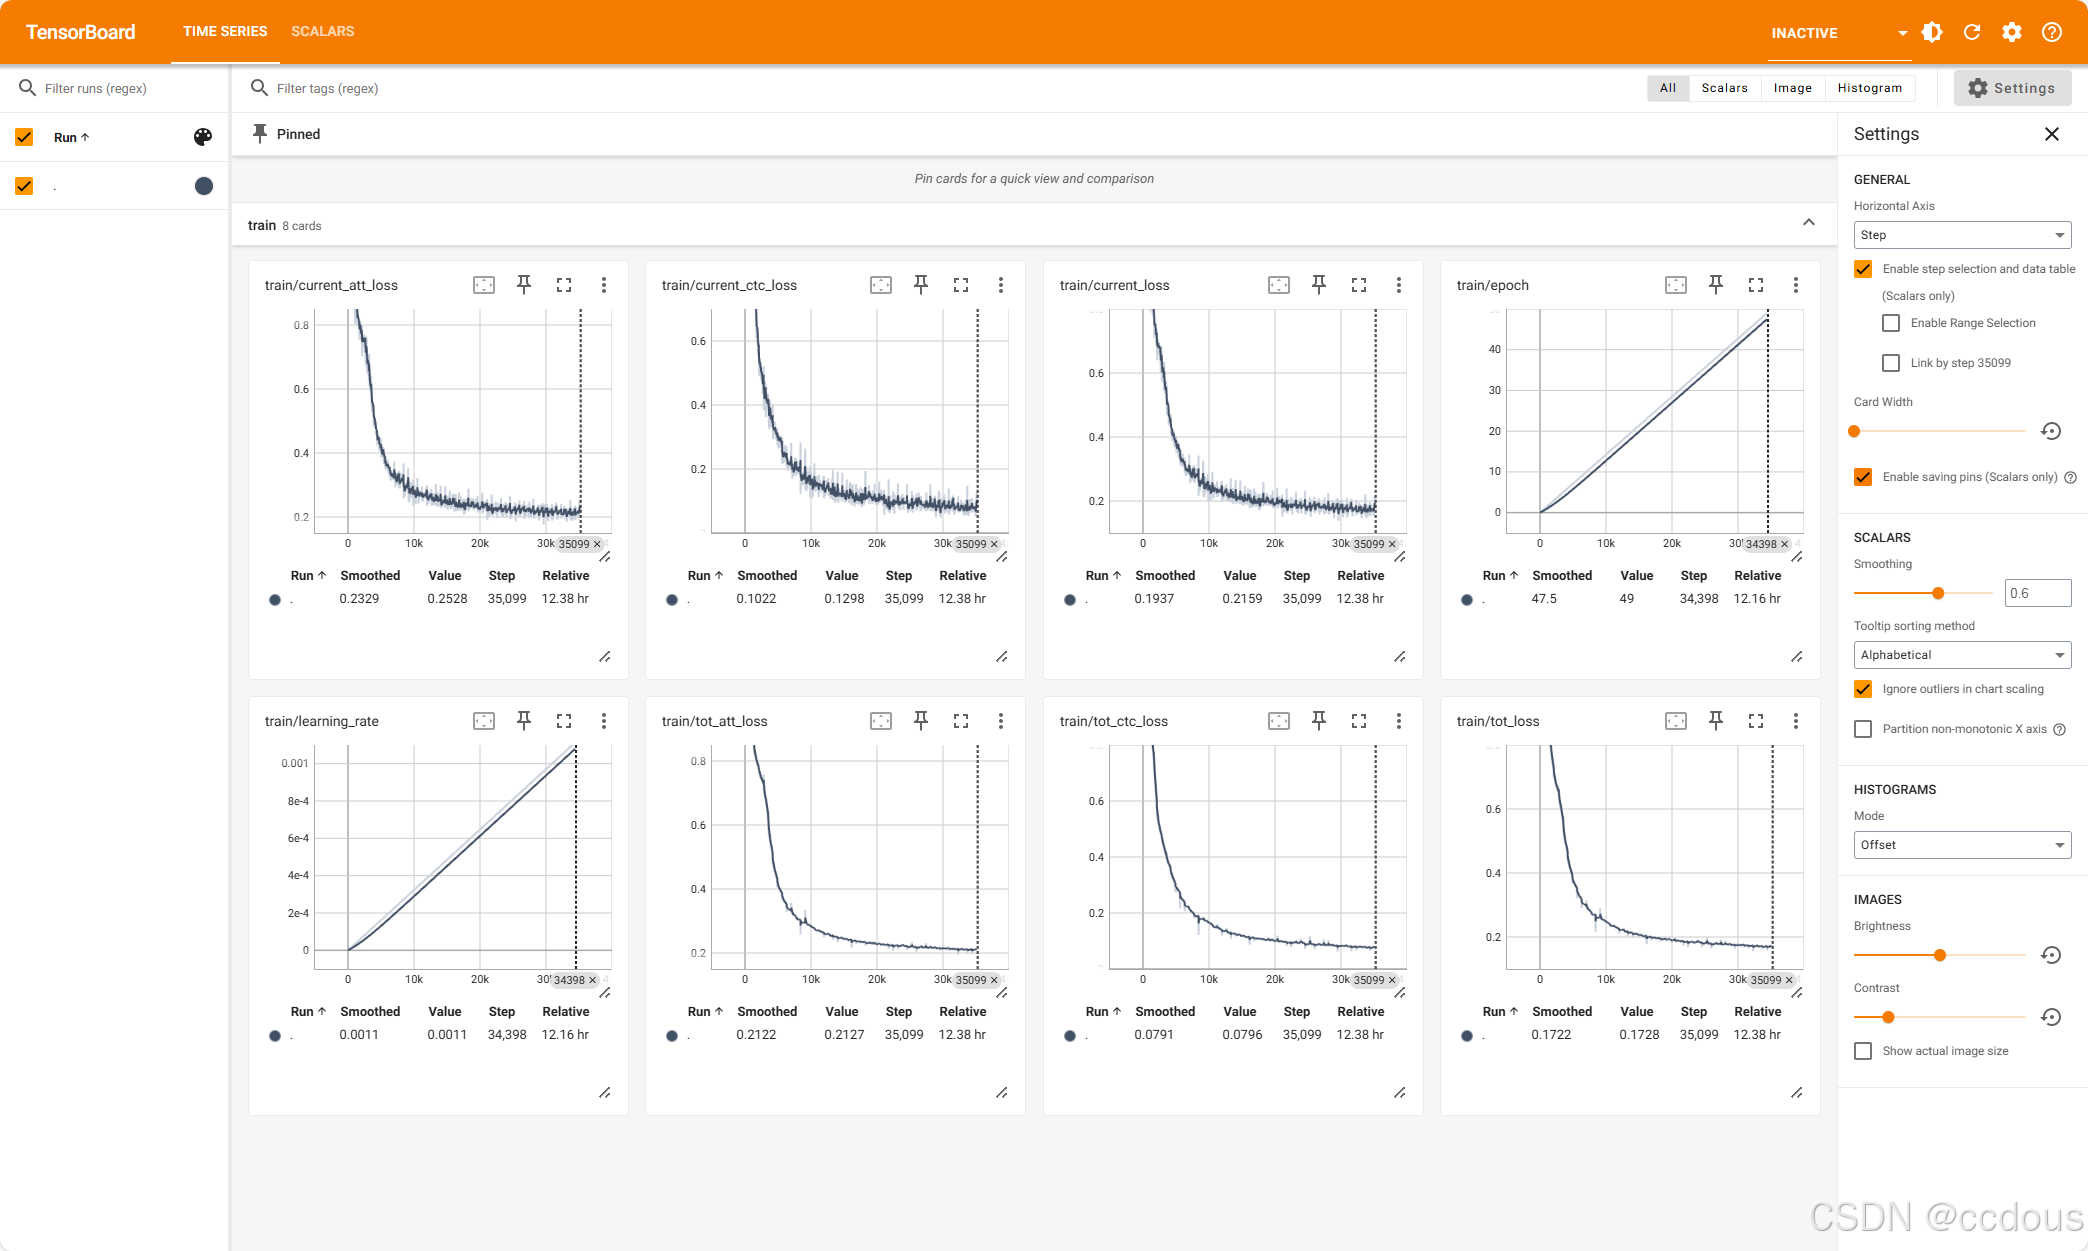
打开给出的链接得到可视化结果
5、解码
# 修改run.sh中日志文件配置
#SBATCH --output=/s6home/chy524/project/icefall/egs/yesno/ASR/icefall-prepare-%j.out

# 将run.sh最后一行的python执行修改为解码的代码
python ./conformer_ctc/decode.py --method attention-decoder --nbest-scale 0.5 --avg 5 --max-duration 60


 1492
1492

 被折叠的 条评论
为什么被折叠?
被折叠的 条评论
为什么被折叠?
 到【灌水乐园】发言


