


提示:本篇文章为学校项目实训的记录,所以可能会写的没头没尾的,不具有实际指导意义,因为是小组共同开发,所以不是自己负责的部分会在别的小组成员博客里。
前言
上次说到完成了活动打卡的一二级页面,现在进入下一个主题,个人中心。
一、个人中心
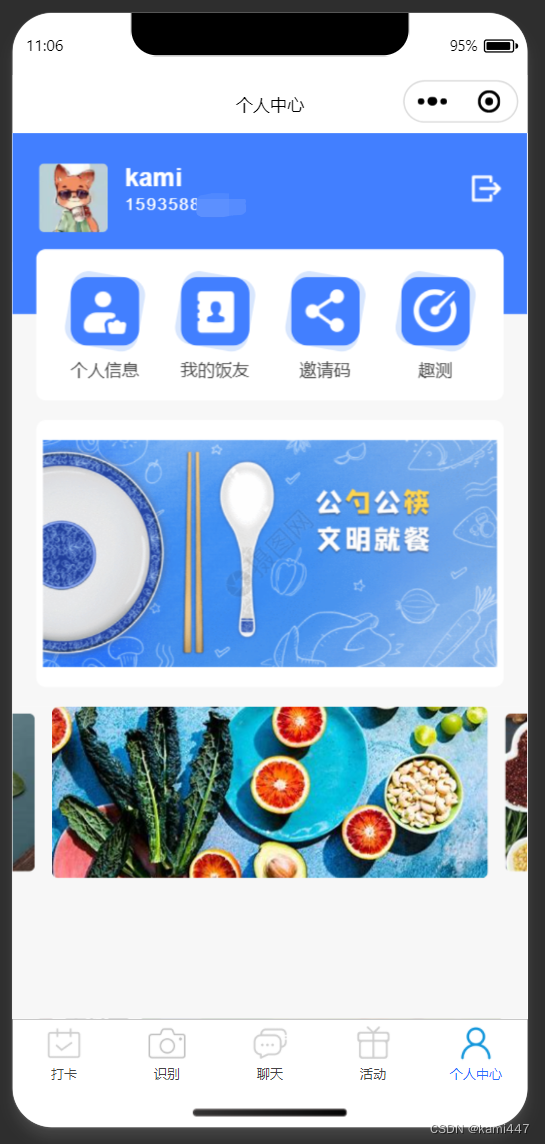
个人中心页面包含登录功能,登出功能,以及一个导航栏,包含个人信息、我的饭友、趣测页面的跳转和邀请码的生成。下方是渲染好的动图和轮播图,丰富画面。效果图如下
二、效果详述
1.个人中心顶部区域
若用户未注册/登录,则显示注册/登录

若用户已经登录,则显示区域如下,右侧为登出键:

前端template代码如下,
<!-- 顶部注册登录/用户名显示区域 -->
		<view class="top-container">
			<u-avatar :src="user.avatar || ''" shape="square" size="52"></u-avatar>
			<view class="info">
				<!-- 给<view>标签设置open-type="getUserInfo"属性非常必要。 -->
				<!-- 因为该标签绑定了点击事件,当我们点击标签的时候,微信会弹出授权弹窗。 -->
				<!-- 如果用户同意授权,我们就能用JS语句获取到用户的微信资料和临时授权码。 -->
				<!-- 毕竟我们注册新用户的时候需要用到微信昵称、头像和性别。 -->
				<!-- 小程序中的点击事件叫tap -->
				<view v-if="flag == 'logout'" open-type="getUserInfo" @tap="loginOrRegister">
					<text class="operate">注册 / 登陆</text>
					<text class="remark">请登陆膳逸小程序</text>
				</view>
				<view v-if="flag == 'login'">
					<text class="username">{{ user.username }}</text>
					<text class="phone">{{ user.phone != null ? user.phone : '未绑定手机(需完善个人信息)' }}</text>
				</view>
			</view>
			<view v-if="flag == 'login'" @tap="confirmLogout" class="dengchu">
                <image src="/static/icon/登出.png" style="width: 22px; height: 22px;" />
            </view>
		</view>
script代码:
		loginOrRegister: function() {
			let that = this;
			// console.log('loginOrRegister');
			// console.log(that.api.loginOrRegister);

			// 获取微信用户的临时授权码
			// 调用uni中的内置方法login,传入provider和success回调函数
			// resp中的code就是临时授权码
			uni.login({
				provider: 'weixin',
				success: function(resp) {
					// console.log(resp.code);
					that.code = resp.code;
				}
			});

			// console.log("a");

			// 获取微信用户的资料,用于注册
			uni.getUserProfile({
				desc: '获取用户信息',
				success: function(resp) {
					// console.log("b");
					let info = resp.userInfo;
					let nickName = info.nickName;
					let avatar = info.avatarUrl;
					let sex = info.gender == 0 ? '男' : '女';
					let data = {
						code: that.code,
						nickName,
						avatar,
						sex
					};
					// console.log(data);

					// console.log(that);

					// 提交Ajax请求,执行登录或注册
					that.ajax(that.api.loginOrRegister, 'POST', data, function(resp) {
						console.log('登录的返回信息',data)
						// console.log(that.api.loginOrRegister);
						let msg = resp.data.msg;
						// console.log(that);
						// console.log(that.$refs);
						that.$refs.uToast.show({
							message: msg,
							type: 'success',
							duration: 1200,
							complete: function() {
								// console.log("c");

								let token = resp.data.token;
								let userId = resp.data.userId;
								// 把Token保存到本地存储Storage中
								uni.setStorageSync('token', token);
								uni.setStorageSync('userId', userId);
								// 更新页面标志位变量
								that.flag = 'login';
								// 更新用户信息
								that.user.username = nickName;
								that.user.avatar = avatar;
								// 如果用户创建了个人信息,就把电话显示在页面上
								if (resp.data.hasOwnProperty('phone')) {
									that.user.phone = resp.data.phone;
								}
								// console.log(resp.data);
								that.ajax(that.api.searchUserInfo, 'GET', {}, function(resp) {
									let data = resp.data;
									if (data.msg == '没有查询到数据') {
										uni.showToast({
											title: '请进入个人信息页面维护自己的信息',
											icon: 'none',
											duration: 3000
										});
										return;
									}
								}, false);
							}
						});
					});

					// console.log("d");

				}
			});
		},
		confirmLogout() {
            uni.showModal({
                title: '确认登出',
                content: '确定要登出吗?',
                success: (res) => {
                    if (res.confirm) {
                        this.logout();
                    }
                }
            });
        },
        // 登出
        logout() {
            uni.clearStorageSync();
            uni.reLaunch({
                url: '/pages/mine/mine'
            });
        }
2.导航栏界面详述
导航栏部分的template代码如下:
<!-- 导航栏 -->
		<view class="navigator-container">
			<!-- @click="navigatorHandle"为导航栏(其实只要是跳转到别的页面的按钮,都绑定这个通用的)点击事件回调函数 -->
			<u-grid :border="false" col="4" @click="navigatorHandle">
				<u-grid-item name="个人信息">
					<view class="navigator-icon"><view class="navigator-icon-1" /></view>
					<text class="title">个人信息</text>
				</u-grid-item>
				<u-grid-item name="我的饭友">
					<view class="navigator-icon"><view class="navigator-icon-2" /></view>
					<text class="title">我的饭友</text>
				</u-grid-item>
				<u-grid-item name="邀请码">
					<view class="navigator-icon"><view class="navigator-icon-3" /></view>
					<text class="title">邀请码</text>
				</u-grid-item>
				<u-grid-item name="趣测">
					<view class="navigator-icon"><view class="navigator-icon-4" /></view>
					<text class="title">趣测</text>
				</u-grid-item>
			</u-grid>
		</view>
当用户未登录时,点击导航栏无响应,提示登录。当用户登录后,导航栏的四个图标分别有各自的作用。
		// 导航栏点击事件
		navigatorHandle: function(name) {
			console.log('调用导航栏')
			let token = uni.getStorageSync('token');
			console.log(token);
			// 跳转到别的页面之前,先判断一下用户是否登录
			if (token == null || token.length == 0) {
				uni.showToast({
					icon: 'error',
					title: '请先登录'
				});
				return;
			}

			// 跳转到别的页面
			let url = null;
			if(name == "个人信息"){
				url = '/user/fill_user_info/fill_user_info';
			}
			if(name == "我的饭友"){
				url = '/user/my_follow_list/my_follow_list';
			}
			if(name == "邀请码"){
				this.getMyCode();
			}
			if(name == "趣测"){
				//这里到时候填转移的页面
				url = '/pages/test/test';
			}
			// TODO: 其他判断条件


			uni.navigateTo({
				url
			});
		},
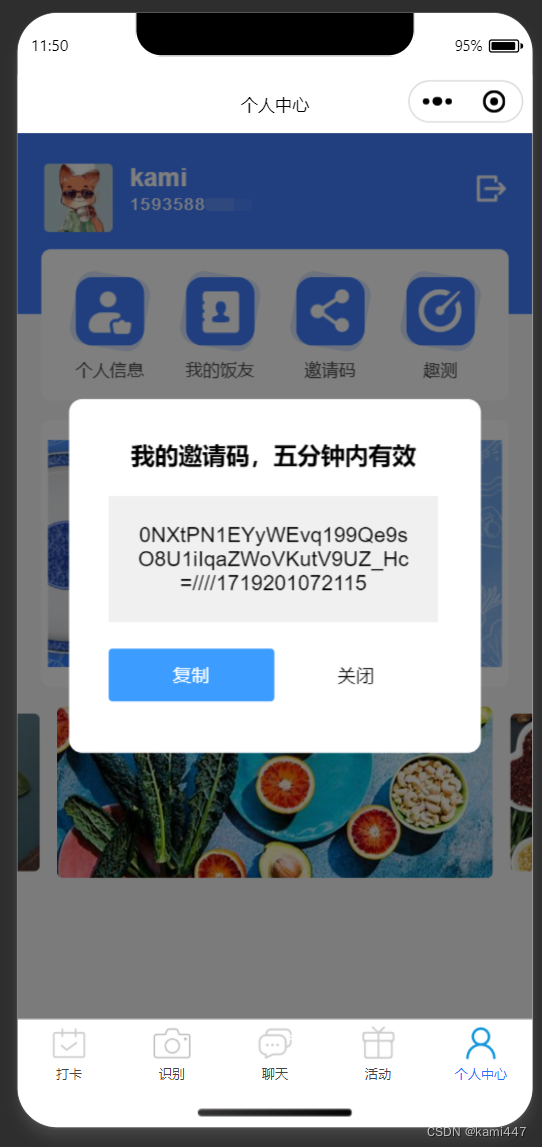
3.获取邀请码
点击导航栏的邀请码按钮,会弹窗显示我的邀请码,可以直接点击复制按钮进行复制。效果图如下:
script代码如下:
		getMyCode() {
		    let that = this;
		    let userIdStore = uni.getStorageSync('userId');
		    let data = {
		        userId: userIdStore
		    };
		    that.ajax(that.api.getMyCode, 'POST', data, function(resp) {
		        if (resp.data.code === 200) {
		            that.invitedCode = resp.data.result;
		            that.showCodePopup = true;
		        } else {
		            uni.showToast({
		                icon: 'error',
		                title: resp.data.msg || '获取邀请码失败'
		            });
		        }
		    });
		},
		hideCodePopup() {
		    this.showCodePopup = false;
		},
		copyCode() {
		    let that = this;
		    uni.setClipboardData({
		        data: that.invitedCode,
		        success() {
		            uni.showToast({
		                icon: 'success',
		                title: '已复制到粘贴板,5分钟内有效'
		            });
		        }
		    });
		},
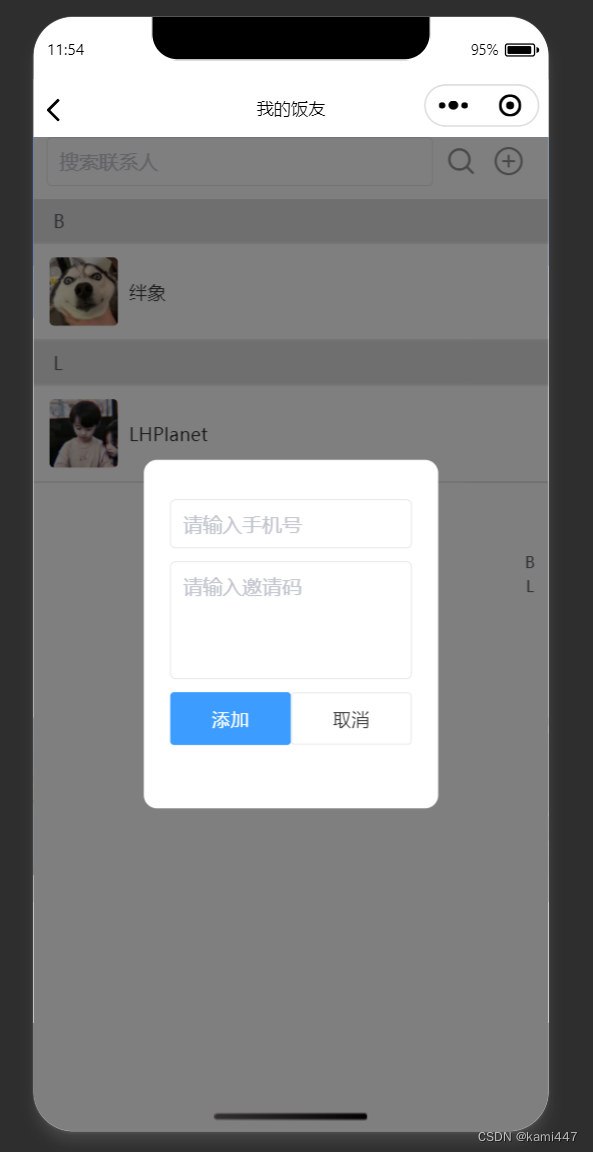
这里再把之前我的饭友页面的添加饭友部分讲一下,以实现联动,点击我的饭友列表右上角的加号,即可出现弹窗,输入微信登录的电话号和邀请码后即可添加新的联系人。效果图如下:
前端template代码如下
		<!-- 添加联系人弹窗 -->
        <u-popup :show="showAddContactPopup" :customStyle="{ 'max-width': '80%','height': '35%' }" mode="center" :round="10">
            <view class="add-contact-popup">
                <view class="input-container">
                    <u-input v-model="newContact.phone" placeholder="请输入手机号"></u-input>
                </view>
                <view class="input-container">
                    <u-textarea v-model="newContact.invitedCode" placeholder="请输入邀请码"></u-textarea>
                </view>
                <view class="input-container">
                    <u-row>
                        <u-button type="primary" @click="addContact">添加</u-button>
                        <u-button type="info" @click="hideAddContactPopup">取消</u-button>
                    </u-row>
                </view>
            </view>
        </u-popup>
总结
这次开发的难度核心主要在于逻辑层面,包括登录,权限的控制,除此之外页面的渲染也是需要付出较大精力的。


 被折叠的 条评论
为什么被折叠?
被折叠的 条评论
为什么被折叠?
 到【灌水乐园】发言


