


1.学会在控制台打印Hello World
使用console.log()
console.log('Hello World');
console.log('Hello','World');

//默认代码
@Entry
@Component
struct Index {
  @State message: string = 'Hello World';

  build() {
    Row() {
      Column() {
        Text(this.message)
          .fontSize(50)
          .fontWeight(FontWeight.Bold)
      }
      .width('100%')
    }
    .height('100%')
  }
}
2.存储数据(变量、常量)
常量:存储不可变的数据
使用 const 定义常量
const PI:number = 3.14
console.log('PI',PI)

@Entry
@Component
struct Index {
  @State message: string = 'Hello World';

  build() {
    Row() {
      Column() {
        Text(this.message)
          .fontSize(50)
          .fontWeight(FontWeight.Bold)
      }
      .width('100%')
    }
    .height('100%')
  }
}
变量:存储可变的数据
使用 let 定义变量
let myUniversity:String = '清华'
console.log('myUniversity',myUniversity)
myUniversity = '北大'
console.log('myUniversity',myUniversity)

@Entry
@Component
struct Index {
  @State message: string = 'Hello World';

  build() {
    Row() {
      Column() {
        Text(this.message)
          .fontSize(50)
          .fontWeight(FontWeight.Bold)
      }
      .width('100%')
    }
    .height('100%')
  }
}
3. 数组
数组是一个容器,可以容纳多个数据
使用的方式: let 数组名: 类型[ ] = [ 数据1 , 数据2, ... ]
数组的下标索引是从0开始的
let poet:String[]= ['李白','杜甫','辛弃疾']
console.log('poet',poet)

console.log('数组第三位:',poet[2])

@Entry
@Component
struct Index {
  @State message: string = 'Hello World';

  build() {
    Row() {
      Column() {
        Text(this.message)
          .fontSize(50)
          .fontWeight(FontWeight.Bold)
      }
      .width('100%')
    }
    .height('100%')
  }
}
4.函数
4.1 无参函数
定义函数
定义函数方式:
function 函数名(){
函数体
}
调用函数
调用函数方式: 函数名()
function hello(){
  console.log('Hello World 1')
  console.log('Hello World 2')
  console.log('Hello World 3')
}

hello();

@Entry
@Component
struct Index {
  @State message: string = 'Hello World';

  build() {
    Row() {
      Column() {
        Text(this.message)
          .fontSize(50)
          .fontWeight(FontWeight.Bold)
      }
      .width('100%')
    }
    .height('100%')
  }
}
4.2 有参函数
定义函数
定义函数方式:
function 函数名(形参1:类型,形参2:类型,...){
编写代码对数据进行处理
return 处理后的结果
}
调用函数
调用函数方式: 函数名(实参1:类型,实参2:类型,...)
function sum(number1:number,number2:number){
  let total = number1 + number2
  return total
}

let total = sum(2,3)
console.log('total',total)


@Entry
@Component
struct Index {
  @State message: string = 'Hello World';

  build() {
    Row() {
      Column() {
        Text(this.message)
          .fontSize(50)
          .fontWeight(FontWeight.Bold)
      }
      .width('100%')
    }
    .height('100%')
  }
}
5. 箭头函数
箭头函数比普通函数更简洁的一种函数写法
5.1 无参箭头函数
定义方式:
let 函数名 = () => {
函数体
}
调用方式:
函数名()
let hello = ()=>{
  console.log('Hello World 1')
  console.log('Hello World 2')
  console.log('Hello World 3')
}
hello()


@Entry
@Component
struct Index {
  @State message: string = 'Hello World';

  build() {
    Row() {
      Column() {
        Text(this.message)
          .fontSize(50)
          .fontWeight(FontWeight.Bold)
      }
      .width('100%')
    }
    .height('100%')
  }
}
5.2 有参箭头函数
定义方式:
let 函数名 = (形参1:类型,形参2:类型,...) =>{
编写代码对数据进行处理
return 处理后的结果
}
调用方式:
函数名(实参1,实参2)
let sum = (number1:number,number2:number)=>{
  let total = number1 + number2
  return total
}

let total = sum(2,3)
console.log('total',total)


@Entry
@Component
struct Index {
  @State message: string = 'Hello World';

  build() {
    Row() {
      Column() {
        Text(this.message)
          .fontSize(50)
          .fontWeight(FontWeight.Bold)
      }
      .width('100%')
    }
    .height('100%')
  }
}
6.接口 和 对象
6.1 对象
作用:用于描述一个物体的特征和行为
对象:是一个可以存储多个数据的容器
注意:数组是同一类型的数据,而对象可以存储不同类型的数据
6.2接口
通过 interface 接口约定 对象结构类型
interface 接口名 {
属性1:类型1
属性2:类型2
属性3:类型3
}
interface Student{
  name:string
  age:number
  university:string
}

let zhangsan:Student = {
  name:'张三',
  age:18,
  university:'清华'
}

console.log('姓名:',zhangsan.name)
console.log('年龄:',zhangsan.age)
console.log('学校:',zhangsan.university)
@Entry
@Component
struct Index {
  @State message: string = 'Hello World';

  build() {
    Row() {
      Column() {
        Text(this.message)
          .fontSize(50)
          .fontWeight(FontWeight.Bold)
      }
      .width('100%')
    }
    .height('100%')
  }
}
7.对象方法
方法的作用:描述对象的具体行为
方法的类型:
interface 接口名称{
方法名: (参数:类型) => 返回类型
}
interface Student{
write:() => void
read:(book:string) => void
}
添加方法使用箭头函数,示例:
interface Student{
  write:() => void
  read:(book:string) => void
}

let zhangsan:Student = {
  write:()=>{
    console.log('写作业')
  },
  read:(book:string) => {
   console.log('我正在阅读',book)
  }
}
zhangsan.write()
zhangsan.read('平凡的世界')


@Entry
@Component
struct Index {
  @State message: string = 'Hello World';

  build() {
    Row() {
      Column() {
        Text(this.message)
          .fontSize(50)
          .fontWeight(FontWeight.Bold)
      }
      .width('100%')
    }
    .height('100%')
  }
}
8. 联合类型
联合类型是一种灵活的数据类型,它修饰的变量可以存储不同类型的数据。
语法: let 变量:类型1 | 类型2 | 类型3 = 值
let grade:number | string = 100
console.log('分数',grade)
grade = 'A'
console.log('分数',grade)


@Entry
@Component
struct Index {
  @State message: string = 'Hello World';

  build() {
    Row() {
      Column() {
        Text(this.message)
          .fontSize(50)
          .fontWeight(FontWeight.Bold)
      }
      .width('100%')
    }
    .height('100%')
  }
}
联合类型对变量的值进行一组数据范围内进行选择
例如:性别为:男、女、保密
let gender:'man' | 'woman' | 'secret' = 'man'
console.log('gender:',gender)

@Entry
@Component
struct Index {
  @State message: string = 'Hello World';

  build() {
    Row() {
      Column() {
        Text(this.message)
          .fontSize(50)
          .fontWeight(FontWeight.Bold)
      }
      .width('100%')
    }
    .height('100%')
  }
}
9.枚举类型
枚举类型是一种特殊的数据类型,约定变量只能在一组数据范围内选择值。
虽然联合类型也能约定变量只能在一组数据范围内选择值,但是联合类型只是值约定,而枚举是变量与值都进行约定。
语法:
enum 枚举名{
常量1 = 值,
常量2 = 值,
......
}
enum ThemeColor{
  Red = '#fb123f',
  Orange = '#f7b078',
  Green = '#64e14e'
}

let color:ThemeColor = ThemeColor.Red
console.log(color)

@Entry
@Component
struct Index {
  @State message: string = 'Hello World';

  build() {
    Row() {
      Column() {
        Text(this.message)
          .fontSize(50)
          .fontWeight(FontWeight.Bold)
      }
      .width('100%')
    }
    .height('100%')
  }
}
10.类型转换
(1)字符串转数字
- Number(变量) 转换为number类型的变量
- parseInt(变量) 转换为去掉小数点后部分(取整)
- parseInt(变量) 保留小数部分
(2)数字转字符串
- toString():数字直接转字符串
- toFixed():四舍五入转字符串
11.赋值运算符
| 赋值运算符 | 作用 |
| += | 加法赋值 |
| -= | 减法赋值 |
| *= | 乘法赋值 |
| /= | 除法赋值 |
| %= | 取余赋值 |
12.一元运算符
i是赋值的变量
| 一元运算符 | 作用 |
| i++ | 先赋值后自增 |
| ++i | 先自增后赋值 |
| i-- | 先赋值后自减 |
| --i | 先自减后赋值 |
13.比较运算符
作用:判断比较两个数据的大小,返回布尔类型
| 比较运算符 | 作用 |
| > | 判断大于 |
| >= | 判断大于等于 |
| < | 判断小于 |
| <= | 判断小于等于 |
| == | 等于 |
| != | 不等于 |
14.逻辑运算符
| 逻辑运算符 | 作用 |
| && | 与(全部为真则为真) |
| || | 或(一个为真则为真) |
| ! | 非(取反) |
15.数组操作
查找:数组名[下标]
修改:数组名[下标] = 新值
数组长度:数组名.length
添加数组元素:
- 往开头添加:数组名.unshift(数据1,数据2,数据3,......)
- 往结尾添加:数组名.push(数据1,数据2,数据3,......)
删除数组元素:
- 往开头删除:数组名.shift()
- 往结尾删除:数组名.pop()
任意位置的添加/删除数组元素:
语法:数组名.splice(起始位置,删除的个数,新增元素1,新增元素2,......)
16.条件判断分支
if、if-else、switch
17.循环语句
while、for
18.遍历循环
使用 for 循环遍历数组
语法:
for(let i = 0 ;i<nums.length;i++){
}
使用 for...of 遍历数组
for(let item of nums){
}
示例:
let poets:string[] = ['李白','杜甫','白居易']

for(let i = 0;i<poets.length;i++){
 console.log('诗人1:'+poets[i])
}

for(let item of poets){
 console.log('诗人2:'+item)
}

@Entry
@Component
struct Index {

 build(){

 }
}
19.对象数组
示例:
interface Student{
 name:string
 age:number
 university:string
}

let student:Student[]=[
  {name:'张三',age:11,university:'清华'},
 {name:'李四',age:12,university:'北大'}
]
console.log('学生数组',JSON.stringify(student))
使用JSON.stringify(数组) 来打印数组
20.Class类
(1)Class类的基本使用
语法:
Class 类名{
字段名1:类型='xxx' //必须加上初始值
字段名2?:类型 //可选字段在字段名后加上问号,可以不设置初始值
}
//可选字段在使用时需要可选链操作符,避免出错
const 对象 = new 类名()
对象.字段 = 'xxx' //给对象的字段赋值
示例代码:
class Student{
  name?:string
  age?:number
  university?:string
}

const stu = new Student()
stu.name = '小明'
stu.age = 17
stu.university = '清华大学'
console.log('姓名:'+stu.name)
console.log('年龄:'+stu.age)
console.log('大学:'+stu.university)

@Entry
@Component
struct Index {

  build(){

  }
}
(2)Class类-构造函数
语法:
class 类{
字段1:类型
字段2:类型
constructor(参数...){
this.字段1 = 参数
}
}
const 对象 = new 类(参数...)
示例一:入门实例
示例代码:
class Student{
name:string
age:number
university:string
constructor(name:string,age:number,university?:string){
this.name = name
this.age = age
this.university = university
}
}
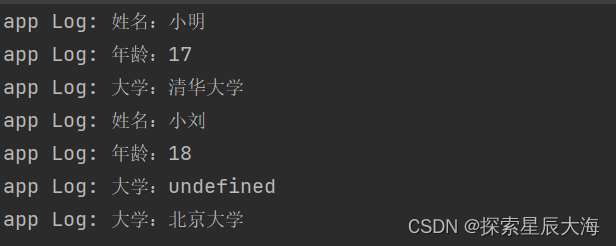
const stu = new Student("小明",17,"清华大学")
console.log('姓名:'+stu.name)
console.log('年龄:'+stu.age)
console.log('大学:'+stu.university)
const stu2 = new Student("小刘",18)
console.log('姓名:'+stu2.name)
console.log('年龄:'+stu2.age)
console.log('大学:'+stu2.university)
stu2.university = '北京大学'
console.log('大学:'+stu2.university)
@Entry
@Component
struct Index {
build(){
}
}示例代码运行结果:
示例二:对于复杂的参数类型,考虑到使用接口的情况:
示例代码:
interface ICourse{
  name:string
  teacher:string
}

class Student{
  name:string
  age:number
  university:string
  course:ICourse[]

  constructor(name:string,age:number,university:string,course:ICourse[]){
    this.name = name
    this.age = age
    this.university = university
    this.course = course
  }

}

const stu = new Student("小明",17,"清华大学",[{name:'英语',teacher:'陈老师'},{name:'数学',teacher:'李老师'}])

console.log('姓名:'+stu.name)
console.log('年龄:'+stu.age)
console.log('大学:'+stu.university)
console.log('课程:'+JSON.stringify(stu.course))

@Entry
@Component
struct Index {

  build(){

  }
}
示例运行结果:

(3)Class类-方法
语法:
class 类{
字段1:类型
字段2:类型
constructor(参数...){
this.字段1 = 参数
}
方法名(参数...){
//可以使用 this 访问创建出来的实例对象
}
}
示例代码:
interface ICourse{
  name:string
  teacher:string
}

class Student{
  name:string
  age:number
  university:string
  course:ICourse[]

  constructor(name:string,age:number,university:string,course:ICourse[]){
    this.name = name
    this.age = age
    this.university = university
    this.course = course
  }

  myCourse(name:string){
    console.log(`Hello:${name},我的大学是:${this.university}`)
  }

}

const stu = new Student("小明",17,"清华大学",[{name:'英语',teacher:'陈老师'},{name:'数学',teacher:'李老师'}])

console.log('姓名:'+stu.name)
console.log('年龄:'+stu.age)
console.log('大学:'+stu.university)
console.log('课程:'+JSON.stringify(stu.course))
stu.myCourse('小刘')

@Entry
@Component
struct Index {

  build(){

  }
}
示例运行结果:

(4)Class类的静态属性和方法
语法:
class 类{
static 字段名:类型 = 'xxx' //不过不设置,则默认为undefined
static 方法名(){
}
}
直接可以通过类名.的方式使用
- 类.字段名
- 类.方法名
(5)Class类-extend和super关键字
extend的用于继承父类
super用于调用父类的方法
(6)Class类- instanceof和typeof用于判断类的类型
instanceof语法:实例对象 instanceof 类 //判断实例对象是否属于该类,返回布尔类型
typeof语法:typeof 实例对象 //返回该实例的类型,仅能判断简单的类型
(7)Class类-修饰符
类的方法和属性都可以使用修饰符来限定访问
修饰符包括:readonly、private、protected、public,省略则默认为public
readonly:使用readonly是只能取值,无法修改
private :类内部访问
protected:类以及子类可访问
public:任何都可以访问该类
21 剩余参数和展开运算符
剩余参数语法:
//剩余参数只能写在最后一位
function 函数名(参数1,参数2,..剩余参数数组){
//剩余的参数以数组的方式获取
}
展开运算符语法:(合并数组)
const Array1:number[] = [1,2,3,4]
const Array2:number[] = [5,6,7,8]
//合并结果
const Array:number[] = [...Array1,...Array2]
22.泛型
(1)泛型函数
语法:
function 函数名<Type>(形参:Type):Type{
return 形参
}
示例代码:
function fn<T> (param:T):T{
  console.log('param:'+param)
  return param
}

fn<string>('abc')
fn<number>(123)
fn<boolean>(true)
fn<number[]>([1,2,3,4])

//也可以不写指定的传参类型,会根据类型进行推盘,动态配置类型参数的值
fn('abc')
fn(123)
fn(true)
fn([1,2,3,4])


@Entry
@Component
struct Index {
  build(){

  }
}
(2)泛型约束
通过继承接口的方式,设置传递来的参数必须是有该接口属性的对象才行
示例代码:
interface Person{
  name:string,
  age:number
}

function fn<T extends Person> (param:T){
  console.log('param:'+param)
  return param
}

class Student{
  name:string
  age:number
  university:string
}
const stu = new Student()

fn(stu)


@Entry
@Component
struct Index {
  build(){

  }
}
(3)泛型接口
语法:
interface 接口<Type>{
//内部使用Type
}
示例:
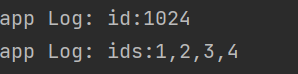
interface IdFunc<Type>{
  id:(value:Type)=>Type
  ids:()=>Type[]
}

let obj:IdFunc<number> = {
  id(value){return value},
  ids(){return [1,2,3,4]}
}

console.log('id:'+obj.id(1024))
console.log('ids:'+obj.ids())

@Entry
@Component
struct Index {
  build(){

  }
}
运行结果:
(4)泛型类
语法:
class 类名<Type>{
//内部使用Type
}
示例:
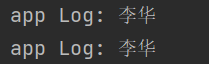
class Person<T>{
  name:T

  constructor(name:T) {
    this.name = name
  }
  getName():T{
    return this.name
  }
}

let person  = new Person('李华')
console.log(person.name)
console.log(person.getName())
@Entry
@Component
struct Index {
  build(){

  }
}
运行结果:
23.模块化语法
(1)导出和导入
默认导出:export default 需要导出的内容
默认导入:import xxx from '模块路径'
实操:
在ets中创建目录tools存放模块
然后创建ArkTS File模块,名为module1.ets
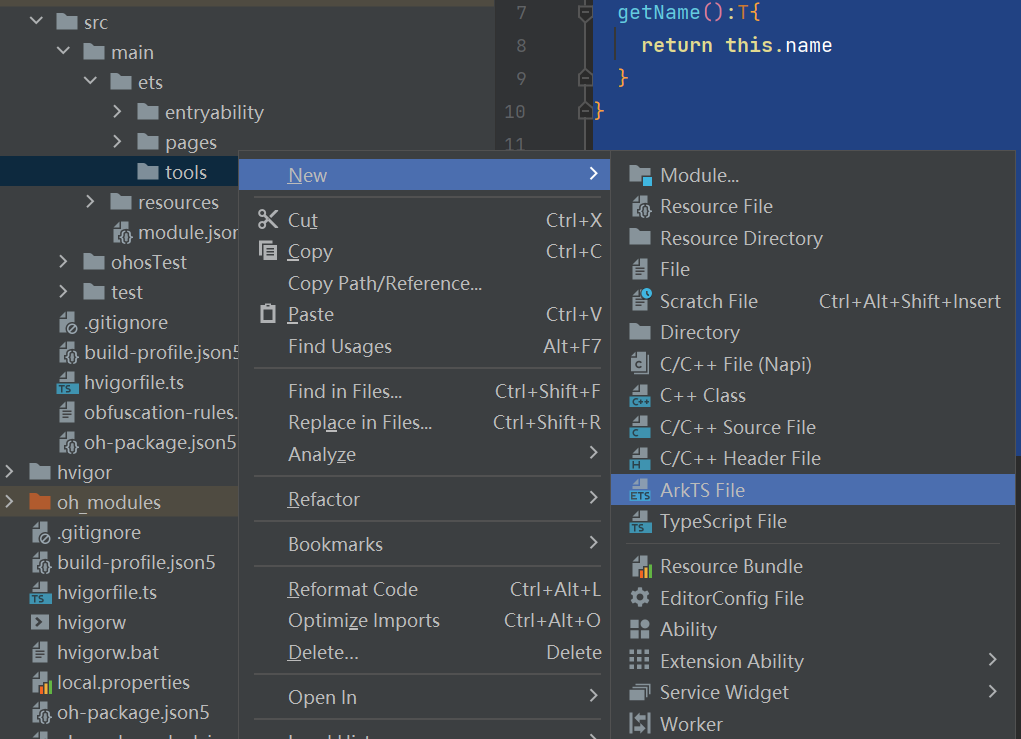
module1.ets的代码:
(2)多个特性导入和导出
导出:export {xxx,xxx, ... ,xxx}
导入:import {xxx,xxx,xxx as 别名} from '模块路径'
(3)导入该模块全部特性
导入:import * as 别名 from '模块路径'


 1万+
1万+

 被折叠的 条评论
为什么被折叠?
被折叠的 条评论
为什么被折叠?
 到【灌水乐园】发言


