


标准项模型
一.使用标准型项模型
1.应用场景
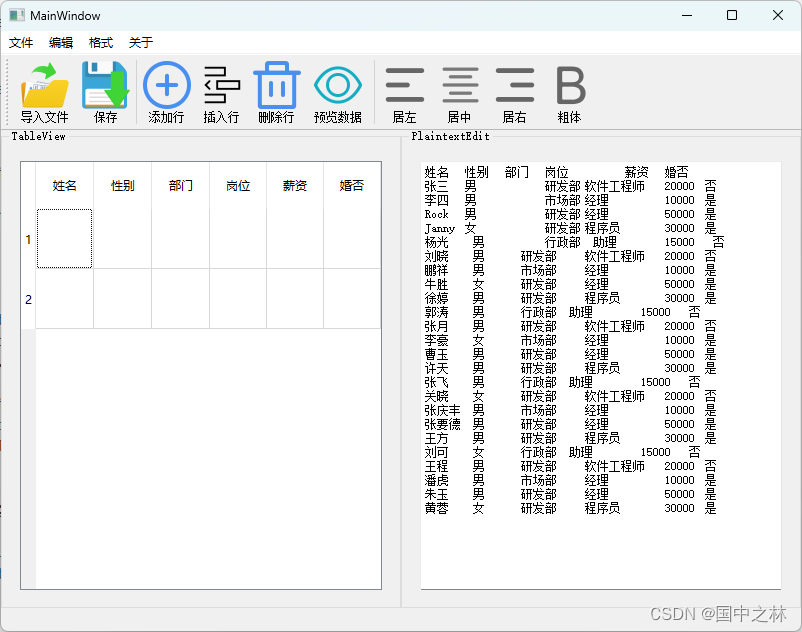
标准项是有行有列的,类似于表格,所以标准项模型一般可以用于管理表格类的数据。
还是先上目标效果:
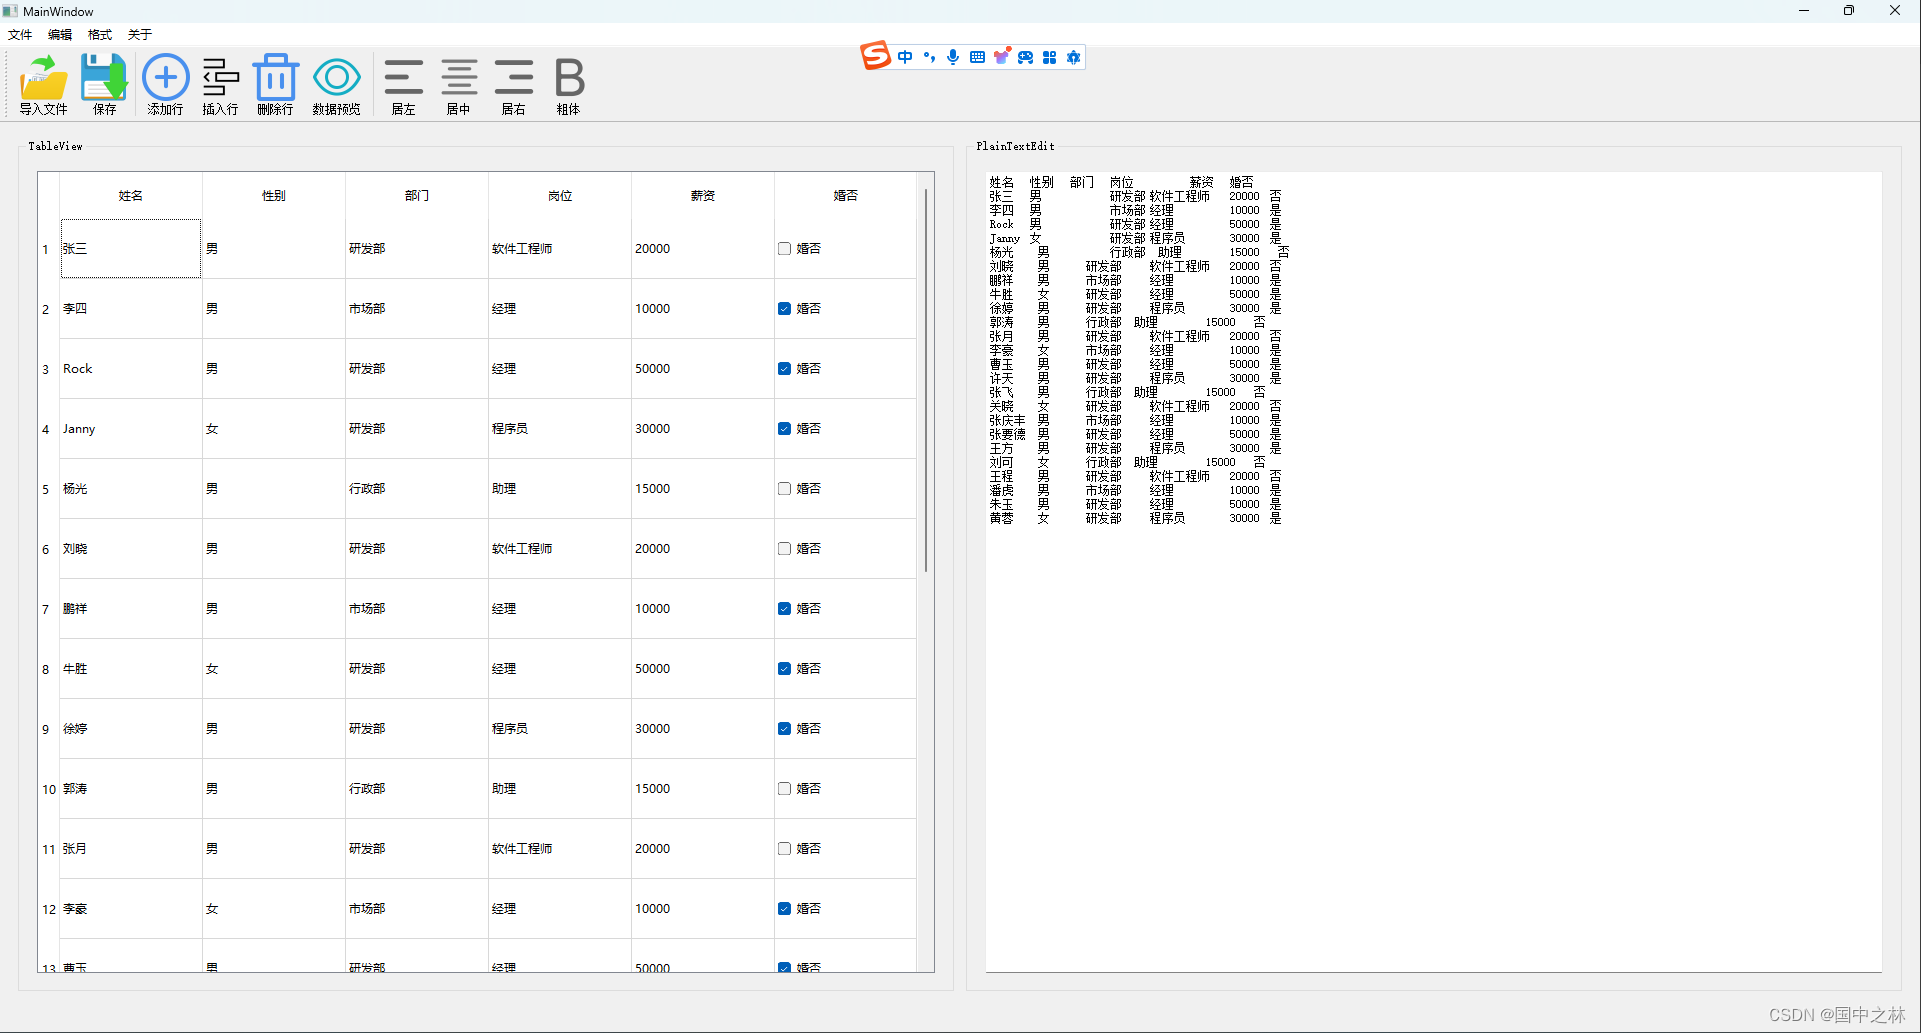
我们的数据来源于文本文件:

2.界面拖放
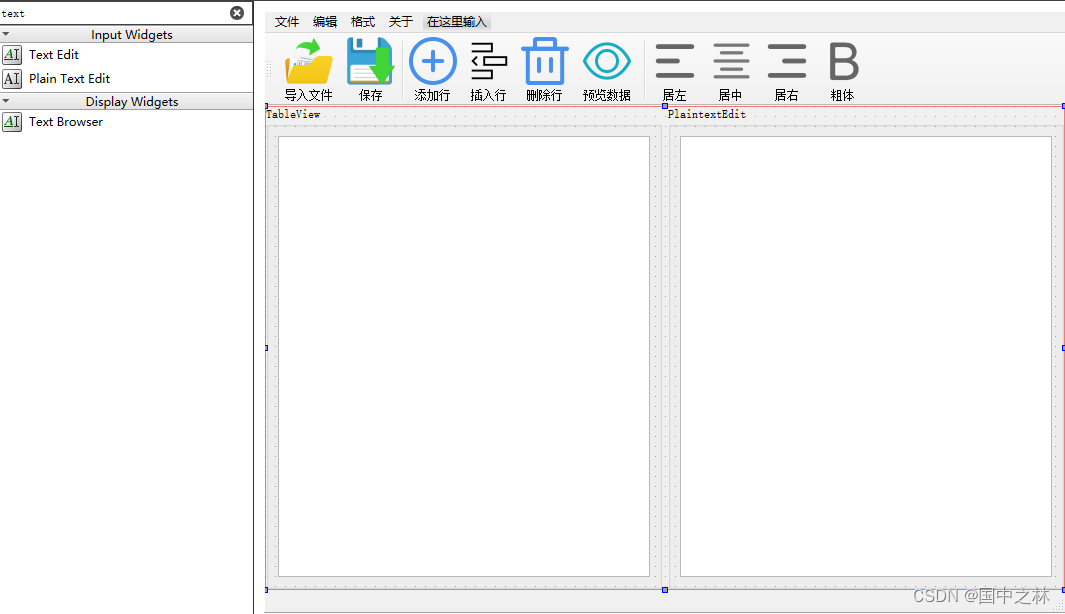
需要蔬菜的可以dd我。。。
3.创建模型
在mainwindow.h中
#ifndef MAINWINDOW_H
#define MAINWINDOW_H

#include <QMainWindow>
#include <QStandardItemModel>//标准型模型头文件

QT_BEGIN_NAMESPACE
namespace Ui { class MainWindow; }
QT_END_NAMESPACE

class MainWindow : public QMainWindow
{
    Q_OBJECT

public:
    MainWindow(QWidget *parent = nullptr);
    ~MainWindow();

private:
    Ui::MainWindow *ui;
    QStandardItemModel* model;
};
#endif // MAINWINDOW_H
文本文件中一共有6列,我们可以定义一个变量来记录

在mainwindow.cpp中
#include "mainwindow.h"
#include "ui_mainwindow.h"

MainWindow::MainWindow(QWidget *parent)
    : QMainWindow(parent)
    , ui(new Ui::MainWindow)
{
    ui->setupUi(this);

    colCount=6;
    model=new QStandardItemModel(2,colCount);//创建模型初始化行列
}

MainWindow::~MainWindow()
{
    delete ui;
}
4.配套模型
在表格中,无疑我们需要许多的选择,我们可以增加一个项选择模型。
在mainwindow.h中
#ifndef MAINWINDOW_H
#define MAINWINDOW_H

#include <QMainWindow>
#include <QStandardItemModel>//标准型模型头文件
#include <QItemSelectionModel>//项选择模型

QT_BEGIN_NAMESPACE
namespace Ui { class MainWindow; }
QT_END_NAMESPACE

class MainWindow : public QMainWindow
{
    Q_OBJECT

public:
    MainWindow(QWidget *parent = nullptr);
    ~MainWindow();

private:
    Ui::MainWindow *ui;
    int colCount;
    QStandardItemModel* model;
    QItemSelectionModel*selectionModel;
};
#endif // MAINWINDOW_H
同时,使用标准型模型来初始化项选择模型。
model=new QStandardItemModel(2,colCount);
selectionModel=new QItemSelectionModel(model);
5.视图设置模型
ui->tableView->setModel(model);
ui->tableView->setSelectionModel(selectionModel);
现在就可以看到了:

表自适应大小(表格组件有讲过哦):
auto hearView=ui->tableView->horizontalHeader();
hearView->setSectionResizeMode(QHeaderView::Stretch);
运行结果:

6.视图属性的设置
设置选择模式,按ctrl可以多个,按shift可以矩形选中
设置选择行为,就是点击是行还是列还是单元格。这里是单元格
 ui->tableView->setSelectionMode(QAbstractItemView::ExtendedSelection);
 ui->tableView->setSelectionBehavior(QAbstractItemView::SelectItems);
参数的选择可以F1在线文档去找。
二.从文件中拿到数据
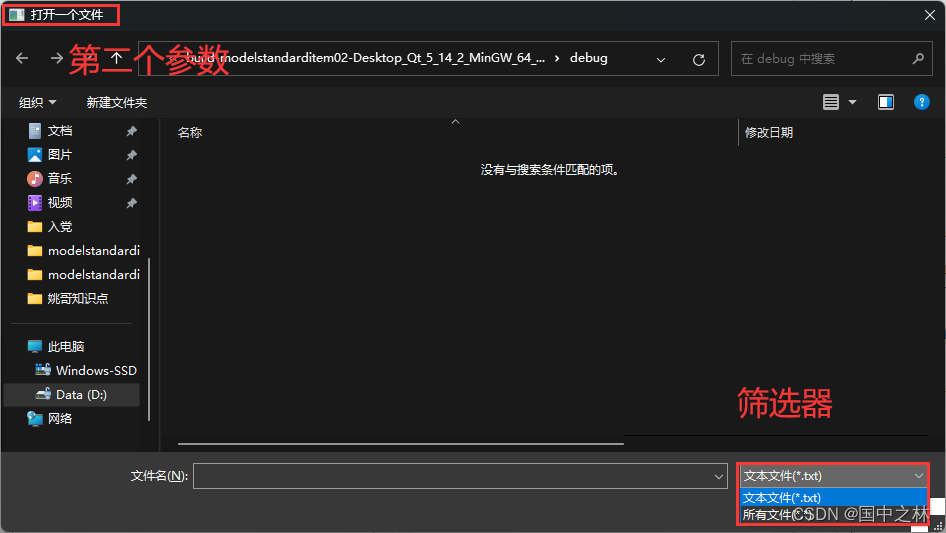
1.文件对话框获取文件名
头文件记得:
#include <QFileDialog>//文件对话框
第一个参数是父窗口,第二个是文件对话框的名字,第三个是获取应用程序的路径,第四个参数是筛选器。
void MainWindow::on_actionOpen_triggered()
{
    QString fileName=QFileDialog::getOpenFileName(this,"打开一个文件",
                                                  QCoreApplication::applicationDirPath(),
                                                  "文本文件(*.txt);;所有文件(*.*)");
}
运行效果;
2.创建文件对象并初始化
记得现判断一下,如果没有获取到文件名就直接退出了
 if(fileName.isEmpty())
    {
        return;
    }
用文件名初始化文件对象
QFile qFile(fileName);
3.打开文件对象
用只读和文本的方式打开文件,如果打不开就退出吧。
if(!qFile.open(QIODevice::ReadOnly|QIODevice::Text))
    {
        return;
    }
4.创建文本流并初始化
记得头文件哦。
#include <QTextStream>//文本流
...
QTextStream stream(&qFile);
5.读取文本流
没在文本结尾就一直读,每次读一行,将读到的信息保存到内存变量contents中,纯文本编辑器也添加读的信息。
QStringList contents;
while(!stream.atEnd())
    {
        QString line=stream.readLine();
        contents.push_back(line);
        ui->plainTextEdit->appendPlainText(line);
    }
6.关闭文件
qFile.close();
7.完整代码
void MainWindow::on_actionOpen_triggered()
{
    QString fileName=QFileDialog::getOpenFileName(this,"打开一个文件",
                                                  QCoreApplication::applicationDirPath(),
                                                  "文本文件(*.txt);;所有文件(*.*)");
    if(fileName.isEmpty())
    {
        return;
    }
    QFile qFile(fileName);

    if(!qFile.open(QIODevice::ReadOnly|QIODevice::Text))
    {
        return;
    }

    QTextStream stream(&qFile);
    QStringList contents;
    while(!stream.atEnd())
    {
        QString line=stream.readLine();
        contents.push_back(line);
        ui->plainTextEdit->appendPlainText(line);
    }

    qFile.close();
}
运行结果:
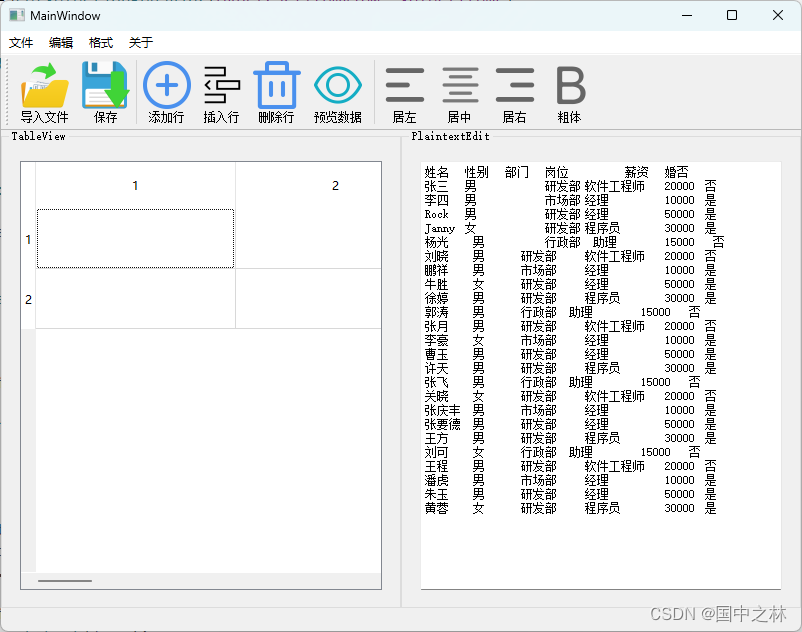
OK,数据我们是拿到了,接下来我们开始将其添加到模型中。
三.为模型添加数据
1.自定义函数
用来初始化模型,用我们刚刚从文本拿到的数据
//添加数据到模型
initModel(contents);
2.模型添加表头
文本文件的第一行为表头,我们优先处理,先拿出第一行,然后用正则表达式来拆开第一行。
"\s+"是跳过多个空白符,QString::SkipEmptyParts是跳过空白字段
void MainWindow::initModel(QStringList contents)
{
    QString headLine=contents[0];//数据第一行为表头
    QStringList headList=headLine.split(QRegExp("\\s+"),QString::SkipEmptyParts);
    model->setHorizontalHeaderLabels(headList);//设置表头标签
}
运行结果:
3.模型添加数据
int rows=contents.count();
    for(int i=1;i<rows;i++)//从1开始,因为表头已经取出了
    {
        QString line=contents[i];
        QStringList list=line.split(QRegExp("\\s+"),QString::SkipEmptyParts);
        for(int j=0;j<colCount-1;j++)
        {
            QStandardItem* item=new QStandardItem(list[j]);
            model->setItem(i-1,j,item);//将数据添加到模型
        }
    }
拿到内存中的数据,先拆开,然后添加到QStandarditem中,然后再设置到模型中。
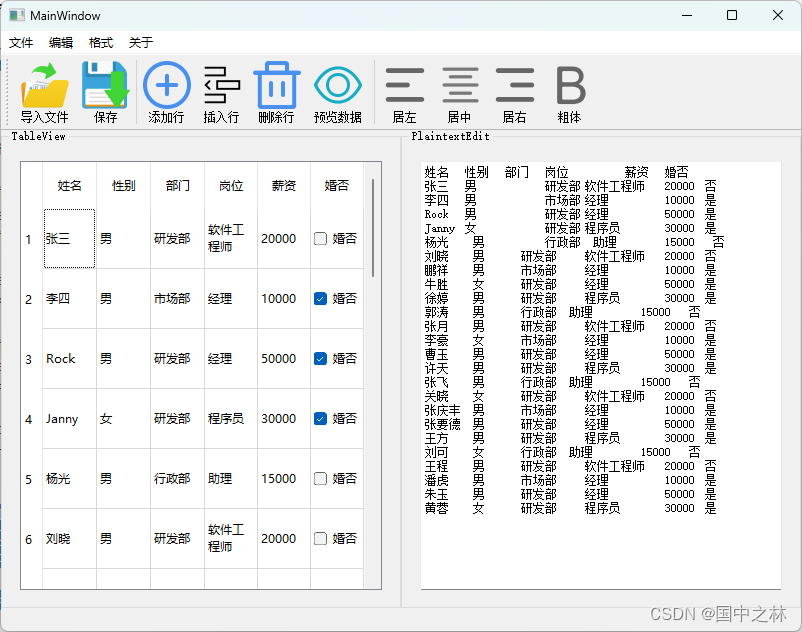
因为最后一列有复选框,所以我们单独进行处理:
QStandardItem* item=new QStandardItem(headList[colCount-1]);
        item->setCheckable(true);
        if(list[colCount-1]=="否")
        {
            item->setCheckState(Qt::Unchecked);
        }
        else
        {
            item->setCheckState(Qt::Checked);
        }
        model->setItem(i-1,colCount-1,item);
运行结果:
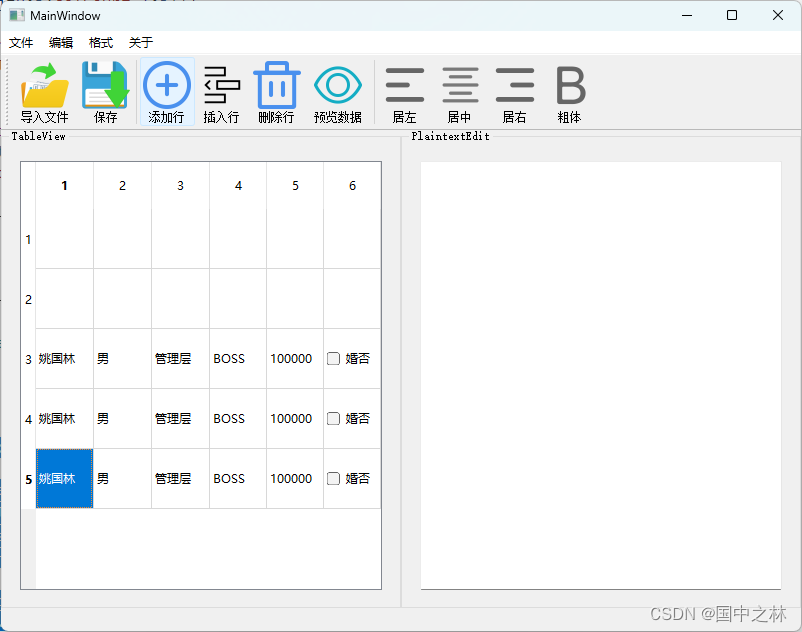
四.模型插入数据
1.尾部添加数据
void MainWindow::on_actionAdd_triggered()
{
    selectionModel->clearSelection();//清空选中的
    QStringList list={"姚国林","男","管理层","BOSS","100000","婚否"};
    QList<QStandardItem*> itemList;//插入需要QStandardItem*列表
    for(int i=0;i<list.count();i++)
    {
        QStandardItem *item=new QStandardItem(list[i]);
        itemList.push_back(item);
    }
    itemList[colCount-1]->setCheckable(true);//最后一列设置复选框
    model->insertRow(model->rowCount(),itemList);//在最后一行插入数据
    QModelIndex index=model->index(model->rowCount()-1,0);//通过模型获取当前插入模型索引
    selectionModel->setCurrentIndex(index,QItemSelectionModel::Select);//设置刚刚插入的索引
}
运行结果:
2.任意位置插入
和尾插基本一样,只是插入位置,是我们当前选中的位置
void MainWindow::on_actionInsert_triggered()
{
    selectionModel->clearSelection();//清空选中的
    QStringList list={"姚国林","男","管理层","BOSS","100000","婚否"};
    QList<QStandardItem*> itemList;//插入需要QStandardItem*列表
    for(int i=0;i<list.count();i++)
    {
        QStandardItem *item=new QStandardItem(list[i]);
        itemList.push_back(item);
    }
    itemList[colCount-1]->setCheckable(true);//最后一列设置复选框
    QModelIndex index=selectionModel->currentIndex();//通过选择模型获取当前模型索引
    model->insertRow(index.row(),itemList);//在最后一行插入数据
    selectionModel->setCurrentIndex(index,QItemSelectionModel::Select);//设置刚刚插入的索引
}
运行结果:

五.模型删除数据
void MainWindow::on_actionDel_triggered()
{
    QModelIndex index=selectionModel->currentIndex();//通过选择模型获取当前模型索引
    if(index.row()==model->rowCount()-1)//如果选中的是最后一行,直接删除
    {
        model->removeRow(index.row());
    }
    else
    {
        model->removeRow(index.row());
        selectionModel->setCurrentIndex(index,QItemSelectionModel::Select);//以单元格选中的形式
    }
}
运行结果:

六.总结一下
还有一些功能,我们下一接再讲,你们先熟练掌握这些功能。
这节课主要用到的模型是标准项模型,附加一个选择模型。
每个接口不要死记硬背,注意其含义,参数可以到在线文档里面查找。
慌了,你就慢下来,还慌,你就停下来!


 5126
5126


 被折叠的 条评论
为什么被折叠?
被折叠的 条评论
为什么被折叠?
 到【灌水乐园】发言


