


我们在使用react的时候,通常使用state来做状态管理,除了state之外,我们还可以使用redux来做状态管理。redux是第三方出的一个库,与react没有任何关系,就像Java与JavaScript。
先让我们来看一张图:

1、原理
我们先不讨论react是怎么和redux链接的,先看下他们之间是怎样工作的。
- 首先,当我们在react中的Components中调用方法改变状态时,我们将这次的行为用一个对象封装起来,我们称为它为一个action,它由两个key:value组成,也就是两个属性。{type:‘行为的名称(调用的方法的名称)’, data:value(要传的数据)}。
- 然后将这次的action传给了store,store不会对该action做任何处理,store只是一个桥梁。也可以按它的英文理解为仓库、存储。
- 再然后通过store传递给reducers,reducers作为真正处理action的角色对该行为进行处理,并改变redux中的状态。reducer中有两个参数,第一个是之前的状态(之前的数据),第二个是这次的action。这样我们就可以利用之前的状态和这次的状态进行我们想要的更新。
- 最后再将处理之后的state返回给components。
2、代码实现
说了这么多,让我们直接上代码康康😀…
首先我们先将redux请进来 npm add redux
- 我们先创建一个component
import React from "react";
export default class Count extends React.Component{
state = {carName:'迈凯伦p1'}
increment = () => {
const {value} = this.selectNumber;
// this.props.jia(value*1);
}
componentDidMount(){
store.subscribe(()=>{this.setState({})})
}
decrement = ()=>{
const {value} = this.selectNumber;
}
render(){
console.log(this.props);
return (
<div>
<h1>当前求和为:????</h1>
<select ref={c=>this.selectNumber = c}>
<option value="1">1</option>
<option value="2">2</option>
<option value="3">3</option>
</select>
<button onClick={this.increment}>+</button>
<button onClick={this.decrement}>-</button>
</div>
)
}
}
页面显示(我们要做的就是在选择下拉的数据,点击加,上面显示计算之后的结果)

- 之后,我们就要创建一个store,store作为redux的核心,需要我们进行引入
我们先在src下创建一个redux文件夹,再在里面创建一个store文件。
//引入createStore,用来创建store
import { createStore } from "redux";
//引入reducer
import countReducer from "./count_reducer"
//将reducer与store链接,并暴露出去
export default createStore(countReducer);
- 上面store引入了reducer,那么我们在这里就要创建一个reducer
const initState = 0
function countReducer(preState=initState, action) {
  console.log('aaa',preState);
  const { type, data } = action;
  switch (type) {
    case "add":
      return preState + data;
    case "sub":
      return preState - data;
    default:
        return preState;
  }
}

export default countReducer;
这里的reducer是对count组件的action进行处理的地方,preState和action分别为之前的state与现在的action。add与sub是component中传入的action的type属性的value。
- 到此,我们已经将组件中的数据传到了reducer中并进行了处理,这时我们就需要在component中对返回的数据进行接收。我们在Count组件中在打印数据的地方,使用store.getState()方法进行读取数据(当然,需要引入store)。
import React from "react";
import store from "../../redux/store";
export default class Count extends React.Component{
state = {carName:'迈凯伦p1'}
increment = () => {
const {value} = this.selectNumber;
// this.props.jia(value*1);
store.dispatch({type:'add', data: value*1})
}
componentDidMount(){
store.subscribe(()=>{this.setState({})}) //监测redux中的数据是否发生改变,改变便更新state。
}
decrement = ()=>{
const {value} = this.selectNumber;
}
render(){
console.log(this.props);
return (
<div>
<h1>当前求和为:{store.getState()}</h1>
<select ref={c=>this.selectNumber = c}>
<option value="1">1</option>
<option value="2">2</option>
<option value="3">3</option>
</select>
<button onClick={this.increment}>+</button>
<button onClick={this.decrement}>-</button>
</div>
)
}
}
到此,在这里我们已经实现了action的传递、处理与处理之后数据的接收。如果这时我们去点击+号,打开控制台,我们会发现虽然我们的数据已经发生了改变,但是页面却没有更新,这是为啥呢?这里就不得不说下了。开篇说了,redux是一个第三方库,与react没有任何关系,我们想想react是如何更新页面的呢?当我们调用setState()方法时,react会自动调用render进行更新,所以我们可以在componentDidMount进行一个假更新处理。
除了在这里更新页面,我们还可以在index入口文件中进行监测。
import React from 'react';
import ReactDOM from 'react-dom';
import './index.css';
import App from './App';
import reportWebVitals from './reportWebVitals';
import store from './redux/store'


ReactDOM.render(
  <React.StrictMode>
    <App />
  </React.StrictMode>,
  document.getElementById('root')
);
store.subscribe(()=>{
  ReactDOM.render(
    <React.StrictMode>
      <App />
    </React.StrictMode>,
    document.getElementById('root')
  );
})
完整版
刚才上面的redux的写法相信不少人都发现了,与原理图相对比,好像少了action的创建,下面我们便写一个包括action的创建的完整版的redux。
先看目录:
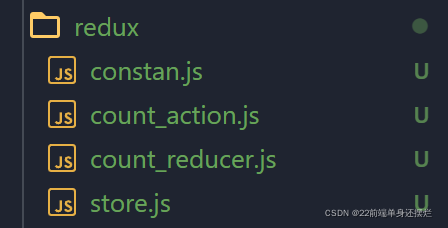
- constant:里面是常量
export const ADD = 'add';
export const SUB = 'sub';
- count_action:action对象
import {ADD,SUB} from './constan'

export const addAction = data => ({type:ADD,data});
export const subAction = data => ({type:SUB, data});
最后在组件中使用action的地方引入count_action
import {addAction, subAction} from "../../redux/count_action"

export default class Count extends React.Component{
    state = {carName:'迈凯伦p1'}

    increment = ()  => {
        const {value} = this.selectNumber;
        // this.props.jia(value*1);
        store.dispatch(addAction(value*1));
    }
剩下的减法与加法类似,这里就不实现了。
异步Action
对于异步action来说,我们可以直接在组件调用dispatch时使用异步,或者直接创建一个异步action,下面我们讲讲如何创建一个异步action。
- 添加库
npm add redux-thunk - 在组件中添加异步的按钮
asyncIncrement = ()=>{
        const {value} = this.selectNumber;
        store.dispatch(asyncAddAction(value*1,1000));
    }
<button onClick={this.asyncIncrement}>异步加+</button>
- 在action中配置新的action
export const asyncAddAction = (data,time) =>{
    return (dispatch)=>{
        setTimeout(()=>{
            dispatch(addAction(data))
        },time)
    }
}
- 配置store
import { createStore, applyMiddleware } from "redux";

import countReducer from "./count_reducer"

import thunk from "redux-thunk";

export default createStore(countReducer, applyMiddleware(thunk));
我们大概讲解一下:
对于store来说,它必须接收一个普通的对象,也就是像之前上面的同步action,但是我们要想传入一个异步的action,就必须使用函数了,这个时候store就不能对其进行接收。我们就需要引入redux-thunk,它能作为一个转换程序,使store接收函数并调用异步之后的dispatch。
然后我们就可以配置一下store,先引入applyMiddleware 与thunk ,将thunk作为参数放入applyMiddleware函数中。
这样就能实现异步了,但是这样的异步写法并不是必须的,我们可以在组件中调用dispatch时直接使用异步。
connect
在上面的redux代码中,如果我们拥有多个组件,在其中都使用了redux管理数据,那么我们将在每个组件中都写相同的代码,对于一个优秀的程序员来说,偷懒(bushi)是一个良好的品德,所以我们将把重复的代码抽取出来。这个时候我们定义一个connect函数来连接组件与redux。
我们这样定义这个connect函数
function connect(mapStateToProps, mapDispatchToProps){

}
因为不同的组件中我们的state和将要派发的事件不同,所以我们在这里传入这两个参数
我们先定义一个函数式组件
import React from 'react'

export default function Count (props) {
  return (
    <div>
    	<h2>当前计数:{props.counter}</h2>
    	<button onclick={e=> props.decrement()}>-1</button>
    	<button onclick={e=> props.addNumber()}>+1</button>
	</div>
  )
}
此时再回到我们的connect函数,我们现在对其做如下修改
function connect(mapStateToProps, mapDispatchToProps){
	return function enhanceHOC(WrapperComponent) {
		return class extends PurComponent {
			render(){
				return {<WrapperComponent/>}
			}
		}
	}
}
这里的connect函数其实是一个高阶函数,利用其返回一个高阶组件,我们将组件传入connect函数中,使其对原组件进行加强,因为这里我们可以对该组件传入参数,并在该组件内使用props进行接收。
import React from 'react'
import {addAction, subAction} from './actionCreator' //引入action

export default function Count (props) {
  return (
    <div>
    	<h2>当前计数:{props.counter}</h2>
    	<button onclick={e=> props.decrement()}>-1</button>
    	<button onclick={e=> props.addNumber()}>+1</button>
	</div>
  )
}

const mapStateToProps = state => {
	return {
		counter: state.counter
	}
}

const mapDispatchToProps= dispatch => {
	return {
		decrement: () => {
			dispatch(subAction());
		},
		addNumber: () => {
			dispatch(addAction());
		}
	}
}

export default connect(mapStateToProps , mapDispatchToProps)(Count)
在组件中,我们调用了connect函数,并传入两个函数
我们再来到connect函数
import store from './store'

function connect(mapStateToProps, mapDispatchToProps){
	return function enhanceHOC(WrapperComponent) {
		return class extends PurComponent {
			render(){
				return {<WrapperComponent {...this.props}
										  {...mapStateToProps(store.getState())}
										  {...mapDispatchToProps(store.dispatch)}/>}
			}
		}
	}
}
在connect函数中,我们调用组件中传来的函数,然后再在返回的组件中返回回去,这样子之前的组件中就被添加了state和相关的dispatch方法了。
最后再对组件重新进行渲染
import store from './store'

function connect(mapStateToProps, mapDispatchToProps){
	return function enhanceHOC(WrapperComponent) {
		return class extends PurComponent {

			constructor(props){
				surper(props);
				this.state{
					storeState:mapStateToProps(store.getState())
				}

				componentDidMount(){
					this.unsubscribe = store.subscribe(()=>{
						this.setState({
							storeState:mapStateToProps(store.getState())
						})
					})
				}
				componentWillUnmount(){
					this.unsubscribe();
				}
			}
			render(){
				return {<WrapperComponent {...this.props}
										  {...mapStateToProps(store.getState())}
										  {...mapDispatchToProps(store.dispatch)}/>}
			}
		}
	}
}
好了,以上就是全部的关于redux的基本使用了,如果有不对的地方,欢迎大家指正😀。


 521
521


 被折叠的 条评论
为什么被折叠?
被折叠的 条评论
为什么被折叠?
 到【灌水乐园】发言


