


前言
我以前把魔搭社区看成了魔塔社区。哈哈!
感觉还是魔塔社区这个名字更加霸气一些!
魔搭社区的大模型文件是有多种格式的,有时候感觉脑子有点乱。主要的格式有在线下载后的cache格式、safetensors格式、bin格式。
本文试图梳理一下,主要内容是各个格式之间的转换,离线调用,也供大家参考。
(另外,之所以关注魔搭社区的大模型格式,也是因为在用LLaMa-Factory做大模型微调的时候,发现了大模型格式不对的话,很容易的出错。关于LLaMa-Factory微调Qwen大模型的内容,我专门写了一篇博客:采用Lama-factory对QWen大模型实现微调(效果很好)-CSDN博客)
一、直接从网站上下载
链接:魔搭社区
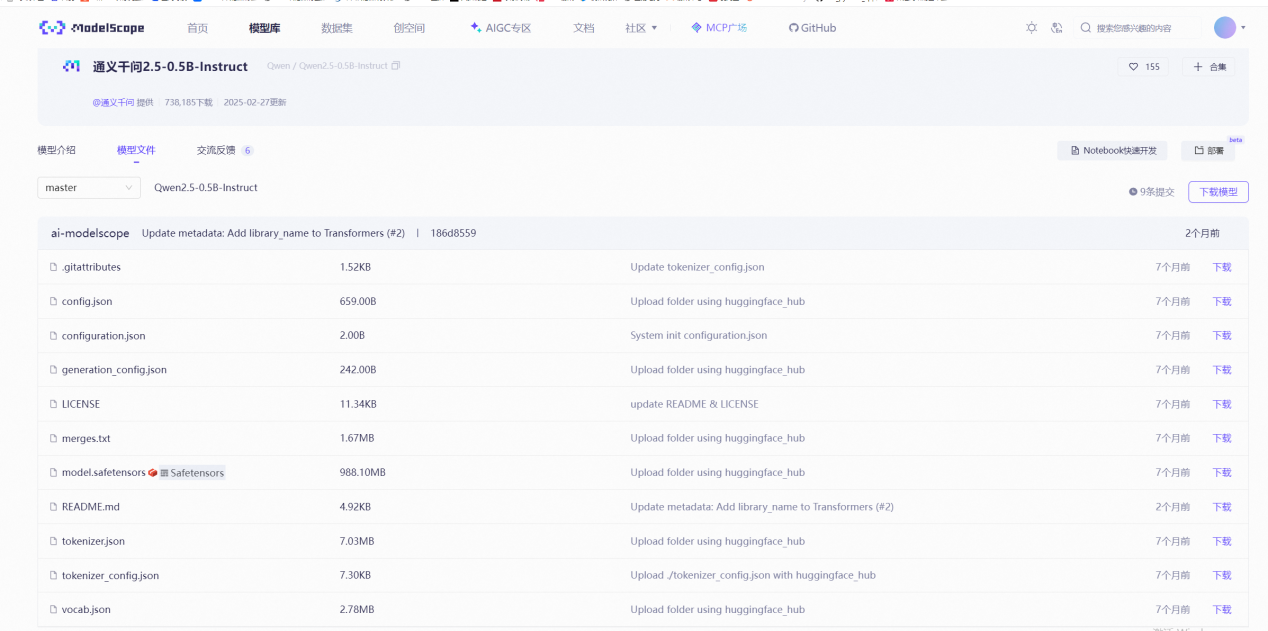
直接逐个下载即可(当然也可用命令行下载,在此不赘述)
下载完毕后,文件夹中的文件如下:
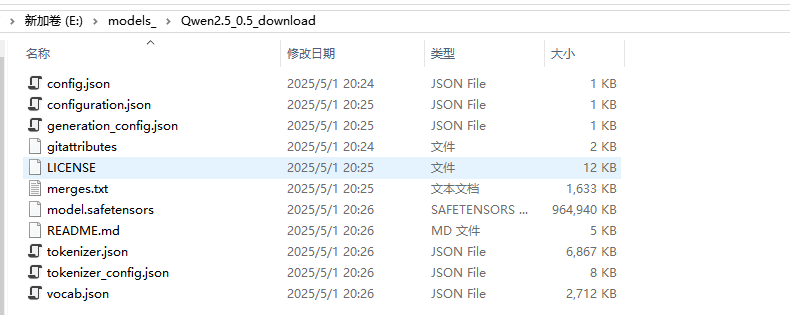
可见主要的模型文件格式是safetensors,这也是魔搭社区大模型的主要格式。
二、采用Python程序在线保存
2.1、不指定目录用cache缓存
如果采用直接访问魔搭的大模型,大模型文件采用自动下载的方法,代码如下:
rom transformers import AutoModelForCausalLM, AutoTokenizer
#模型文件采用在线的方式进行
model_name = "Qwen/Qwen2.5-0.5B-Instruct"
model = AutoModelForCausalLM.from_pretrained(
model_name,
torch_dtype="auto",
device_map="auto"
)
tokenizer = AutoTokenizer.from_pretrained(model_name)
prompt = "Give me a short introduction to large language model."
messages = [
{"role": "system", "content": "You are Qwen, created by Alibaba Cloud. You are a helpful assistant."},
{"role": "user", "content": prompt}
]
text = tokenizer.apply_chat_template(
messages,
tokenize=False,
add_generation_prompt=True
)
model_inputs = tokenizer([text], return_tensors="pt").to(model.device)
generated_ids = model.generate(
**model_inputs,
max_new_tokens=512
)
generated_ids = [
output_ids[len(input_ids):] for input_ids, output_ids in zip(model_inputs.input_ids, generated_ids)
]
response = tokenizer.batch_decode(generated_ids, skip_special_tokens=True)[0]
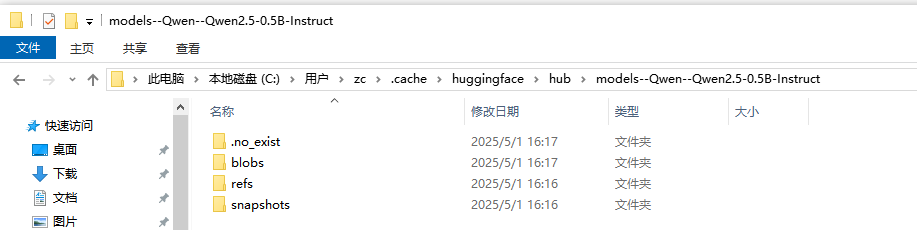
print(response)此时的大模型文件会自动下载缓存到了本地。
我的本机在这个位置:

(符合:Windows:C:\Users\<你的用户名>\.cache\huggingface\hub)
打开包含4个文件夹,如下:
再打开blobs:
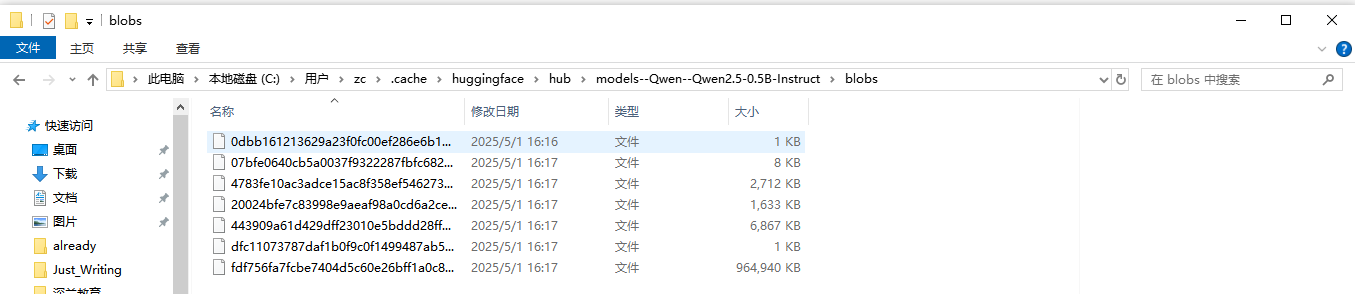
感觉这个文件夹经过某种加密,连文件名都做了处理。
2.2、指定目录进行cache缓存
考虑到能否将缓存的文件,保存到别处,有利于长期保存呢,代码如下:
from  transformers import AutoModelForCausalLM, AutoTokenizer

model_name = "Qwen/Qwen2.5-0.5B-Instruct"
cache_path = r"E:\models_\QWen2.5_0.5"  # 这里改成你想存放模型的路径

model = AutoModelForCausalLM.from_pretrained(
   model_name,
   torch_dtype="auto",
   device_map="auto",
   cache_dir=cache_path
)

tokenizer = AutoTokenizer.from_pretrained(
   model_name,
   cache_dir=cache_path
)

prompt = "Give me a short introduction to large language model."
messages = [
   {"role": "system", "content": "You are Qwen, created by Alibaba Cloud. You are a helpful assistant."},
   {"role": "user", "content": prompt}
]

text = tokenizer.apply_chat_template(
   messages,
   tokenize=False,
   add_generation_prompt=True
)

model_inputs = tokenizer([text], return_tensors="pt").to(model.device)

generated_ids = model.generate(
   **model_inputs,
   max_new_tokens=512
)

generated_ids = [
   output_ids[len(input_ids):] for input_ids, output_ids in zip(model_inputs.input_ids, generated_ids)
]

response = tokenizer.batch_decode(generated_ids, skip_special_tokens=True)[0]

print(response)
三、将缓存文件进行转换
3.1、在线调用时用safetensors格式保存
代码如下:
from transformers import AutoModelForCausalLM, AutoTokenizer
model_name = "Qwen/Qwen2.5-0.5B-Instruct"
cache_path = r"E:\models_\QWen2.5_0.5" # 模型缓存路径
output_path = r"E:\models_\Qwen2.5_0.5_safe" # 保存统一 safetensors文件的路径,自己新建或确保存在
# 加载模型(从缓存)
model = AutoModelForCausalLM.from_pretrained(
model_name,
torch_dtype="auto",
device_map="auto",
cache_dir=cache_path
)
tokenizer = AutoTokenizer.from_pretrained(
model_name,
cache_dir=cache_path
)
# 保存为统一的 pytorch_model.bin 和 tokenizer 文件到 output_path
#model.save_pretrained(output_path) #其实默认也是 ,safe_serialization=True
model.save_pretrained(output_path,safe_serialization=True)
tokenizer.save_pretrained(output_path)
prompt = "Give me a short introduction to large language model."
messages = [
{"role": "system", "content": "You are Qwen, created by Alibaba Cloud. You are a helpful assistant."},
{"role": "user", "content": prompt}
]
text = tokenizer.apply_chat_template(
messages,
tokenize=False,
add_generation_prompt=True
)
model_inputs = tokenizer([text], return_tensors="pt").to(model.device)
generated_ids = model.generate(
**model_inputs,
max_new_tokens=512
)
generated_ids = [
output_ids[len(input_ids):] for input_ids, output_ids in zip(model_inputs.input_ids, generated_ids)
]
response = tokenizer.batch_decode(generated_ids, skip_special_tokens=True)[0]
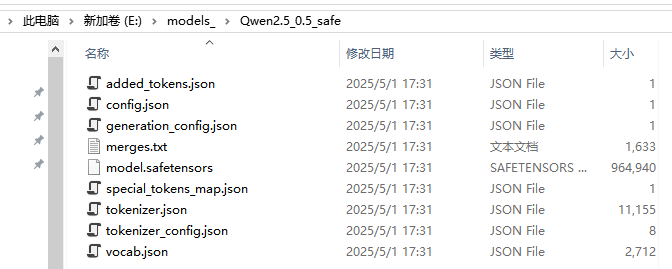
print(response)对应的目录以及文件:
对比从网站上进行直接下载,结果基本上是一致的。
3.2、在线调用时用bin格式保存
代码如下:
from transformers import AutoModelForCausalLM, AutoTokenizer

model_name = "Qwen/Qwen2.5-0.5B-Instruct"
cache_path = r"E:\models_\QWen2.5_0.5"  # 模型缓存路径
output_path = r"E:\models_\Qwen2.5_0.5_bin"  # 保存统一 bin 文件的路径,自己新建或确保存在

# 加载模型(从缓存)
model = AutoModelForCausalLM.from_pretrained(
   model_name,
   torch_dtype="auto",
   device_map="auto",
   cache_dir=cache_path
)

tokenizer = AutoTokenizer.from_pretrained(
   model_name,
   cache_dir=cache_path
)

# 保存为统一的 pytorch_model.bin 和 tokenizer 文件到 output_path
model.save_pretrained(output_path,safe_serialization=False)
tokenizer.save_pretrained(output_path)

prompt = "Give me a short introduction to large language model."
messages = [
   {"role": "system", "content": "You are Qwen, created by Alibaba Cloud. You are a helpful assistant."},
   {"role": "user", "content": prompt}
]

text = tokenizer.apply_chat_template(
   messages,
   tokenize=False,
   add_generation_prompt=True
)

model_inputs = tokenizer([text], return_tensors="pt").to(model.device)

generated_ids = model.generate(
   **model_inputs,
   max_new_tokens=512
)

generated_ids = [
   output_ids[len(input_ids):] for input_ids, output_ids in zip(model_inputs.input_ids, generated_ids)
]

response = tokenizer.batch_decode(generated_ids, skip_special_tokens=True)[0]

print(response)
对应的目录以及文件:

四、bin格式和safetensors格式间的相互转换
4.1、bin转safetensors
代码如下:
import  torch
from transformers import AutoModel, AutoTokenizer

model_bin_path = r"E:\models_\Qwen2.5_0.5_transfer"  # 这里改成你想存放模型的路径
model_safe_path= r"E:\models_\Qwen2.5_0.5_transfer2"  # 这里改成你想存放模型的路径
# 加载模型和分词器
model = AutoModel.from_pretrained(model_bin_path,     torch_dtype="auto")
tokenizer = AutoTokenizer.from_pretrained(model_bin_path)

# 保存为safetensors格式
model.save_pretrained(model_safe_path, use_safetensors=True)
tokenizer.save_pretrained(model_safe_path)
4.2、safetensors转bin
代码如下:
import  torch
from transformers import AutoModel, AutoTokenizer
from safetensors.torch import load_file

model_bin_path = r"E:\models_\Qwen2.5_0.5_transfer2\model.bin"  # 这里改成你想存放模型的路径
model_safe_path= r"E:\models_\Qwen2.5_0.5_transfer2\model.safetensors"  # 这里改成你想存放模型的路径

def safetensors_to_bin(safetensors_path, bin_output_path):
   state_dict = load_file(safetensors_path)
   torch.save(state_dict, bin_output_path)


safetensors_to_bin(model_safe_path,model_bin_path)
五、完全采用离线方式访问大模型文件
5.1、访问safetensors格式的大模型文件
代码如下:
from transformers import AutoModelForCausalLM, AutoTokenizer

#模型文件采用在线的方式进行
#model_name = "Qwen/Qwen2.5-0.5B-Instruct"
model_name=r"E:\models_\Qwen2.5_0.5_safe"

model = AutoModelForCausalLM.from_pretrained(
   model_name,
   torch_dtype="auto",
   device_map="auto"
)
tokenizer = AutoTokenizer.from_pretrained(model_name)

prompt = "Give me a short introduction to large language model."
messages = [
   {"role": "system", "content": "You are Qwen, created by Alibaba Cloud. You are a helpful assistant."},
   {"role": "user", "content": prompt}
]
text = tokenizer.apply_chat_template(
   messages,
   tokenize=False,
   add_generation_prompt=True
)
model_inputs = tokenizer([text], return_tensors="pt").to(model.device)

generated_ids = model.generate(
   **model_inputs,
   max_new_tokens=512
)
generated_ids = [
   output_ids[len(input_ids):] for input_ids, output_ids in zip(model_inputs.input_ids, generated_ids)
]

response = tokenizer.batch_decode(generated_ids, skip_special_tokens=True)[0]

print(response)
运行的效果:

5.2、访问bin格式的大模型文件
代码:
from transformers import AutoModelForCausalLM, AutoTokenizer

#模型文件采用在线的方式进行
model_name=r"E:\models_\Qwen2.5_0.5_transfer2"

model = AutoModelForCausalLM.from_pretrained(
   model_name,
   torch_dtype="auto",
   device_map="auto"
)
tokenizer = AutoTokenizer.from_pretrained(model_name)

prompt = "Give me a short introduction to large language model."
messages = [
   {"role": "system", "content": "You are Qwen, created by Alibaba Cloud. You are a helpful assistant."},
   {"role": "user", "content": prompt}
]
text = tokenizer.apply_chat_template(
   messages,
   tokenize=False,
   add_generation_prompt=True
)
model_inputs = tokenizer([text], return_tensors="pt").to(model.device)

generated_ids = model.generate(
   **model_inputs,
   max_new_tokens=512
)
generated_ids = [
   output_ids[len(input_ids):] for input_ids, output_ids in zip(model_inputs.input_ids, generated_ids)
]

response = tokenizer.batch_decode(generated_ids, skip_special_tokens=True)[0]

print(response)
运行效果:

这个model.bin文件是,原model.bin转model.safetensors,再转回来的。
总体而言,问答的效果是一致的。
5.3、离线大模型文件的使用总结
框架兼容性:safetensors主要用于PyTorch生态下的模型存储,而bin格式是PyTorch默认的序列化格式。
性能优化:safetensors在加载速度和内存占用上优于传统bin格式,推荐优先使用。


 2036
2036

 被折叠的 条评论
为什么被折叠?
被折叠的 条评论
为什么被折叠?
 到【灌水乐园】发言


