


参考链接:https://www.cnblogs.com/XYQ-208910/p/11777352.html
IOS4-IOS9发送本地通知使用UILocalNotification,IOS10使用UNNotification。
区别:
UILocalNotification 和 UNNotification 是 iOS 中用于发送本地通知和远程通知的类,它们之间有一些区别和不同的特点。
iOS 版本支持的不同
UILocalNotification 被引入 iOS 4 中,并保持到 iOS 9,但在 iOS 10 中被废弃。而 UNNotification 则是在 iOS 10 引入的,是一个全新的通知框架。
支持的通知内容类型
UILocalNotification 只支持包含简单文本、声音、应用程序图标数量等基本内容的通知。而 UNNotification 支持更多的通知内容类型,包括富文本、图片、视频等,并且可以自定义通知界面的样式和行为。
通知触发机制
UILocalNotification 使用 fireDate 属性设置通知触发时间,而 UNNotification 支持多种触发条件,如时间、位置、用户行为等,并且支持自定义触发器。
通知的管理和更新
UILocalNotification 发出通知后,就无法再次更新其内容。而 UNNotification 提供了一套通知管理和更新机制,可以根据需要动态修改通知内容或删除通知。(应用程序在后台或未运行时,无法更新通知;只有在应用程序正在运行时才能更新。)
通知的定制化
UNNotification 拥有更灵活的通知定制化能力,可以使用 Notification Content Extension 和 Notification Service Extension 来自定义通知的展示界面和内容,同时还可以在通知中嵌入音视频文件,实现更丰富的交互体验。
综上所述,UILocalNotification 和 UNNotification 都是用于发送本地通知和远程通知的类,它们有不同的特点和使用场景。如果您需要发送基本的文本通知,可以考虑使用 UILocalNotification;如果您需要发送和管理更多、更丰富的通知内容,并支持自定义通知界面和交互效果,则应使用 UNNotification。
1.请求权限
    //    if ([[UIApplication sharedApplication] currentUserNotificationSettings].types == UIUserNotificationTypeNone) {
    //        //开始授权
    //        [[UIApplication sharedApplication] registerUserNotificationSettings:[UIUserNotificationSettings settingsForTypes:UIUserNotificationTypeBadge | UIUserNotificationTypeAlert | UIUserNotificationTypeSound categories:nil]];
    //    }else{
    //        [self sendLocalNotify];
    //    }
2.创建并注册具有两个按钮的通知类别
//AppDelegate.m
// 创建一个可编辑的通知操作
    UIMutableUserNotificationAction *action1 = [[UIMutableUserNotificationAction alloc] init];
    action1.identifier = @"CustomAction1";
    action1.title = @"Custom Action Title1";
    action1.activationMode = UIUserNotificationActivationModeForeground;
    action1.destructive = NO;
    action1.authenticationRequired = NO;
    // 创建一个可编辑的通知操作
    UIMutableUserNotificationAction *action2 = [[UIMutableUserNotificationAction alloc] init];
    action2.identifier = @"CustomAction2";
    action2.title = @"Custom Action Title2";
    action2.activationMode = UIUserNotificationActivationModeForeground;
    action2.destructive = NO;
    action2.authenticationRequired = NO;

    // 创建一个可编辑的通知操作类别
    UIMutableUserNotificationCategory *category = [[UIMutableUserNotificationCategory alloc] init];
    category.identifier = @"CustomActionCategory";
    [category setActions:@[action1,action2] forContext:UIUserNotificationActionContextDefault];

    // 注册通知操作类别
    NSSet *categories = [NSSet setWithObject:category];
    UIUserNotificationType types = UIUserNotificationTypeAlert | UIUserNotificationTypeBadge | UIUserNotificationTypeSound;
    UIUserNotificationSettings *settings = [UIUserNotificationSettings settingsForTypes:types categories:categories];
    [[UIApplication sharedApplication] registerUserNotificationSettings:settings];
3.注册通知
//支持IOS10以下的版本
- (void)sendLocalNotify {
NSLog(@"发送本地通知,IOS10以前的代码");
UILocalNotification *notification = [[UILocalNotification alloc] init];
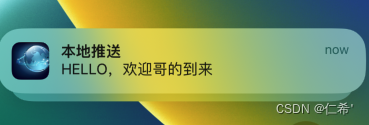
notification.alertTitle = @"本地推送"; /// 通知标题
notification.alertBody = @"HELLO,欢迎哥的到来"; /// 通知主体
notification.applicationIconBadgeNumber = 1; /// 应用程序图标的消息数
notification.hasAction = YES; /// 待机界面开启左滑按钮
notification.alertAction = @"打开应用"; /// 待机界面的滑动按钮提示
// 在通知中存储自定义信息
notification.userInfo = @{@"name":@"xyq"}; /// 传递的用户数据
notification.soundName = UILocalNotificationDefaultSoundName; /// 在收到通知时播放的声音,默认消息声音
notification.category = @"CustomActionCategory";
// 设置需要重复发送通知的时间间隔
notification.repeatInterval = NSCalendarUnitMinute;
// 在 10 秒后触发本地通知
notification.fireDate = [NSDate date];
notification.timeZone = [NSTimeZone defaultTimeZone];
// 注册本地通知
[[UIApplication sharedApplication] scheduleLocalNotification:notification];
}4.响应通知触发事件
// 在系统运行应用程序时响应通知操作
- (void)application:(UIApplication *)application handleActionWithIdentifier:(NSString *)identifier forLocalNotification:(UILocalNotification *)notification completionHandler:(void (^)(void))completionHandler {
    NSDictionary *userInfo = notification.userInfo;
    if ([identifier isEqualToString:@"CustomAction1"]) {
        // 点击了自定义操作按钮,执行相关逻辑
        NSLog(@"点击第一个按钮");
    }else{
        NSLog(@"点击第二个按钮");
    }
    NSLog(@"Notification received with userInfo: %@", userInfo);
    // 完成操作后的处理
    if (completionHandler) {
        completionHandler();
    }
}
5.回调响应事件
/// 当用户点击允许或者不允许时,会执行如下代理方法,我们在其中实现处理逻辑
-(void)application:(UIApplication *)application didRegisterUserNotificationSettings:(UIUserNotificationSettings *)notificationSettings {
    //如果通知类型不是不显示类型则调用通知
    if (notificationSettings.types != UIUserNotificationTypeNone) {
        [self addLocalNotification];
    }
}

/// 当我们的应用程序在前台或者从后台进入前台时,收到本地通知
-(void)application:(UIApplication *)application didReceiveLocalNotification:(UILocalNotification *)notification {
    // 确定应用程序是从通知中启动的
    if (application.applicationState == UIApplicationStateInactive) {
        // 这里添加处理本地通知的逻辑

        if (notification) {
            // 标记通知为已处理
            notification.applicationIconBadgeNumber = 0;
            NSDictionary *userInfo = notification.userInfo;
            NSString *body = notification.alertBody;
            //    NSLog(@"2----notification------- %@",notification);
            NSLog(@"2----userInfo------- %@",userInfo);
            NSLog(@"2----alertBody------- %@",body);
        }
    }
}

/// 当我们的应用进入前台时,需要清除应用图标的数字
-(void)applicationWillEnterForeground:(UIApplication *)application {
    [[UIApplication sharedApplication] setApplicationIconBadgeNumber:0];
}
实现效果:
1.退出app定时发送
2.加入信息传递
3.添加按钮以及触发事件


4.能够在图标右上角显示通知数量

5.app图标改变了能够自动切换
Ps:
1. 通知的UI自定义设计有限制,为标题和主体内容,不能添加附件。可以自定义提示音。
2. app在前台是,默认不会发送通知,想要实现前台也发送通知,需要另外处理。
3.打开app后,之前的通知回消失。


 1131
1131


 被折叠的 条评论
为什么被折叠?
被折叠的 条评论
为什么被折叠?
 到【灌水乐园】发言


