


VoxelNeXt论文复现
代码链接:GitHub - dvlab-research/VoxelNeXt: VoxelNeXt: Fully Sparse VoxelNet for 3D Object Detection and Tracking (CVPR 2023)
原文地址:https://arxiv.org/abs/2303.11301
A Brief Introduction
VoxelNeXt直接使用了稀疏卷积网络完全通过体素特征检测和跟踪3D对象,而不需要转换到密集检测头以及NMS后处理,实现了速度和精度更好的权衡。
Getting Started
step0 Check the environment
My environment:
- Linux (tested on Ubuntu 20.04)
- Python 3.8
- PyTorch 1.10
- CUDA 11.3 (11.1 or higher)
- gcc 9.3.0
- cmake 3.16.3
step1 Clone the repo
git clone https://github.com/dvlab-research/VoxelNeXt && cd VoxelNeXt
step2 Install the environment
注意,在VoxelNeXt的readme中,是跟着OpenPCDet的doc安装环境,建议新开一个虚拟环境:
Install pcdet v0.5
NOTE: Please re-install pcdet v0.5 by running python setup.py develop even if you have already installed previous version.
a. Clone this repository. (不需要,VoxelNeXt-master本身就是改了名字的该repo)
git clone https://github.com/open-mmlab/OpenPCDet.git
b. Install the dependent libraries as follows:
-
Install the SparseConv library, we use the implementation from
[spconv].- If you use PyTorch 1.1, then make sure you install the
spconv v1.0with (commit 8da6f96) instead of the latest one. - If you use PyTorch 1.3+, then you need to install the
spconv v1.2. As mentioned by the author ofspconv, you need to use their docker if you use PyTorch 1.4+. - You could also install latest
spconv v2.xwith pip, see the official documents of spconv.
这是很重要的一步,该库需要适配我们的环境,具体注意点如下:
- 先在自己的环境里测试是否已存在spconv,若存在,测试其版本:
#spconv1.x版本
import spconv
a = spconv.SparseModule()
#spconv2.x版本,import的同时会自动编译
import spconv.pytorch as spconv
a = spconv.SparseModule()
由于1.x版本基本在现在不用了,而且可能要手动编译,建议根据官方提供的方法彻底删除原来的库,在环境中存在多个不同版本的spconv会导致错误 (所以建议在虚拟环境中开发)。
-
确认自己环境干净,直接pip 2.x版本的spconv,注意与cuda版本对应。
-
在pip后,注意再次进行a步骤的测试,验证2.x版本spconv以安装成功。具体相关问题可以参考https://blog.csdn.net/AaaA00000001/article/details/127031829
- If you use PyTorch 1.1, then make sure you install the
c. Install this pcdet library and its dependent libraries by running the following command:
python setup.py develop
NOTE: 编译时注意查看 gcc和cmake版本。
d. 这一步是在OpenPCDet的demo里的,安装可视化mayavi或者open3d两者都可以,可以安装其中一个,也可以两个都安装,安装前者需要额外的依赖。
NOTE: 其实requirement是不完全的,后期需要补充安装av2和kornia模块,直接pip即可。
step3 Evaluation
a. 准备数据集,这里以nuscenes为例
pip install pycocotools
pip install pip install nuscenes-devkit==1.0.5

# nuscenes_dataset.py中需要修改一下自己实际存放数据集的路径,这一步是处理nuscenes格式,创建data infos,使之可以被OpenPCDet调用
python -m pcdet.datasets.nuscenes.nuscenes_dataset \
			--func create_nuscenes_infos \
			--cfg_file tools/cfgs/dataset_configs/nuscenes_dataset.yaml \
			--version v1.0-trainval (or v1.0-mini)

# 参考链接:https://zhuanlan.zhihu.com/p/599090187
原始格式
OpenPCDet
├── data
│   ├── nuscenes
│   │   │── v1.0-trainval (or v1.0-mini)
│   │   │   │── samples # 对keyframes的,各种sensor的数据,包括了相机、毫米波雷达和激光雷达
│   │   │   │── sweeps # intermediate frames(过渡帧或中间帧)的sensor data
│   │   │   │── maps # 存放着所有的map files,包括栅格化后的png图片和向量化后的json文件
│   │   │   │── v1.0-trainval (or v1.0-mini) # 存放着所有meta data和annotations的JSON table

处理后的格式
OpenPCDet
├── data
│   ├── nuscenes
│   │   │── v1.0-trainval (or v1.0-mini)
│   │   │   │── samples
│   │   │   │── sweeps
│   │   │   │── maps
│   │   │   │── v1.0-trainval (or v1.0-mini) # 存放着所有meta data和annotations的JSON table
        │   │── gt_database_10sweeps_withvelo # mini版本里没有
        │   │── nuscenes_infos_10sweeps_train.pkl
        │   │── nuscenes_infos_10sweeps_val.pkl
        │   │── nuscenes_dbinfos_10sweeps_withvelo.pkl

参考链接:https://blog.csdn.net/Mao_Jonah/article/details/120567084
处理日志:
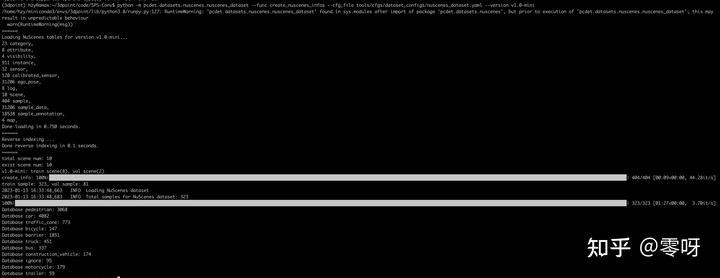
这里引用了知乎 @零呀 同学的图,若有问题请与我联系。
参考链接:https://zhuanlan.zhihu.com/p/599090187
NOTE: 如使用nuscense_mini数据集,要修改VoxelNeXt-master/tools/cfgs/dataset_configs/nuscenes_dataset.yaml :
VERSION: ‘v1.0-trainval’ 为 VERSION: ‘v1.0-mini’
b. eval
先下载预训练模型:
nuScenes Detection	Set	mAP	NDS	Download
VoxelNeXt	        val	60.5	66.6	Pre-trained
这个对应的cfg文件是:
VoxelNeXt/tools/cfgs/nuscenes_models/cbgs_voxel0075_voxelnext.yaml
cd tools
bash scripts/dist_test.sh NUM_GPUS --cfg_file PATH_TO_CONFIG_FILE --ckpt PATH_TO_MODEL
#For example,
bash scripts/dist_test.sh 8 --cfg_file PATH_TO_CONFIG_FILE --ckpt PATH_TO_MODEL
H_TO_CONFIG_FILE --ckpt PATH_TO_MODEL
#For example,
bash scripts/dist_test.sh 8 --cfg_file PATH_TO_CONFIG_FILE --ckpt PATH_TO_MODEL


 8807
8807

 被折叠的 条评论
为什么被折叠?
被折叠的 条评论
为什么被折叠?
 到【灌水乐园】发言


