


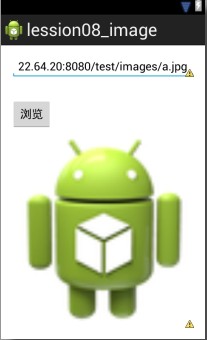
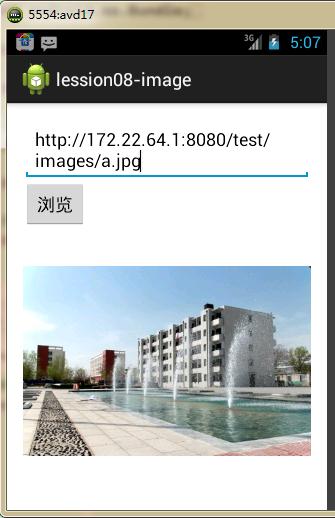
1、布局界面
- <RelativeLayout xmlns:android="http://schemas.android.com/apk/res/android"
- xmlns:tools="http://schemas.android.com/tools"
- android:layout_width="match_parent"
- android:layout_height="match_parent"
- android:paddingBottom="@dimen/activity_vertical_margin"
- android:paddingLeft="@dimen/activity_horizontal_margin"
- android:paddingRight="@dimen/activity_horizontal_margin"
- android:paddingTop="@dimen/activity_vertical_margin"
- tools:context=".MainActivity" >
- <EditText
- android:id="@+id/url_text"
- android:layout_width="wrap_content"
- android:layout_height="wrap_content"
- android:layout_alignParentLeft="true"
- android:layout_alignParentRight="true"
- android:layout_alignParentTop="true"
- android:ems="10"
- android:inputType="textPostalAddress"
- android:text="@string/url_text" >
- <requestFocus />
- </EditText>
- <Button
- android:id="@+id/btn_text"
- android:layout_width="wrap_content"
- android:layout_height="wrap_content"
- android:layout_alignLeft="@+id/url_text"
- android:layout_below="@+id/url_text"
- android:layout_marginTop="32dp"
- android:onClick="sendHttp"
- android:text="@string/btn_text" />
- <ImageView
- android:id="@+id/iv_ie"
- android:layout_width="wrap_content"
- android:layout_height="wrap_content"
- android:layout_alignParentBottom="true"
- android:layout_alignParentLeft="true"
- android:layout_alignRight="@+id/url_text"
- android:layout_below="@+id/btn_text"
- android:src="@drawable/ic_launcher" />
- </RelativeLayout>
<RelativeLayout xmlns:android="http://schemas.android.com/apk/res/android"
    xmlns:tools="http://schemas.android.com/tools"
    android:layout_width="match_parent"
    android:layout_height="match_parent"
    android:paddingBottom="@dimen/activity_vertical_margin"
    android:paddingLeft="@dimen/activity_horizontal_margin"
    android:paddingRight="@dimen/activity_horizontal_margin"
    android:paddingTop="@dimen/activity_vertical_margin"
    tools:context=".MainActivity" >

    <EditText
        android:id="@+id/url_text"
        android:layout_width="wrap_content"
        android:layout_height="wrap_content"
        android:layout_alignParentLeft="true"
        android:layout_alignParentRight="true"
        android:layout_alignParentTop="true"
        android:ems="10"
        android:inputType="textPostalAddress"
        android:text="@string/url_text" >

        <requestFocus />
    </EditText>

    <Button
        android:id="@+id/btn_text"
        android:layout_width="wrap_content"
        android:layout_height="wrap_content"
        android:layout_alignLeft="@+id/url_text"
        android:layout_below="@+id/url_text"
        android:layout_marginTop="32dp"
        android:onClick="sendHttp"
        android:text="@string/btn_text" />

    <ImageView
        android:id="@+id/iv_ie"
        android:layout_width="wrap_content"
        android:layout_height="wrap_content"
        android:layout_alignParentBottom="true"
        android:layout_alignParentLeft="true"
        android:layout_alignRight="@+id/url_text"
        android:layout_below="@+id/btn_text"
        android:src="@drawable/ic_launcher" />

</RelativeLayout>
2、封转的一些类
URL的封装:
- package com.example.lession08_code.utis;
- import java.io.InputStream;
- import java.net.HttpURLConnection;
- import java.net.URL;
- import android.graphics.Bitmap;
- import android.graphics.BitmapFactory;
- public class HttpUtils {
- public static String sendGet(String path){
- String content=null;
- try{
- //设置访问的url
- URL url=new URL(path);
- //打开请求
- HttpURLConnection httpURLConnection=(HttpURLConnection) url.openConnection();
- //设置请求的信息
- httpURLConnection.setRequestMethod("GET");
- //设置请求是否超时
- httpURLConnection.setConnectTimeout(5000);
- //判断服务器是否响应成功
- if(httpURLConnection.getResponseCode()==200){
- //获取响应的输入流对象
- InputStream is=httpURLConnection.getInputStream();
- byte data[]=StreamTools.isTodata(is);
- //把转换成字符串
- content=new String(data);
- //内容编码方式
- if(content.contains("gb2312")){
- content=new String(data,"gb2312");
- }
- }
- //断开连接
- httpURLConnection.disconnect();
- }catch(Exception e){
- e.printStackTrace();
- }
- return content;
- }
- public static Bitmap sendGets(String path){
- Bitmap bitmap=null;
- try{
- //设置访问的url
- URL url=new URL(path);
- //打开请求
- HttpURLConnection httpURLConnection=(HttpURLConnection) url.openConnection();
- //设置请求的信息
- httpURLConnection.setRequestMethod("GET");
- //设置请求是否超时
- httpURLConnection.setConnectTimeout(5000);
- //判断服务器是否响应成功
- if(httpURLConnection.getResponseCode()==200){
- //获取响应的输入流对象
- InputStream is=httpURLConnection.getInputStream();
- //直接把is的流转换成Bitmap对象
- bitmap=BitmapFactory.decodeStream(is);
- }
- //断开连接
- httpURLConnection.disconnect();
- }catch(Exception e){
- e.printStackTrace();
- }
- return bitmap;
- }
- }
package com.example.lession08_code.utis;

import java.io.InputStream;
import java.net.HttpURLConnection;
import java.net.URL;

import android.graphics.Bitmap;
import android.graphics.BitmapFactory;

public class HttpUtils {

	public static String sendGet(String path){
		String content=null;
		try{
			//设置访问的url
			URL url=new URL(path);
			//打开请求
			HttpURLConnection httpURLConnection=(HttpURLConnection) url.openConnection();
			//设置请求的信息
			httpURLConnection.setRequestMethod("GET");
			//设置请求是否超时
			httpURLConnection.setConnectTimeout(5000);
			//判断服务器是否响应成功
			if(httpURLConnection.getResponseCode()==200){
				//获取响应的输入流对象
				InputStream is=httpURLConnection.getInputStream();
				byte data[]=StreamTools.isTodata(is);
				//把转换成字符串
				content=new String(data);
				//内容编码方式
				if(content.contains("gb2312")){
					content=new String(data,"gb2312");
				}
			}
			//断开连接
			httpURLConnection.disconnect();
		}catch(Exception e){
			e.printStackTrace();
		}

		return content;
	}


	public static Bitmap sendGets(String path){
		Bitmap bitmap=null;
		try{
			//设置访问的url
			URL url=new URL(path);
			//打开请求
			HttpURLConnection httpURLConnection=(HttpURLConnection) url.openConnection();
			//设置请求的信息
			httpURLConnection.setRequestMethod("GET");
			//设置请求是否超时
			httpURLConnection.setConnectTimeout(5000);
			//判断服务器是否响应成功
			if(httpURLConnection.getResponseCode()==200){
				//获取响应的输入流对象
				InputStream is=httpURLConnection.getInputStream();
				//直接把is的流转换成Bitmap对象
				bitmap=BitmapFactory.decodeStream(is);
			}
			//断开连接
			httpURLConnection.disconnect();
		}catch(Exception e){
			e.printStackTrace();
		}

		return bitmap;
	}
}
判断网络是否连接的封装类
- package com.example.lession08_code.utis;
- import android.app.AlertDialog;
- import android.content.ComponentName;
- import android.content.Context;
- import android.content.DialogInterface;
- import android.content.Intent;
- import android.net.ConnectivityManager;
- import android.net.NetworkInfo;
- import android.widget.Toast;
- public class NetWorkUtils {
- private Context context;
- // 网路链接管理对象
- public ConnectivityManager connectivityManager;
- public NetWorkUtils(Context context) {
- this.context = context;
- // 获取网络链接的对象
- connectivityManager = (ConnectivityManager) context
- .getSystemService(Context.CONNECTIVITY_SERVICE);
- }
- public boolean setActiveNetWork() {
- boolean flag=false;
- // 获取可用的网络链接对象
- NetworkInfo networkInfo = connectivityManager.getActiveNetworkInfo();
- if (networkInfo == null) {
- new AlertDialog.Builder(context)
- .setTitle("网络不可用")
- .setMessage("可以设置网络?")
- .setPositiveButton("确认",
- new DialogInterface.OnClickListener() {
- @Override
- public void onClick(DialogInterface dialog,
- int which) {
- Toast.makeText(context, "点击确认",
- Toast.LENGTH_LONG).show();
- // 声明意图
- Intent intent = new Intent();
- intent.setAction(Intent.ACTION_MAIN);
- intent.addCategory("android.intent.category.LAUNCHER");
- intent.setComponent(new ComponentName(
- "com.android.settings",
- "com.android.settings.Settings"));
- intent.setFlags(0x10200000);
- // 执行意图
- context.startActivity(intent);
- }
- })
- .setNegativeButton("取消",
- new DialogInterface.OnClickListener() {
- @Override
- public void onClick(DialogInterface dialog,
- int which) {
- }
- }).show();// 必须.show();
- }
- if(networkInfo!=null){
- flag=true;
- }
- return flag;
- }
- }
package com.example.lession08_code.utis;

import android.app.AlertDialog;
import android.content.ComponentName;
import android.content.Context;
import android.content.DialogInterface;
import android.content.Intent;
import android.net.ConnectivityManager;
import android.net.NetworkInfo;
import android.widget.Toast;

public class NetWorkUtils {

	private Context context;

	// 网路链接管理对象
	public ConnectivityManager connectivityManager;

	public NetWorkUtils(Context context) {
		this.context = context;
		// 获取网络链接的对象
		connectivityManager = (ConnectivityManager) context
				.getSystemService(Context.CONNECTIVITY_SERVICE);
	}

	public boolean setActiveNetWork() {
		boolean flag=false;
		// 获取可用的网络链接对象
		NetworkInfo networkInfo = connectivityManager.getActiveNetworkInfo();
		if (networkInfo == null) {
			new AlertDialog.Builder(context)
					.setTitle("网络不可用")
					.setMessage("可以设置网络?")
					.setPositiveButton("确认",
							new DialogInterface.OnClickListener() {
								@Override
								public void onClick(DialogInterface dialog,
										int which) {
									Toast.makeText(context, "点击确认",
											Toast.LENGTH_LONG).show();


									// 声明意图
									Intent intent = new Intent();
									intent.setAction(Intent.ACTION_MAIN);
									intent.addCategory("android.intent.category.LAUNCHER");
									intent.setComponent(new ComponentName(
											"com.android.settings",
											"com.android.settings.Settings"));
									intent.setFlags(0x10200000);
									// 执行意图
									context.startActivity(intent);

								}

							})
					.setNegativeButton("取消",
							new DialogInterface.OnClickListener() {

								@Override
								public void onClick(DialogInterface dialog,
										int which) {
								}

							}).show();// 必须.show();

		}

		if(networkInfo!=null){
			flag=true;
		}

		return flag;
	}
}
输出流的封装类
- package com.example.lession08_code.utis;
- import java.io.ByteArrayOutputStream;
- import java.io.IOException;
- import java.io.InputStream;
- public class StreamTools {
- public static byte[] isTodata(InputStream is) throws IOException{
- //字节输出流
- ByteArrayOutputStream bops=new ByteArrayOutputStream();
- //读取数据的缓冲区
- byte buffer[]=new byte[1024];
- //读取记录的长度
- int len=0;
- while((len=is.read(buffer))!=-1){
- bops.write(buffer, 0, len);
- }
- //把读取的内容转换成byte数组
- byte data[]=bops.toByteArray();
- return data;
- }
- }
package com.example.lession08_code.utis;

import java.io.ByteArrayOutputStream;
import java.io.IOException;
import java.io.InputStream;

public class StreamTools {

	public static byte[] isTodata(InputStream is) throws IOException{
		//字节输出流
		ByteArrayOutputStream bops=new ByteArrayOutputStream();
		//读取数据的缓冲区
		byte buffer[]=new byte[1024];
		//读取记录的长度
		int len=0;
		while((len=is.read(buffer))!=-1){
			bops.write(buffer, 0, len);
		}
		//把读取的内容转换成byte数组
		byte data[]=bops.toByteArray();
		return data;
	}
}
注意:在这里还需要加权限问题
- <uses-permission android:name="android.permission.ACCESS_NETWORK_STATE"/>
- <uses-permission android:name="android.permission.INTERNET"/>
 <uses-permission android:name="android.permission.ACCESS_NETWORK_STATE"/>
    <uses-permission android:name="android.permission.INTERNET"/>


 731
731

 被折叠的 条评论
为什么被折叠?
被折叠的 条评论
为什么被折叠?
 到【灌水乐园】发言


