


学习如何使用官方Jenkins的REST的API操作
1. 启动运行jenkins(这里不啰嗦~)
2.登录
自己的jenkins是运行在容器里的,访问是用域名 账号为:admin/admin

3.查看rest api
登录后,在界面的右下角有
Page generated: 2020年6月23日 UTC 上午11:15:26 REST API Jenkins ver. 2.204.2
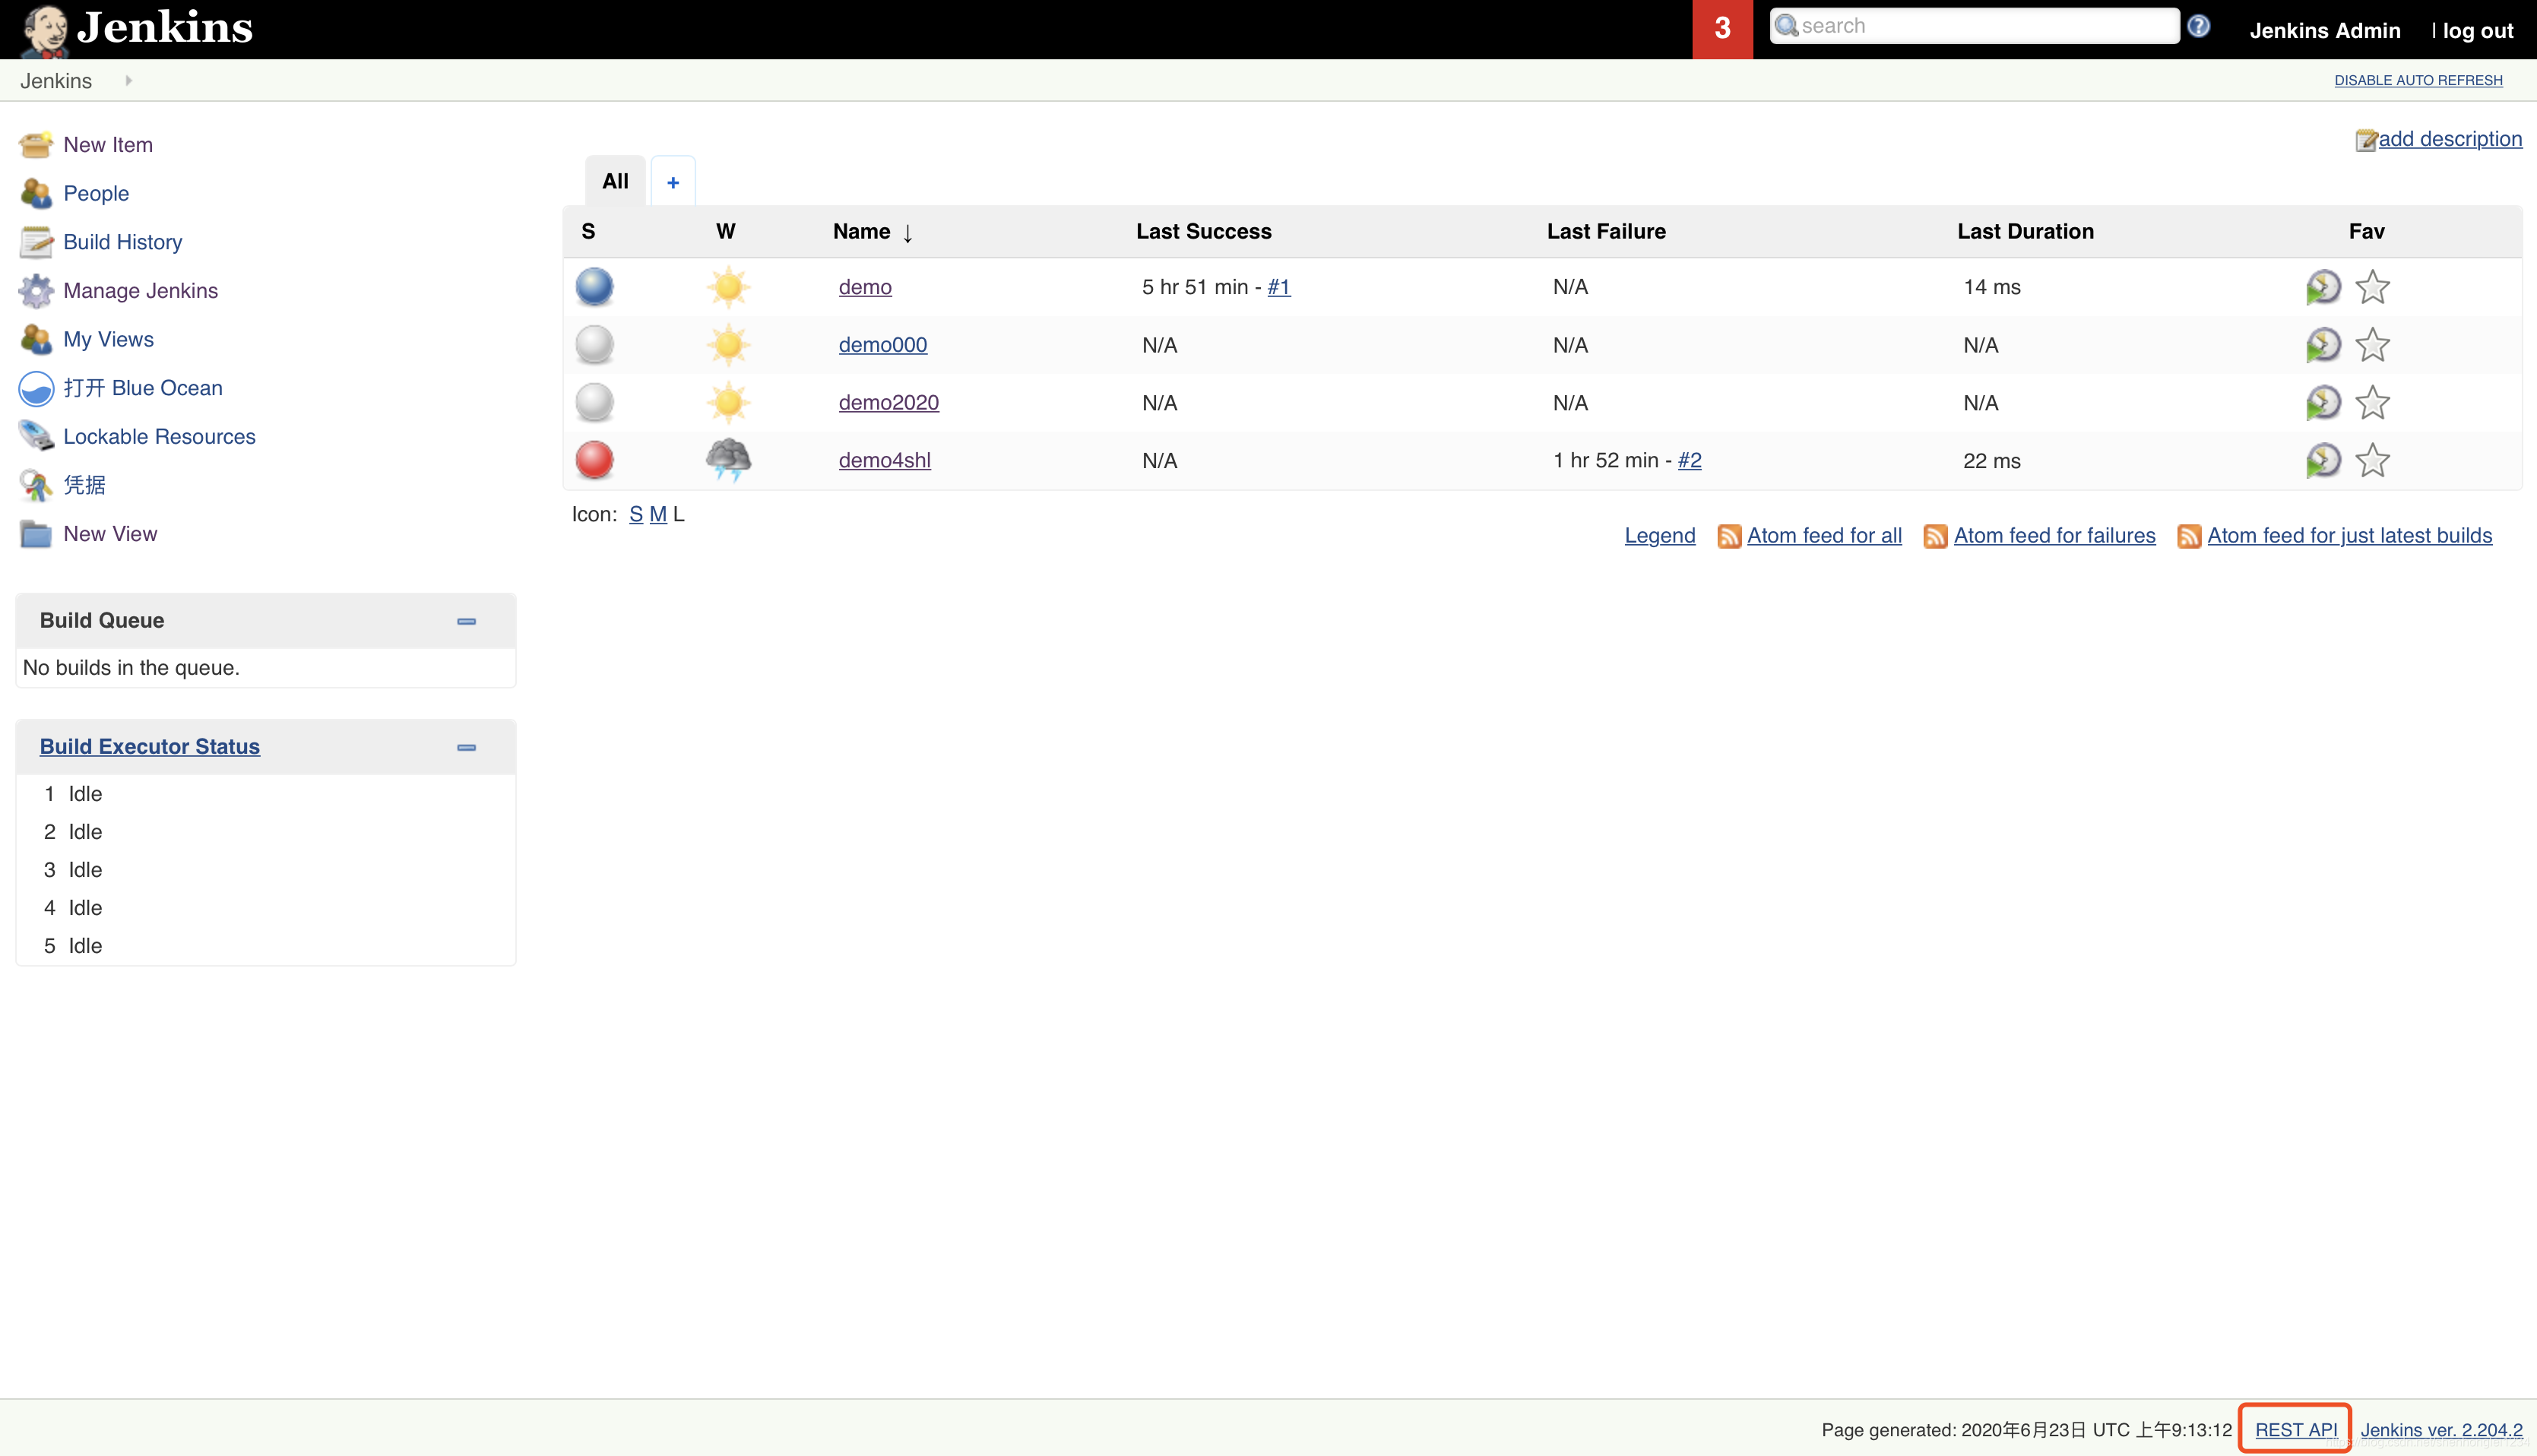
3.查看rest api 界面
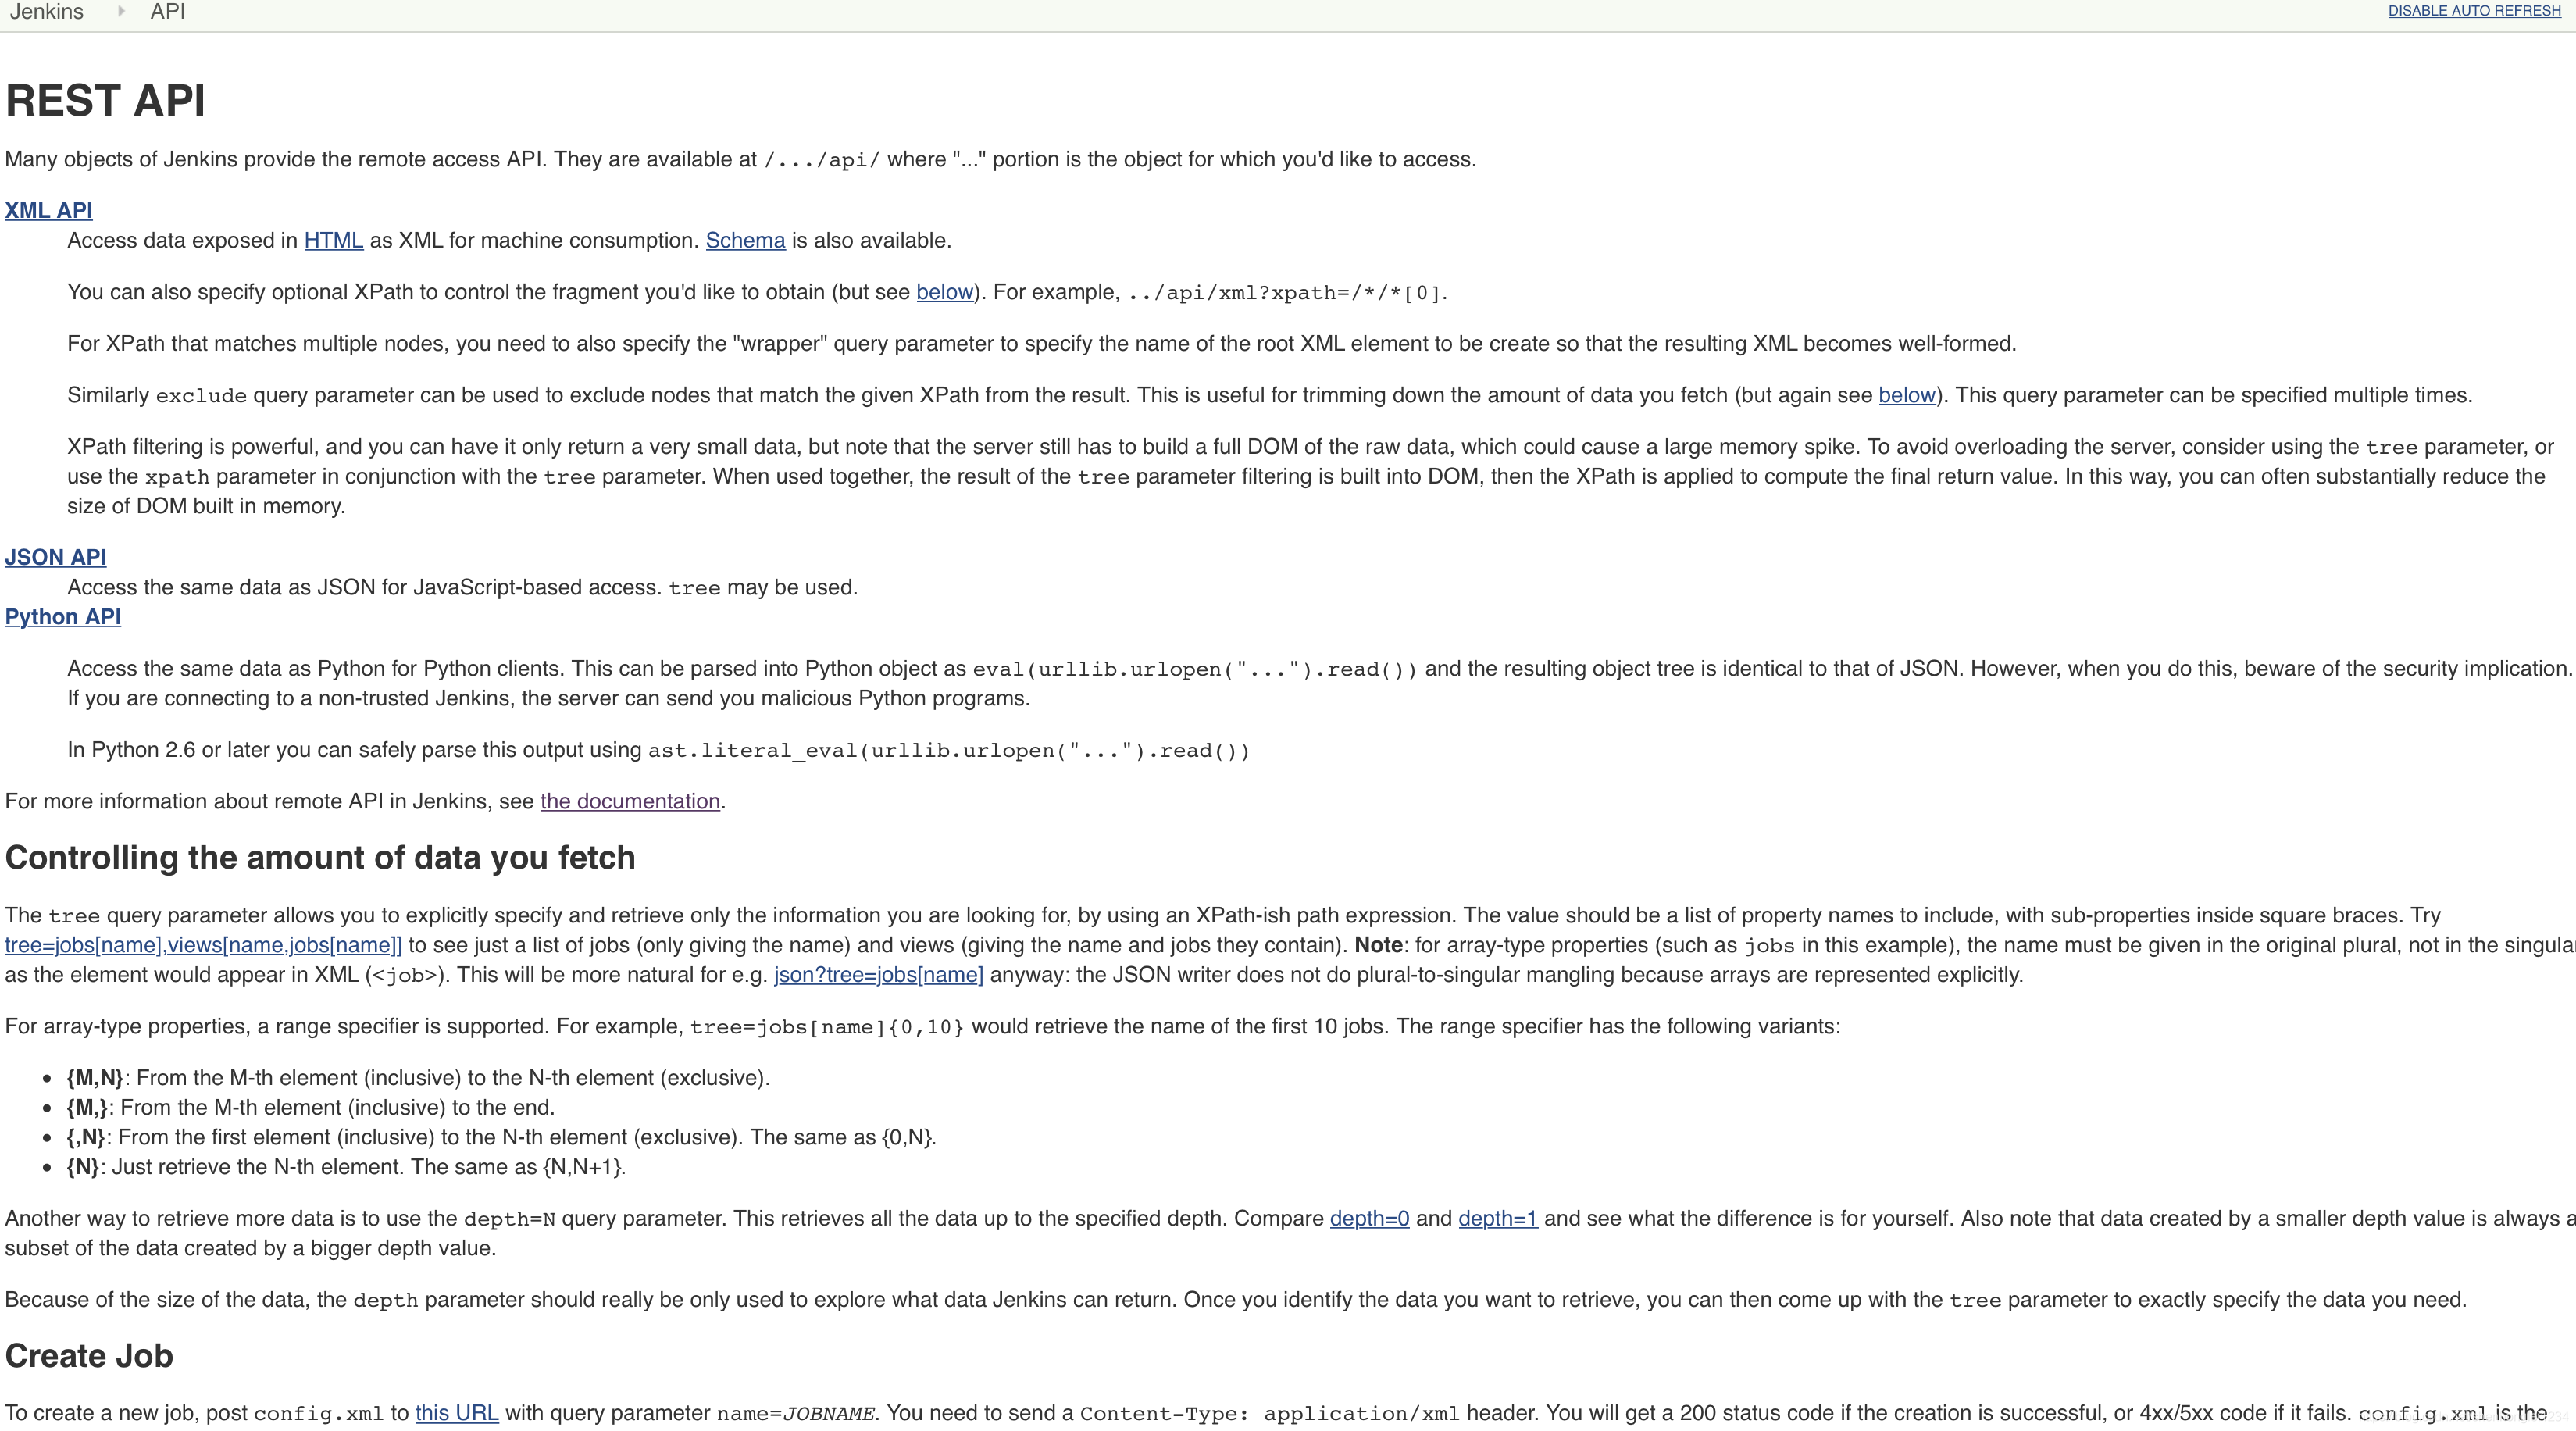
Jenkins的许多对象都提供了远程访问API。 它们在/…/api/中可用,其中“ …”部分是您要访问的对象.
4.如何使用官方rest api 接口
4.1 控制查询的数据量
Controlling the amount of data you fetch控制您获取的数据量,就是类似于分页查询
{M,N}:从第M个元素(包括)到第N个元素(不包括)。
4.2 Create Job (pipeline)
原文
To create a new job, post config.xml to this URL with query parameter name=JOBNAME, You need to send a Content-Type: application/xml header. You will get a 200 status code if the creation is successful, or 4xx/5xx code if it fails. config.xml is the format Jenkins uses to store the project in the file system, so you can see examples of them in the Jenkins home directory, or by retrieving the XML configuration of existing jobs from /job/JOBNAME/config.xml.
意思就是说:
创建job,必须是post方法,参数name=job名称,Content-Type: application/xml 等
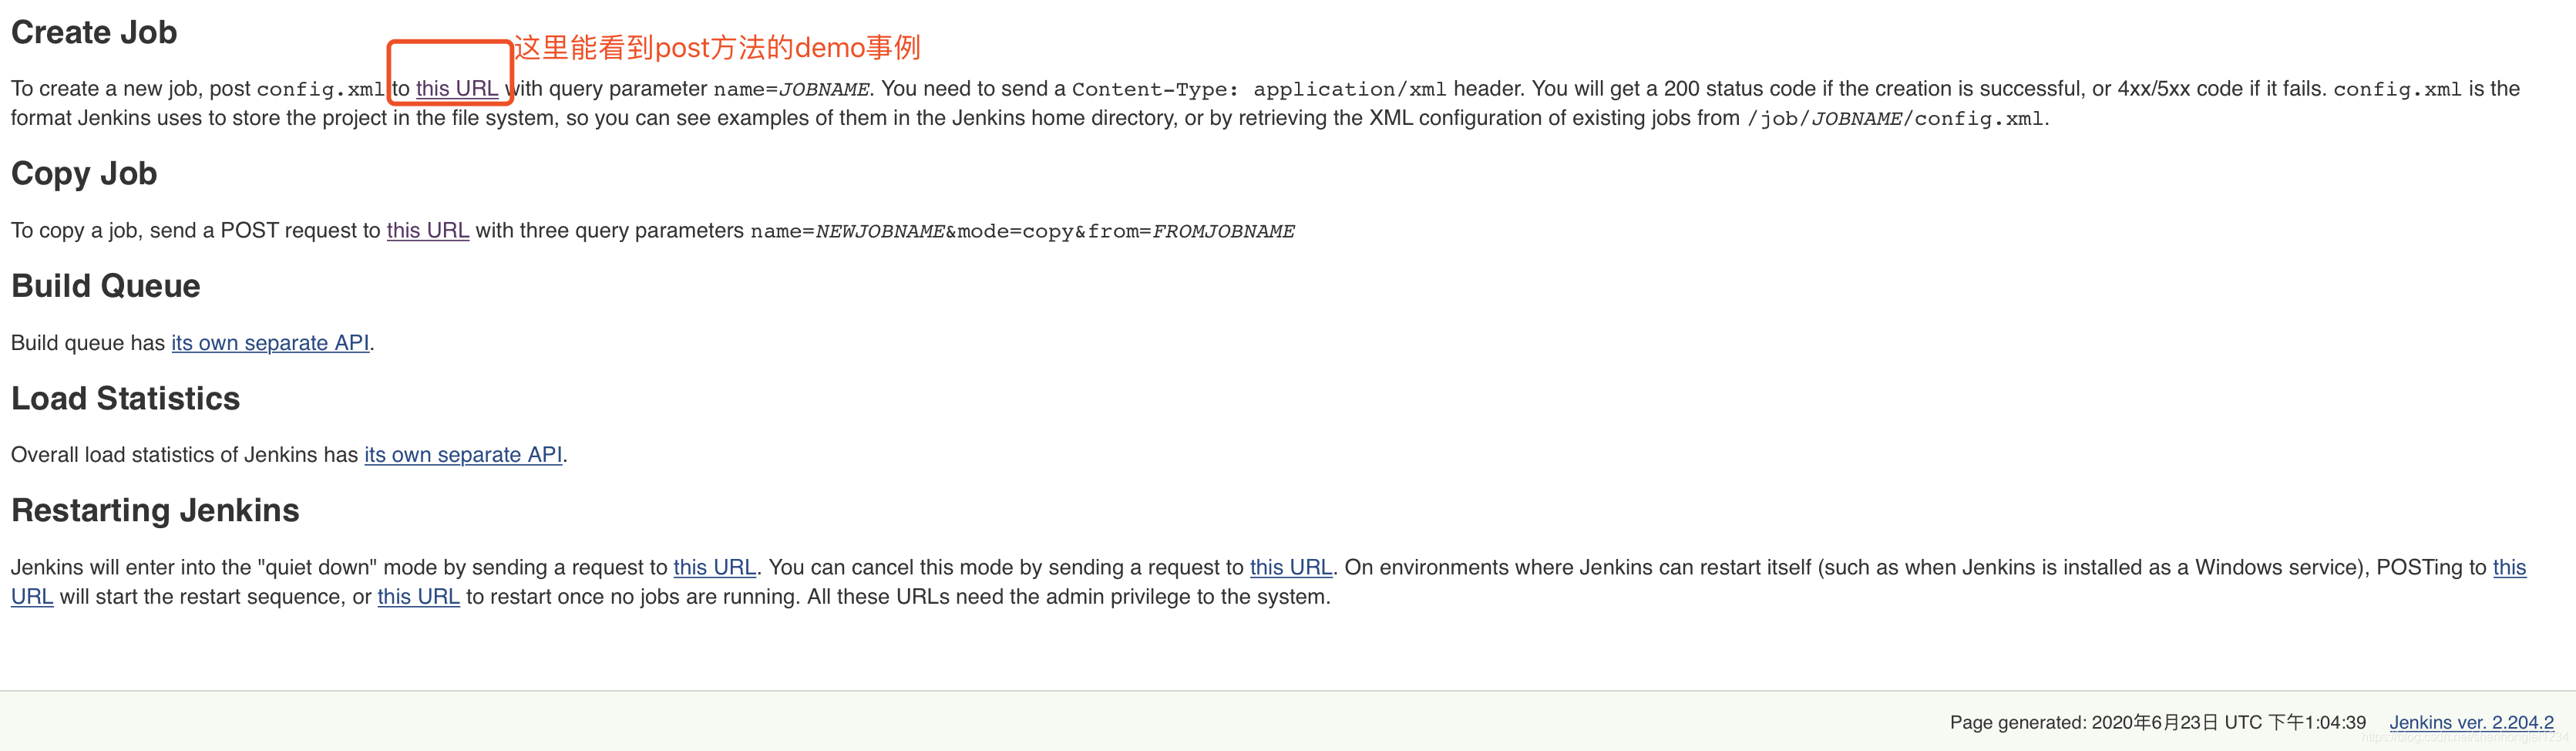
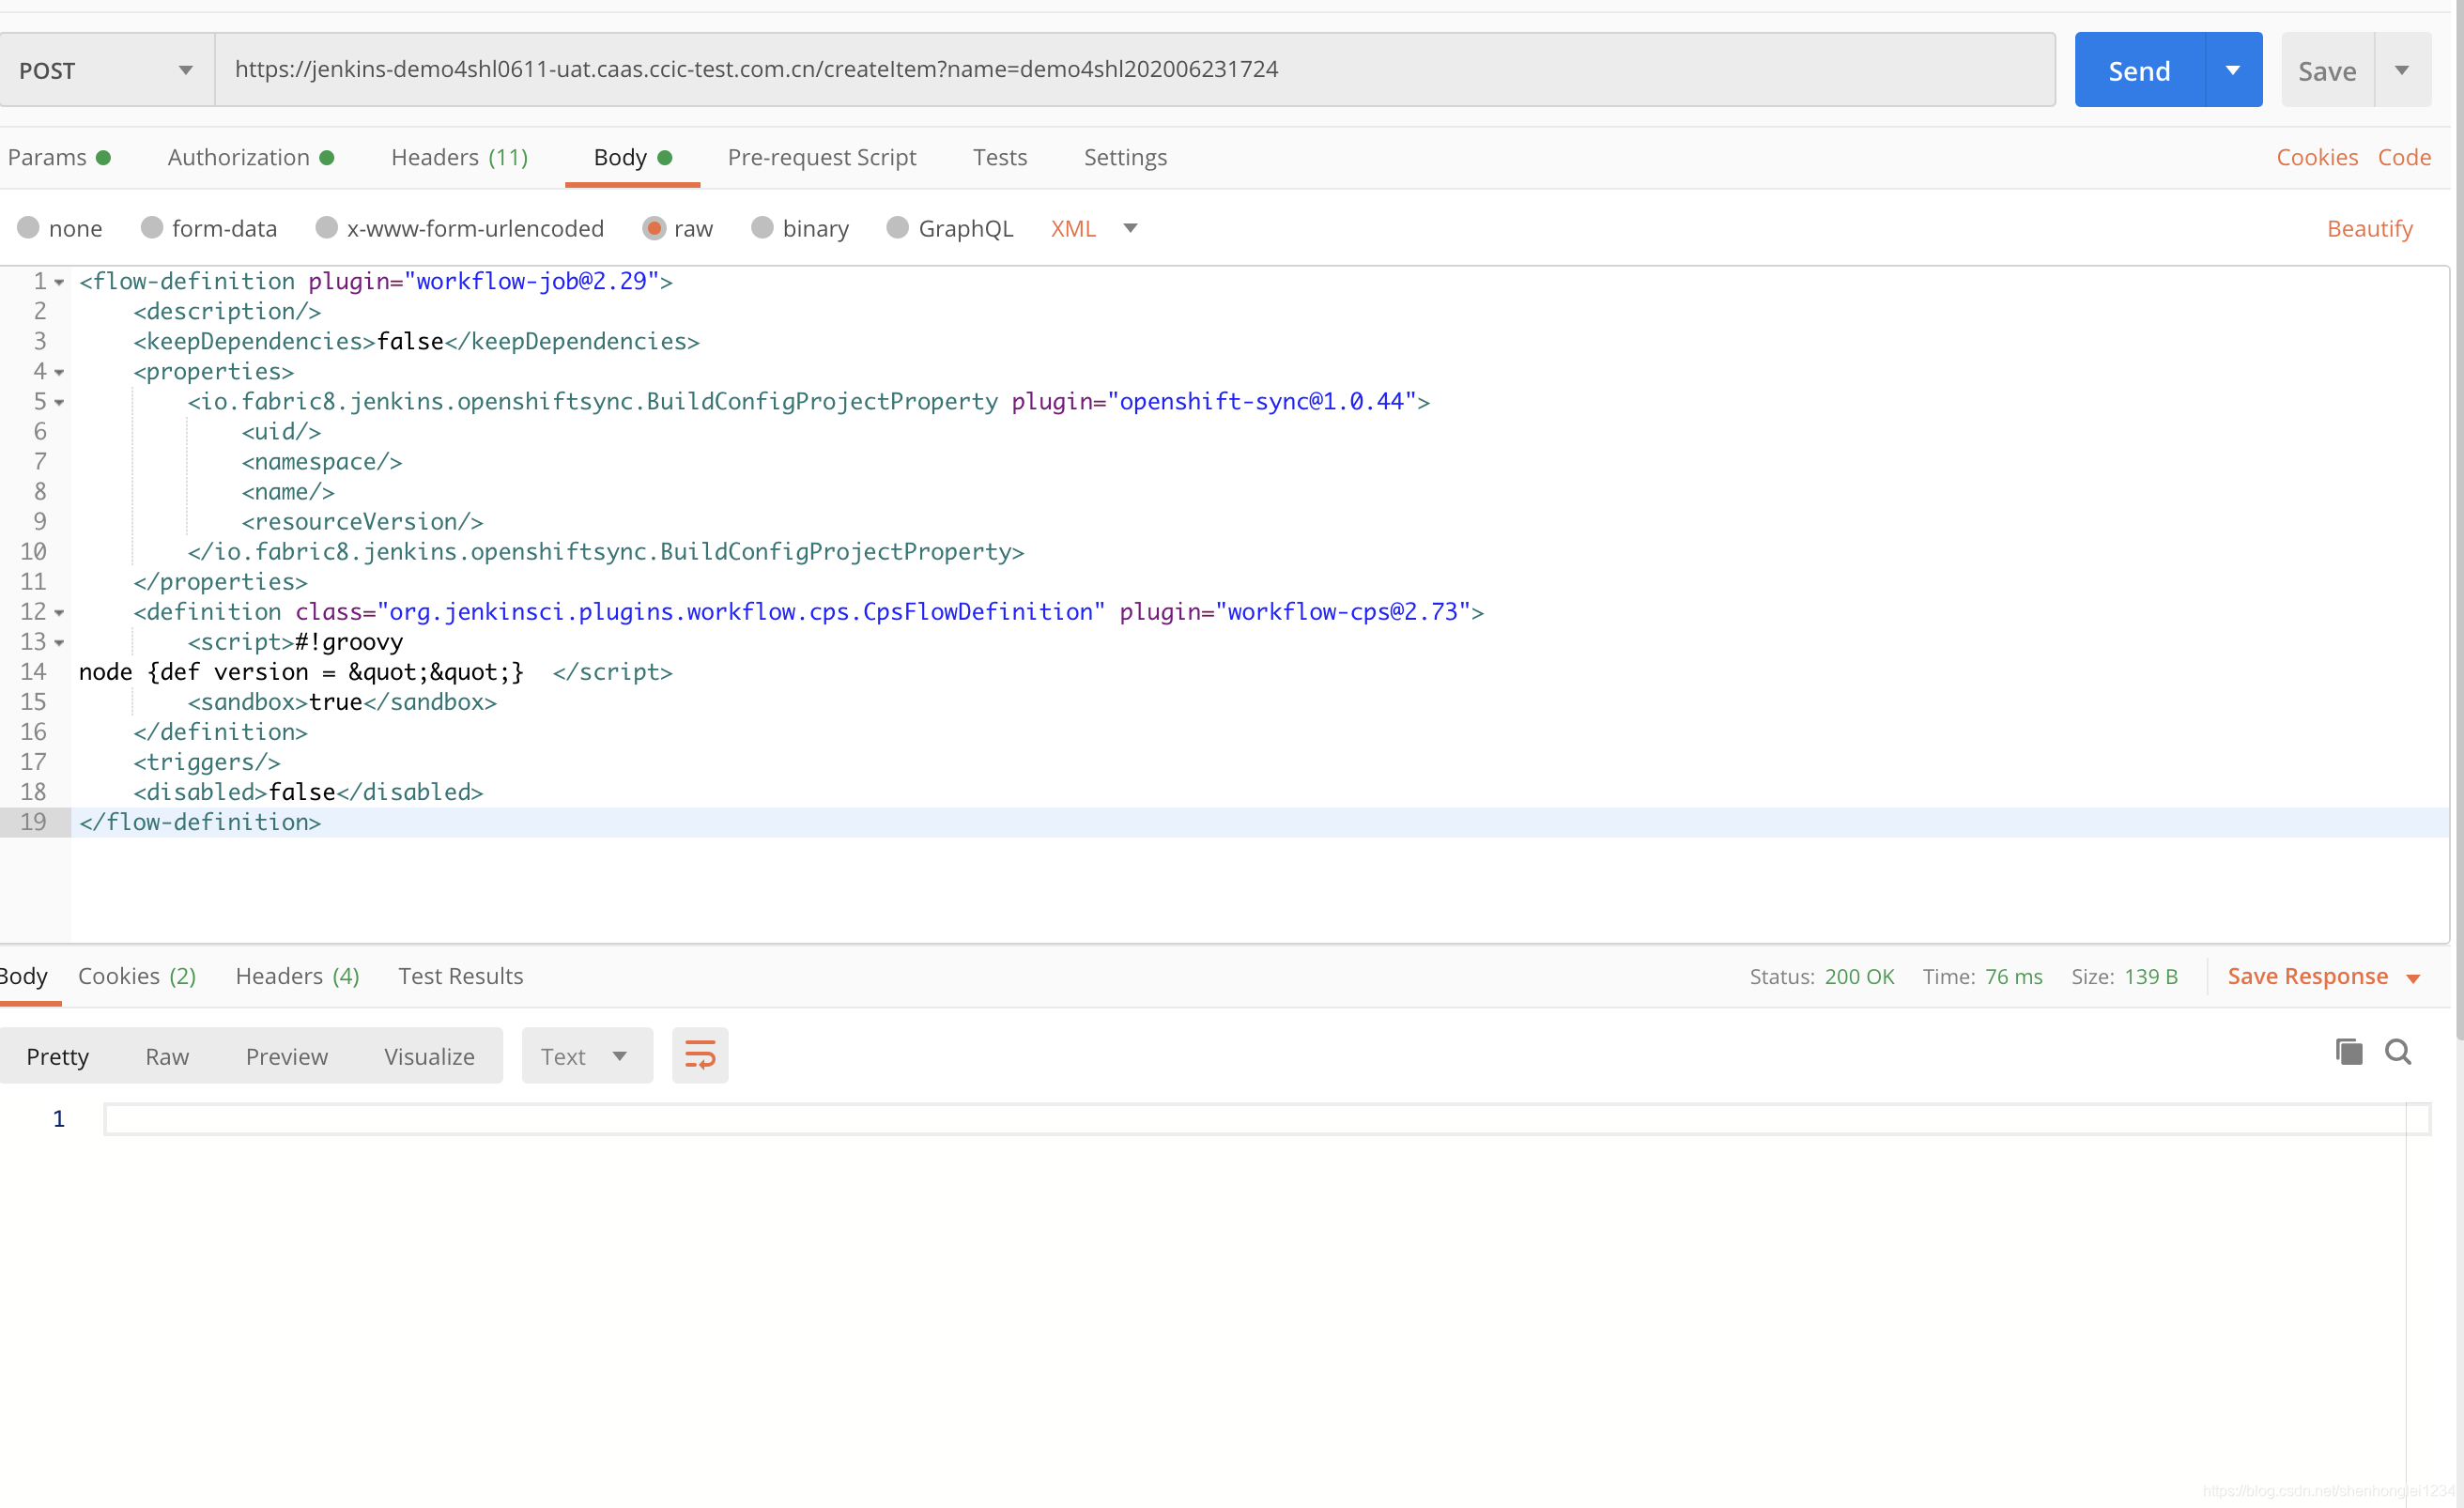
上实操事例:
- post方法:
- https://ip+端口/createItem?name=demo4shl202006232124
- Content-Type=application/xml
- body是raw选择是xml类型
<flow-definition plugin="workflow-job@2.29">
    <description/>
    <keepDependencies>false</keepDependencies>
    <properties>
        <io.fabric8.jenkins.openshiftsync.BuildConfigProjectProperty plugin="openshift-sync@1.0.44">
            <uid/>
            <namespace/>
            <name/>
            <resourceVersion/>
        </io.fabric8.jenkins.openshiftsync.BuildConfigProjectProperty>
    </properties>
    <definition class="org.jenkinsci.plugins.workflow.cps.CpsFlowDefinition" plugin="workflow-cps@2.73">
        <script>#!groovy </script>
        <sandbox>true</sandbox>
    </definition>
    <triggers/>
    <disabled>false</disabled>
</flow-definition>
- 登录认证是:Basic Auth 输入用户名和密码
- 创建的是带插件plugin(pipeline)的job
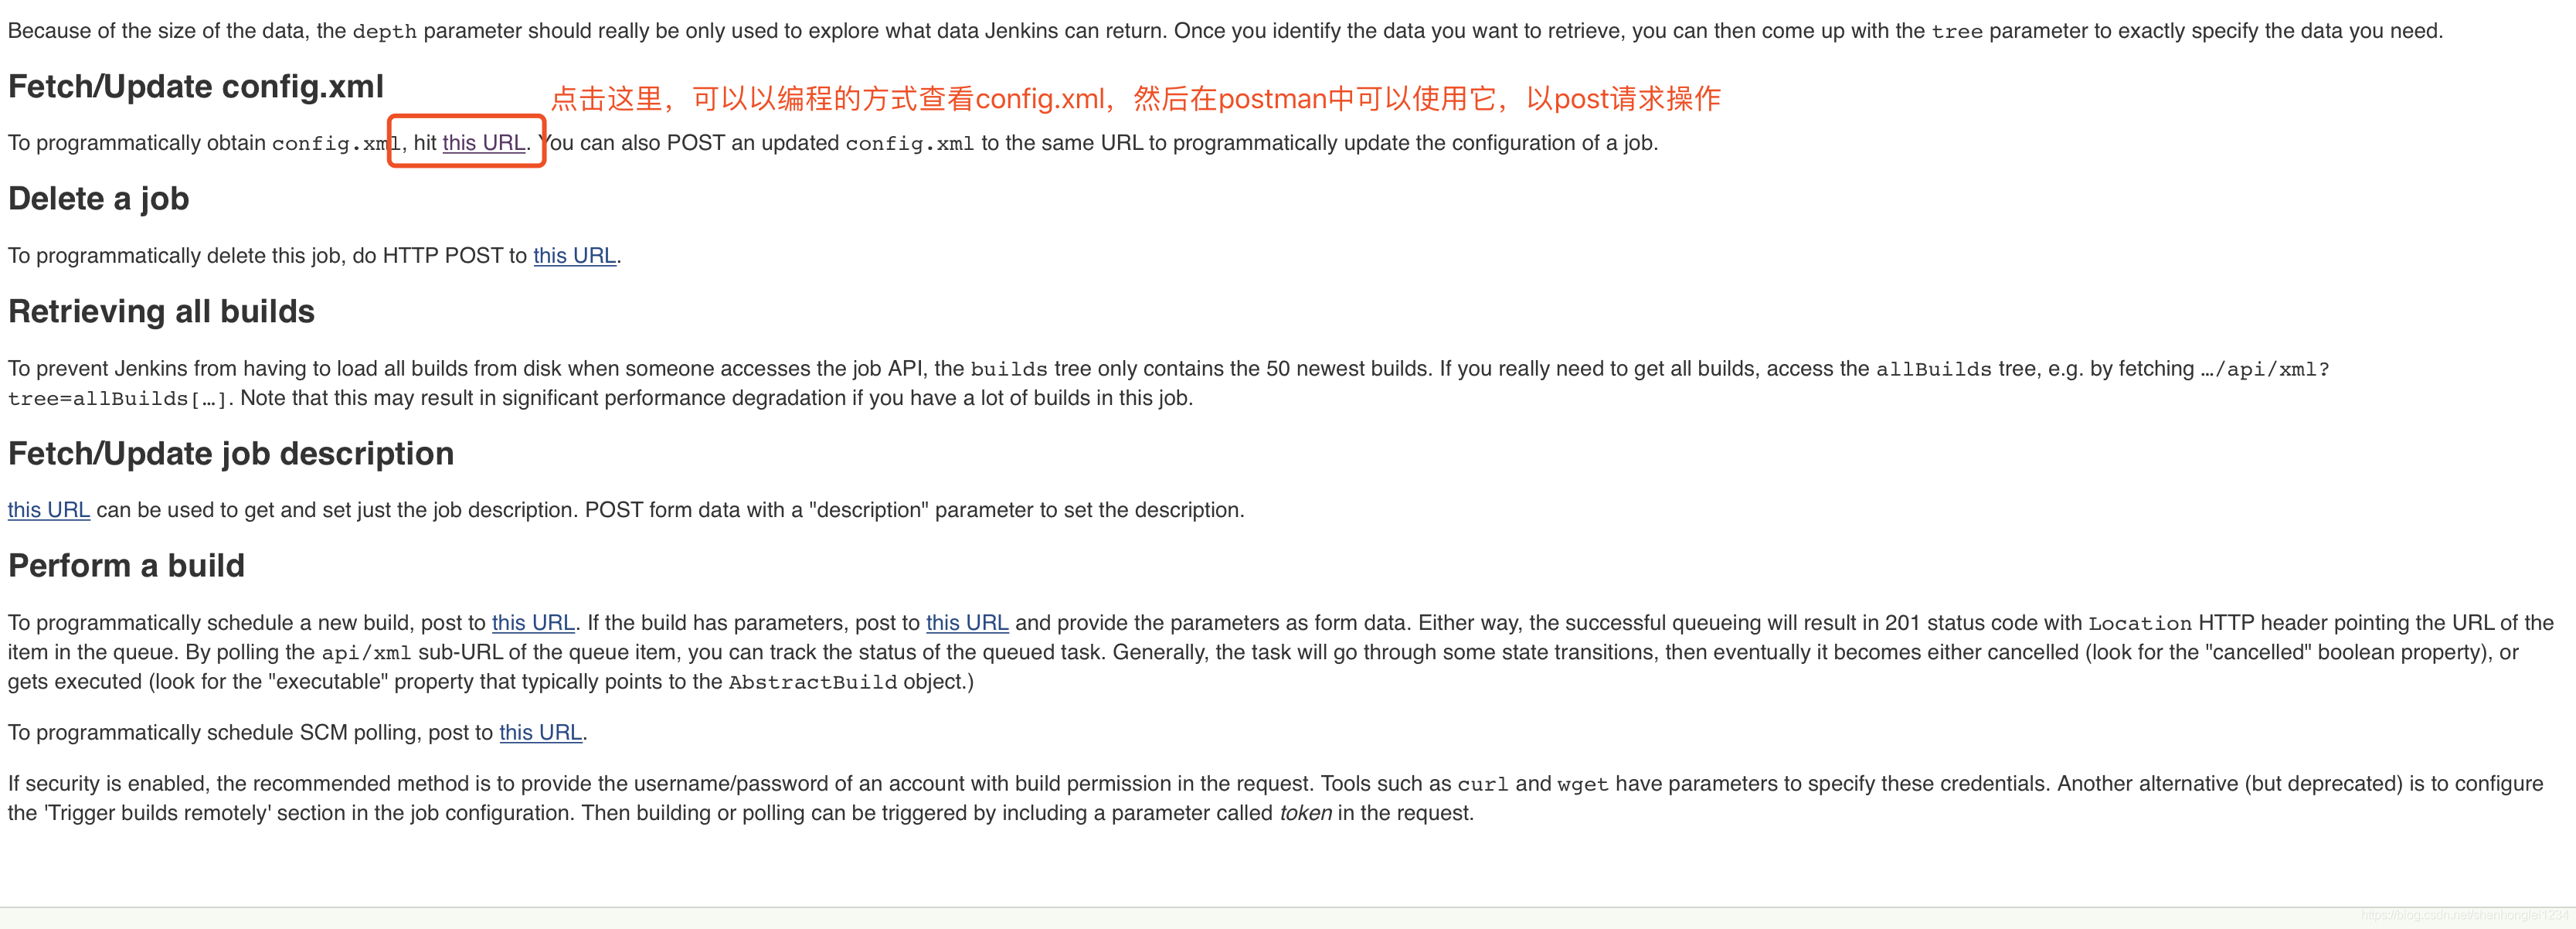
4.3 查询/更新job的config.xml【查询job,更新job】
Fetch/Update config.xml
要以编程方式获取config.xml【https://ip+端口/job/job名称/config.xml】。 您也可以将更新的config.xml POST到相同的URL,以编程方式更新作业的配置。
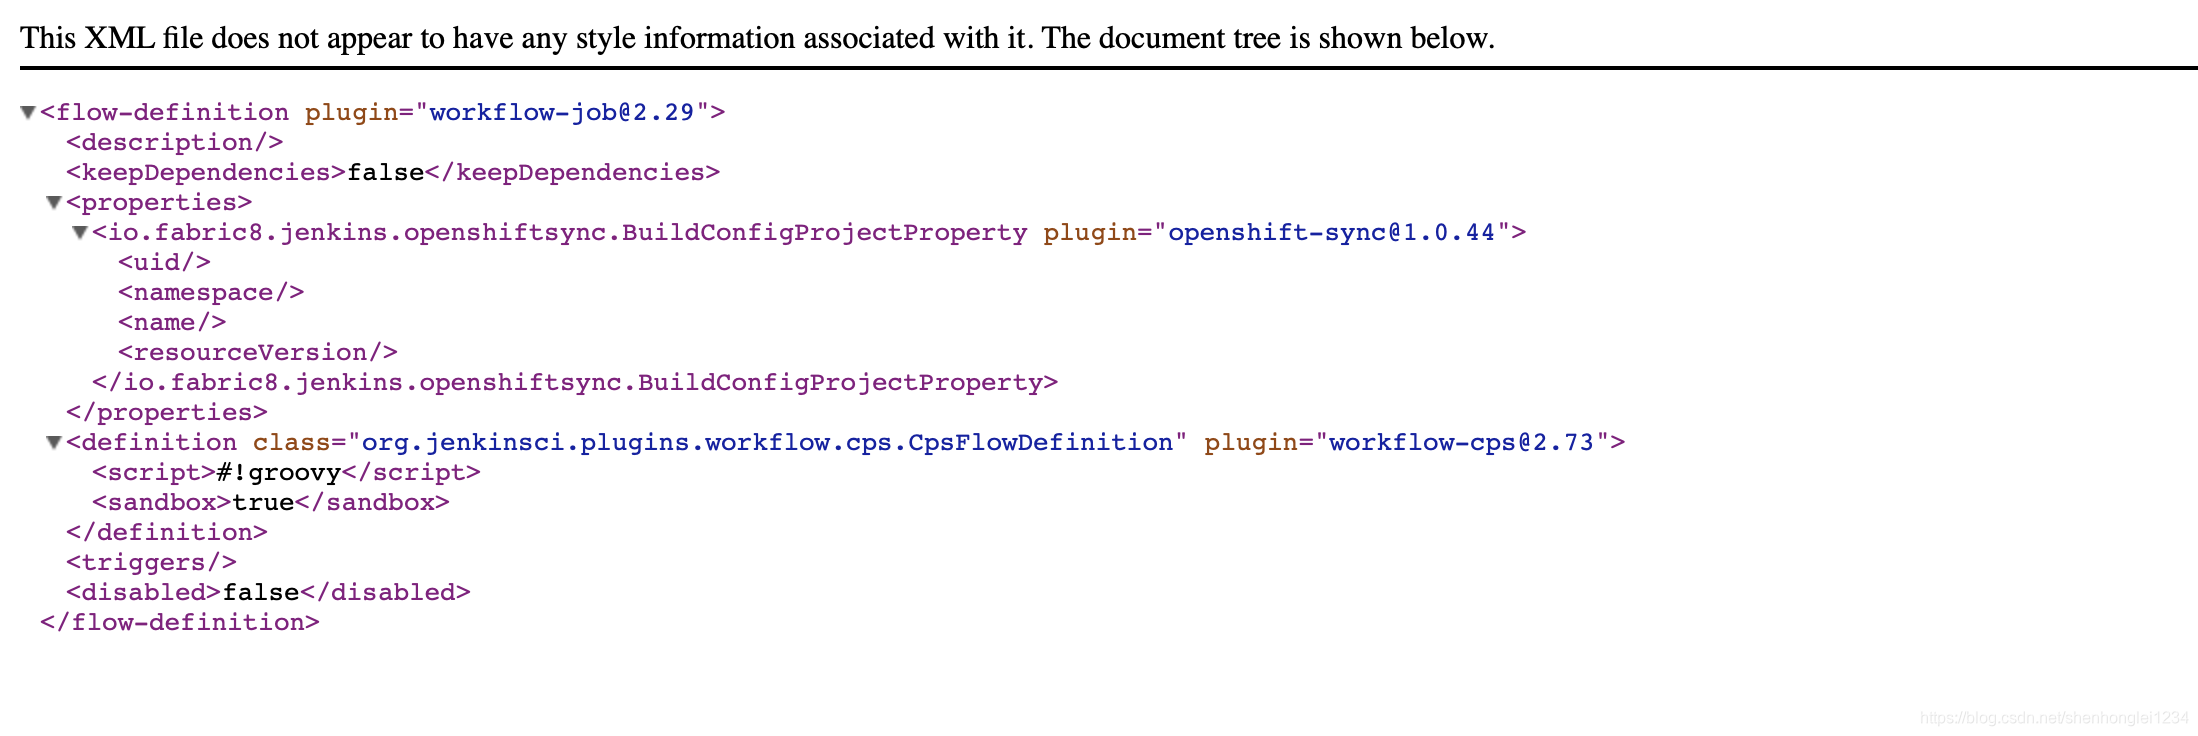
点击url查看job的config.xml的效果
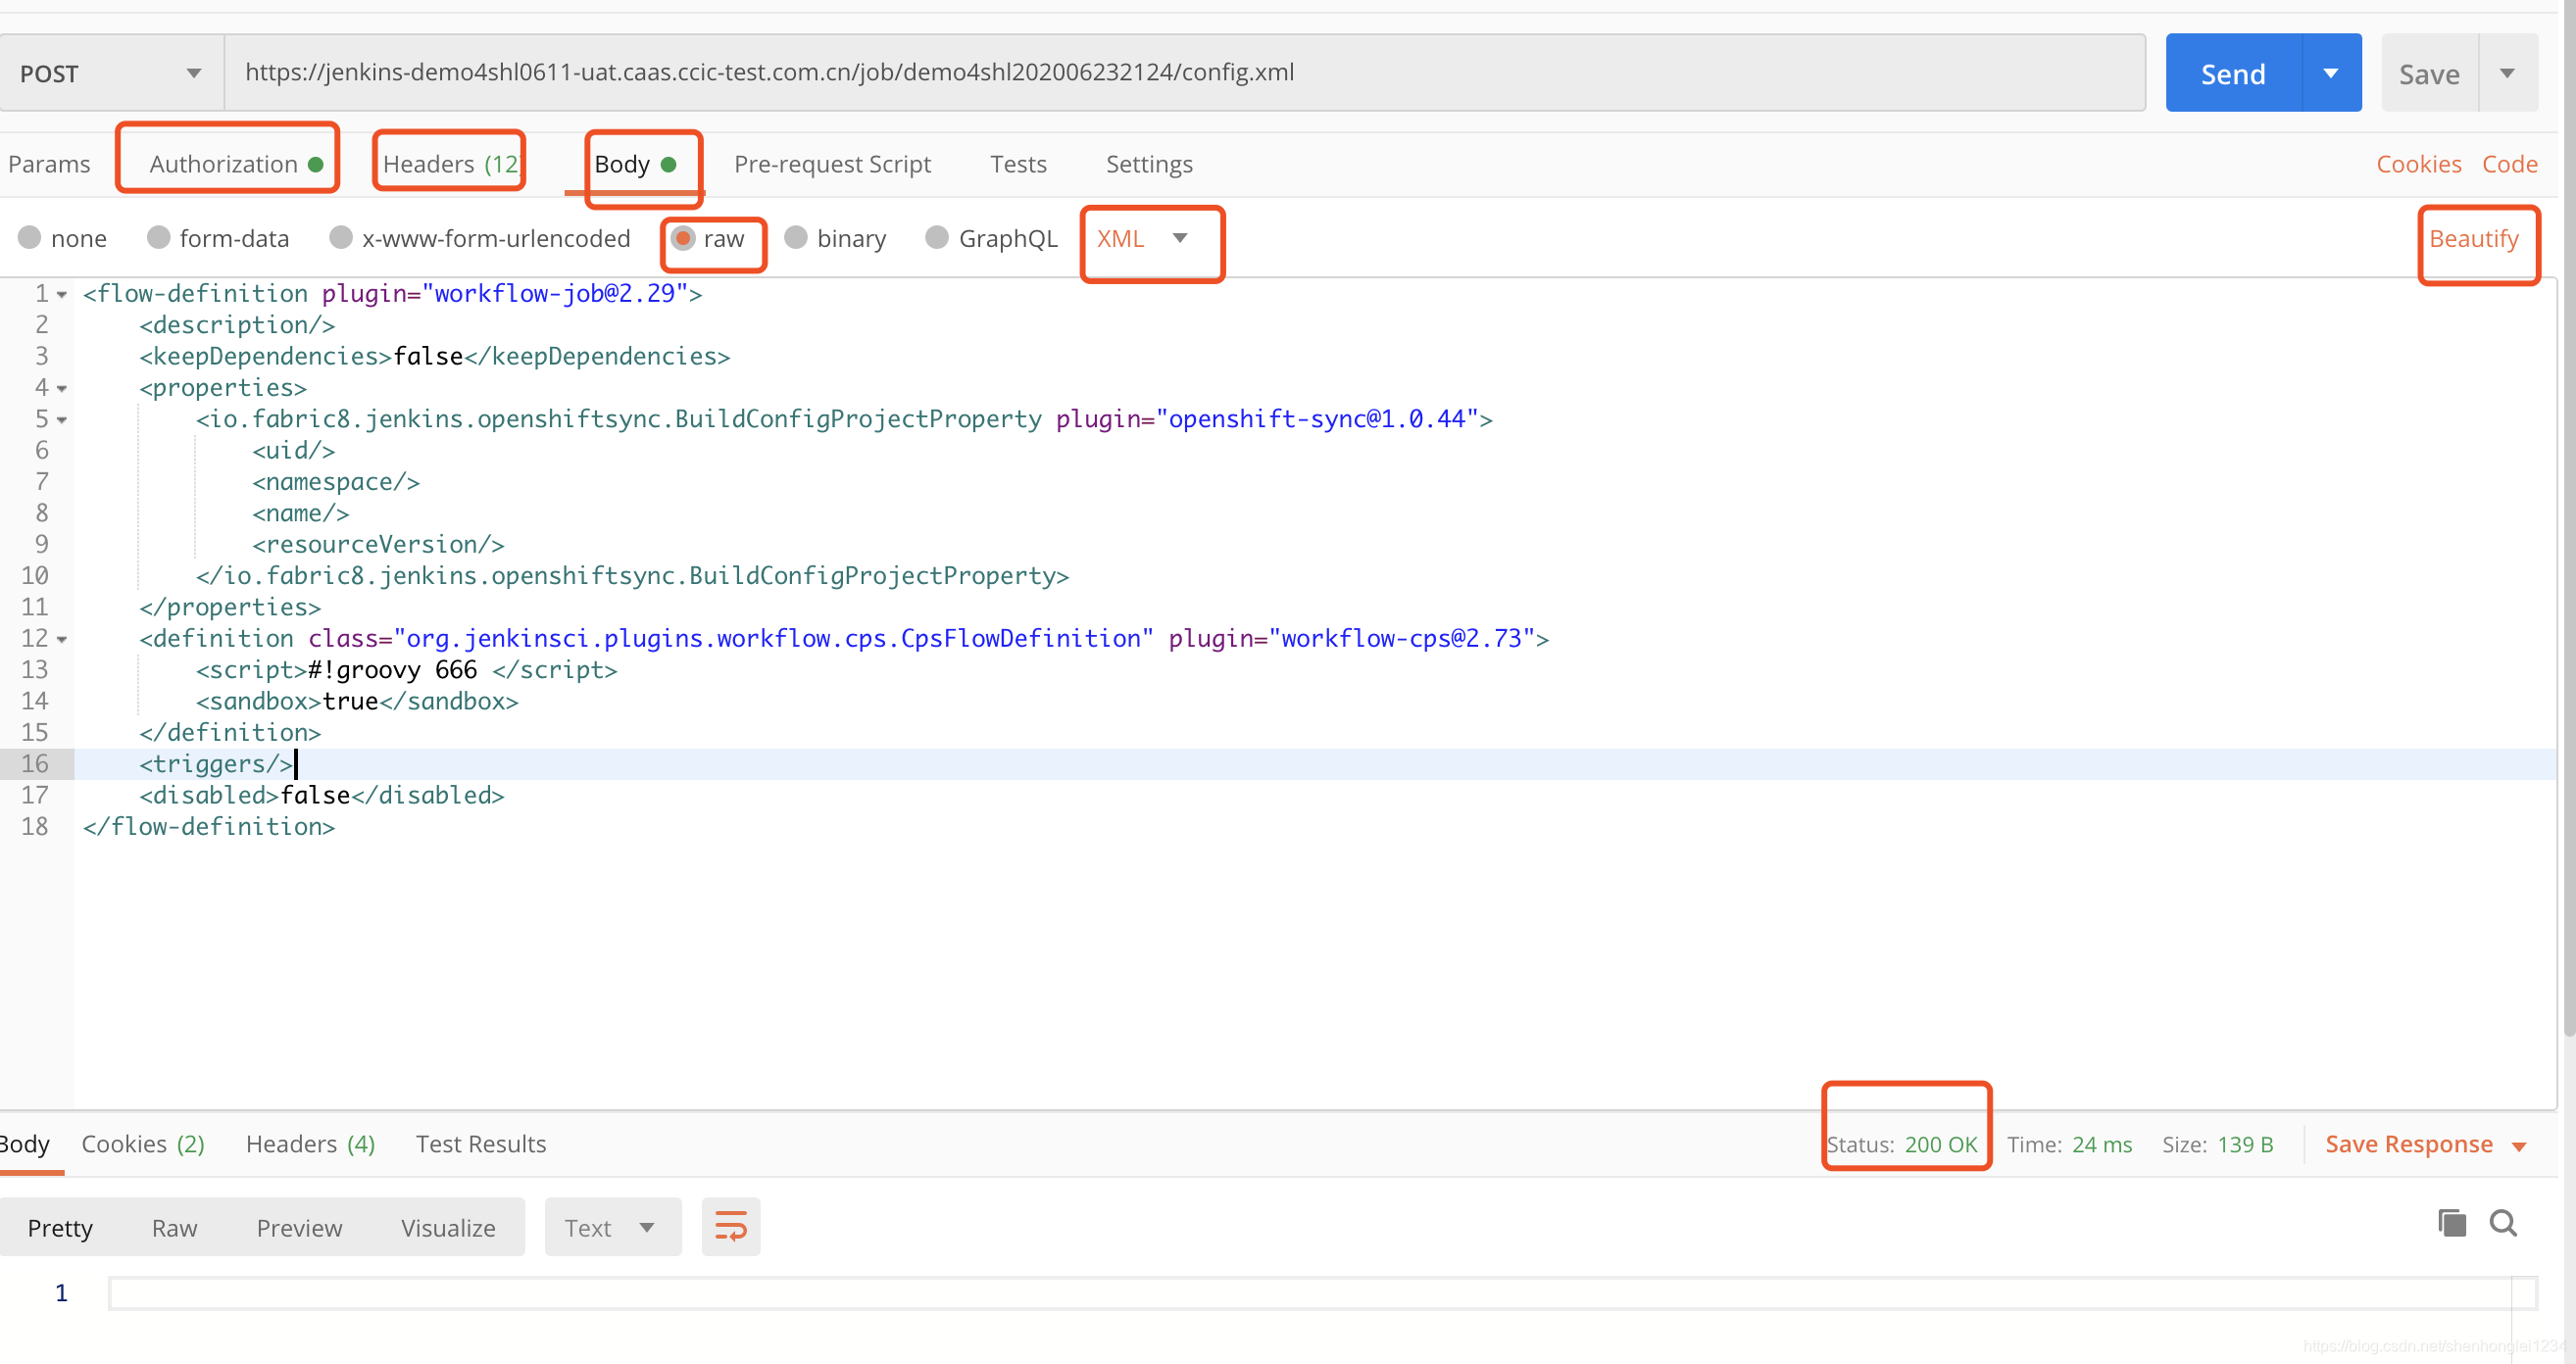
postman中的操作示例
- post 方法
- url:https://ip+端口/job/你的job名称/config.xml
- Content-Type=application/xml
- Basic Auth admin/password
- body内容是raw【格式为xml,后面有个美化操作Beautity】
<flow-definition plugin="workflow-job@2.29">
    <description/>
    <keepDependencies>false</keepDependencies>
    <properties>
        <io.fabric8.jenkins.openshiftsync.BuildConfigProjectProperty plugin="openshift-sync@1.0.44">
            <uid/>
            <namespace/>
            <name/>
            <resourceVersion/>
        </io.fabric8.jenkins.openshiftsync.BuildConfigProjectProperty>
    </properties>
    <definition class="org.jenkinsci.plugins.workflow.cps.CpsFlowDefinition" plugin="workflow-cps@2.73">
        <script>#!groovy 666 </script>
        <sandbox>true</sandbox>
    </definition>
    <triggers/>
    <disabled>false</disabled>
</flow-definition>
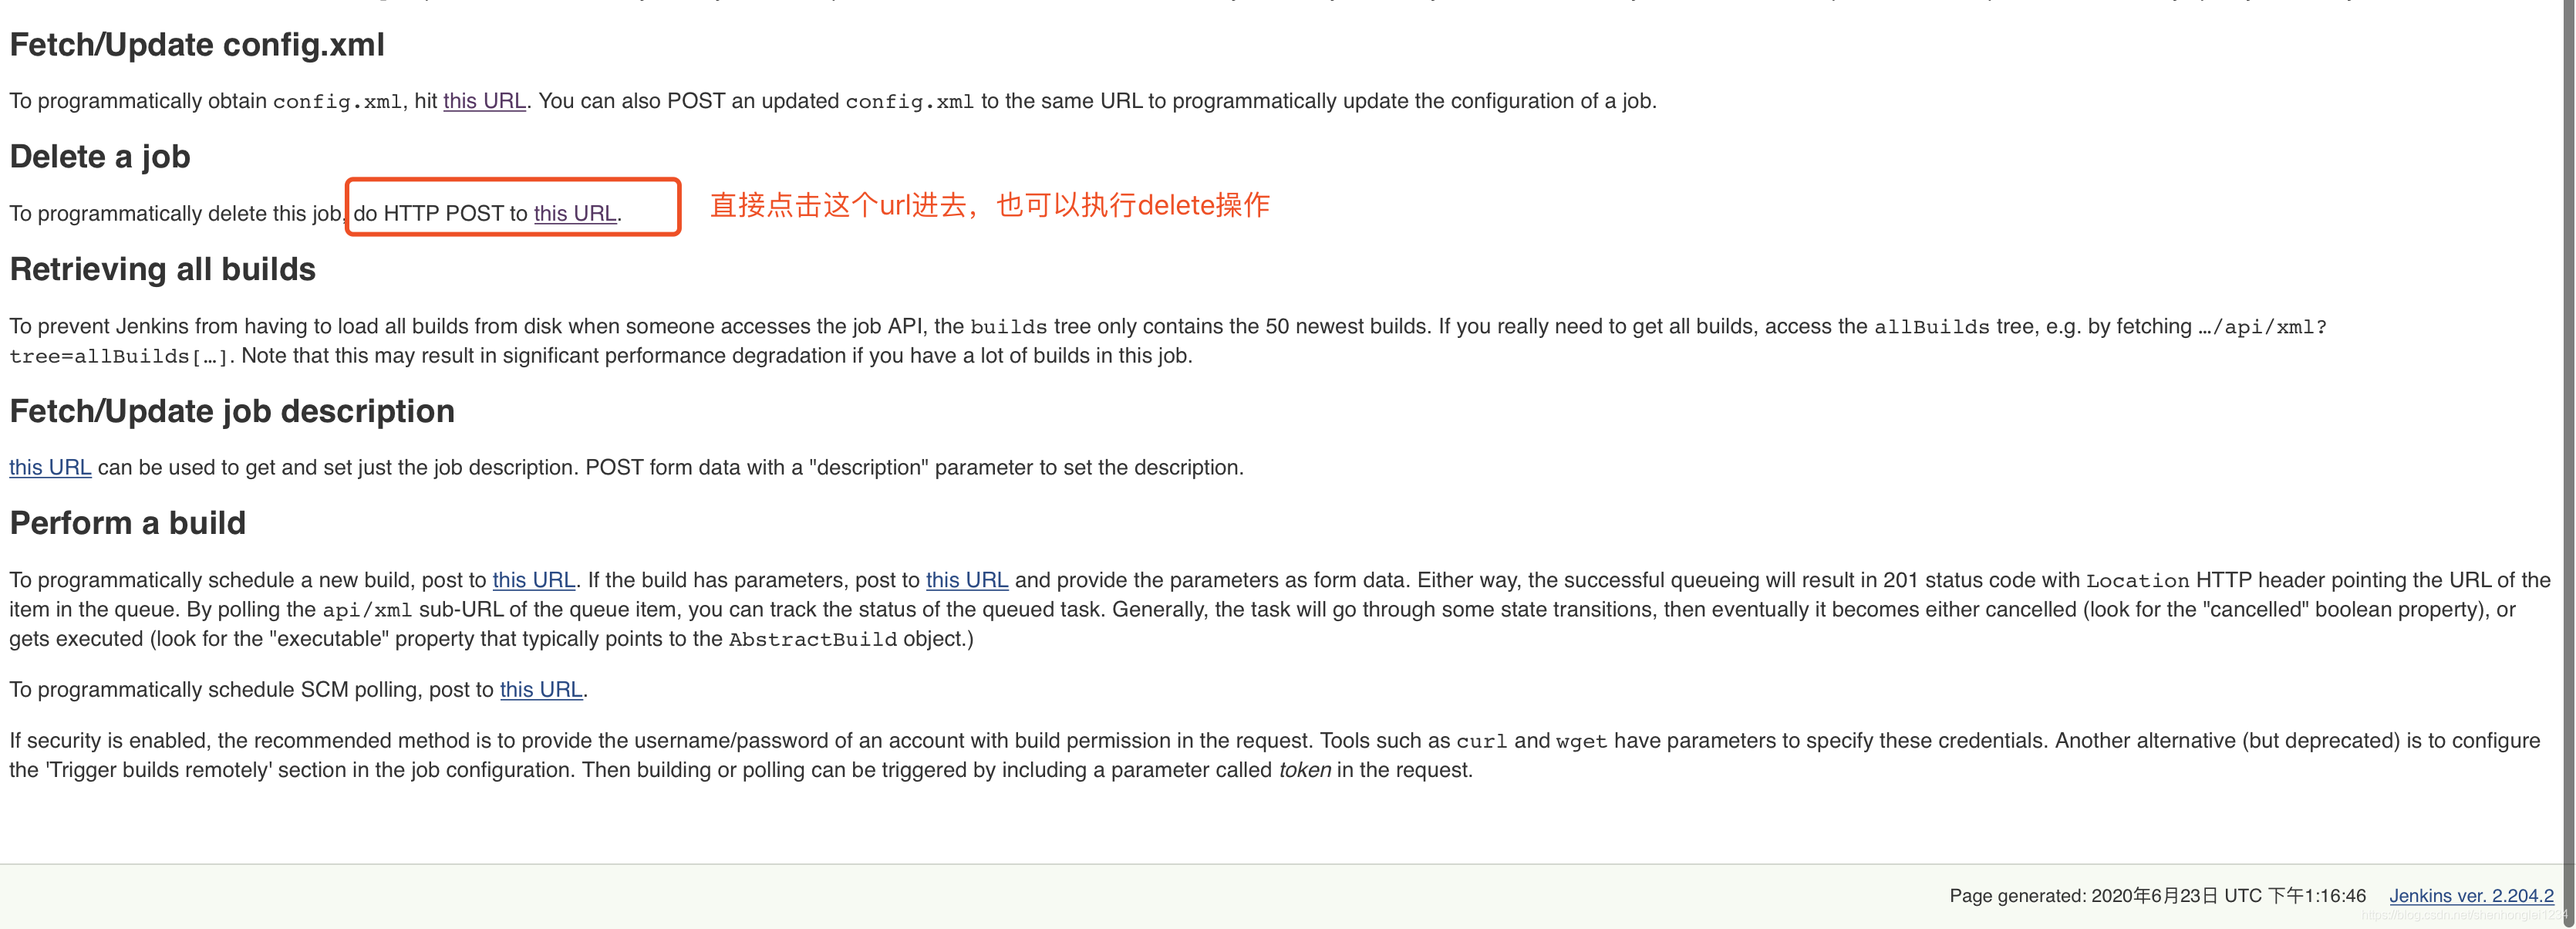
4.4 Delete a job
注:删除后,界面要重新加载,因为这个界面是基于你选中的job显示的
post方法,认证和之前一样,接口:https://ip+端口/job/你要删除的job名称/doDelete
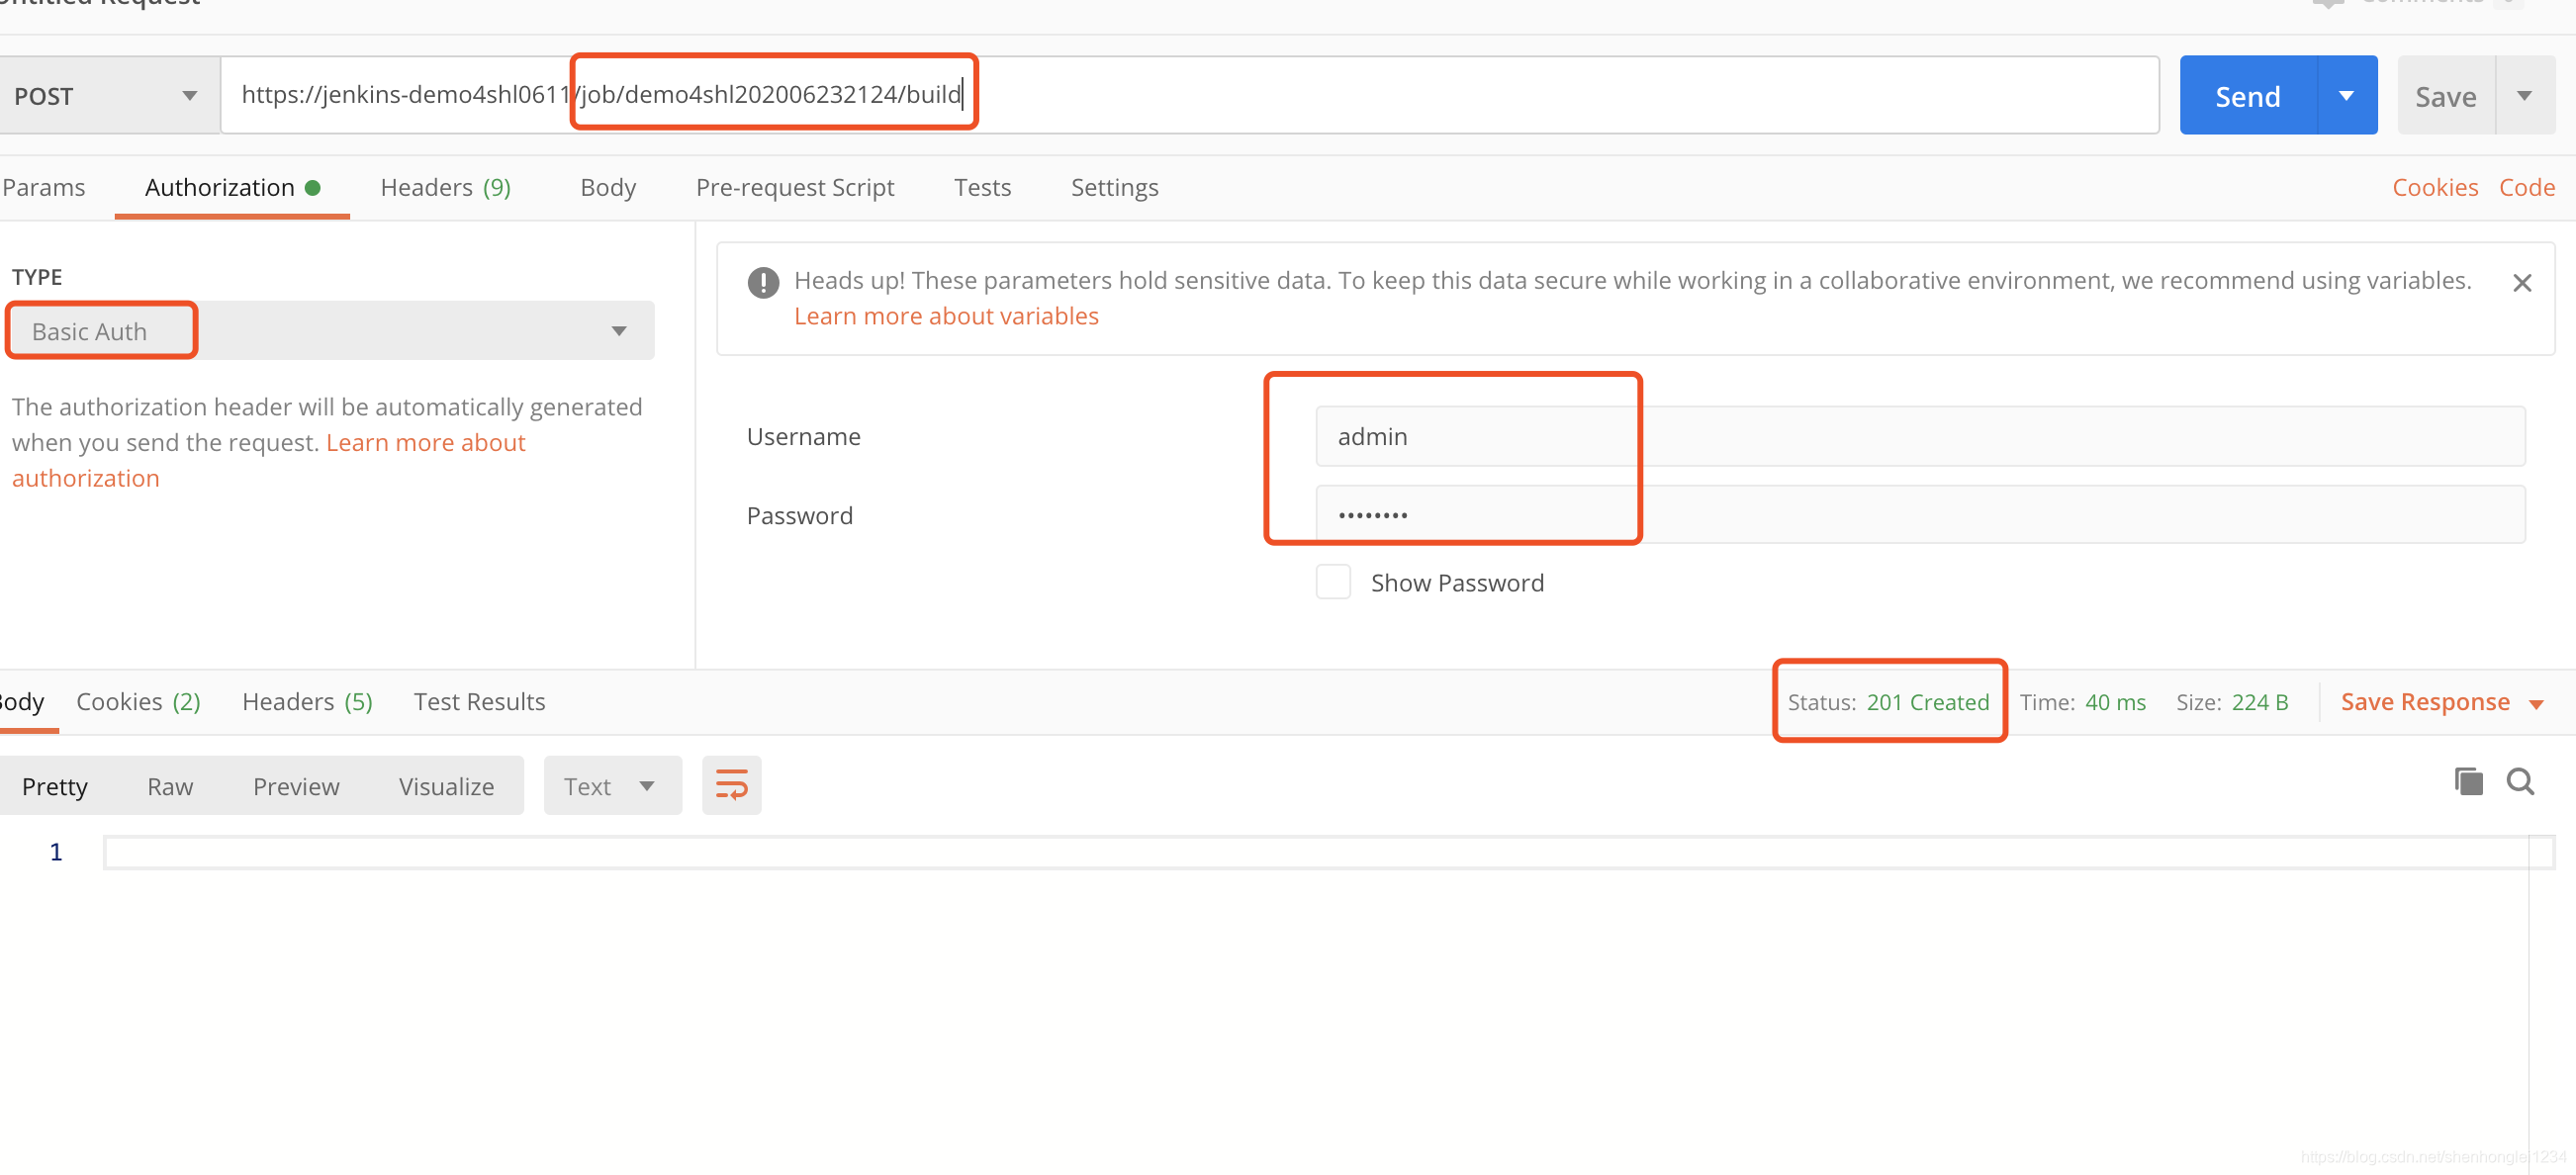
4.5 Perform a build 构建
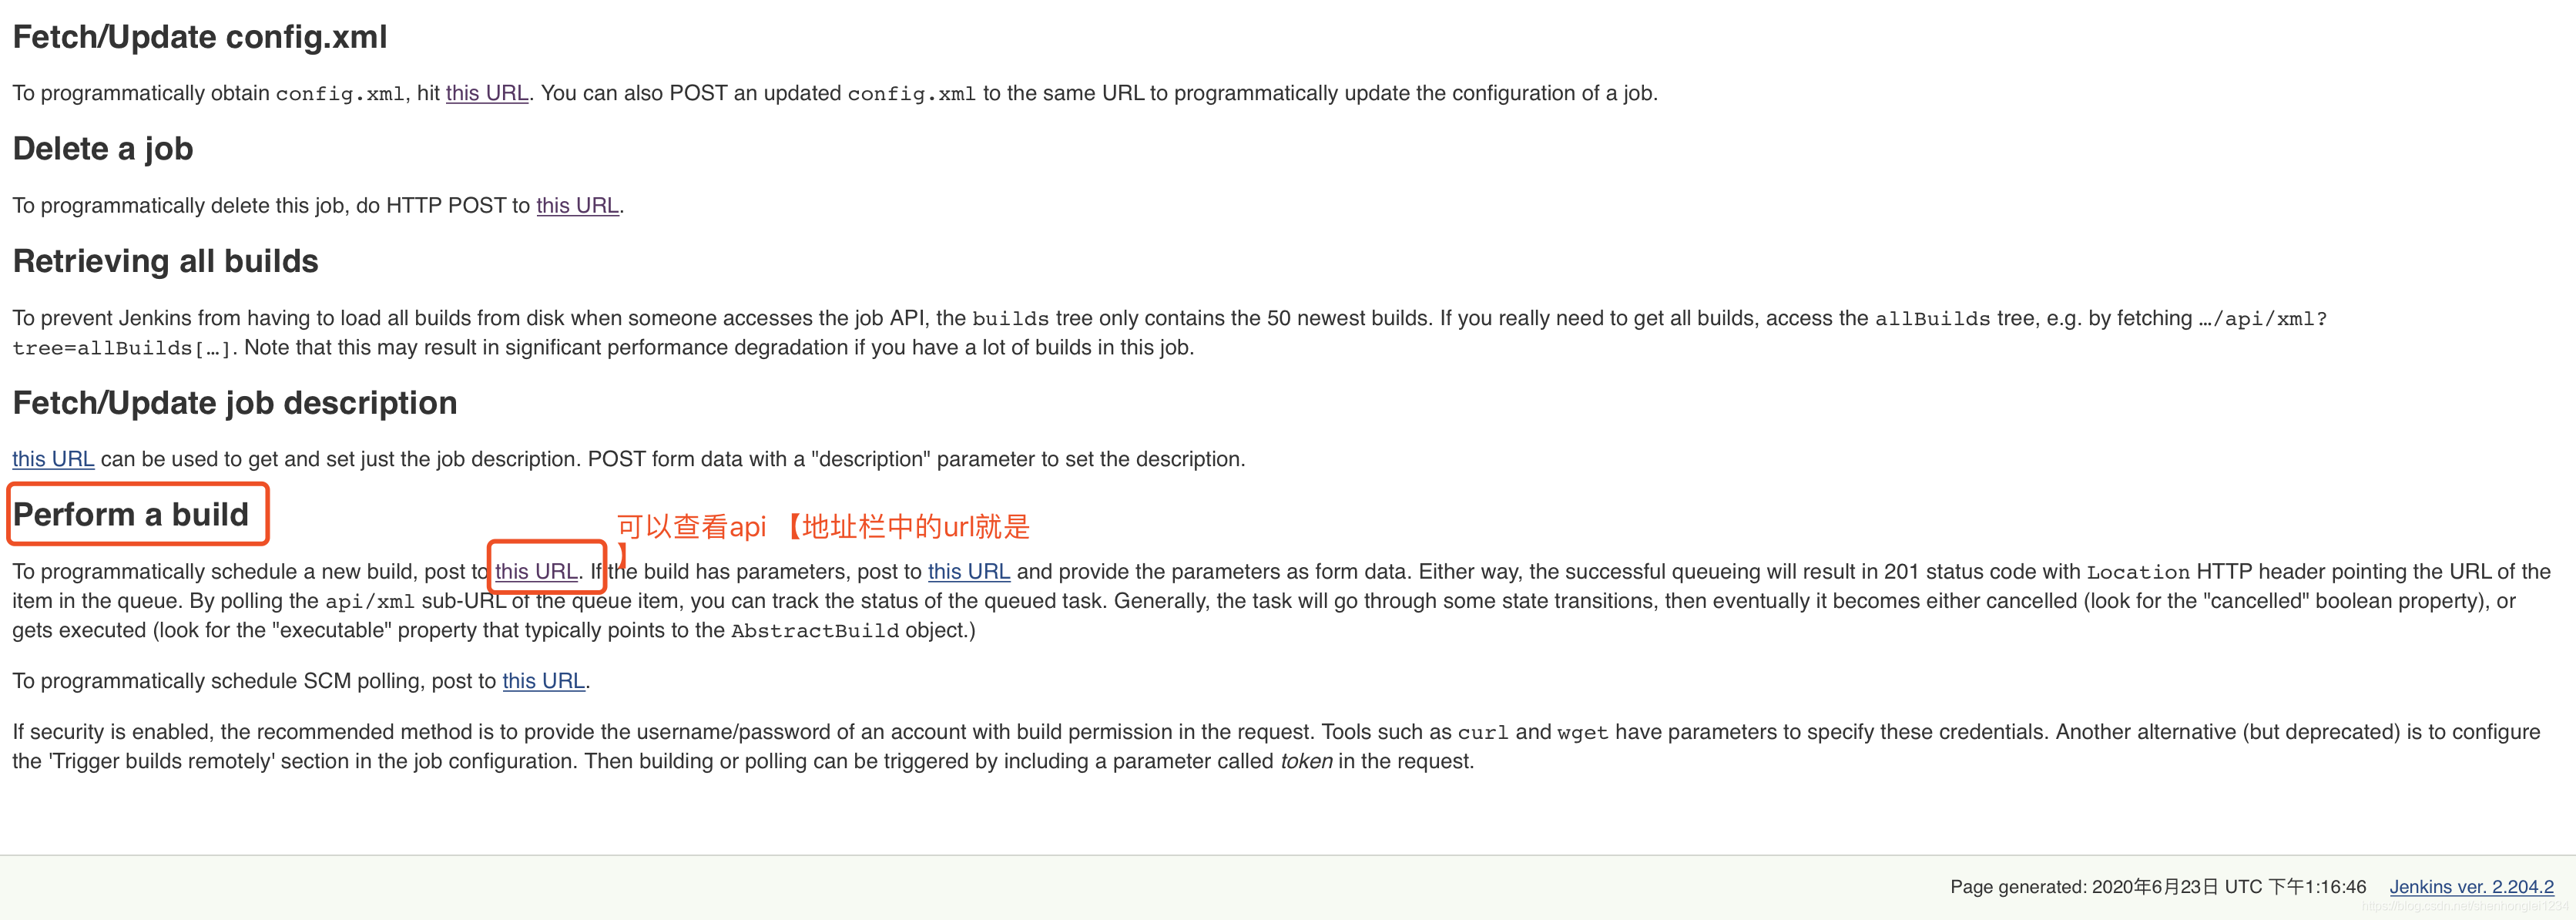
postman的示例
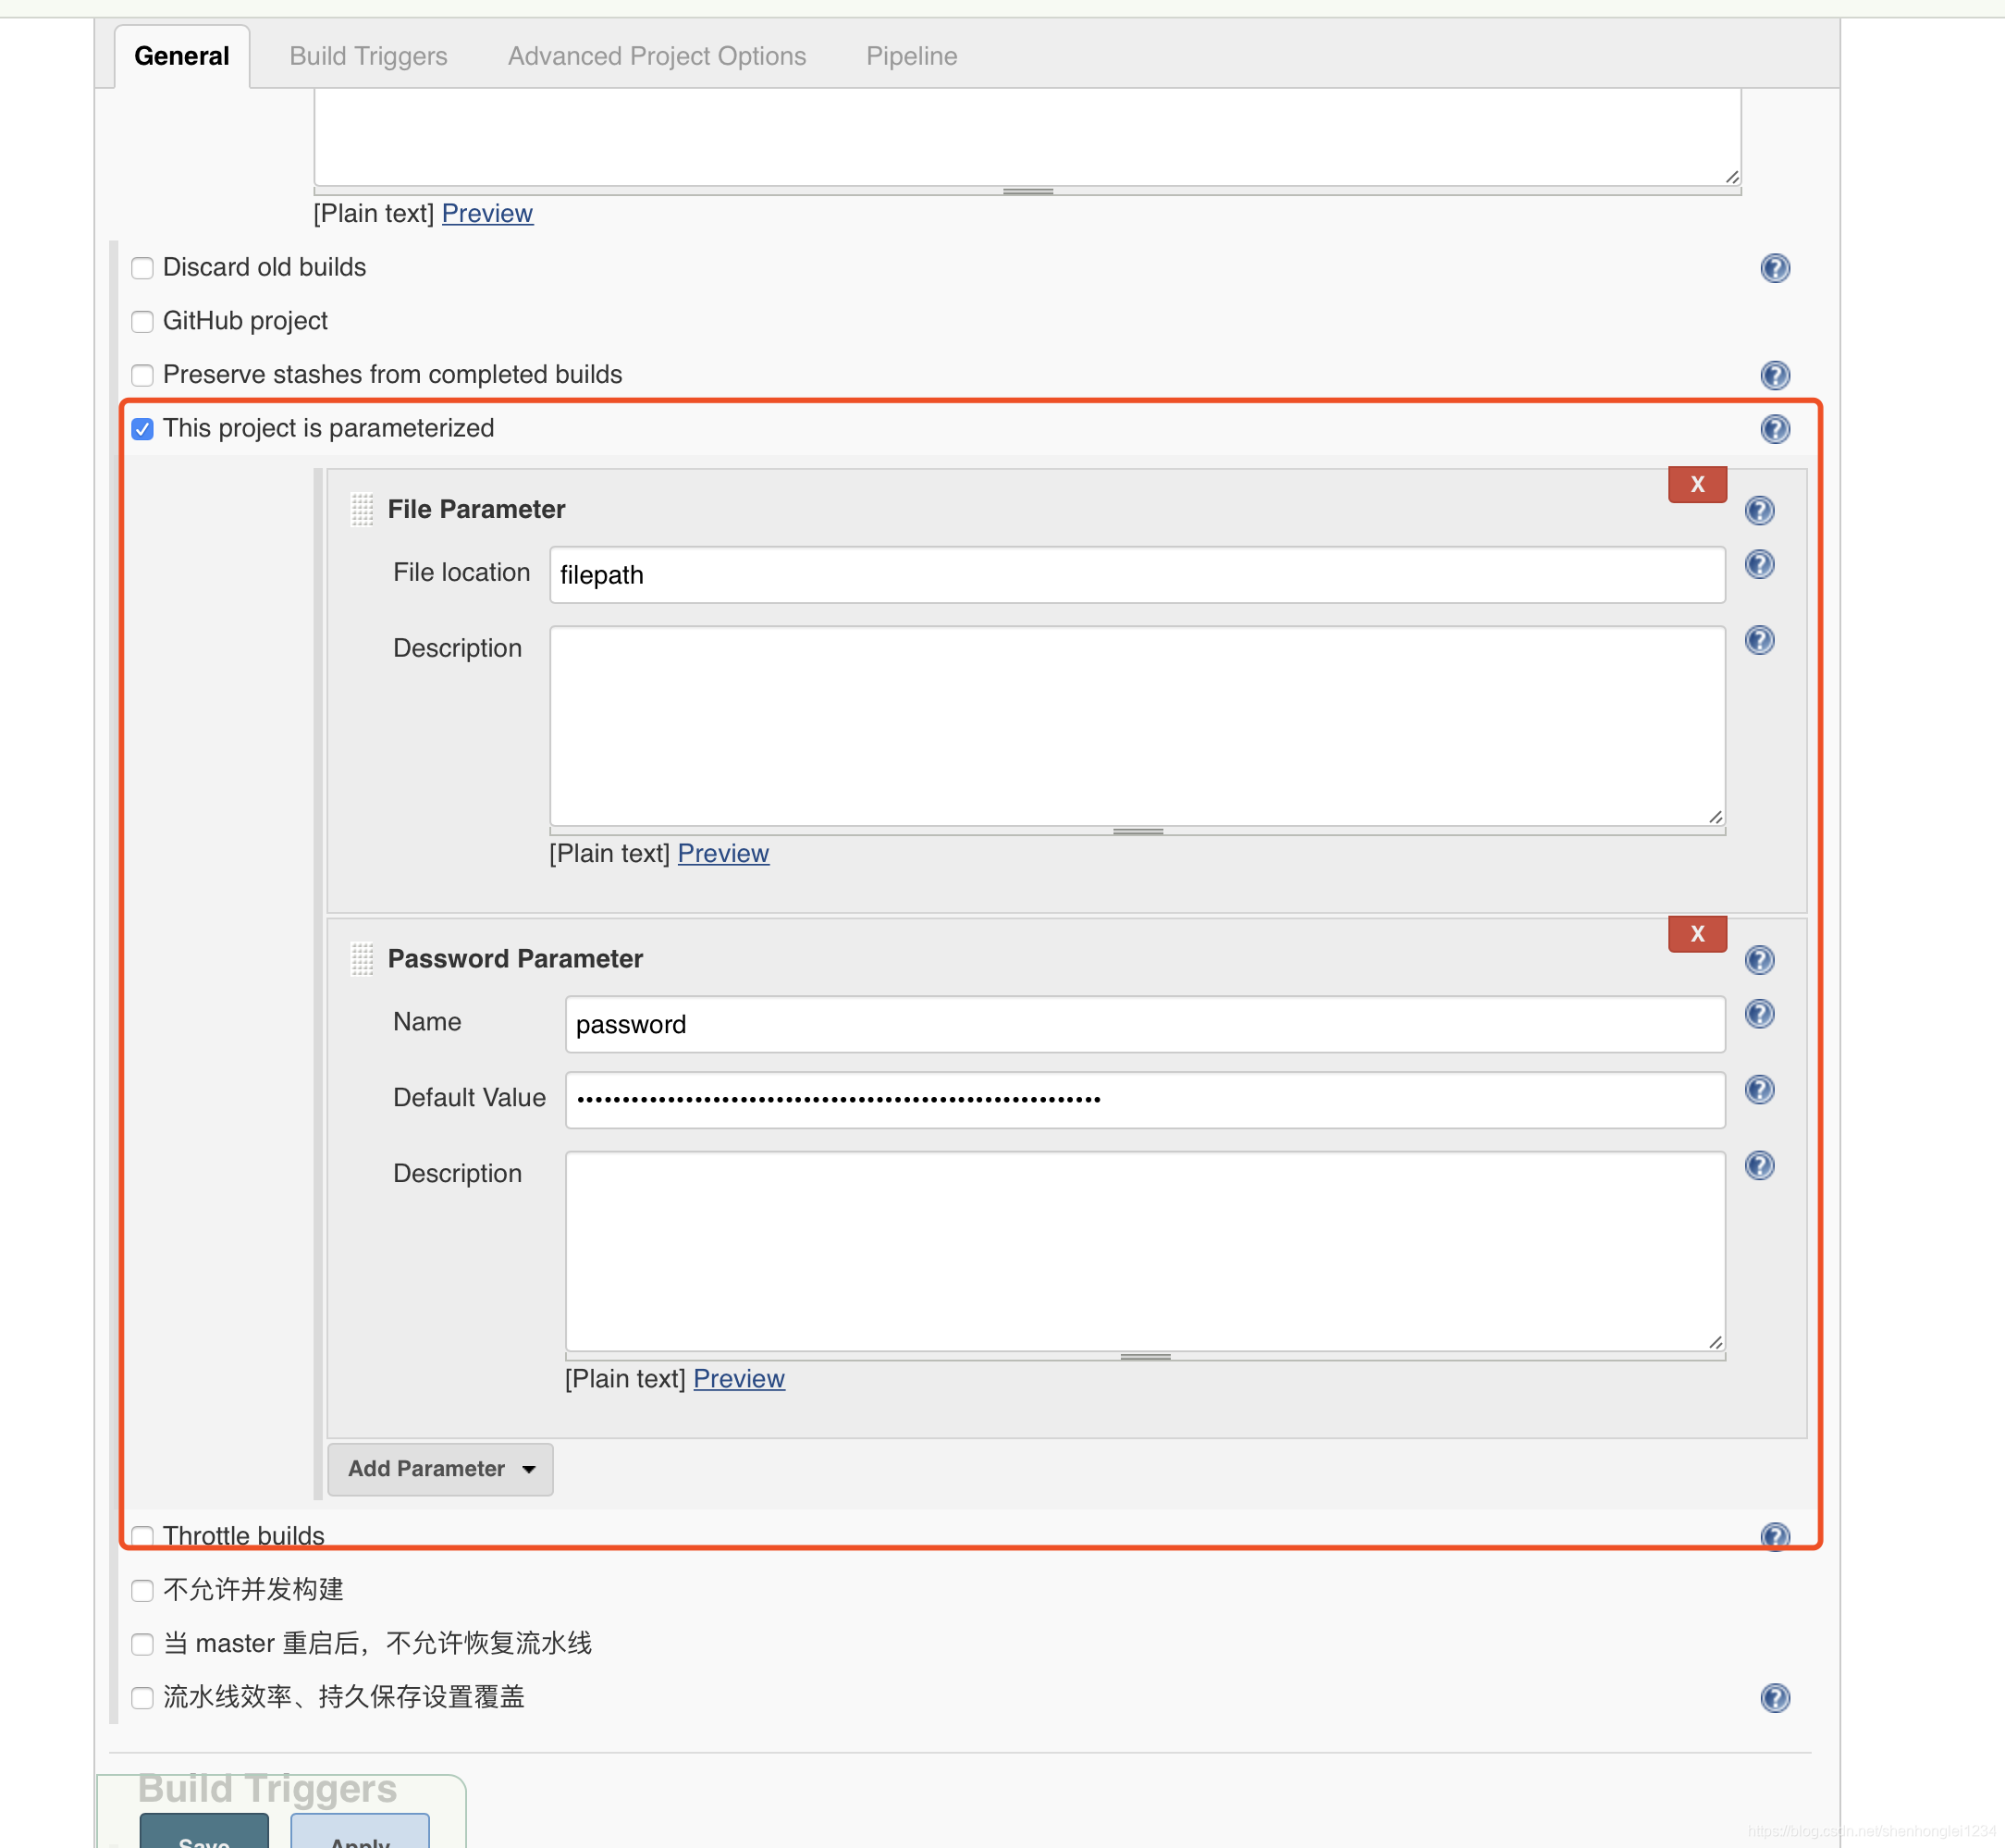
4.6 Perform a build 带参数构建
https://ip+端口/job/demo4shl202006232124/buildWithParameters
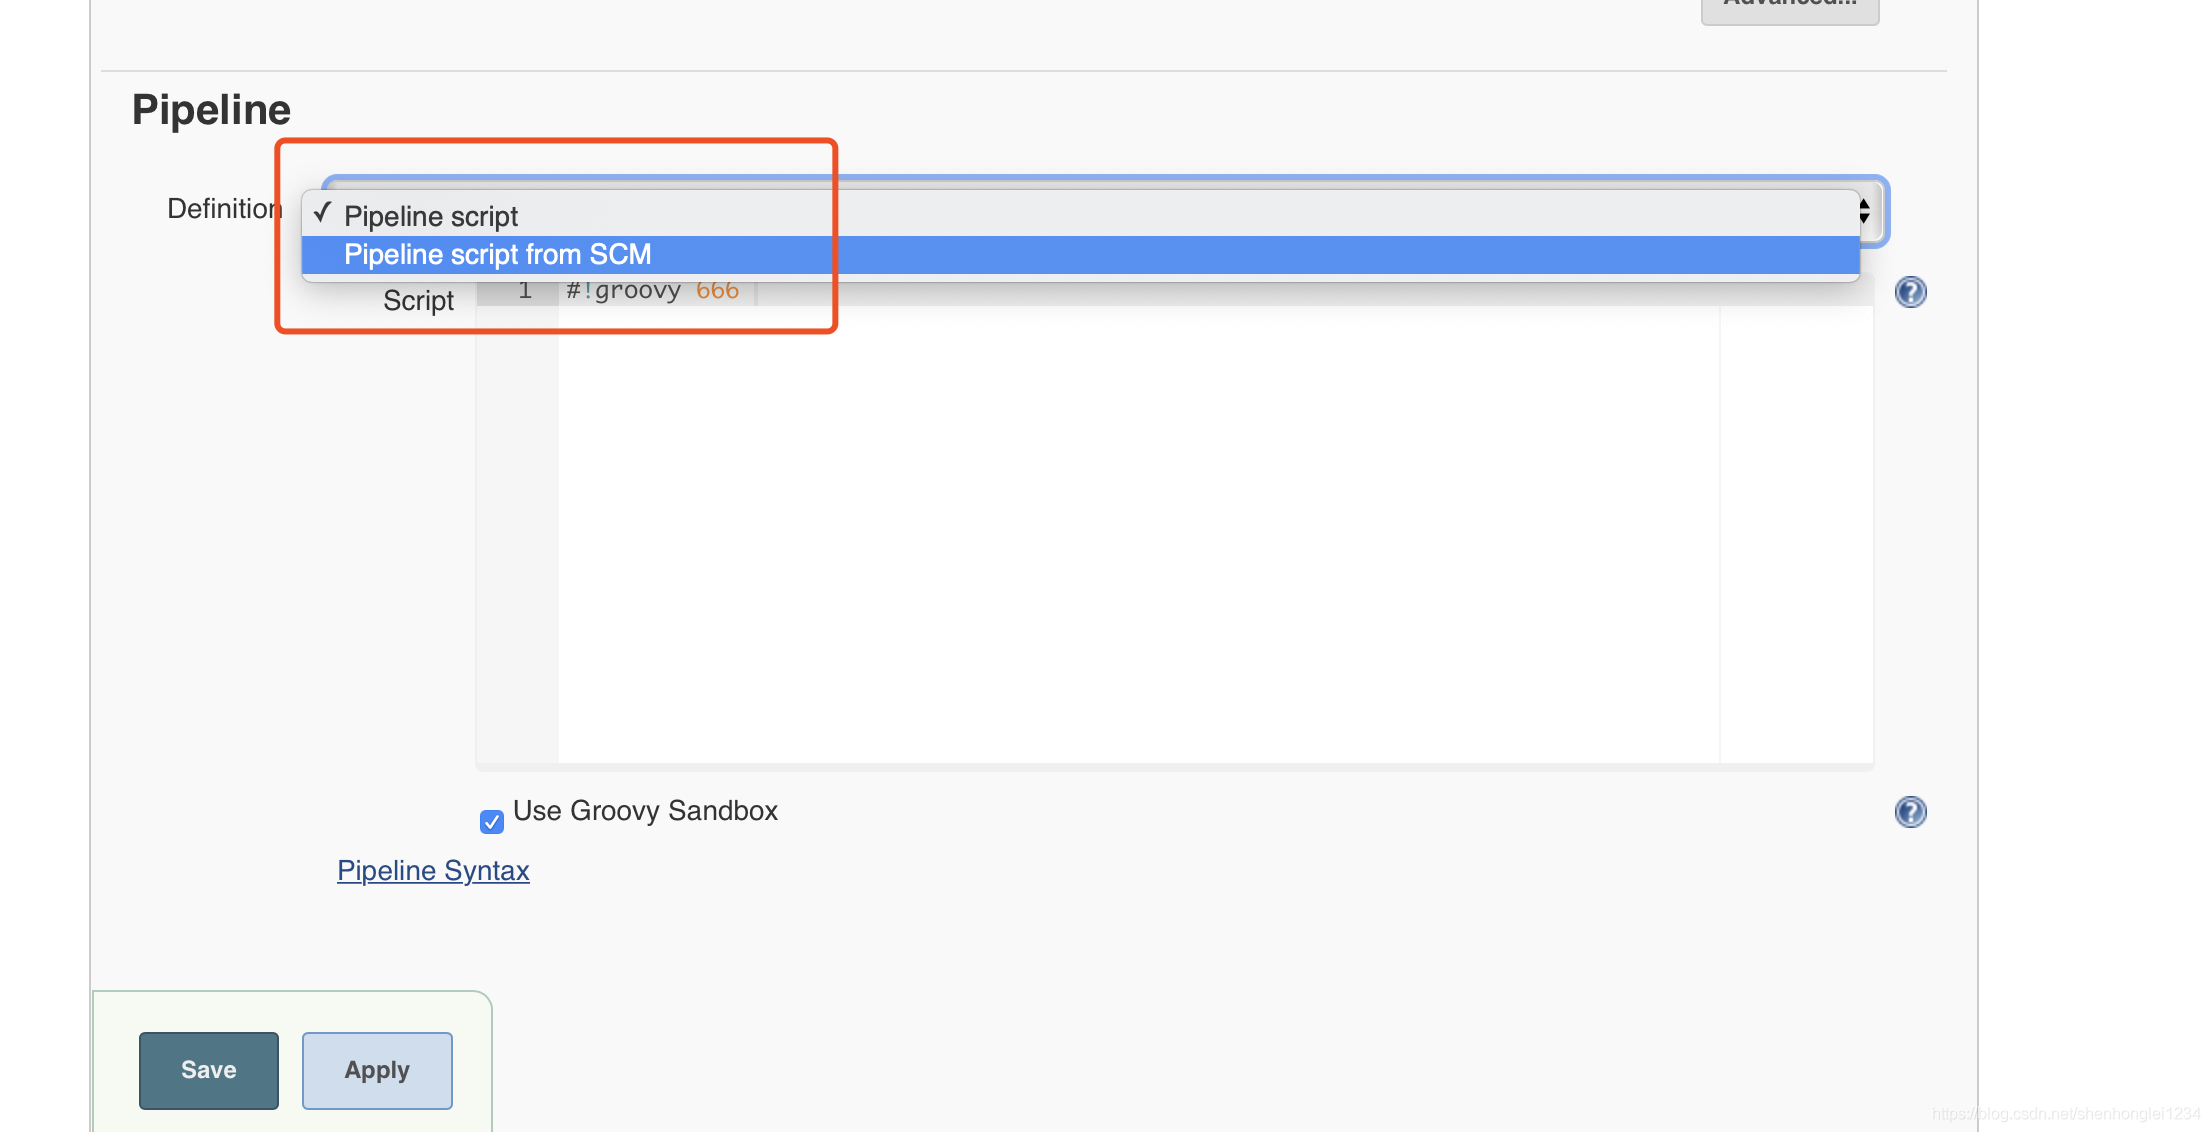
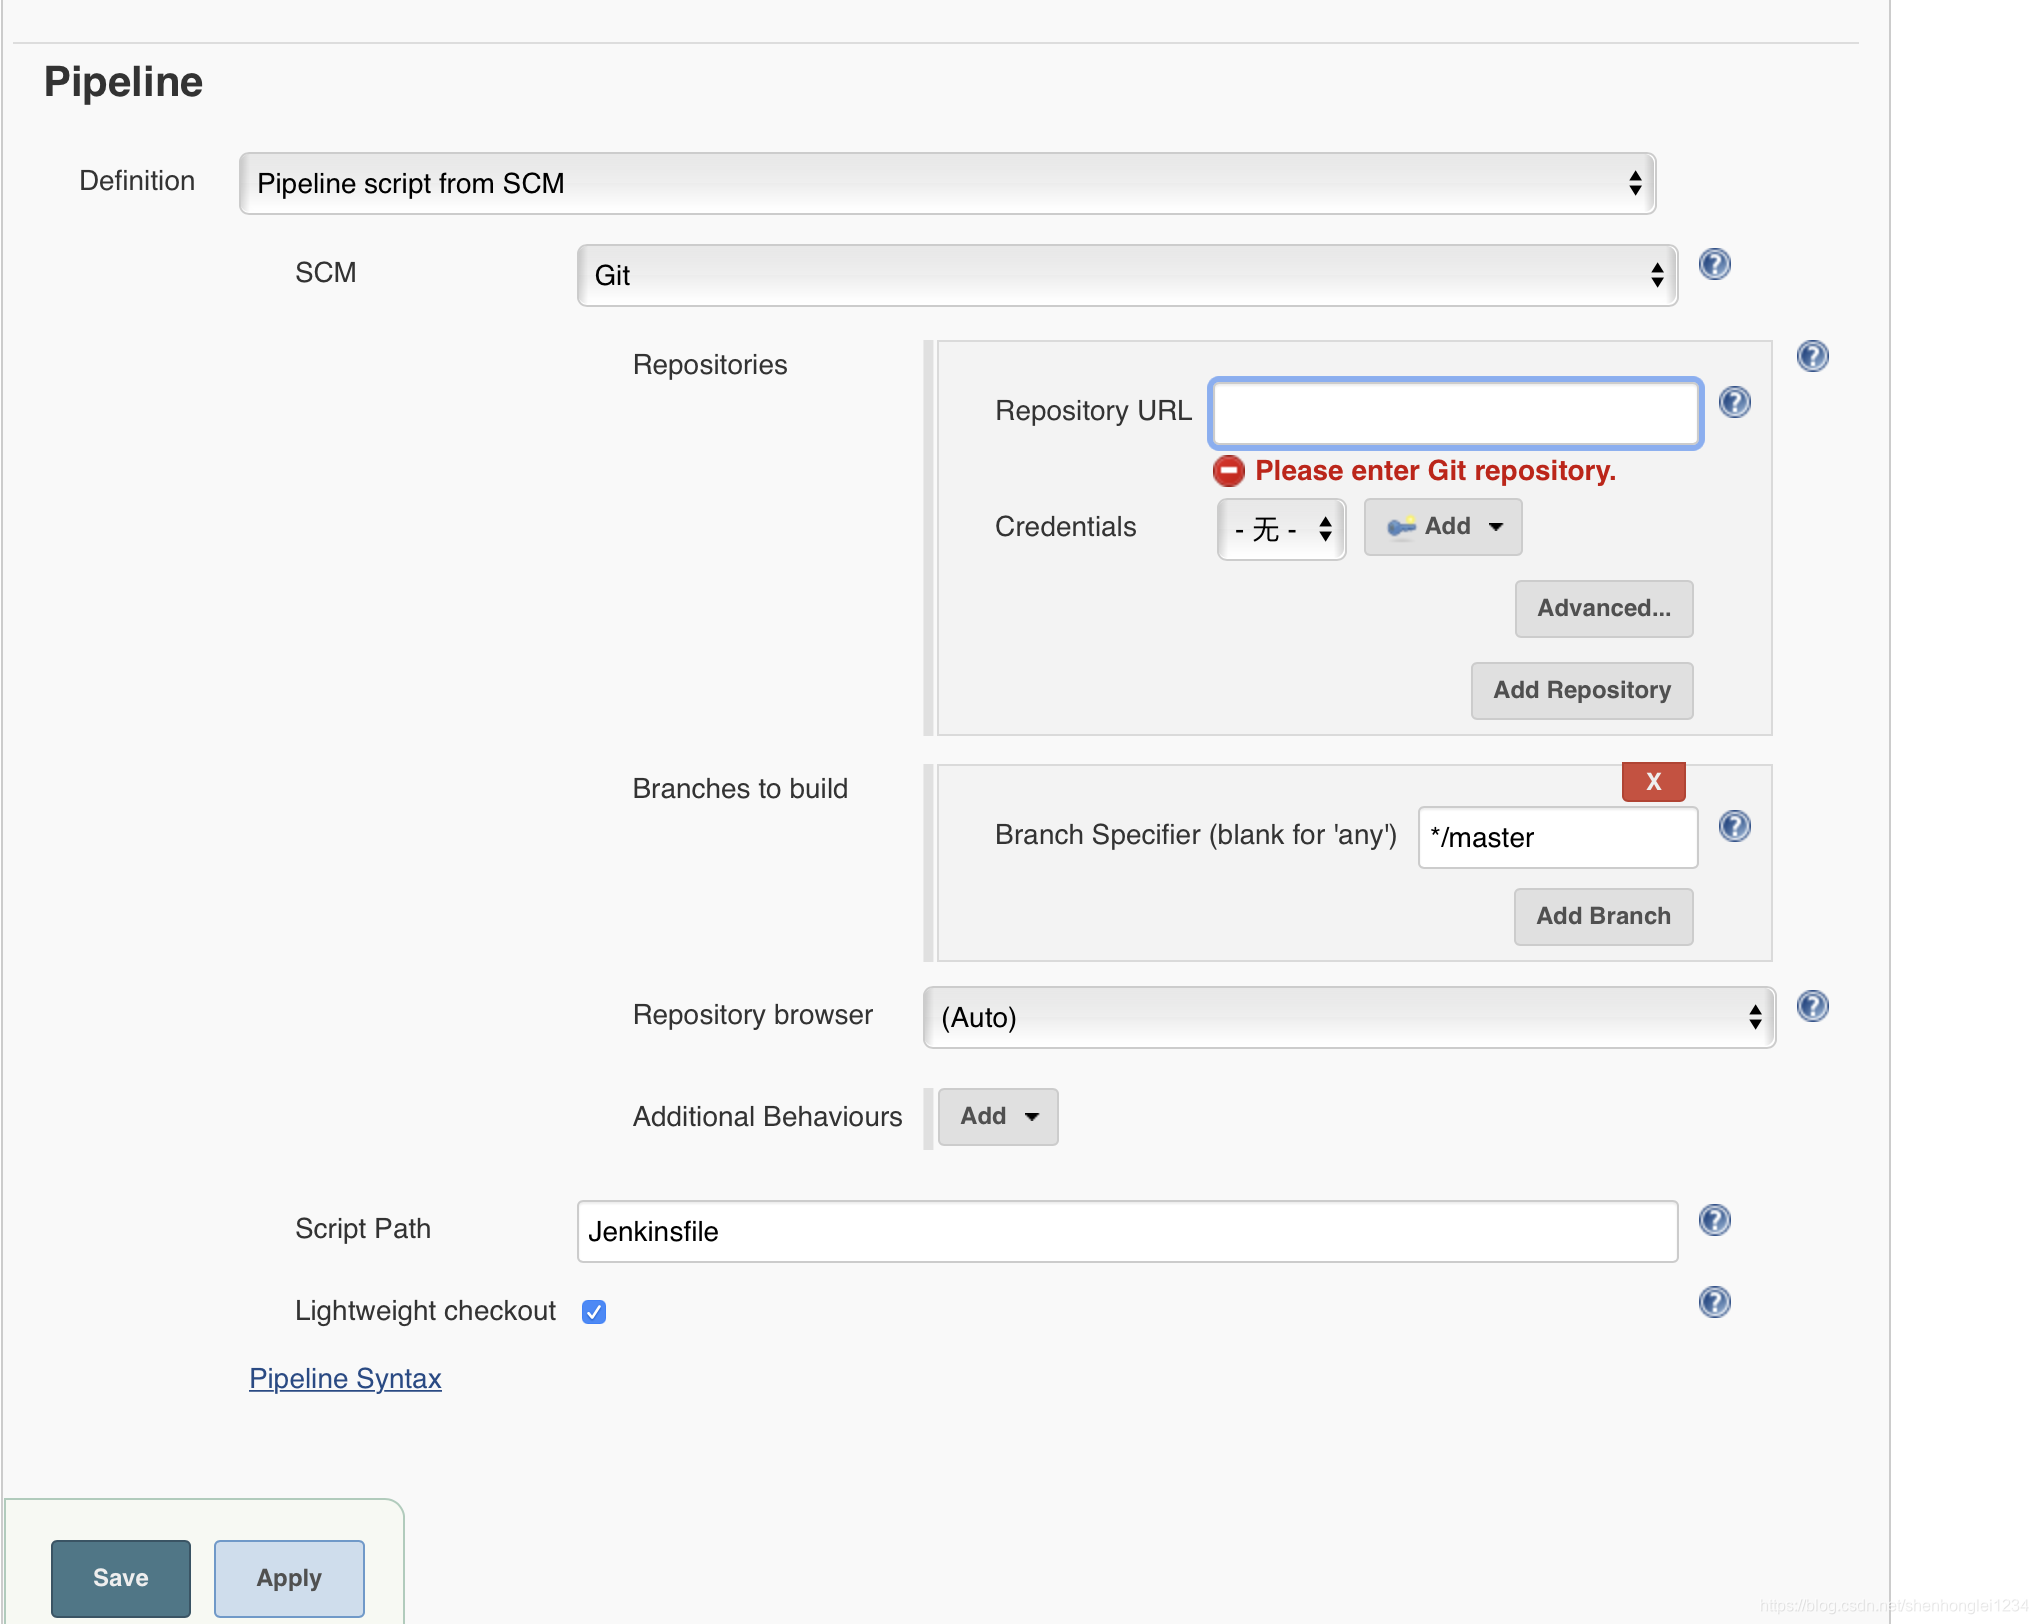
4.7 Perform a build 从git获取pipeline脚本
两种方法:1.pipeline脚本 ;2.从scm获取
To programmatically schedule SCM polling, post to this URL.
方法:post+认证+body
https://ip+端口//job/demo4shl202006232124/polling
4.8 获取console output
只要你想要,都可以使用api获取的得,have a fun.


 8901
8901

 被折叠的 条评论
为什么被折叠?
被折叠的 条评论
为什么被折叠?
 到【灌水乐园】发言


