


在做相册时,首先我们清楚思路,清楚我们到底要做什么,以及该实现什么样的效果。
我用LWUIT做的这个相册有两个界面:
1.显示相片列表
2.显示相册原始图
具体实现:
1.显示相片列表
原始图片一般都是比较大的,在显示相册列表时,需要把这些大图生成缩略图,缩略图以Button来显示 列表以GridLayout显示,每行4个,计算缩略图的宽,高(根据屏幕宽和按钮的Margin来计算,适应所有屏幕)。
2.显示相册原始图
这个Form的布局如下图,上一张,下一张两个按钮,miniPhotoContainer是3张图片的缩略图,photoContainer是显示大图的容器。
*************************************************
*上一张 miniPhotoContainer 下一张 * (topContainer)
*************************************************
** photoContainer ** *************************************************
思路清晰了,具体的就要开始编写代码了,我们先看看具体的效果图吧。
图片列表页面

显示大图页面
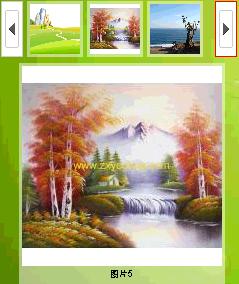
点击下一张,翻到下一张图片

下面我们来看看核心的代码
1.实体类 Photo类

 代码
代码
    public


    class


     Photo {


    //


    图片名称


    private


     String name;


    //


    原始图片


    private


     Image pic;


    //


    缩放以后的图片


    private


     Image resizePic;


    public


     Image getResizePic() {


    return


     resizePic;

    }


    public


    void


     setResizePic(Image resizePic) {


    this


    .resizePic


    =


     resizePic;

    }


    public


     Photo(String name, Image pic) {


    this


    .name


    =


     name;


    this


    .pic


    =


     pic;

    }


    public


     String getName() {


    return


     name;

    }


    public


    void


     setName(String name) {


    this


    .name


    =


     name;

    }


    public


     Image getPic() {


    return


     pic;

    }


    public


    void


     setPic(Image pic) {


    this


    .pic


    =


     pic;

    }

}
2.PhotoListForm类,显示图片列表的页面
代码
    public


    class


     PhotoListForm


    extends


     BaseForm {

    Photo[] photos;

    Hashtable photosHash


    =


    new


     Hashtable();


    public


    static


    int


     selectedIndex


    =


    -


    1


    ;


    public


     PhotoListForm() {


    this


    .setScrollable(


    true


    );


    this


    .setLayout(


    new


     BorderLayout());


    //


    构造Photo对象,为了模拟,在实际中看你从哪个地方提取照片


            String[] picNames


    =


    new


     String[


    10


    ];


    for


     (


    int


     i


    =


    0


    ; i


    <


     picNames.length; i


    ++


    ) {

            picNames[i]


    =


    "


    图片


    "


    +


     i;

        }

        Image[] pics


    =


    new


     Image[


    10


    ];


    for


     (


    int


     i


    =


    0


    ; i


    <


     pics.length; i


    ++


    ) {


    try


     {

                pics[i]


    =


     Image.createImage(


    "


    /pic/pic


    "


    +


     (i


    +


    1


    )


    +


    "


    .jpg


    "


    );

            }


    catch


     (IOException ex) {

                ex.printStackTrace();

            }

        }

        photos


    =


    new


     Photo[


    10


    ];


    for


     (


    int


     i


    =


    0


    ; i


    <


     photos.length; i


    ++


    ) {

            photos[i]


    =


    new


     Photo(picNames[i], pics[i]);

        }


    //


    每行显示4列,计算行数


    int


     column


    =


    4


    ;


    int


     row


    =


     (pics.length


    %


     column


    ==


    0


    )


    ?


     (photos.length


    /


     column) : (photos.length


    /


     column


    +


    1


    );


    //


    图片容器以GridLayout布局


            Container photoContainer


    =


    new


     Container(


    new


     GridLayout(row, column));


    for


     (


    int


     i


    =


    0


    ; i


    <


    10


    ; i


    ++


    ) {

            Button b


    =


    new


     Button();


    //


    Button的LeftMargin=2,RightMargin=2


    int


     margin


    =


    4


    ;


    //


    生成缩略图


                photos[i].setResizePic(resizeImage(photos[i].getPic(), getDestW(margin), getDestW(margin)));

            b.setIcon(photos[i].getResizePic());

            b.setText(photos[i].getName());

            b.setAlignment(Label.CENTER);

            b.setTextPosition(Label.BOTTOM);

            b.setUIID(


    "


    PhotoButton


    "


    );

            photoContainer.addComponent(b);


    //


    int类型无法放入Hashtable,先转为Integer类型


                Integer index


    =


    new


     Integer(i);

            photosHash.put(b, index);

            b.addActionListener(


    new


     ButtonActionListener());


    //


    识别选中的图片,返回时,选中的图片仍然是这张被点击的图片


    if


     (selectedIndex


    ==


     i) {


    this


    .setFocused(b);

            }

        }


    this


    .addComponent(BorderLayout.CENTER, photoContainer);

    }


    private


    class


     ButtonActionListener


    implements


     ActionListener {


    public


    void


     actionPerformed(ActionEvent evt) {


    int


     value


    =


     Integer.parseInt(photosHash.get((Button) evt.getSource()).toString());


    //


    标识选中的图片,返回时,选中的图片仍然是这张被点击的图片


                selectedIndex


    =


     value;


    new


     PhotoDetailForm(photos, value);

        }

    }


    //


    根据屏幕宽度,计算图片应该缩放的宽度


    public


    int


     getDestW(


    int


     margin) {


    return


     (Display.getInstance().getDisplayWidth()


    -


    40


    )


    /


    4


    ;

    }


    //


    缩放图片


    public


     Image resizeImage(Image src,


    int


     destW,


    int


     destH) {


    return


     src.scaledSmallerRatio(destW, destH);

    }

}
3.PhotoDetailForm类,显示大图的页面
代码
    import


     com.sun.lwuit.Button;


    import


     com.sun.lwuit.Command;


    import


     com.sun.lwuit.Component;


    import


     com.sun.lwuit.Container;


    import


     com.sun.lwuit.Form;


    import


     com.sun.lwuit.Image;


    import


     com.sun.lwuit.Label;


    import


     com.sun.lwuit.animations.CommonTransitions;


    import


     com.sun.lwuit.animations.Transition;


    import


     com.sun.lwuit.events.ActionEvent;


    import


     com.sun.lwuit.events.ActionListener;


    import


     com.sun.lwuit.layouts.BorderLayout;


    import


     com.sun.lwuit.layouts.BoxLayout;


    import


     com.sun.lwuit.layouts.FlowLayout;


    import


     com.sun.lwuit.plaf.UIManager;


    import


     com.thinkrace.UCHome.access.UCHome;


    import


     com.thinkrace.UCHome.entity.Photo;


    import


     com.thinkrace.UCHome.subform.MyPhotos;


    import


     com.thinkrace.UCHome.ui.UIButton;


    import


     java.io.IOException;


    /**


 *

 *


    @author


     Administrator


    */


    /**


 * *<pre>

 *

 *       *********************************************

 *       *上一张        miniPhotoContainer      下一张*    (topContainer)

 *       *********************************************

 *       *                                           *

 *       *                                           *

 *       *            photoContainer                 *

 *       *                                           *

 *       *                                           *

 *       *********************************************

 *       *                 MenuBar                   *

 *       *********************************************

 *</pre>

 *


    */


    public


    class


     PhotoDetailForm


    extends


     Form


    implements


     ActionListener {


    private


     Command Back_Command


    =


    new


     Command(


    "


    返回


    "


    ,


    0


    );

    Photo[] photos;


    public


    int


     currentIndex;

    Label[] lblPhotos


    =


    new


     Label[


    3


    ];


    //


        Label currentPhoto;


    //


        Label prePhoto;


    //


        Label nextPhoto;


    Container mainContainer


    =


    new


     Container(


    new


     BoxLayout(BoxLayout.Y_AXIS));

    Container topContainer


    =


    new


     Container(


    new


     BorderLayout());


    //


    miniPhotoContainer存放3张大图的缩略图


        Container miniPhotoContainer


    =


    new


     Container(


    new


     BoxLayout(BoxLayout.X_AXIS));

    Container photoContainer


    =


    new


     Container(


    new


     FlowLayout(Component.CENTER));


    //


    上一张,下一张按钮


        UIButton btnPre;

    UIButton btnNext;

    Transition in


    =


     CommonTransitions.createSlide(CommonTransitions.SLIDE_HORIZONTAL,


    false


    ,


    500


    );


    //


    标识当前点击的是哪一个按钮


    public


    static


    int


     btnSelected;


    public


     PhotoDetailForm(Photo[] photos,


    int


     index) {


    this


    .photos


    =


     photos;


    this


    .currentIndex


    =


     index;


    this


    .setLayout(


    new


     BorderLayout());


    this


    .setScrollable(


    true


    );

        buildPhoto(currentIndex);

        btnPre.addActionListener(


    new


     ActionListener() {


    //


    这里是翻张的关键代码


    public


    void


     actionPerformed(ActionEvent evt) {

                btnSelected


    =


    0


    ;


    if


     (


    --


    currentIndex


    >=


    0


    ) {


    new


     PhotoDetailForm(PhotoDetailForm.


    this


    .photos, currentIndex);

                }


    else


    {


    ++


    currentIndex;

                }

            }

        });

        btnNext.addActionListener(


    new


     ActionListener() {


    //


    这里是翻张的关键代码


    public


    void


     actionPerformed(ActionEvent evt) {

                 btnSelected


    =


    1


    ;


    if


     (


    ++


    currentIndex


    <=


     PhotoDetailForm.


    this


    .photos.length


    -


    1


    ) {


    new


     PhotoDetailForm(PhotoDetailForm.


    this


    .photos, currentIndex);

                }


    else


    {


    --


    currentIndex;

                }


    //


    moveTransition();


                }

        });


    this


    .addCommand(Back_Command);


    this


    .addCommandListener(


    this


    );


    this


    .show();

    }


    public


    void


     removePhoto(){

        miniPhotoContainer.removeAll();

        topContainer.removeAll();

        photoContainer.removeAll();

        mainContainer.removeAll();


    this


    .removeAll();

    }


    /*


    public void moveTransition(){

        photoContainer.replace(currentPhoto, nextPhoto, in);

    }

     *


    */


    public


    void


     buildPhoto(


    int


     index) {


    //


    生成缩略图


    for


     (


    int


     i


    =


    0


    ; i


    <


     lblPhotos.length; i


    ++


    ) {


    if


     (currentIndex


    ==


    0


    ) {

                lblPhotos[i]


    =


    new


     Label(photos[currentIndex


    +


     i].getResizePic());

            }


    else


    if


     (currentIndex


    ==


     photos.length


    -


    1


    ) {

                lblPhotos[i]


    =


    new


     Label(photos[currentIndex


    +


     i


    -


    2


    ].getResizePic());

            }


    else


     {

                lblPhotos[i]


    =


    new


     Label(photos[currentIndex


    +


     i


    -


    1


    ].getResizePic());

            }

            miniPhotoContainer.addComponent(lblPhotos[i]);

        }


    /*


        currentPhoto = new Label(photos[currentIndex].getPic());

        nextPhoto = new Label(photos[currentIndex+1].getPic());

         *


    */


    //


    添加pre按钮


    try


     {


    if


     (currentIndex


    ==


    0


    ) {

                btnPre


    =


    new


     UIButton(Image.createImage(


    "


    /pre_disabled.png


    "


    ));

                btnPre.setFocusable(


    false


    );

            }


    else


     {

                btnPre


    =


    new


     UIButton(Image.createImage(


    "


    /pre.png


    "


    ));

                btnPre.setFocusable(


    true


    );

            }

            topContainer.addComponent(BorderLayout.WEST, btnPre);

        }


    catch


     (IOException ex) {

            ex.printStackTrace();

        }


    //


    添加缩略图列表


            topContainer.addComponent(BorderLayout.CENTER, miniPhotoContainer);


    //


    添加next按钮


    try


     {


    if


     (currentIndex


    ==


     photos.length


    -


    1


    ) {

                btnNext


    =


    new


     UIButton(Image.createImage(


    "


    /next_disabled.png


    "


    ));

                btnNext.setFocusable(


    false


    );

            }


    else


     {

                btnNext


    =


    new


     UIButton(Image.createImage(


    "


    /next.png


    "


    ));

                btnNext.setFocusable(


    true


    );

            }

            topContainer.addComponent(BorderLayout.EAST, btnNext);

        }


    catch


     (IOException ex) {

            ex.printStackTrace();

        }


    if


    (btnSelected


    ==


    1


    ){


    this


    .setFocused(btnNext);

        }


    //


    生成大图


            Label lblPhoto


    =


    new


     Label();

        lblPhoto.setIcon(photos[currentIndex].getPic());

        lblPhoto.setText(photos[currentIndex].getName());

        lblPhoto.setAlignment(Label.CENTER);

        lblPhoto.setTextPosition(Label.BOTTOM);


        photoContainer.addComponent(lblPhoto);

        mainContainer.addComponent(topContainer);

        mainContainer.addComponent(photoContainer);


    this


    .addComponent(BorderLayout.CENTER, mainContainer);

    }


    public


    void


     actionPerformed(ActionEvent evt) {


    int


     cmdId


    =


     evt.getCommand().getId();


    if


     (cmdId


    ==


    0


    ) {


    new


     PhotoListForm();

        }

    }

}
注意我们注释部分的代码,当你翻张时,可以实现Transition效果,这样相册就会更有动感,这个效果我已经实现了。
   /*


    public void moveTransition(){

        photoContainer.replace(currentPhoto, nextPhoto, in);

    }

     *


   */
这个相册只是我做的第一个Demo,后面我会花时间进行改进,比如:图片放大、缩小,图片的自动播放,以及发送图片给好友等功能。


 2903
2903

 被折叠的 条评论
为什么被折叠?
被折叠的 条评论
为什么被折叠?
 到【灌水乐园】发言


