


目录
Qt 窗口布局是指将多个子窗口按照某种排列方式将其全部展示到对应的父窗口中的一种处理方式。在 Qt 中常用的布局样式有三种,分别是:
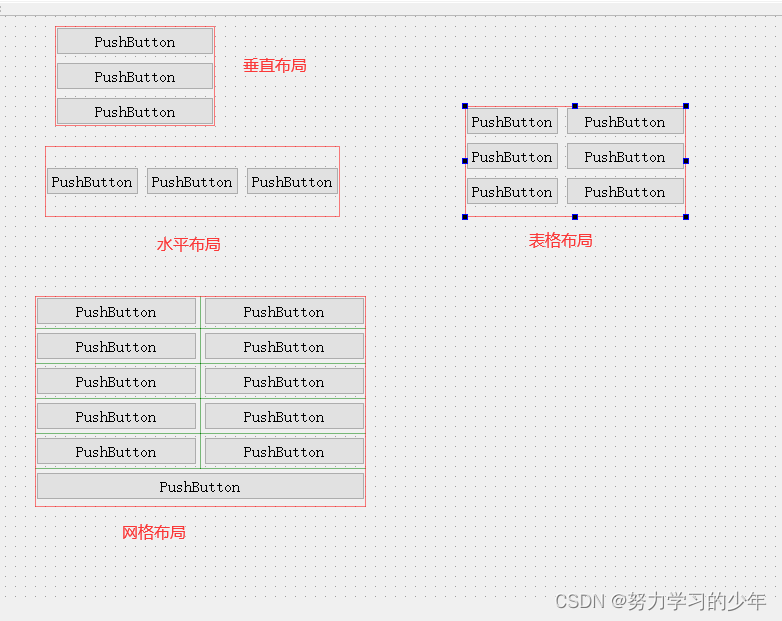
- 水平布局:布局中的所有的控件水平排列
- 垂直布局:布局中的所有的控件垂直排列
- 栅格布局:布局中的所有的控件垂直 + 水平排列
1.在UI窗口中布局
在UI界面中找到对应的布局窗口。

将相应的控件放入到布局对应的红色框内部,这些控件就按照布局的样式自动排列到一起了
布局的注意事项:
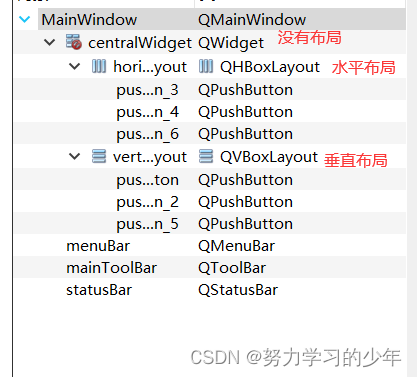
通过 UI 编辑窗口的树状列表我们可以对所有窗口的布局进行检查,如果发现某个窗口没有布局,一定要对其进行设置,如果某个窗口没有进行布局, 那么当这个窗口显示出来之后里边的子部件就可能无法被显示出来。
方式2:


布局属性:

布局与窗口是有间隙的,上面的属性是描述窗口与布局之间的上下左右的属性。
layoutSpacing是描述布局内控件的间隙

2.API设置布局
在 QT 中,布局也有对应的类,布局类之间的关系如下:

常用的布局类:
- 水平布局:GHBoxLayout
- 垂直布局:GVBoxLayout
- 栅格布局:QGridLayout
一般我们不使用这些布局类对窗口进行布局,但是在这里还是给大家介绍一下这些类中常用的一些 API 函数
2.1 QLayout
// 在布局最后面添加一个窗口
void QLayout::addWidget(QWidget *w);
// 将某个窗口对象从布局中移除, 窗口对象如果不再使用需要自己析构
void QLayout::removeWidget(QWidget *widget);
// 设置布局的四个边界大小, 即: 左、上、右和下的边距。
void QLayout::setContentsMargins(int left, int top, int right, int bottom);
// 设置布局中各个窗口之间的间隙大小
void setSpacing(int);
2.2 QHBoxLayout
这个类中的常用 API 都是从基类继承过来的,关于其使用,实例代码如下:
MainWindow::MainWindow(QWidget *parent) :
QMainWindow(parent),
ui(new Ui::MainWindow)
{
//在QMaindow布局
ui->setupUi(this);
QWidget* w=new QWidget;
setCentralWidget(w);
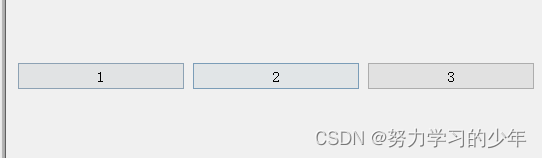
QHBoxLayout* hlayout=new QHBoxLayout;
QPushButton* b1=new QPushButton("1");
QPushButton* b2=new QPushButton("2");
QPushButton* b3=new QPushButton("3");
hlayout->addWidget(b1);
hlayout->addWidget(b2);
hlayout->addWidget(b3);
centralWidget()->setLayout(hlayout);
}
2.3 QVBoxLayout
这个类中的常用 API 都是从基类继承过来的,关于其使用,实例代码如下:
MainWindow::MainWindow(QWidget *parent) :
QMainWindow(parent),
ui(new Ui::MainWindow)
{
ui->setupUi(this);
QWidget* w=new QWidget;
setCentralWidget(w);
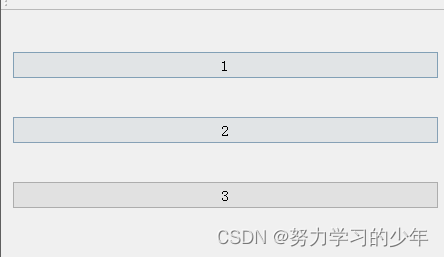
QVBoxLayout* hlayout=new QVBoxLayout;
QPushButton* b1=new QPushButton("1");
QPushButton* b2=new QPushButton("2");
QPushButton* b3=new QPushButton("3");
hlayout->addWidget(b1);
hlayout->addWidget(b2);
hlayout->addWidget(b3);
centralWidget()->setLayout(hlayout);
}
2.4 QGirdLayout
// 构造函数
QGridLayout::QGridLayout();
QGridLayout::QGridLayout(QWidget *parent);

// 添加窗口对象到网格布局中
/*
参数:
  - widget: 添加到布局中的窗口对象
  - row: 添加到布局中的窗口对象位于第几行 (从0开始)
  - column: 添加到布局中的窗口对象位于第几列 (从0开始)
  - alignment: 窗口在布局中的对齐方式, 没有特殊需求使用默认值即可
*/
void QGridLayout::addWidget(
	QWidget *widget, int row, int column,
Qt::Alignment alignment = Qt::Alignment());

/*
参数:
  - widget: 添加到布局中的窗口对象
  - fromRow: 添加到布局中的窗口对象位于第几行 (从0开始)
  - fromColumn: 添加到布局中的窗口对象位于第几列 (从0开始)
  - rowSpan: 添加的窗口从 fromRow 行开始跨越的行数
  - columnSpan: 添加的窗口从 fromColumn 列开始跨越的列数
  - alignment: 窗口在布局中的对齐方式, 没有特殊需求使用默认值即可
*/
void QGridLayout::addWidget(
QWidget *widget, int fromRow, int fromColumn,
int rowSpan, int columnSpan,
Qt::Alignment alignment = Qt::Alignment());

// 设置 column 对应的列的最新宽度, 单位: 像素
void QGridLayout::setColumnMinimumWidth(int column, int minSize);

// 设置布局中水平方向窗口之间间隔的宽度
void QGridLayout::setHorizontalSpacing(int spacing);

// 设置布局中垂直方向窗口之间间隔的宽度
void QGridLayout::setVerticalSpacing(int spacing);
注意
在MainWindow并不能直接进行布局。不然会显示QWidget::setLayout: Attempting to set QLayout "" on MainWindow这个错误。
解决:
1.创建一个QWidget的实例,并将这个实例设置为centralWidget。
QWidget *widget = new QWidget();
this->setCentralWidget(widget);
2. 进行布局 。
QHBoxLayout *hbLayout = new QHBoxLayout();
hbLayout->addWidget(m_openButton);
hbLayout->addWidget(m_closeButton);
3.只需要将widget的布局设置为布局就好了
centralWidget()->setLayout(hbLayout);
示例
使用UI界面设计一个登录窗口。
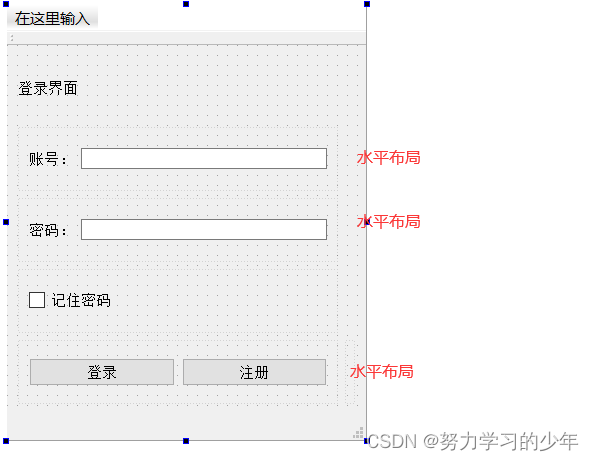
改进:
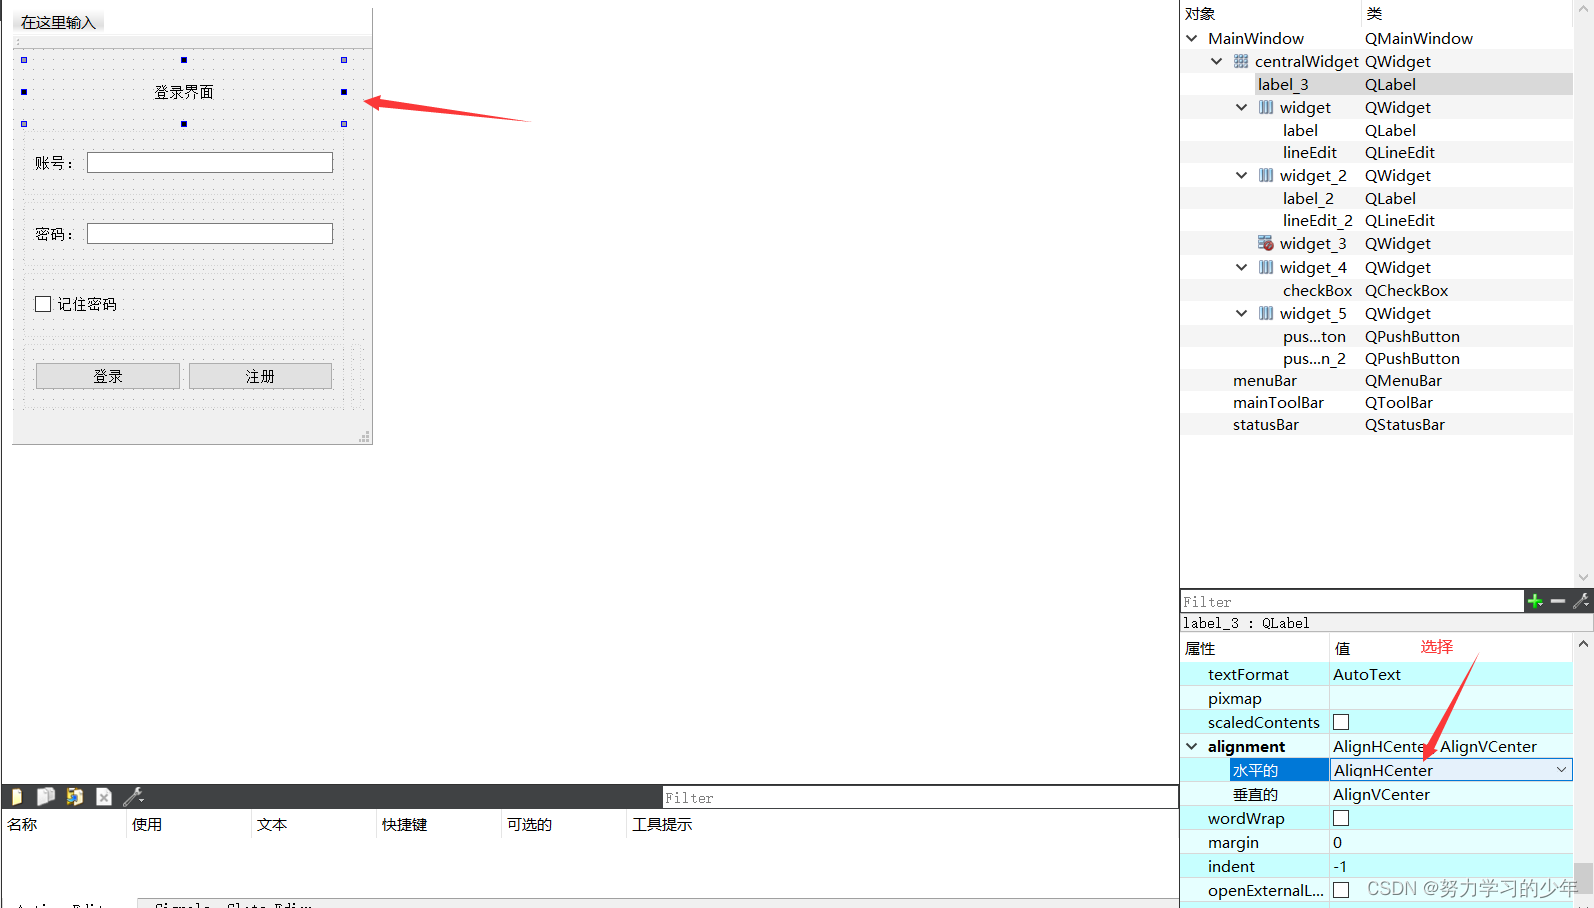
将登录界面放在中间
第一种方式:设置属性
点击右侧的属性,找到alignment->水平布局->选择AlignCenter
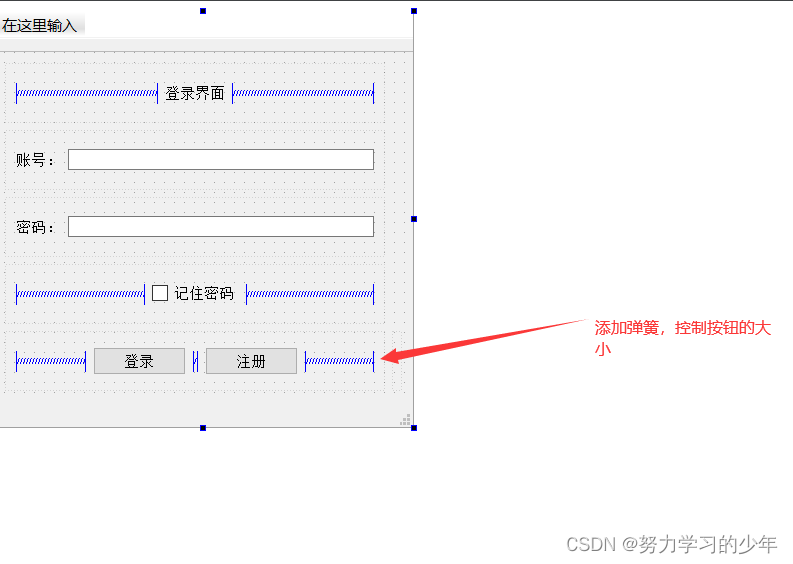
第二种方式:添加弹簧

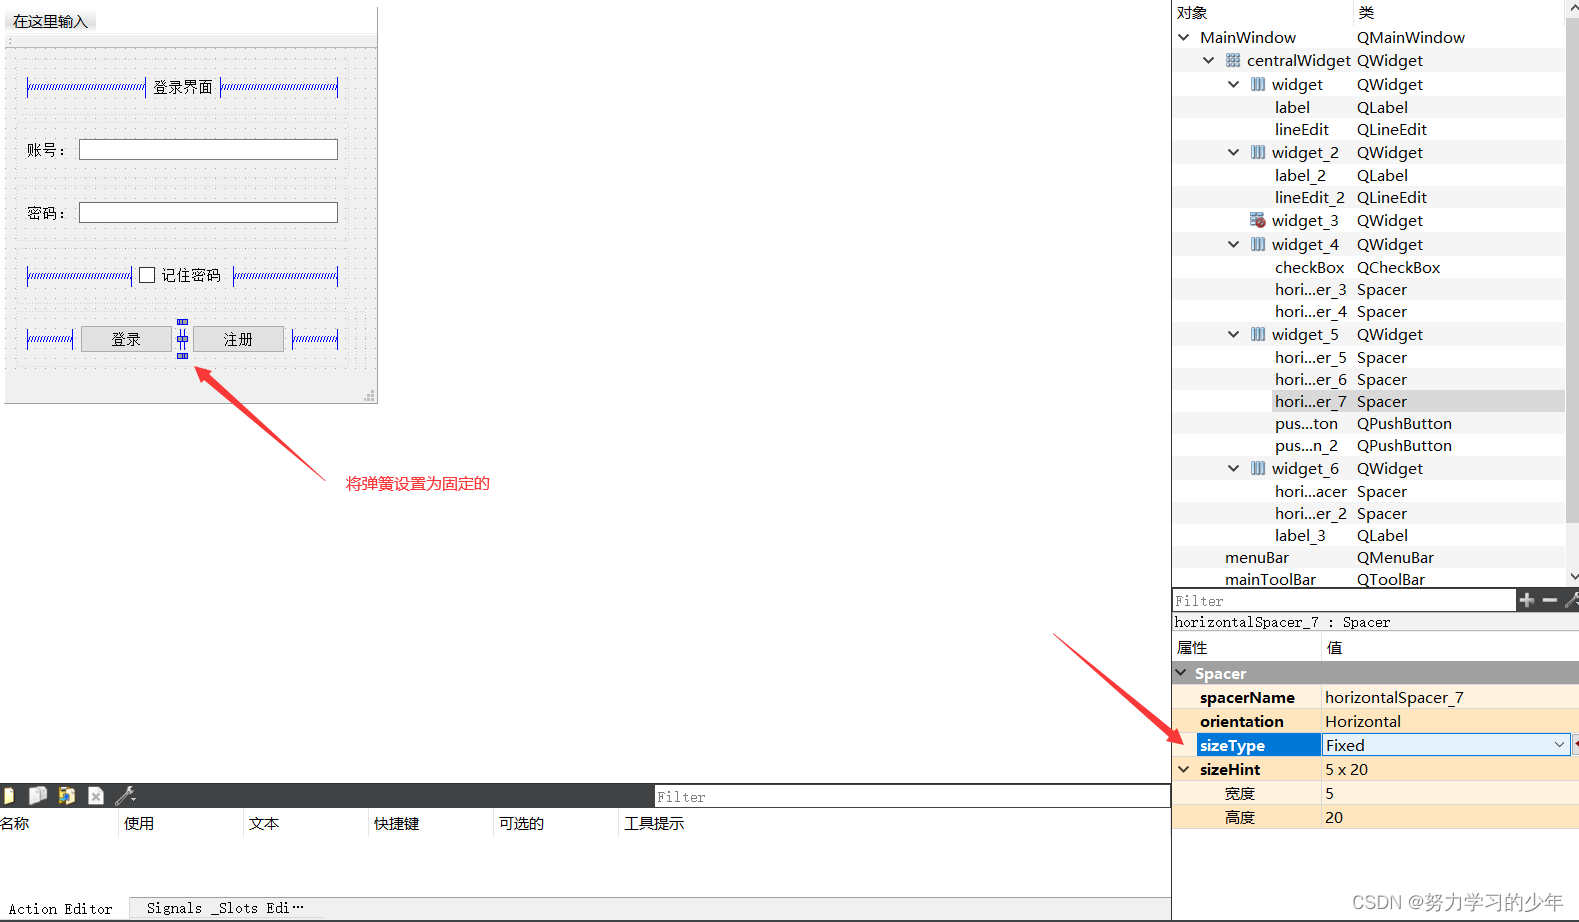
最后,在设置窗口为固定:

记住宽度和高度,将窗口设置为固定大小。
setFixedSize(419.350);
最终显示效果:


 1万+
1万+


 被折叠的 条评论
为什么被折叠?
被折叠的 条评论
为什么被折叠?
 到【灌水乐园】发言


