


从网站下载数据集解压到工作目录
import os
import zipfile
local_zip = 'E:\JupyterWorkdir\data\horse-or-human.zip'
zip_ref = zipfile.ZipFile(local_zip, 'r')
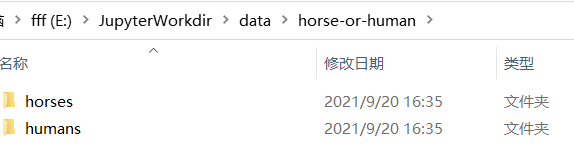
zip_ref.extractall('E:\JupyterWorkdir\data\horse-or-human')
zip_ref.close()
目录如下图

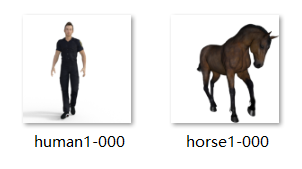
查看每个分类前10个图像
import os
# Directory with our training horse pictures
train_horse_dir = os.path.join('E:\JupyterWorkdir\data\horse-or-human\horses')

# Directory with our training human pictures
train_human_dir = os.path.join('E:\JupyterWorkdir\data\horse-or-human\humans')

train_horse_names = os.listdir(train_horse_dir)
print(train_horse_names[:10])

train_human_names = os.listdir(train_human_dir)
print(train_human_names[:10])
[‘horse01-0.png’, ‘horse01-1.png’, ‘horse01-2.png’, ‘horse01-3.png’, ‘horse01-4.png’, ‘horse01-5.png’, ‘horse01-6.png’, ‘horse01-7.png’, ‘horse01-8.png’, ‘horse01-9.png’]
[‘human01-00.png’, ‘human01-01.png’, ‘human01-02.png’, ‘human01-03.png’, ‘human01-04.png’, ‘human01-05.png’, ‘human01-06.png’, ‘human01-07.png’, ‘human01-08.png’, ‘human01-09.png’]
绘制4行4列的区域展示图像
%matplotlib inline

import matplotlib.pyplot as plt
import matplotlib.image as mpimg

# Parameters for our graph; we'll output images in a 4x4 configuration
nrows = 4
ncols = 4

# Index for iterating over images
pic_index = 0

# Set up matplotlib fig, and size it to fit 4x4 pics
fig = plt.gcf()
fig.set_size_inches(ncols * 4, nrows * 4)

pic_index += 8
next_horse_pix = [os.path.join(train_horse_dir, fname)
                for fname in train_horse_names[pic_index-8:pic_index]]
next_human_pix = [os.path.join(train_human_dir, fname)
                for fname in train_human_names[pic_index-8:pic_index]]

for i, img_path in enumerate(next_horse_pix+next_human_pix):
  # Set up subplot; subplot indices start at 1
  sp = plt.subplot(nrows, ncols, i + 1)
  sp.axis('Off') # Don't show axes (or gridlines)

  img = mpimg.imread(img_path)
  plt.imshow(img)

plt.show()

搭建神经网络
import tensorflow as tf
from tensorflow.keras.optimizers import RMSprop
os.environ["CUDA_VISIBLE_DEVICES"] = "-1"

model = tf.keras.models.Sequential([
    # Note the input shape is the desired size of the image 300x300 with 3 bytes color
    # This is the first convolution
    tf.keras.layers.Conv2D(16, (3,3), activation='relu', input_shape=(300, 300, 3)),
    tf.keras.layers.MaxPooling2D(2, 2),
    # The second convolution
    tf.keras.layers.Conv2D(32, (3,3), activation='relu'),
    tf.keras.layers.MaxPooling2D(2,2),
    # The third convolution
    tf.keras.layers.Conv2D(64, (3,3), activation='relu'),
    tf.keras.layers.MaxPooling2D(2,2),
    # The fourth convolution
    tf.keras.layers.Conv2D(64, (3,3), activation='relu'),
    tf.keras.layers.MaxPooling2D(2,2),
    # The fifth convolution
    tf.keras.layers.Conv2D(64, (3,3), activation='relu'),
    tf.keras.layers.MaxPooling2D(2,2),
    # Flatten the results to feed into a DNN
    tf.keras.layers.Flatten(),
    # 512 neuron hidden layer
    tf.keras.layers.Dense(512, activation='relu'),
    # Only 1 output neuron. It will contain a value from 0-1 where 0 for 1 class ('horses') and 1 for the other ('humans')
    tf.keras.layers.Dense(1, activation='sigmoid')
])
输出网络结构
model.summary()

设置网络相应参数
model.compile(loss='binary_crossentropy',
              optimizer=RMSprop(lr=0.001),
              metrics=['acc'])
我们设置数据生成器来读取源文件夹中的图片,将它们转换为float32张量,并将它们(及其标签)提供给我们的网络。我们将有一个用于训练图像的生成器和一个用于验证图像的生成器。我们的生成器将生成批量大小为300x300的图像及其标签(二分类)。
进入神经网络的数据通常应该以某种方式进行规范化,以使其更易于网络处理。(将原始像素输入convnet是不常见的。)在我们的例子中,我们将通过将像素值规格化为[0,1]范围(最初所有值都在[0,255]范围内)来预处理图像。
在Keras中,这可以通过Keras.preprocessing.image.ImageDataGenerator类使用重缩放参数来完成。此ImageDataGenerator类允许您通过.flow(data, labels) or .flow_from_directory(directory)实例化增强映像批(及其标签)的生成器。然后,这些生成器可以与接受数据生成器作为输入的Keras模型方法一起使用:如 fit_generator, evaluate_generator, and predict_generator.
ImageDataGenerator类可以通过指定父目录,然后将子目录的名称分别映射为分类的名称,在这里我们采用的使二分类,所以分类的对象就是horses和humans。
train_dir指定父目录,target_size可以把不同大小的图片都resize成一样的大小(这里是300*300),batch_size将数据以128的大小批次送入train_generator生成器

具体代码实现如下:
from tensorflow.keras.preprocessing.image import ImageDataGenerator

# All images will be rescaled by 1./255
train_datagen = ImageDataGenerator(rescale=1/255)

# Flow training images in batches of 128 using train_datagen generator
train_generator = train_datagen.flow_from_directory(
        'E:\JupyterWorkdir\data\horse-or-human',  # 训练图片的目录
        target_size=(300, 300),  # 所有图片被中置为300*300
        batch_size=128,
        # 因为使用了 binary_crossentropy loss, 所以使用二分类标签
        class_mode='binary')
输出:Found 1027 images belonging to 2 classes.
训练网络
history = model.fit_generator(
      train_generator,
      steps_per_epoch=8,
      epochs=15,
      verbose=1)

保存网络模型
model.save('my_model.h5')
分别用一张人的图片和马的图片给模型预测
import numpy as np

from keras.preprocessing import image

path = 'E:\JupyterWorkdir\data\human1-000.png'
img = image.load_img(path, target_size=(300, 300))
x = image.img_to_array(img)
x = np.expand_dims(x, axis=0)

images = np.vstack([x])
classes = model.predict(images, batch_size=10)
if classes[0]>0.5:
    print(" is a human")
else:
    print(" is a horse")


 1522
1522


 被折叠的 条评论
为什么被折叠?
被折叠的 条评论
为什么被折叠?
 到【灌水乐园】发言


