这次带来的控件,可以实现让任意指定控件“爆炸”。像下面这样:
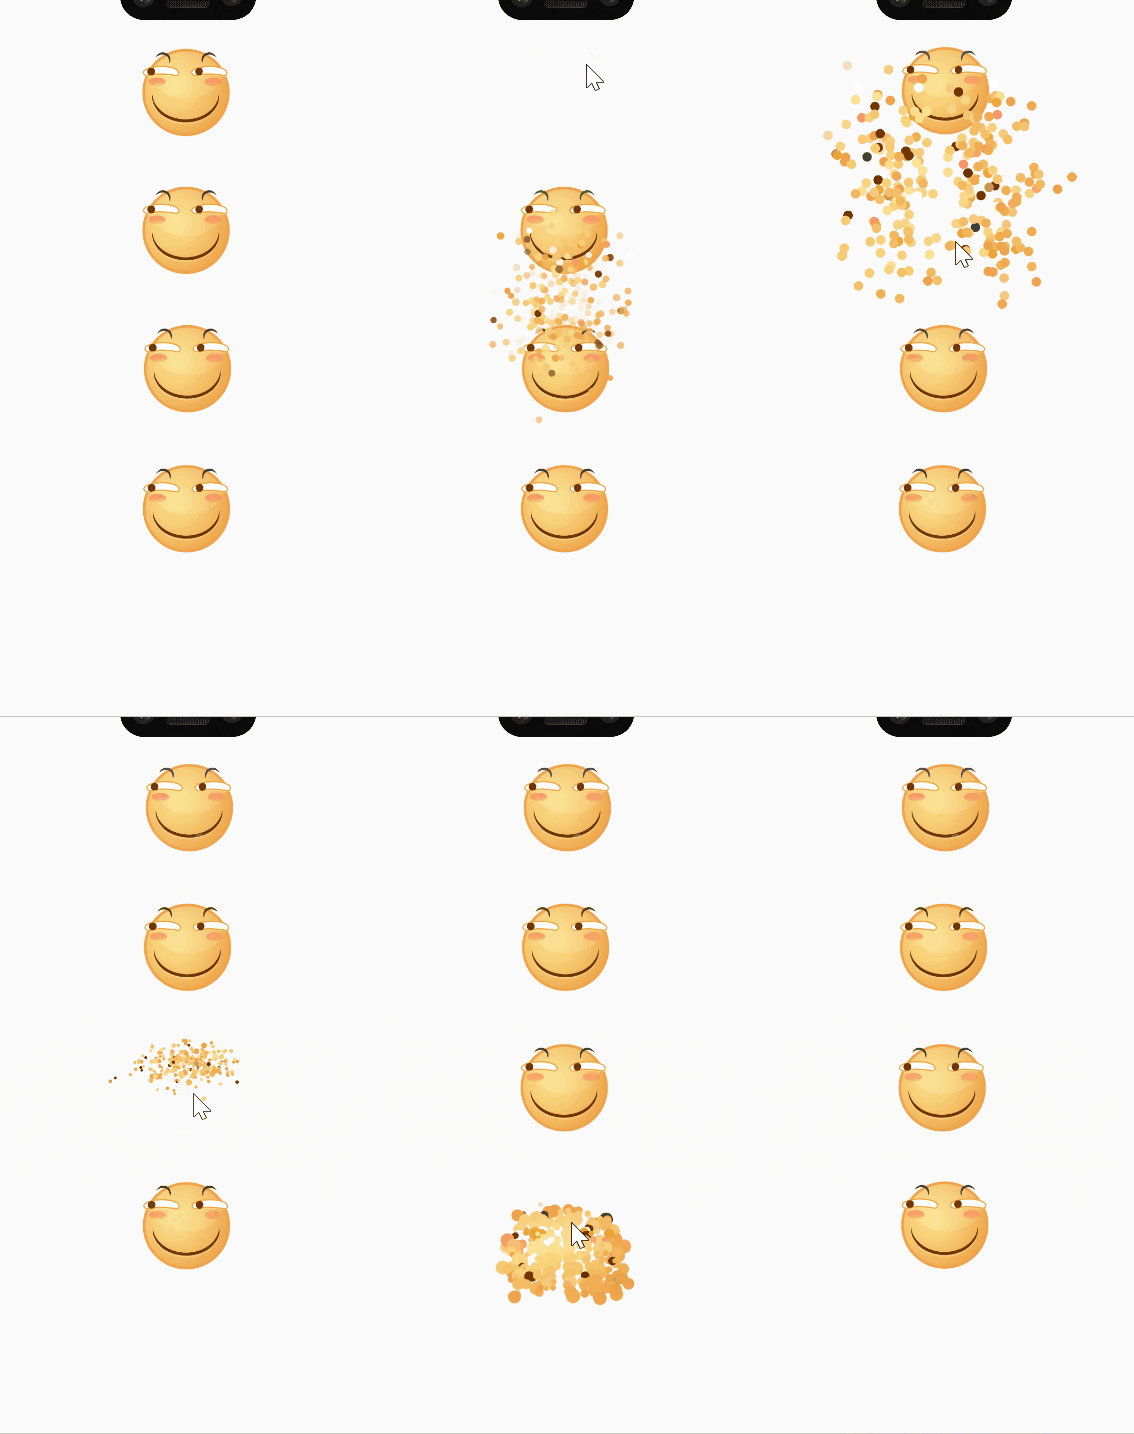
效果很直观,下面上代码。核心控件就一个ExplodeView:
public class ExplodeView extends View {

    private static Context context;

    // 被爆炸的视图
    private View view;


    /**
     * 可设置参数
     */
    // 粒子半径
    private int particleRadius;

    // 动画持续时间
    private int duration;

    // 爆炸轨迹算子
    private TrackIterator trackIterator;


    /**
     * 运行参数
     */
    // 爆炸动画
    private ExplosionAnimator explodeAnimator;

    // 爆炸动画监听
    private OnExplodeListener listener;


    public ExplodeView(Context context) {
        this(context, null);
    }

    public ExplodeView(Context context, AttributeSet attrs) {
        this(context, attrs, -1);
    }

    public ExplodeView(Context context, AttributeSet attrs, int defStyle) {
        super(context, attrs, defStyle);
        init(context);
    }

    /**
     * 初始化方法
     *
     * @param context
     */
    private void init(Context context) {

        this.context = context;

        particleRadius = dp2px(5);
        duration = 1000;

        attach2Activity((Activity) context);
    }

    @Override
    protected void onDraw(Canvas canvas) {
        super.onDraw(canvas);

        // 每次页面刷新时,命令爆炸动画类重新绘制粒子位置
        if (explodeAnimator != null) {
            explodeAnimator.draw(canvas);
        }
    }

    /**
     * 触发爆炸方法
     *
     * @param view 被爆炸的视图
     */
    public void explode(View view) {

        if (view == null) {
            return;
        }

        if (explodeAnimator != null && explodeAnimator.isStarted()) {
            return;
        }

        this.view = view;

        Rect rect = new Rect();
        view.getGlobalVisibleRect(rect);
        int[] location = new int[2];
        getLocationOnScreen(location);
        rect.offset(-location[0], -location[1]);

        Bitmap bitmap = createBitmapFromView(view);
        explodeAnimator = new ExplosionAnimator(bitmap, rect);

        bitmap.recycle();
        bitmap = null;
        System.gc();

        view.setEnabled(false);

        ValueAnimator shakeAnimator = ValueAnimator.ofFloat(0f, 1f);
        shakeAnimator.setDuration(150);
        shakeAnimator.addUpdateListener(new ValueAnimator.AnimatorUpdateListener() {

            Random random = new Random();

            @Override
            public void onAnimationUpdate(ValueAnimator animation) {
                ExplodeView.this.view.setTranslationX((random.nextFloat() - 0.5f) * ExplodeView.this.view.getWidth() * 0.05f);
                ExplodeView.this.view.setTranslationY((random.nextFloat() - 0.5f) * ExplodeView.this.view.getHeight() * 0.05f);
            }
        });

        shakeAnimator.addListener(new AnimatorListenerAdapter() {
            @Override
            public void onAnimationEnd(Animator animation) {
                explodeAnimator.addListener(new AnimatorListenerAdapter() {
                    @Override
                    public void onAnimationStart(Animator animation) {
                        ExplodeView.this.view.setVisibility(View.INVISIBLE);

                        if (listener != null) {
                            listener.onStart(ExplodeView.this.view);
                        }
                    }

                    @Override
                    public void onAnimationEnd(Animator animation) {
                        ExplodeView.this.view.setEnabled(true);

                        explodeAnimator.particles = null;
                        explodeAnimator = null;

                        if (listener != null) {
                            listener.onFinish(ExplodeView.this.view);
                        }
                    }
                });

                explodeAnimator.addUpdateListener(new ValueAnimator.AnimatorUpdateListener() {
                    @Override
                    public void onAnimationUpdate(ValueAnimator animation) {
                        invalidate();
                    }
                });

                explodeAnimator.start();
            }
        });

        shakeAnimator.start();
    }

    /**
     * 将自身添加到当前页面的窗口中
     *
     * @param activity
     */
    private void attach2Activity(Activity activity) {
        ViewGroup rootView = activity.findViewById(Window.ID_ANDROID_CONTENT);

        ViewGroup.LayoutParams lp = new ViewGroup.LayoutParams(
                ViewGroup.LayoutParams.MATCH_PARENT, ViewGroup.LayoutParams.MATCH_PARENT);
        rootView.addView(this, lp);
    }

    /**
     * 获取被爆炸视图的缓存方法
     *
     * @param view 被爆炸视图
     * @return 缓存
     */
    private Bitmap createBitmapFromView(View view) {
        view.setDrawingCacheEnabled(true);
        Bitmap bitmap = Bitmap.createBitmap(view.getDrawingCache());
        view.destroyDrawingCache();

        return bitmap;
    }

    public static int dp2px(float dipValue) {
        float scale = context.getResources().getDisplayMetrics().density;
        return (int) (dipValue * scale + 0.5f);
    }

    /**
     * 轨迹迭代方法
     *
     * @param position 粒子编号
     * @param particle 粒子对象
     * @param factor   动画进度
     */
    private void advance(int position, Particle particle, float factor) {

        float x = particle.centerX;
        float y = particle.centerY;
        float alpha = particle.alpha;
        float radius = particle.radius;
        int color = particle.color;

        particle.centerX = trackIterator.getX(position, x, y, radius, color, alpha, particle.rectWidth, particle.rectHeight, factor);
        particle.centerY = trackIterator.getY(position, x, y, radius, color, alpha, particle.rectWidth, particle.rectHeight, factor);
        particle.alpha = trackIterator.getAlpha(position, x, y, radius, color, alpha, particle.rectWidth, particle.rectHeight, factor);
        particle.radius = trackIterator.getRadius(position, x, y, radius, color, alpha, particle.rectWidth, particle.rectHeight, factor);
        particle.color = trackIterator.getColor(position, x, y, radius, color, alpha, particle.rectWidth, particle.rectHeight, factor);

    }

    /**
     * 设置粒子半径
     *
     * @param particleRadius 粒子半径 单位dp
     */
    public void setParticleRadius(int particleRadius) {
        this.particleRadius = dp2px(particleRadius);
    }

    /**
     * 设置爆炸动画时长
     *
     * @param duration 时长 单位毫秒
     */
    public void setDuration(int duration) {
        this.duration = duration;
    }

    /**
     * 爆炸轨迹算子 决定了粒子的运动轨迹
     *
     * @param trackIterator 轨迹算子,目前支持的算子:
     *                      ·NormalTrackIterator:普通算子,粒子呈类自由落体
     *                      ·BezierTrackIterator:Bezier算子,粒子呈斜向上Bezier曲线
     *                      ·QuadraticTrackIterator:二次函数算子,粒子呈斜向上抛物线
     */
    public void setTrackIterator(TrackIterator trackIterator) {
        this.trackIterator = trackIterator;
    }

    /**
     * 动画监听接口
     */
    public interface OnExplodeListener {

        /**
         * 动画开始时回调
         *
         * @param view
         */
        void onStart(View view);

        /**
         * 动画结束时回调
         *
         * @param view
         */
        void onFinish(View view);
    }

    /**
     * 设置动画监听
     *
     * @param listener
     */
    public void setOnExplodeListener(OnExplodeListener listener) {
        this.listener = listener;
    }

    /**
     * 爆炸动画类,实现了初始化粒子和更新轨迹的操作
     */
    class ExplosionAnimator extends ValueAnimator {

        // 所有粒子数组
        private Particle[][] particles;

        private Paint paint;

        /**
         * 初始化粒子
         *
         * @param bitmap 爆炸view的视图缓存
         * @param bound  爆炸view的显示区域
         */
        public ExplosionAnimator(Bitmap bitmap, Rect bound) {
            paint = new Paint();
            setFloatValues(0.0f, 1.0f);
            setDuration(duration);
            setInterpolator(new LinearInterpolator());

            int w = bound.width();
            int h = bound.height();

            int columnCount = w / particleRadius; //横向粒子个数
            int rowCount = h / particleRadius;    //竖向粒子个数

            particles = new Particle[rowCount][columnCount];

            for (int row = 0; row < rowCount; row++) { //行
                for (int column = 0; column < columnCount; column++) { //列
                    int color = bitmap.getPixel(column * particleRadius, row * particleRadius);
                    particles[row][column] = new Particle(row * columnCount + column, color,
                            particleRadius, bound.left, bound.top, bound.width(), bound.height(),
                            column, row, bound.centerX(), bound.centerY());
                }
            }
        }

        /**
         * 刷新粒子轨迹
         *
         * @param canvas
         */
        public void draw(Canvas canvas) {
            if (!isStarted()) {
                return;
            }
            for (int row = 0; row < particles.length; row++) { //行
                for (int column = 0; column < particles[row].length; column++) { //列
                    advance(row * particles[row].length + column, particles[row][column], (Float) getAnimatedValue());

                    paint.setColor(particles[row][column].color);
                    paint.setAlpha((int) (Color.alpha(particles[row][column].color) * particles[row][column].alpha));

                    canvas.drawCircle(particles[row][column].centerX, particles[row][column].centerY, particles[row][column].radius, paint);
                }
            }
        }
    }

    /**
     * 粒子对象
     */
    public class Particle {

        // 粒子中心x坐标
        private float centerX;

        // 粒子中心y坐标
        private float centerY;

        // 粒子半径
        private float radius;

        // 粒子颜色
        private int color;

        // 粒子透明度
        private float alpha;

        // 爆炸view的显示区域宽度
        private int rectWidth;

        // 爆炸view的显示区域高度
        private int rectHeight;

        /**
         * 构造方法
         *
         * @param position   粒子编号
         * @param color      粒子颜色
         * @param width      粒子半径
         * @param left       爆炸view的左上角x坐标
         * @param top        爆炸view的左上角y坐标
         * @param rectWidth  爆炸view的宽度
         * @param rectHeight 爆炸view的高度
         * @param column     粒子在粒子矩阵中的列数
         * @param row        粒子在粒子矩阵中的行数
         * @param centerX    爆炸view的中心x坐标
         * @param centerY    爆炸view的中心y坐标
         */
        public Particle(int position, int color, int width, int left, int top, int rectWidth, int rectHeight, int column, int row, float centerX, float centerY) {

            if (trackIterator == null) {
                trackIterator = new NormalTrackIterator();
            }

            trackIterator.initParticle(position, left + width * column, top + width * row, width, color, 1, rectWidth, rectHeight, centerX, centerY, this);

            this.color = trackIterator.getColor(position, left + width * column, top + width * row, width, color, 1, rectWidth, rectHeight, 0);
            this.alpha = trackIterator.getAlpha(position, left + width * column, top + width * row, width, color, 1, rectWidth, rectHeight, 0);
            this.radius = trackIterator.getRadius(position, left + width * column, top + width * row, width, color, 1, rectWidth, rectHeight, 0);
            this.centerX = trackIterator.getX(position, left + width * column, top + width * row, width, color, 1, rectWidth, rectHeight, 0);
            this.centerY = trackIterator.getY(position, left + width * column, top + width * row, width, color, 1, rectWidth, rectHeight, 0);
            this.rectWidth = rectWidth;
            this.rectHeight = rectHeight;

        }

        public float getCenterX() {
            return centerX;
        }

        public void setCenterX(float centerX) {
            this.centerX = centerX;
        }

        public float getCenterY() {
            return centerY;
        }

        public void setCenterY(float centerY) {
            this.centerY = centerY;
        }

        public float getRadius() {
            return radius;
        }

        public void setRadius(float radius) {
            this.radius = radius;
        }

        public int getColor() {
            return color;
        }

        public void setColor(int color) {
            this.color = color;
        }

        public float getAlpha() {
            return alpha;
        }

        public void setAlpha(float alpha) {
            this.alpha = alpha;
        }
    }
}
简单讲一下实现原理吧。粒子的爆炸效果通过属性动画不断迭代实现。具体由内部类ExplosionAnimator实现。ExplosionAnimator创建时将目标对象的bitmap缓存分割成若干小块,每个小块视为一个粒子,粒子颜色取小块右下角像素颜色,也就是这几句话:
particles = new Particle[rowCount][columnCount];

for (int row = 0; row < rowCount; row++) { //行
    for (int column = 0; column < columnCount; column++) { //列
        int color = bitmap.getPixel(column * particleRadius, row * particleRadius);
        particles[row][column] = new Particle(row * columnCount + column, color,
                particleRadius, bound.left, bound.top, bound.width(), bound.height(),
                column, row, bound.centerX(), bound.centerY());
    }
}
属性动画迭代时,通过ExplosionAnimator的draw方法不断更新粒子在屏幕上的显示位置。也就是这几句:
for (int row = 0; row < particles.length; row++) { //行
    for (int column = 0; column < particles[row].length; column++) { //列
        advance(row * particles[row].length + column, particles[row][column], (Float) getAnimatedValue());

        paint.setColor(particles[row][column].color);
        paint.setAlpha((int) (Color.alpha(particles[row][column].color) * particles[row][column].alpha));

        canvas.drawCircle(particles[row][column].centerX, particles[row][column].centerY, particles[row][column].radius, paint);
    }
}
具体的迭代算法由抽象算子TrackIterator实现,简单提一下TrackIterator算子中需要实现的方法:
initParticle():初始化算子,在爆炸开始之前会被调用
getX():决定了下一时刻粒子的x坐标。
getY():决定了下一时刻粒子的y坐标。
getRadius():决定了下一时刻粒子的半径。
getColor():决定了下一时刻粒子的颜色。
getAlpha():决定了下一时刻粒子的透明度。
控件自带了四种算子的实现,分别是:
NormalTrackIterator:普通随机算子,粒子向下无规则随机掉落
BezierTrackIterator:贝塞尔算子,粒子沿随机贝塞尔曲线运动
QuadraticTrackIterator:二次函数算子,粒子沿随机二次函数曲线运动
FreeFallTrackIterator:自由落体算子,粒子沿计算空气阻力的类平抛曲线运动
介绍完了,终于可以试一试效果了。先在布局里随便加个图片:
<?xml version="1.0" encoding="utf-8"?>
<RelativeLayout xmlns:android="http://schemas.android.com/apk/res/android"
    android:layout_width="match_parent"
    android:layout_height="match_parent">

    <ImageView
        android:id="@+id/imageview"
        android:layout_width="100dp"
        android:layout_height="100dp"
        android:layout_centerInParent="true"
        android:src="@drawable/icon" />

</RelativeLayout>
Antivity里简单写几句代码:
private ImageView imageView;

private ExplodeView explodeView;

@Override
protected void onCreate(@Nullable Bundle savedInstanceState) {
    super.onCreate(savedInstanceState);
    setContentView(R.layout.activity_main);

    imageView = findViewById(R.id.imageview);

    explodeView = new ExplodeView(this);
    explodeView.setParticleRadius(3);
    explodeView.setTrackIterator(new FreeFallTrackIterator());

    explodeView.setOnExplodeListener(new ExplodeView.OnExplodeListener() {
        @Override
        public void onStart(View view) {

        }

        @Override
        public void onFinish(View view) {
            imageView.setVisibility(View.VISIBLE);
        }
    });

    imageView.setOnClickListener(new View.OnClickListener() {
        @Override
        public void onClick(View v) {
            explodeView.explode(imageView);
        }
    });
}
代码很简单,通过ExplodeView的explode方法传入任意View对象,就能让这个View呈现爆炸效果了。顺带一提,爆炸动画结束后对象的View默认被隐藏了,可以通过监听接口OnExplodeListener来在爆炸动画结束后执行自己指定的操作。
好了,看看效果吧:
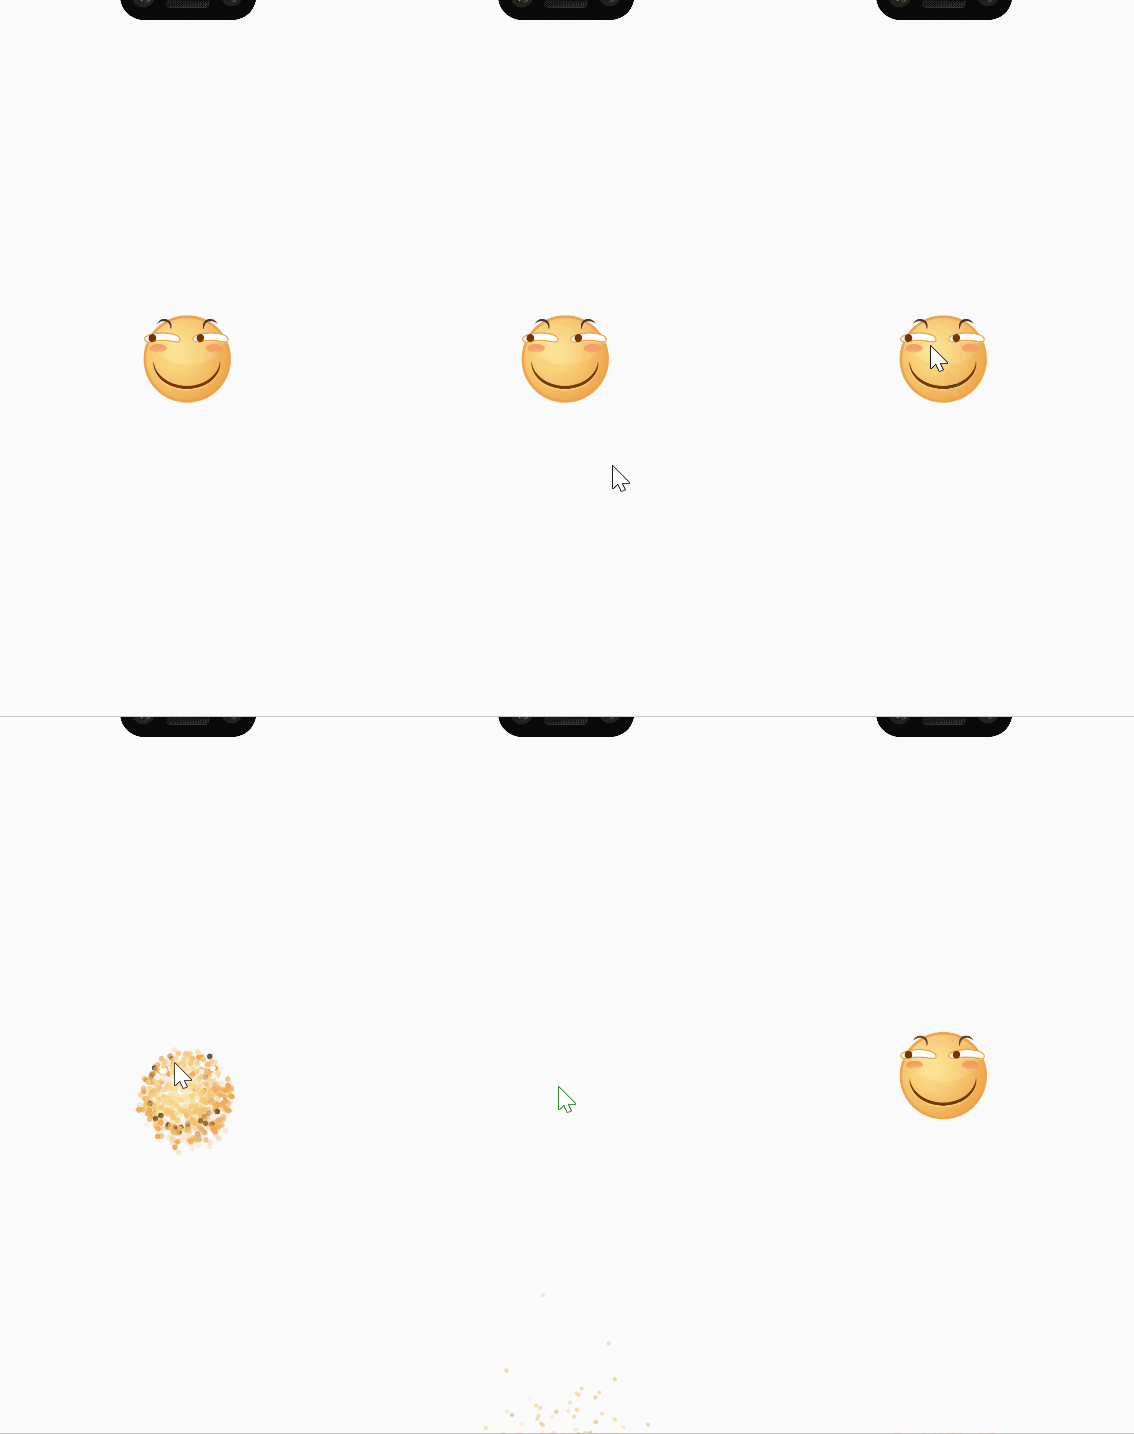
再试试别的算子。换成贝塞尔算子:
explodeView.setTrackIterator(new BezierTrackIterator());效果:
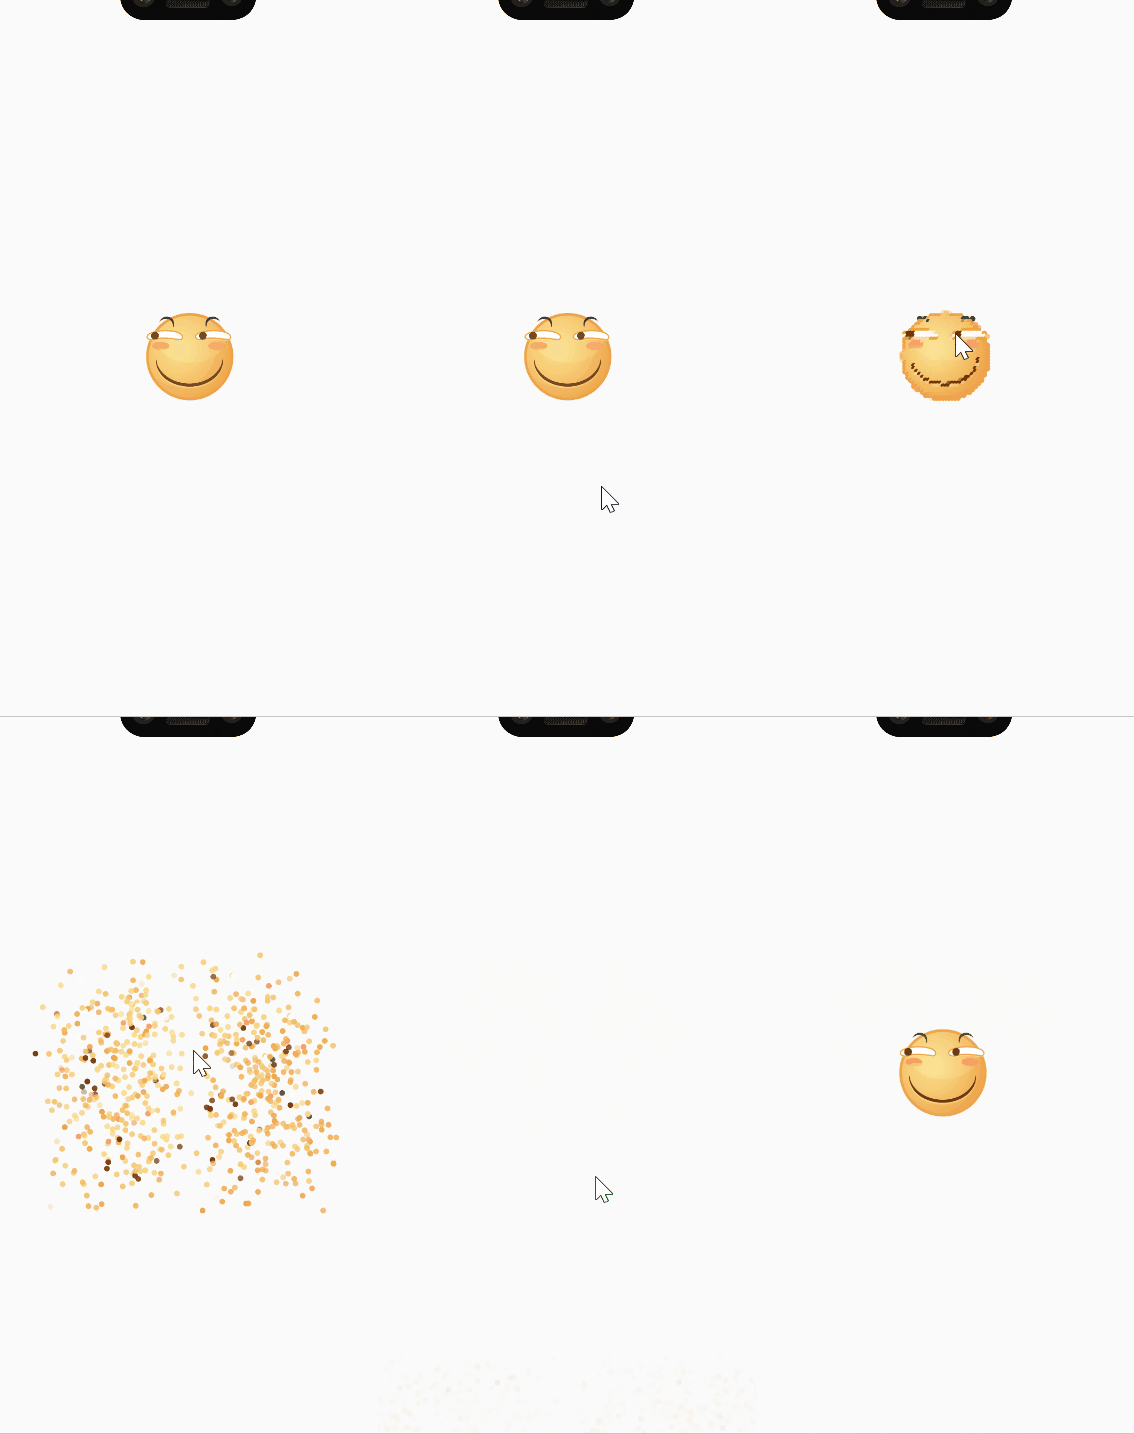
再试试二次函数算子:
explodeView.setTrackIterator(new QuadraticTrackIterator());效果:
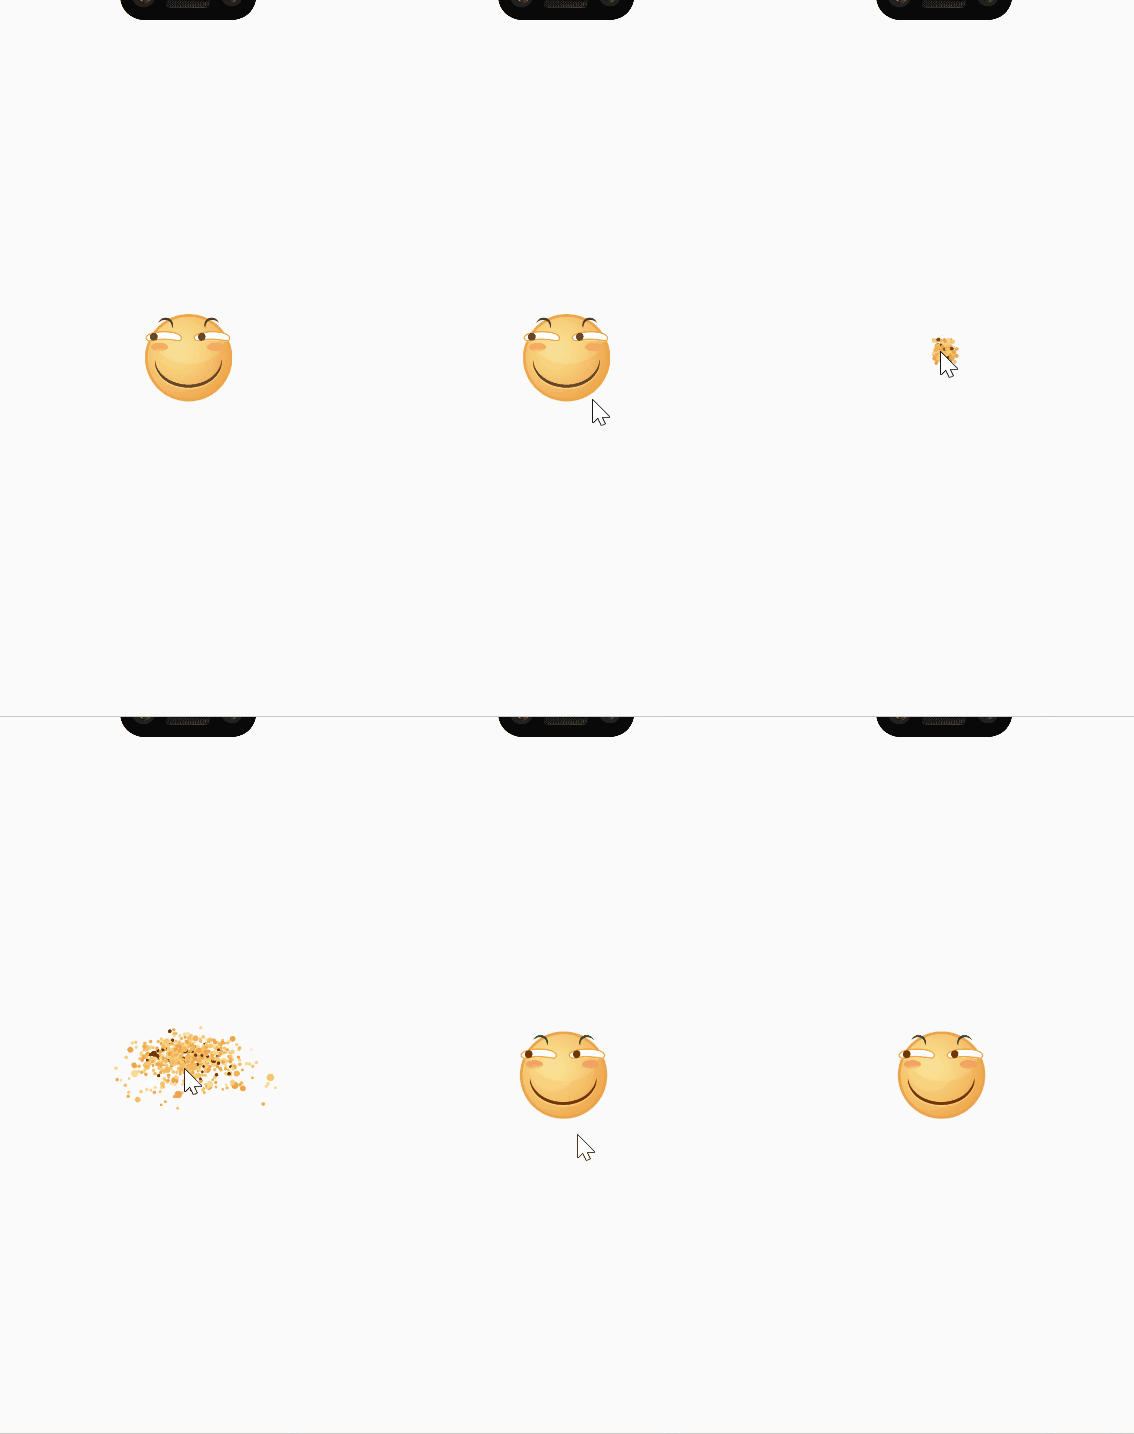
很像MiUI删除应用时的爆炸效果是不是?
最后再试试自由落体算子:
explodeView.setTrackIterator(new FreeFallTrackIterator());效果:
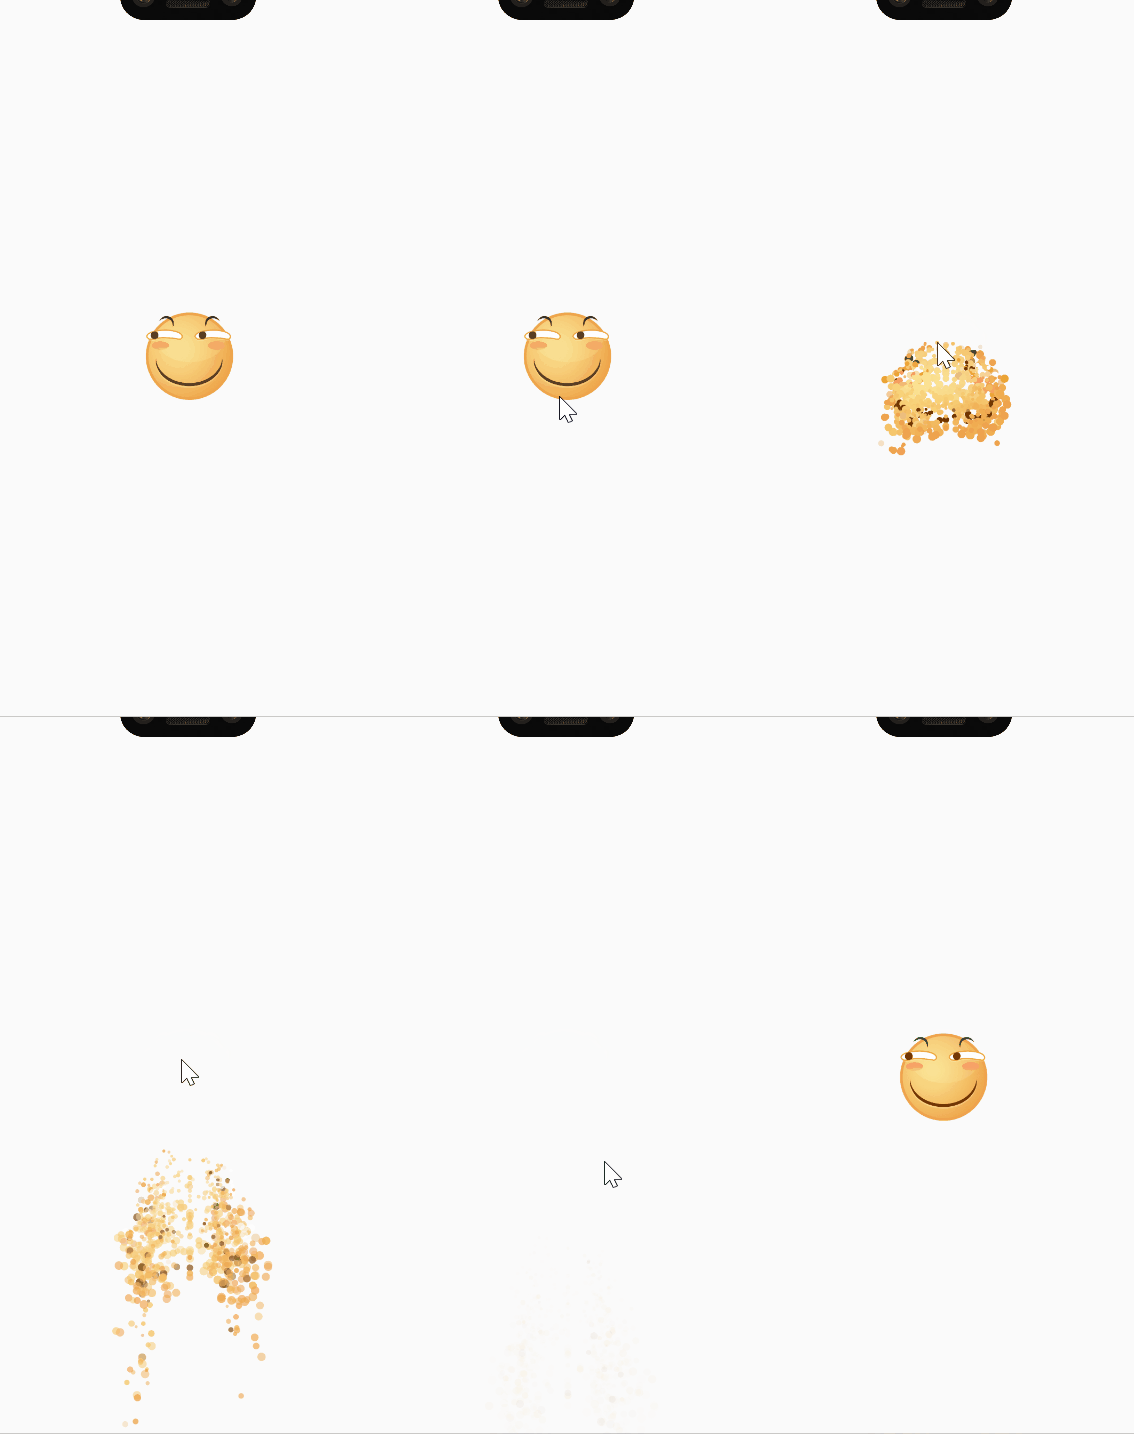
当然你们也可以自己实现TrackIterator来定义算子,实现想要的效果,这里只是抛砖引玉。
终于终于讲完了。最后再来总结一下。ExplodeView集成了爆炸功能,提供explode方法让指定View对象爆炸,提供setTrackIterator方法设置不同的爆炸算子,提供OnExplodeListener接口监听爆炸过程。还有一些可设置参数在源码注释里都写得比较清楚了,大家自己看注释就好。
最后的最后,附上源码地址:https://download.csdn.net/download/Sure_Min/12581569
这次的内容就到这里,我们下次再见。


 1186
1186


 被折叠的 条评论
为什么被折叠?


