


目录
4.结合mybatis-plus批量导入excel数据到数据库
1.一些关于excel的常识
首先关于excel的文件格式,分为xls和xlsx,分别对应03版本和07以后的版本。
03版本的excel最大行数限制为表格共有65536行,256列;而07版本的excel则无此限制。
关于excel中的单元格格式,一般为以下几类:
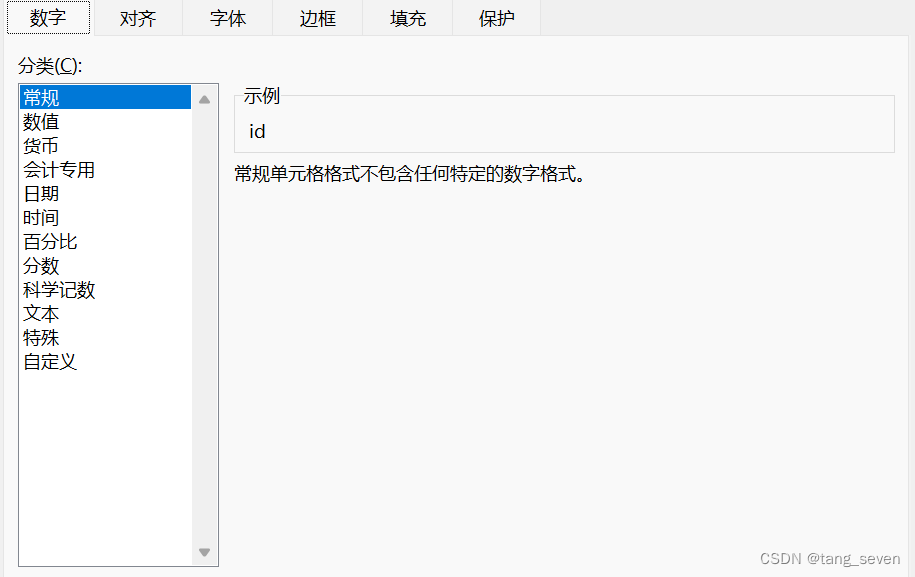
转为java代码时,可以初略地处理为:字符串、数值(普通数字、日期)、公式三类。由于不同的格式对应不同的java数据类型,所以读取时需要进行格式的转换。
2.使用Apache POI操作excel
Apache POI是创建和维护操作各种符合Office Open XML(OOXML)标准和微软的OLE 2复合文档格式(OLE2)的Java API。用它可以使用Java读取和创建,修改EXCEL文件。简单来说Apache POI 提供Java操作Excel进行读写的解决方案。
首先,我们需要知道的是,不同版本的excel对应POI不同版本下的依赖:
        <!--xls 03版-->
        <dependency>
            <groupId>org.apache.poi</groupId>
            <artifactId>poi</artifactId>
            <version>3.9</version>
        </dependency>
        <!--xlsx 07版-->
        <dependency>
            <groupId>org.apache.poi</groupId>
            <artifactId>poi-ooxml</artifactId>
            <version>3.9</version>
        </dependency>
操作excel对象时,也对应不同的类:
//创建工作蒲(03版)
Workbook workbook_03 = new HSSFWorkbook();
//创建工作蒲(07版)
Workbook workbook_07 = new XSSFWorkbook();(1)使用POI实现excel写:
import org.apache.poi.hssf.usermodel.HSSFWorkbook;
import org.apache.poi.ss.usermodel.Cell;
import org.apache.poi.ss.usermodel.Row;
import org.apache.poi.ss.usermodel.Sheet;
import org.apache.poi.ss.usermodel.Workbook;
import org.joda.time.DateTime;
import java.io.FileOutputStream;

public class ExcelWriter {

    private static final String path = "C:/Users/14125/Desktop/";

    public static void main(String[] args) throws Exception {
        //创建工作蒲(03版)
        Workbook workbook = new HSSFWorkbook();
        //Workbook workbook_07 = new XSSFWorkbook();
        //创建工作表
        Sheet sheet = workbook.createSheet();
        //创建行/列
        Row row1 = sheet.createRow(0);
        Cell cell_11 = row1.createCell(0);
        cell_11.setCellValue("测试一下");
        Cell cell_12 = row1.createCell(1);
        cell_12.setCellValue("测试两下");

        Row row2 = sheet.createRow(1);
        Cell cell_21 = row2.createCell(0);
        cell_21.setCellValue(new DateTime().toString("yyyy-MM-dd"));

        //生成一张表(IO流)
        FileOutputStream fileOutputStream = new FileOutputStream(path+"java_excel.xls");
        workbook.write(fileOutputStream);
        fileOutputStream.close();
    }
}
逻辑上很简单,创建工作蒲——》创建表——》创建行——》创建列,从而确定一个单元格——》往单元格写入值——》生成表,使用文件流输出——》关闭流。
(1)使用POI实现excel读:
import org.apache.poi.ss.usermodel.*;
import org.apache.poi.xssf.usermodel.XSSFFormulaEvaluator;
import org.apache.poi.xssf.usermodel.XSSFWorkbook;
import org.joda.time.DateTime;

import java.io.FileInputStream;
import java.io.IOException;
import java.util.Date;

public class ExcelReader {

    private static final String path = "C:/Users/14125/Desktop/";

    public static void main(String[] args) throws IOException {
        //获取文件流
        FileInputStream fileInputStream = new FileInputStream(path+"test_read.xlsX");

        //获取工作蒲对象
        Workbook workbook = new XSSFWorkbook(fileInputStream);
        Sheet sheet = workbook.getSheetAt(1);
        //获取计算公式
        FormulaEvaluator formulaEvaluator = new XSSFFormulaEvaluator((XSSFWorkbook) workbook);

        Row rowTitle = sheet.getRow(0);
        if(rowTitle!=null) {
            //获取一行中数据数
            int cellCount = rowTitle.getPhysicalNumberOfCells();
            //获取标题行
            for (int i = 0; i < cellCount; i++) {
                Cell cell = rowTitle.getCell(i);
                if (cell != null) {
                    //都为String,直接读取
                    System.out.print(cell.getStringCellValue()+"| ");
                }
            }
            System.out.println();

            //获取行数
            int rowCount = sheet.getPhysicalNumberOfRows();

            //第二行非标题行开始遍历
            for (int i = 1; i < rowCount; i++) {
                Row rowData = sheet.getRow(i);
                if(rowData!=null){
                    for (int j = 0; j < cellCount; j++) {
                        Cell cell = rowData.getCell(j);
                        if (cell != null) {
                            //匹配单元格的数据类型
                            int cellType = cell.getCellType();
                            switch (cellType) {
                                //字符串。直接读取
                                case Cell.CELL_TYPE_STRING:
                                    String StringCellValue = cell.getStringCellValue();
                                    System.out.print(StringCellValue+"| ");
                                    break;
                                //数字类型,转换
                                case Cell.CELL_TYPE_NUMERIC:
                                    // 判断是否是日期
                                    if (DateUtil.isCellDateFormatted(cell)) {
                                        Date DateCellValue = cell.getDateCellValue();
                                        //转换日期格式
                                        System.out.print(new DateTime(DateCellValue)
                                                .toString("yyyy-MM-dd hh:mm:ss")+"| ");
                                    }else {
                                        //重新设置单元格的数据类型
                                        cell.setCellType(Cell.CELL_TYPE_STRING);
                                        //转换成字符串获取,防止数字过长
                                        System.out.print(cell.toString()+"| ");
                                    }
                                    break;
                                //boolean类型
                                case Cell.CELL_TYPE_BOOLEAN:
                                    boolean booleanCellValue = cell.getBooleanCellValue();
                                    System.out.print(booleanCellValue+"| ");
                                    break;
                                //公式类型
                                case Cell.CELL_TYPE_FORMULA:
//                                    //计算
//                                    CellValue evaluate = formulaEvaluator.evaluate(cell);
//                                    //获取计算后的值
//                                    String cellValuate = evaluate.formatAsString();
//                                    System.out.println(cellValuate+"| ");
                                    //重新设置单元格的数据类型
                                    double value = cell.getNumericCellValue();
                                    //转换成字符串获取,防止数字过长
                                    System.out.print(value+"| ");
                                    break;
                                //空白
                                case Cell.CELL_TYPE_BLANK:
                                    break;
                                // 匹配不能转换的错误
                                case Cell.CELL_TYPE_ERROR:
                                    break;
                            }
                        }
                    }

                }
                System.out.println();
            }
        }
        //关闭流
        fileInputStream.close();
    }
}
上述代码逻辑如上:创建文件流——》获取excel工作簿——》获取表头行——》 获取有内容单元格行数——》遍历所有行——》在每一行中获取有内容单元格列数——》遍历该行所有单元格——》判断单元格格式,并输出内容——》直到遍历所有单元格内容
上述代码中,核心代码为判断单元格格式,转为可处理的格式并进行输出:
        //匹配单元格的数据类型
        switch (cellType) {
            //字符串。直接读取
            case Cell.CELL_TYPE_STRING:
                String StringCellValue = cell.getStringCellValue();
                System.out.print(StringCellValue+"| ");
                break;
            //数字类型,转换
            case Cell.CELL_TYPE_NUMERIC:
                // 判断是否是日期
                if (DateUtil.isCellDateFormatted(cell)) {
                    Date DateCellValue = cell.getDateCellValue();
                    //转换日期格式
                    System.out.print(new DateTime(DateCellValue)
                            .toString("yyyy-MM-dd hh:mm:ss")+"| ");
                }else {
                    //重新设置单元格的数据类型
                    cell.setCellType(Cell.CELL_TYPE_STRING);
                    //转换成字符串获取,防止数字过长
                    System.out.print(cell.toString()+"| ");
                }
                break;
            //boolean类型
            case Cell.CELL_TYPE_BOOLEAN:
                boolean booleanCellValue = cell.getBooleanCellValue();
                System.out.print(booleanCellValue+"| ");
                break;
            //公式类型
            case Cell.CELL_TYPE_FORMULA:
                //计算
                CellValue evaluate = formulaEvaluator.evaluate(cell);
                //获取计算后的值
                String cellValuate = evaluate.formatAsString();
                System.out.println(cellValuate+"| ");
                //重新设置单元格的数据类型
                double value = cell.getNumericCellValue();
                //转换成字符串获取,防止数字过长
                System.out.print(value+"| ");
                break;
            //空白
            case Cell.CELL_TYPE_BLANK:
                break;
            // 匹配不能转换的错误
            case Cell.CELL_TYPE_ERROR:
                break;
        }
    }
实际开发中,我们可以将上述代码封装为一个工具类,传入一个excel文件流参数即可进行后续的调用。若在存储数据库,即在 Switch中转换格式后进行存储即可
3.使用easyexcel操作excel
EasyExcel是一个基于Java的、快速、简洁、解决大文件内存溢出的Excel处理工具。可以让你在不用考虑性能、内存的等因素的情况下,快速完成Excel的读、写等功能。
首先引入依赖,而easyexcel中已经包含了Apache poi相关依赖:
        <!--easy excel 已包含POI-->
        <dependency>
            <groupId>com.alibaba</groupId>
            <artifactId>easyexcel</artifactId>
            <version>2.2.0-beta2</version>
        </dependency>
(1)使用easyexcel写:
首先,创建实体类,@ExcelProperty(value="列名称",index = 列坐标);若是包含子标题的复杂标题,使用方法为:@ExcelProperty({"主标题", "字符串标题"})。
@ExcelIgnore 标签可以让实体类写入时,忽略该字段,不进行写入
@Data
@AllArgsConstructor
@NoArgsConstructor
public class Student {

    @ExcelProperty(index = 0)
    private Integer id;

    @ExcelProperty(index = 1)
    private String age;

    @ExcelProperty(index = 2)
    private String name;

    @ExcelProperty(index = 3)
    private String gender;
}
easyexecl进行代码如下:
String fileName = TestFileUtil.getPath() + "complexHeadWrite" + System.currentTimeMillis() + ".xlsx";
// 这里 需要指定写用哪个class去写,然后写到第一个sheet,名字为模板 然后文件流会自动关闭
EasyExcel.write(fileName, ComplexHeadData.class).sheet("模板").doWrite(data());
4.结合mybatis-plus批量导入excel数据到数据库
(2)使用easyexcel读:
首先,创建实体类:
@Data
@AllArgsConstructor
@NoArgsConstructor
@TableName("student")
public class Student {

    @TableId(value = "id",type = IdType.AUTO)
    @ExcelProperty(index = 0)
    private Integer id;

    @ExcelProperty(index = 1)
    private String age;

    @ExcelProperty(index = 2)
    private String name;

    @ExcelProperty(index = 3)
    private String gender;
}
此处,为了简便mybatis-plus和easyexcel使用了同一个实体类,实际中应该为easyexcel封装一个dto,mybatis-plus单使用一个实体类,更为合理。
编写listener代码:
import com.alibaba.excel.context.AnalysisContext;
import com.alibaba.excel.event.AnalysisEventListener;
import com.alibaba.fastjson.JSON;
import com.seven.excel.dao.StudentDao;
import com.seven.excel.entities.Student;
import lombok.extern.slf4j.Slf4j;

import java.util.ArrayList;
import java.util.List;

@Slf4j
public class StudentDataListener extends AnalysisEventListener<Student> {

    /**
     * 每隔10条存储数据库,然后清理list ,方便内存回收
     */
    private static final int BATCH_COUNT = 10;
    //缓存数据列表
    private List<Student> cachedDataList = new ArrayList<>(BATCH_COUNT);

    //不可以用spring管理,需用该方法实例化对象
    private StudentDao studentDao;
    public StudentDataListener(StudentDao studentDao) {
        this.studentDao = studentDao;
    }


    /**
     * 这个每一条数据解析都会来调用
     *
     * @param data    one row value. Is is same as {@link AnalysisContext#readRowHolder()}
     * @param context
     */
    @Override
    public void invoke(Student data, AnalysisContext context) {
        log.info("解析到一条数据:{}", JSON.toJSONString(data));
        Student student = new Student();
        cachedDataList.add(student);
        // 达到BATCH_COUNT了,需要去存储一次数据库,防止数据几万条数据在内存,容易OOM
        if (cachedDataList.size() >= BATCH_COUNT) {
            saveData();
            // 存储完成清理 list
            cachedDataList = new ArrayList<>(BATCH_COUNT);
        }
    }

    /**
     * 所有数据解析完成了 都会来调用
     * @param context
     */
    @Override
    public void doAfterAllAnalysed(AnalysisContext context) {
        // 这里也要保存数据,确保最后遗留的数据也存储到数据库
        saveData();
        log.info("所有数据解析完成!");
    }

    /**
     * 加上存储数据库
     */
    private void saveData() {
        if(cachedDataList.size()>0){
            log.info("{}条数据,开始存储数据库!", cachedDataList.size());
            studentDao.insertBatchSomeColumn(cachedDataList);
            log.info("存储数据库成功!");
        }
    }
}
此处,使用了mybatis-plus的批量插入,代码如下:
@Component
public class InsertBatchInjector extends DefaultSqlInjector {
    @Override
    public List<AbstractMethod> getMethodList(Class<?> mapperClass, TableInfo tableInfo){
        List<AbstractMethod> methodList = super.getMethodList(mapperClass,tableInfo);
        // 过滤Insert语句中的字段
        methodList.add(new InsertBatchSomeColumn(t -> !"weekend".equals(t.getColumn())
                && !"position".equals(t.getColumn())
                && !"date".equals(t.getColumn())
        )); // 添加InsertBatchSomeColumn方法
        return methodList;
    }
}
其次,在一个新的包下面创建一个EasyBaseMapper继承baseMapper:
public interface EasyBaseMapper<T> extends BaseMapper<T> {
    /**
     * 批量插入 仅适用于mysql
     *
     * @param entityList 实体列表
     * @return 影响行数
     */
    Integer insertBatchSomeColumn(Collection<T> entityList);
}
然后,在另一个包下,创建自己的dao继承该 EasyBaseMapper:
@Mapper
public interface StudentDao extends EasyBaseMapper<Student> {
}
注意,二者代码不可放在同一个包下!
最后,编写控制类代码,读取excel文件,批量插入:
@RestController
public class StudentController {

    private static final String PATH = "C:/Users/14125/Desktop/";
    @Resource
    private StudentDao studentDao;

    @GetMapping("/read")
    public void read(@RequestParam("filename") String fileName){
        fileName = PATH + fileName;
        // 这里 需要指定读用哪个class去读,然后读取第一个sheet 文件流会自动关闭
        EasyExcel.read(fileName, Student.class, new StudentDataListener(studentDao)).sheet().doRead();
    }
}


 2万+
2万+


 被折叠的 条评论
为什么被折叠?
被折叠的 条评论
为什么被折叠?
 到【灌水乐园】发言


