TensorRT是NVIDIA开发的高性能推理引擎,可以用于加速深度学习模型的推理。而YoloV5是一种目标检测模型,可以用于检测图像中的物体。
下面是使用TensorRT进行YoloV5推理的Python流程:
1. 导入必要的库和模块:
```python
import tensorrt as trt
import pycuda.driver as cuda
import pycuda.autoinit
import numpy as np
import cv2
import os
import time
```
2. 加载YoloV5模型并构建TensorRT引擎:
```python
def build_engine(onnx_file_path, engine_file_path):
TRT_LOGGER = trt.Logger(trt.Logger.WARNING)
builder = trt.Builder(TRT_LOGGER)
explicit_batch = 1 << (int)(trt.NetworkDefinitionCreationFlag.EXPLICIT_BATCH)
network = builder.create_network(explicit_batch)
parser = trt.OnnxParser(network, TRT_LOGGER)
with open(onnx_file_path, 'rb') as model:
if not parser.parse(model.read()):
for error in range(parser.num_errors):
print(parser.get_error(error))
return None
builder.max_batch_size = 1
builder.max_workspace_size = 1 << 30
engine = builder.build_cuda_engine(network)
with open(engine_file_path, "wb") as f:
f.write(engine.serialize())
return engine
```
3. 加载TensorRT引擎:
```python
def load_engine(engine_file_path):
with open(engine_file_path, "rb") as f, trt.Runtime(TRT_LOGGER) as runtime:
engine = runtime.deserialize_cuda_engine(f.read())
return engine
```
4. 加载测试图片并预处理:
```python
def preprocess(image, input_shape):
image = cv2.resize(image, (input_shape[1], input_shape[0]))
image = cv2.cvtColor(image, cv2.COLOR_BGR2RGB)
image = np.transpose(image, (2, 0, 1)).astype(np.float32)
image /= 255.0
image = np.expand_dims(image, axis=0)
return image
```
5. 执行推理:
```python
def do_inference(context, bindings, inputs, outputs, stream, batch_size=1):
[cuda.memcpy_htod_async(inp.device, inp.host, stream) for inp in inputs]
context.execute_async(bindings=bindings, batch_size=batch_size, stream_handle=stream.handle)
[cuda.memcpy_dtoh_async(out.host, out.device, stream) for out in outputs]
stream.synchronize()
return [out.host for out in outputs]
```
6. 解析推理结果:
```python
def postprocess(outputs, anchors, masks, input_shape, image_shape, conf_thres=0.5, iou_thres=0.5):
num_classes = 80
num_anchors = 3
num_layers = 3
anchor_masks = masks
anchors = np.array(anchors).reshape(num_layers, -1, 2)
input_h, input_w = input_shape
image_h, image_w, _ = image_shape
scale_h, scale_w = image_h / input_h, image_w / input_w
box_mins = np.zeros((0, 2))
box_maxes = np.zeros((0, 2))
box_classes = np.zeros((0))
box_scores = np.zeros((0))
for i in range(num_layers):
grid_h, grid_w = input_h // 32 // (2 ** i), input_w // 32 // (2 ** i)
outputs_i = outputs[i]
outputs_i = np.reshape(outputs_i, (batch_size, num_anchors * (5 + num_classes), grid_h * grid_w)).transpose(0, 2, 1)
outputs_i[..., :2] = 1 / (1 + np.exp(-outputs_i[..., :2]))
outputs_i[..., 2:4] = np.exp(outputs_i[..., 2:4])
outputs_i[..., 4:] = 1 / (1 + np.exp(-outputs_i[..., 4:]))
anchors_scale = anchors[i]
anchors_scale = anchors_scale[np.newaxis, :, :]
box_xy = outputs_i[..., :2]
box_wh = outputs_i[..., 2:4]
box_confidence = outputs_i[..., 4:5]
box_class_probs = outputs_i[..., 5:]
box_xy += (np.arange(grid_w, dtype=np.float32) + 0.5)[np.newaxis, :, np.newaxis]
box_xy += (np.arange(grid_h, dtype=np.float32) + 0.5)[:, np.newaxis, np.newaxis]
box_xy *= 32 * (2 ** i)
box_wh *= anchors_scale
box_wh *= np.array([image_w / input_w, image_h / input_h])[np.newaxis, np.newaxis, :]
box_mins = np.concatenate([box_mins, box_xy - box_wh / 2], axis=0)
box_maxes = np.concatenate([box_maxes, box_xy + box_wh / 2], axis=0)
box_scores = np.concatenate([box_scores, box_confidence], axis=0)
box_classes = np.concatenate([box_classes, np.argmax(box_class_probs, axis=-1).flatten()], axis=0)
boxes = np.concatenate([box_mins, box_maxes], axis=-1)
boxes /= np.array([scale_w, scale_h, scale_w, scale_h])[np.newaxis, :]
nms_indices = cv2.dnn.NMSBoxes(boxes.tolist(), box_scores.flatten().tolist(), conf_thres, iou_thres)
results = []
for i in nms_indices:
i = i[0]
box = boxes[i]
score = box_scores.flatten()[i]
label = box_classes.flatten()[i]
results.append((box[0], box[1], box[2], box[3], score, label))
return results
```
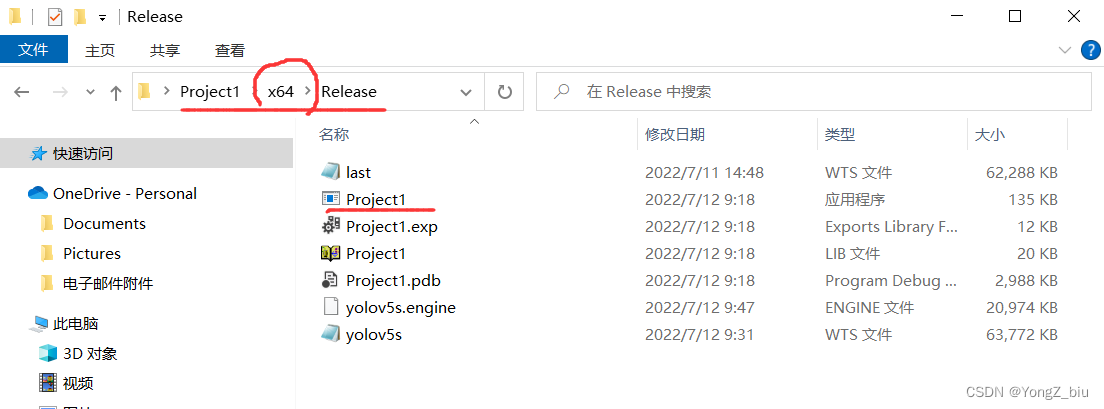
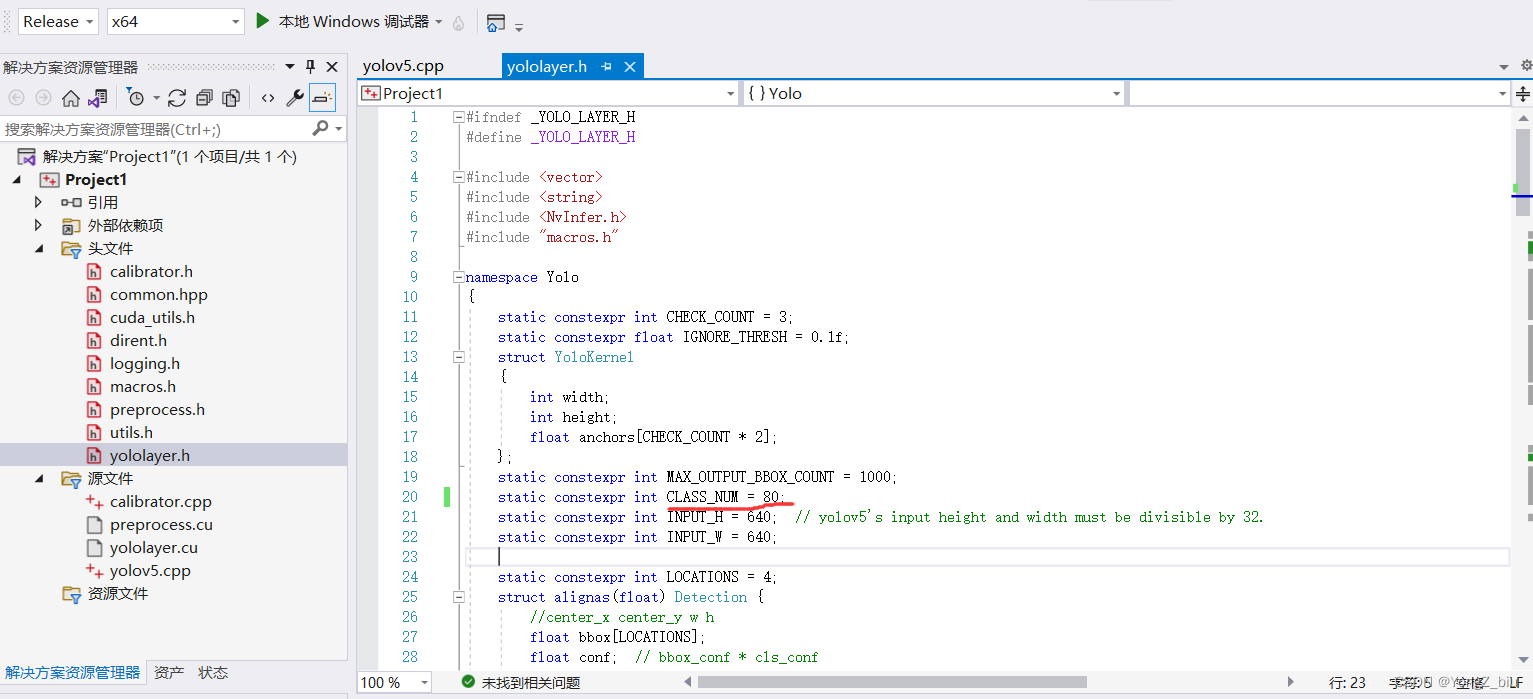
完整代码请参考:https://github.com/wang-xinyu/tensorrtx/tree/master/yolov5
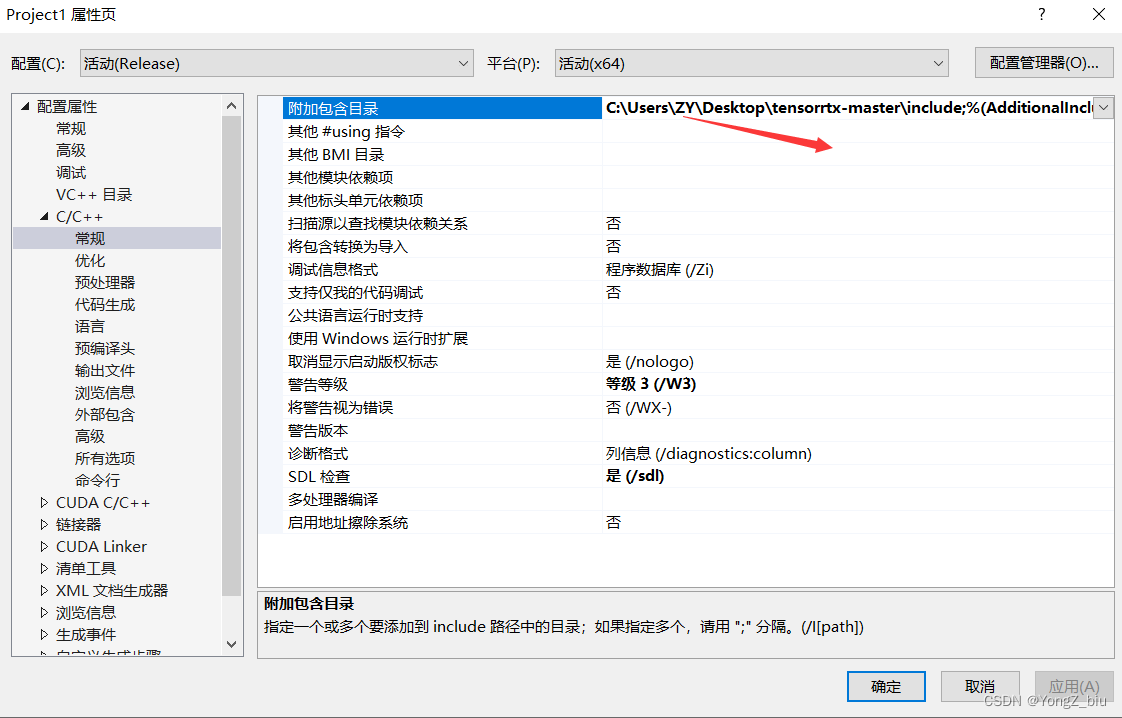
需要注意的是,使用TensorRT进行YoloV5推理需要先将YoloV5模型转换为ONNX格式,然后再使用TensorRT构建引擎。


 5259
5259

 非常没帮助
非常没帮助
 没帮助
没帮助
 一般
一般
 有帮助
有帮助
 非常有帮助
非常有帮助
 被折叠的 条评论
为什么被折叠?
被折叠的 条评论
为什么被折叠?
 到【灌水乐园】发言


