


1 加载目录并进入docker环境
docker run -it --entrypoint /bin/bash -v /home/pretrained_model/output/:/output ollama/ollama将dpo后的模型路径/home/pretrained_model/output/ 映射到docker中的/output目录
2 安装git
查看系统版本
root@8144e6f3a36f:/# cat /etc/os-release
NAME="Ubuntu"
VERSION="20.04.6 LTS (Focal Fossa)"
ID=ubuntu
ID_LIKE=debian
PRETTY_NAME="Ubuntu 20.04.6 LTS"
安装git
root@8144e6f3a36f:/# apt update && apt install -y git
root@8144e6f3a36f:/# git --version
git version 2.25.1
3 下载llama.cpp
root@8144e6f3a36f:/# git clone https://github.com/ggerganov/llama.cpp.git
Cloning into 'llama.cpp'...
remote: Enumerating objects: 47622, done.
remote: Counting objects: 100% (133/133), done.
remote: Compressing objects: 100% (104/104), done.
remote: Total 47622 (delta 79), reused 29 (delta 29), pack-reused 47489 (from 3)
Receiving objects: 100% (47622/47622), 99.78 MiB | 5.51 MiB/s, done.
Resolving deltas: 100% (34186/34186), done.
4 安装miniconda
# 更新 apt 并安装依赖
apt update && apt install -y wget bzip2

# 下载 Miniconda(Linux 64位版本)
wget https://repo.anaconda.com/miniconda/Miniconda3-latest-Linux-x86_64.sh -O ~/miniconda.sh

# 运行安装脚本(自动安装到 /root/miniconda3)
bash ~/miniconda.sh -b -p /opt/miniconda3

# 将 conda 加入 PATH
echo 'export PATH="/opt/miniconda3/bin:$PATH"' >> ~/.bashrc
source ~/.bashrc

# 验证安装
conda --version
root@8144e6f3a36f:/llama.cpp# conda --version
conda 25.1.1
5 创建并进入虚拟环境
root@69e2b4914bb1:/llama.cpp# conda activate llama

CondaError: Run 'conda init' before 'conda activate'

root@69e2b4914bb1:/llama.cpp# source activate llama
(llama) root@69e2b4914bb1:/llama.cpp# ll
6 退出docker后重启
(base) [nlp ~]$ docker attach 69e
You cannot attach to a stopped container, start it first
(base) [nlp ~]$ docker start 69e
69e
(base) [nlp ~]$ docker attach 69e
root@69e2b4914bb1:/# ll
total 8
drwxr-xr-x.    1 root root  140 Apr  7 10:08 ./
drwxr-xr-x.    1 root root  140 Apr  7 10:08 ../
7 合并dpo lora模型
TypeError: __init__() got an unexpected keyword argument 'corda_config'遇到上面问题需要切换虚拟环境
lora_merge.py
import torch
from peft import PeftModel
from transformers import AutoModelForCausalLM, AutoTokenizer

base_model_path = '/Qwen2.5-0.5B-Instruct'           # 初始base模型路径或者模型名字
adapter_model_path = '/home/output/test-lora-dpo'       # 你的DPO adapter模型路径
output_merged_path = '/home/output/merge-lora-dpo'              # 合并后模型保存路径

# 加载基本模型和adapter
base_model = AutoModelForCausalLM.from_pretrained(
    base_model_path,
    torch_dtype=torch.float16,
    device_map='auto'
)
model = PeftModel.from_pretrained(base_model, adapter_model_path, device_map='auto')

# 合并adapter权重到主模型
model = model.merge_and_unload()

# 保存合并后的模型(完整的HF格式权重)
model.save_pretrained(output_merged_path)
# Tokenizer也复制一份到新路径:
tok = AutoTokenizer.from_pretrained(base_model_path)
tok.save_pretrained(output_merged_path)
合并模型:
(llmtuner) [llm_finetune]$ python lora_merge.py
Sliding Window Attention is enabled but not implemented for `sdpa`; unexpected results may be encountered.
[2025-04-08 10:40:30,289] [INFO] [real_accelerator.py:239:get_accelerator] Setting ds_accelerator to cuda (auto detect)
(llmtuner) [llm_finetune]$
合并后的模型:
(base) [merge-lora-dpo]$ du -h *
4.0K    added_tokens.json
4.0K    config.json
4.0K    generation_config.json
1.6M    merges.txt
943M    model.safetensors
4.0K    special_tokens_map.json
8.0K    tokenizer_config.json
11M     tokenizer.json
2.7M    vocab.json
模型结构应类似:
my_dpo_model/
├── config.json
├── tokenizer.json(或tokenizer.model)
├── pytorch_model.bin (或model.safetensors)
├── tokenizer_config.json
├── special_tokens_map.json
└── (...其他必要文件)
(llama) root@69e2b4914bb1:/llama.cpp# python convert_hf_to_gguf.py ../output/merge-lora-dpo --outtype f16 --outfile ../output/convert.bin
INFO:hf-to-gguf:Loading model: merge-lora-dpo
INFO:gguf.gguf_writer:gguf: This GGUF file is for Little Endian only
INFO:hf-to-gguf:Exporting model...
INFO:hf-to-gguf:gguf: loading model part 'model.safetensors'
INFO:hf-to-gguf:token_embd.weight, torch.float16 --> F16, shape = {896, 151936}
INFO:hf-to-gguf:Set model quantization version
INFO:gguf.gguf_writer:Writing the following files:
INFO:gguf.gguf_writer:../output/convert.bin: n_tensors = 290, total_size = 988.2M
Writing: 100%|█████████████████████████████████████████████████████████████████████████████████████████████████████████████████████████████████████████████████████████████████████████████████████████| 988M/988M [00:00<00:00, 1.01Gbyte/s]
INFO:hf-to-gguf:Model successfully exported to ../output/convert.bin8 将HF模型转换到GGML FP16格式(中间步骤)
如果你的模型使用的是LLaMA2架构,可以指定类型:
python convert_hf_to_gguf.py ../output/merge-lora-dpo --outtype f16 --outfile ../output/dop_model_f16.gguf
你还可以转换到更小的量化,如Q4_0:
python convert_hf_to_gguf.py ../output/merge-lora-dpo --outtype q4_0 --outfile ../output/dop_model_q4_0.gguf会报错
usage: convert_hf_to_gguf.py [-h] [--vocab-only] [--outfile OUTFILE] [--outtype {f32,f16,bf16,q8_0,tq1_0,tq2_0,auto}] [--bigendian] [--use-temp-file] [--no-lazy] [--model-name MODEL_NAME]
                             [--verbose] [--split-max-tensors SPLIT_MAX_TENSORS] [--split-max-size SPLIT_MAX_SIZE] [--dry-run] [--no-tensor-first-split] [--metadata METADATA]
                             [--print-supported-models] [--remote]
                             [model]
convert_hf_to_gguf.py: error: argument --outtype: invalid choice: 'q4_0' (choose from 'f32', 'f16', 'bf16', 'q8_0', 'tq1_0', 'tq2_0', 'auto')
最终得到:
(base) [nlp output]$ du -sh *
1.3G convert.bin
1.2G dop_model_f16.gguf
913M dop_model_q8_0.gguf
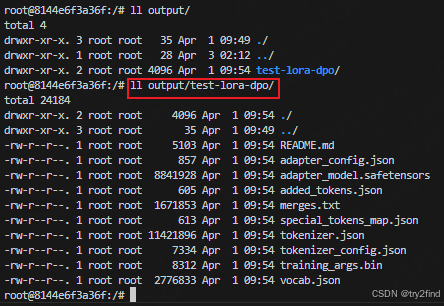
958M merge-lora-dpo
24M test-lora-dpo9 gguf量化
9.1 使用llama.cpp docker full进行量化
拉取llama.cpp docker
docker pull ghcr.io/ggerganov/llama.cpp:full进入容器
docker run -it --entrypoint /bin/bash -v /home/pretrained_model/output/:/output ghcr.io/ggerganov/llama.cpp:full查看是否目录挂载成功
root@e4ed60eee5ae:/app# ll ../output/
total 3451908
drwxrwxrwx. 4 root root       145 Apr  8 03:30 ./
drwxr-xr-x. 1 root root        28 Apr  8 07:44 ../
-rw-r--r--. 1 root root 994156320 Apr  8 02:51 convert.bin
-rw-r--r--. 1 root root 994156320 Apr  8 03:28 dop_model_f16.gguf
-rw-r--r--. 1 root root 531067680 Apr  8 03:30 dop_model_q8_0.gguf
drwxrwxr-x. 2 1018 1018       263 Apr  8 02:40 merge-lora-dpo/
drwxrwxrwx. 2 root root      4096 Apr  1 09:54 test-lora-dpo/
量化出现段错误
root@01382885d44b:/app# ./llama-quantize ../output/dop_model_f16.gguf  ../output/dop_model-Q4_K_M.gguf Q4_K_M
main: build = 5074 (1466621e)
main: built with cc (Ubuntu 11.4.0-1ubuntu1~22.04) 11.4.0 for x86_64-linux-gnu
main: quantizing '../output/dop_model_f16.gguf' to '../output/dop_model-Q4_K_M.gguf' as Q4_K_M
llama_model_loader: loaded meta data with 26 key-value pairs and 290 tensors from ../output/dop_model_f16.gguf (version GGUF V3 (latest))
llama_model_loader: Dumping metadata keys/values. Note: KV overrides do not apply in this output.
llama_model_loader: - kv   0:                       general.architecture str              = qwen2
llama_model_loader: - kv   1:                               general.type str              = model
llama_model_loader: - kv   2:                               general.name str              = Merge Lora Dpo

llama_model_loader: - type  f32:  121 tensors
llama_model_loader: - type  f16:  169 tensors
Segmentation fault (core dumped)
该问题暂未解决
9.2 本地llama.cpp量化
下载llama.cpp
git clone https://github.com/ggerganov/llama.cpp.git
cd llama.cpp/
pip install -r requirements.txt -i https://pypi.tuna.tsinghua.edu.cn/simple
进入llama.cpp,进行命令编译
mkdir build
cd build
cmake .. -DLLAMA_CURL=OFF
cmake --build . --config Release
注意:有些环境编译时可能缺失gxx包
缺少cmake时,需安装cmake
查看当前是什么操作系统:
$ cat /etc/os-release
PRETTY_NAME="Ubuntu 22.04 LTS"
NAME="Ubuntu"
VERSION_ID="22.04"
VERSION="22.04 (Jammy Jellyfish)"
在Ubuntu系统中安装cmake,需要root权限,或者使用sudo:
切换到root:
$ sudo su
root@__su# ls
安装cmake:
apt update
apt install cmake
cmake --version
cmake的告警:
$cmake .. -DLLAMA_CURL=OFF
-- Warning: ccache not found - consider installing it for faster compilation or disable this warning with GGML_CCACHE=OFF
-- CMAKE_SYSTEM_PROCESSOR: x86_64
-- Including CPU backend
-- x86 detected
-- Adding CPU backend variant ggml-cpu: -march=native
-- Configuring done
-- Generating done
-- Build files have been written to: /home/wuwenliang/py_workspase/llama.cpp/build
这个CMake配置输出显示你已经成功生成了构建文件,但有一些需要注意的地方。以下是处理建议:
1. 关于ccache警告
警告信息表明你的系统没有安装ccache(一个编译缓存工具)。你有两个选择:
- 安装ccache(推荐,可以加速后续编译):
sudo apt-get install ccache # Ubuntu/Debian # 或 sudo yum install ccache # CentOS/RHEL - 或者忽略这个警告(如果你不需要加速编译): 下次运行时添加
参数:-DGGML_CCACHE=OFFcmake .. -DLLAMA_CURL=OFF -DGGML_CCACHE=OFF
量化命令:
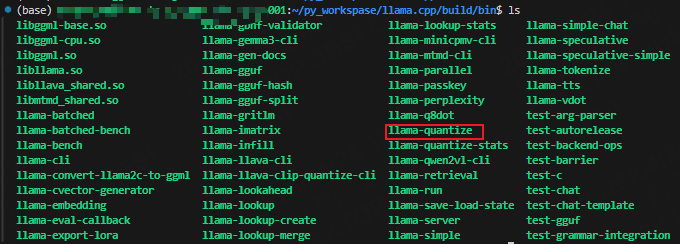
./llama-quantize /your_path/Qwen2.5-0.5B-Instruct-f16.gguf /your_path/Qwen2.5-0.5B-Instruct-Q4_K_M.gguf Q4_K_M量化后结果
llama_tensor_get_type : tensor cols 896 x 128 are not divisible by 256, required for q6_K - using fallback quantization q8_0
converting to q8_0 .. size =     0.22 MiB ->     0.12 MiB
[ 287/ 290]               blk.23.ffn_down.weight - [ 4864,   896,     1,     1], type =    f16, converting to q6_K .. size =     8.31 MiB ->     3.41 MiB
[ 288/ 290]               blk.23.ffn_gate.weight - [  896,  4864,     1,     1], type =    f16,

llama_tensor_get_type : tensor cols 896 x 4864 are not divisible by 256, required for q4_K - using fallback quantization q5_0
converting to q5_0 .. size =     8.31 MiB ->     2.86 MiB
[ 289/ 290]               blk.23.ffn_norm.weight - [  896,     1,     1,     1], type =    f32, size =    0.003 MB
[ 290/ 290]                 blk.23.ffn_up.weight - [  896,  4864,     1,     1], type =    f16,

llama_tensor_get_type : tensor cols 896 x 4864 are not divisible by 256, required for q4_K - using fallback quantization q5_0
converting to q5_0 .. size =     8.31 MiB ->     2.86 MiB
llama_model_quantize_impl: model size  =   942.43 MB
llama_model_quantize_impl: quant size  =   373.71 MB
llama_model_quantize_impl: WARNING: 144 of 169 tensor(s) required fallback quantization

main: quantize time =  1738.01 ms
main:    total time =  1738.01 ms
$ du -sh *
949M Qwen2.5-0.5B-Instruct-f16.gguf
380M Qwen2.5-0.5B-Instruct-Q4_K_M.gguf10 ollama运行自己的gguf
10.1 准备Modefile
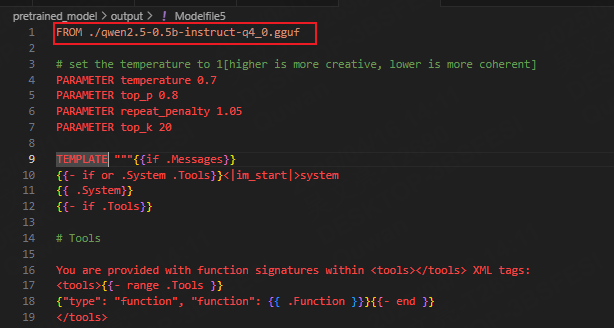
qwen的Modfile配置:
https://qwen.readthedocs.io/zh-cn/latest/run_locally/ollama.html
具体解析:
参数设置 (PARAMETER)
temperature 0.7
控制生成文本的随机性:值越高(如1.0)输出越多样化/创造性,值越低(如0.2)输出越确定/保守。0.7是平衡创造性和连贯性的折中值。
top_p 0.8
核采样(Nucleus Sampling)参数:仅从概率累积超过80%的词汇中选择,过滤低概率词,平衡生成质量与多样性。
repeat_penalty 1.05
抑制重复内容的惩罚因子:1.05表示轻微惩罚重复词汇或短语,避免冗余。
top_k 20
- 限制每一步生成的候选词数量为前20个,配合
top_p进一步控制多样性。
以下是针对模板(
TEMPLATE)的逐条解析,结合其逻辑结构和功能进行详细说明:
1. 模板整体结构
{{ if .Messages }}  <!-- 检查是否存在多轮对话历史 -->
  {{- if or .System .Tools }}  <!-- 检查是否有系统消息或工具定义 -->
    <!-- 系统消息和工具部分 -->
  {{ end }}
  {{- range $i, $_ := .Messages }}  <!-- 遍历每条消息 -->
    <!-- 处理用户/助手/工具角色消息 -->
  {{- end }}
{{- else }}  <!-- 若无历史消息(单轮对话) -->
  <!-- 直接拼接系统消息和用户提示 -->
{{ end }}
2. 系统消息和工具定义部分
<|im_start|>system {{ .System }} <!-- 插入系统消息内容 --> {{- if .Tools }} <!-- 如果有工具定义 --> # Tools <!-- 工具函数签名列表 --> <tools> {{- range .Tools }} {"type": "function", "function": {{ .Function }}} <!-- 每个工具的函数签名 --> {{- end }} </tools> <!-- 工具调用格式说明 --> For each function call, return a json object with function name and arguments within <tool_call></tool_call> XML tags: <tool_call> {"name": <function-name>, "arguments": <args-json-object>} </tool_call> {{- end }}<|im_end|>功能:
- 强制以
开头,插入系统消息(如<|im_start|>system)。You are Qwen...- 如果存在工具(
),则:.Tools
- 在
标签内列出所有工具的函数签名(JSON格式)。<tools>- 说明模型应如何调用工具(返回
包裹的JSON)。<tool_call>3. 多轮消息处理(
range .Messages)
遍历每条消息,根据角色(
user/
assistant/
tool)生成不同格式:
用户消息(
user)
{{- if eq .Role "user" }}<|im_start|>user {{ .Content }}<|im_end|> <!-- 用户输入内容 --> {{ end }}格式:
<|im_start|>user+ 内容 +
<|im_end|>助手消息(
assistant)
{{ else if eq .Role "assistant" }}<|im_start|>assistant {{ if .Content }}{{ .Content }} <!-- 文本回复 --> {{- else if .ToolCalls }}<tool_call> <!-- 工具调用 --> {{ range .ToolCalls }}{"name": "{{ .Function.Name }}", "arguments": {{ .Function.Arguments }}} {{ end }}</tool_call> {{- end }}{{ if not $last }}<|im_end|> <!-- 非最后一条则闭合 --> {{ end }}功能:
- 如果助手返回文本(
),直接输出。.Content- 如果调用工具(
),生成.ToolCalls标签包裹的JSON数组(支持多工具调用)。<tool_call>- 若非最后一条消息,添加
。<|im_end|>工具返回消息(
tool)
{{ else if eq .Role "tool" }}<|im_start|>user <tool_response> {{ .Content }} <!-- 工具执行结果 --> </tool_response><|im_end|> {{ end }}格式:
以user角色模拟工具返回,内容用
<tool_response>标签包裹。
自动触发助手回复
{{- if and (ne .Role "assistant") $last }}<|im_start|>assistant {{ end }}逻辑:
如果最后一条消息不是助手发送的(如用户提问或工具返回),自动添加<|im_start|>assistant以触发模型回复。
4. 单轮对话(无历史消息)
{{- if .System }}<|im_start|>system {{ .System }}<|im_end|> <!-- 系统消息 --> {{ end }}{{ if .Prompt }}<|im_start|>user {{ .Prompt }}<|im_end|> <!-- 用户提示 --> {{ end }}<|im_start|>assistant {{ end }}{{ .Response }}{{ if .Response }}<|im_end|>{{ end }}逻辑:
- 直接拼接
消息(可选)、用户system,然后强制以prompt开头等待模型生成。<|im_start|>assistant- 如果已有预生成响应(
),追加并闭合。.Response
10.2 ollama加载gguf
(llmtuner) [output]$ ollama create qwen2.5-0.5b-instruct-q4_0 -f ./Modelfile5
transferring model data
using existing layer sha256:7671c0c304e6ce5a7fc577bcb12aba01e2c155cc2efd29b2213c95b18edaf6ed
creating new layer sha256:012bbc1c050907cbab5abb78d995ca4cf87a8d25091000e3120b0be009035a1e
creating new layer sha256:66b9ea09bd5b7099cbb4fc820f31b575c0366fa439b08245566692c6784e281e
creating new layer sha256:9297f08dd6c6435240b5cddc93261e8a159aa0fecf010de4568ec2df2417bdb2
creating new layer sha256:507a9849b8e66b2128d6f225f53bc474bae84fc524889ba8b575c341eab354b9
writing manifest
success
(llmtuner) [output]$ ollama run qwen2.5-0.5b-instruct-q4_0:latest
>>> 你好
你好,很高兴为您服务。请问您有什么问题或者需要帮助的事项吗?我会尽力提供帮助。

>>> 你叫什么名字
我是来自阿里巴巴云团队的Qwen,也被称为通义、小明或阿里小白,是阿里云自主研发的人工智能模型。
参考文章:
ollama 使用自己的微调模型_ollama 微调-CSDN博客
https://github.com/ggml-org/llama.cpp/blob/master/examples/quantize/README.md


 135
135

 被折叠的 条评论
为什么被折叠?
被折叠的 条评论
为什么被折叠?
 到【灌水乐园】发言


