


fragment_remote_control.xml
<TableLayout xmlns:android="http://schemas.android.com/apk/res/android"
xmlns:tools="http://schemas.android.com/tools"
android:id="@+id/fragment_remote_control_tableLayout"
android:layout_width="match_parent"
android:layout_height="match_parent"
android:stretchColumns="*" >
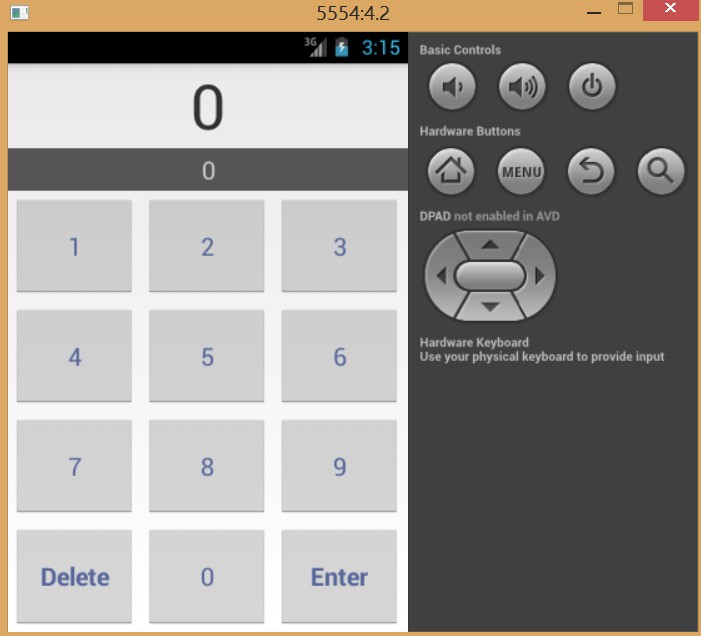
<!-- android:stretchColumns="*"属性定义可确保表格布局的列表都具有相同的宽度 -->
<TextView
android:id="@+id/fragment_remote_control_selectedTextView"
android:layout_width="match_parent"
android:layout_height="0dp"
android:layout_weight="2"
android:gravity="center"
android:text="0"
android:textSize="50dp" />
<!-- 文字尺寸大小使用dp单位而非sp单位。这意味着无论用户如何设置,设备屏幕上的文字大小都是一样的。 -->
<TextView
android:id="@+id/fragment_remote_control_workingTextView"
android:layout_width="match_parent"
android:layout_height="0dp"
android:layout_weight="1"
android:background="#555555"
android:gravity="center"
android:text="0"
android:textColor="#cccccc"
android:textSize="20dp" />
<include
android:layout_weight="1"
layout="@layout/button_row" />
<include
android:layout_weight="1"
layout="@layout/button_row" />
<include
android:layout_weight="1"
layout="@layout/button_row" />
<include
android:layout_weight="1"
layout="@layout/bold_button_row" />
</TableLayout>有关include标签,还应注意两点。首先,基于当前设备配置,引入的布局同样会经历筛选过程。因此,如同其他布局的使用,引入布局也可以使用配置修饰符。其次,通过在include标签上指定android:id以及任何android:layout_*属性,可以覆盖引入布局根元素的对应属性。这样,可实现在多处引入同一布局,而在每次引入时使用不同的属性。
merge标签可与include标签一起协同工作。代替实际组件,merge可用作引入布局的跟元素。布局引入另一个以merge作为跟元素的布局时,merge的子元素也会直接被引入。结果它们成了include元素父元素的子元素,而merge标签则会被丢弃。
merge的实际使用没有听起来那么难。如果还是搞不清楚,只需记住一点:merge标签天生是要丢弃的。它只是用来满足XML文件的格式规范要求的:XML布局文件必须具有一个根源素。
button_row.xml
<?xml version="1.0" encoding="utf-8"?>
<TableRow xmlns:android="http://schemas.android.com/apk/res/android" >

    <Button style="@style/RemoteButton" />

    <Button style="@style/RemoteButton" />

    <Button style="@style/RemoteButton" />

</TableRow>
bold_button_row.xml
<?xml version="1.0" encoding="utf-8"?>
<TableRow xmlns:android="http://schemas.android.com/apk/res/android" >

    <Button style="@style/BoldRemoteButton" />

    <Button style="@style/RemoteButton" />

    <Button style="@style/BoldRemoteButton" />

</TableRow>
styles.xml
<style name="RemoteButton">
        <item name="android:layout_width">0dp</item>
        <item name="android:layout_height">match_parent</item>
        <item name="android:textColor">#556699</item>
        <item name="android:textSize">20dp</item>
        <item name="android:layout_margin">3dp</item>
    </style>

<style name="BoldRemoteButton" parent="RemoteButton">
        <item name="android:textStyle">bold</item>
    </style>
每种样式都是以style元素节点和一个或多个item元素节点进行定义。每个样式item都是以XML属性进行命名的,元素内的文字即为属性值。
创建继承其他样式的新样式非常简单,具体有两种方式可供选择。一种是设置样式的parent属性为要继承样式的名称。另外一种是将父样式名称加上“.”符号后,作为前缀直接附加给样式名称,如ParentStyleName.MystyleName。


 803
803

 被折叠的 条评论
为什么被折叠?
被折叠的 条评论
为什么被折叠?
 到【灌水乐园】发言


