


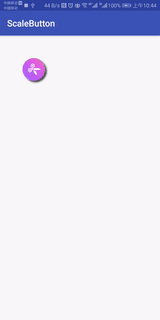
先看效果,点击放大的
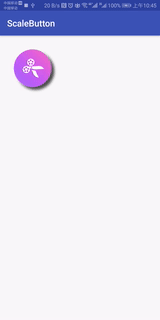
点击缩小
我看了下网上都是用onTouchEvent来实现的,我尽量不想写onTouchEvent内的代码,因为如果遇到手势冲突很折磨人,所以我就用selector里的state_pressed配合view的onDraw来实现这个功能
看过onDraw源码都知道,IamgeView的显示就是mDrawable.draw(canvas);所以只要我们在调用mDrawable.draw(canvas)之前改变mDrawable的尺寸就可以了实现放大缩小了
所以在自定义view内的代码很简单,只要改onDraw就可以了,判断是不是state_pressed,是就改变drawable.setBounds()的大小
@Override
protected void onDraw(Canvas canvas) {
    Drawable drawable = getDrawable();
    if(drawable != null && isPressed()){
        int left = drawable.getBounds().left;
        int top = drawable.getBounds().top;
        int right = drawable.getBounds().right;
        int bottom = drawable.getBounds().bottom;
        drawable.setBounds(strokeWidth,strokeWidth,getWidth() - strokeWidth,getHeight() - strokeWidth);
        drawable.draw(canvas);
        drawable.setBounds(left,top,right,bottom);
    }else{
        super.onDraw(canvas);
    }
}
strokeWidth为负数就是放大,正数就是缩小
可是有一个问题,放大的时候会显示不全,超出的部分没有了,这是因为在调用onDraw的时候显示的范围已经固定了,超过就不显示了,那咋整,可以反过来想,既然不能超出,那我就先缩小嘛,
android:padding="10dp",其他都不用改,这样就是放大到view大小了
缩小就没啥说的,就是设置初始值的时候想了下怎么设置,我选择用android:translationX="10dp",在初始化的时候
strokeWidth = (int) getTranslationX();
setTranslationX(0);
我这样写唯一的缺点就是无法添加背景,因为背景也跟着放大缩小,好了贴源码
activity_main.xml
<?xml version="1.0" encoding="utf-8"?>
<android.support.constraint.ConstraintLayout xmlns:android="http://schemas.android.com/apk/res/android"
    xmlns:tools="http://schemas.android.com/tools"
    android:layout_width="match_parent"
    android:layout_height="match_parent"
    tools:context="com.hyq.hm.scalebutton.MainActivity">
    <RelativeLayout
        android:layout_width="match_parent"
        android:layout_height="match_parent">
        <com.hyq.hm.scalebutton.ScaleImageView
            android:layout_width="100dp"
            android:layout_height="100dp"
            android:src="@drawable/ic_video_encoder"
            android:background="@drawable/drawable_selector_background"
            android:layout_margin="30dp"
            android:onClick="onTest"
            android:translationX="10dp"
            />
        <com.hyq.hm.scalebutton.ScaleImageView
            android:layout_width="100dp"
            android:layout_height="100dp"
            android:src="@drawable/ic_video_encoder"
            android:background="@drawable/drawable_selector_background"
            android:layout_margin="30dp"
            android:onClick="onTest"
            android:padding="10dp"
            android:layout_alignParentRight="true"
            android:layout_alignParentEnd="true"
            />
    </RelativeLayout>
</android.support.constraint.ConstraintLayout>
drawable_selector_background.xml
<?xml version="1.0" encoding="utf-8"?>
<selector xmlns:android="http://schemas.android.com/apk/res/android">
    <item android:state_pressed="true" android:drawable="@color/translucent">
    </item>
</selector>
这里要说一下为什么要android:background="@drawable/drawable_selector_background"这样写,因为如果不设置android:state_pressed="true"那么点击的时候就不会调用onDraw,android:drawable="@color/translucent",既然不能设置背景,那就把背景设置成透明的
ScaleImageView.java
public class ScaleImageView extends ImageView {
    private int strokeWidth = 0;
    public ScaleImageView(Context context) {
        super(context);
    }

    public ScaleImageView(Context context, @Nullable AttributeSet attrs) {
        super(context, attrs);
        strokeWidth = (int) getTranslationX();
        setTranslationX(0);
    }

    @Override
    protected void onDraw(Canvas canvas) {
        Drawable drawable = getDrawable();
        if(drawable != null && isPressed()){
            int left = drawable.getBounds().left;
            int top = drawable.getBounds().top;
            int right = drawable.getBounds().right;
            int bottom = drawable.getBounds().bottom;
            drawable.setBounds(strokeWidth,strokeWidth,getWidth() - strokeWidth,getHeight() - strokeWidth);
            drawable.draw(canvas);
            drawable.setBounds(left,top,right,bottom);
        }else{
            super.onDraw(canvas);
        }
    }
}
MainActivity.java
public class MainActivity extends AppCompatActivity {

    @Override
    protected void onCreate(Bundle savedInstanceState) {
        super.onCreate(savedInstanceState);
        setContentView(R.layout.activity_main);
    }
    public void onTest(View view){
    }
}
<color name="translucent">#00000000</color>这种写法也可以换成state_selected等其他的,在onDraw把isPressed()换成isSelected等其他的,也可以实现既换图片,又放大缩小,只要src指定drawable_selector,drawable_selector的state_pressed或state_selected显示不同的图片就ok了


 1144
1144


 被折叠的 条评论
为什么被折叠?
被折叠的 条评论
为什么被折叠?
 到【灌水乐园】发言


