


安装编辑器&编译器
1、安装Sublime Text 3:
https://www.sublimetext.com/docs/3/linux_repositories.html
apt Install the GPG key:
wget -qO - https://download.sublimetext.com/sublimehq-pub.gpg | sudo apt-key add -
Ensure apt is set up to work with https sources:
sudo apt-get install apt-transport-https
echo “deb https://download.sublimetext.com/ apt/stable/” | sudo tee /etc/apt/sources.list.d/sublime-text.list
sudo apt-get update
sudo apt-get install sublime-text
终端使用Sublime,输入: subl
2、安装Atom:
We can download the Atom .deb package and install it directly:
# Install Atom
sudo dpkg -i atom-amd64.deb
# Install Atom's dependencies if they are missing
sudo apt-get -f install
3、安装PyCharm:
- Copy the pycharm-2017.3.3.tar.gz to the desired installation location
(make sure you have rw permissions for that directory) - Unpack the pycharm-2017.3.3.tar.gz using the following command:
tar -xzf pycharm-2017.3.3.tar.gz- Remove the pycharm-2017.3.3.tar.gz to save disk space (optional)
- Run pycharm.sh from the bin subdirectory
./pycharm.sh【Tip】: Pycharm的快捷启动方式
sudo subl /usr/share/applications/Pycharm.desktop 然后输入以下内容,注意Exec和Icon需要找到正确的路径
[Desktop Entry]
Type=Application
Name=Pycharm
GenericName=Pycharm3
Comment=Pycharm3:The Python IDE
Exec=”/XXX/pycharm-community-3.4.1/bin/pycharm.sh” %f
Icon=/XXX/pycharm-community-3.4.1/bin/pycharm.png
Terminal=pycharm
Categories=Pycharm;
4、安装Shadowsock-qt5
sudo add-apt-repository ppa:hzwhuang/ss-qt5
sudo apt-get update
apt-get install shadowsocks-qt5
全局pac配置:
pip install genpac
genpac --format=pac --pac-proxy="SOCKS5 127.0.0.1:1080" --output="autoproxy.pac"
genpac 的详细使用说明见 GitHub - Wiki:
https://github.com/JinnLynn/GenPAC
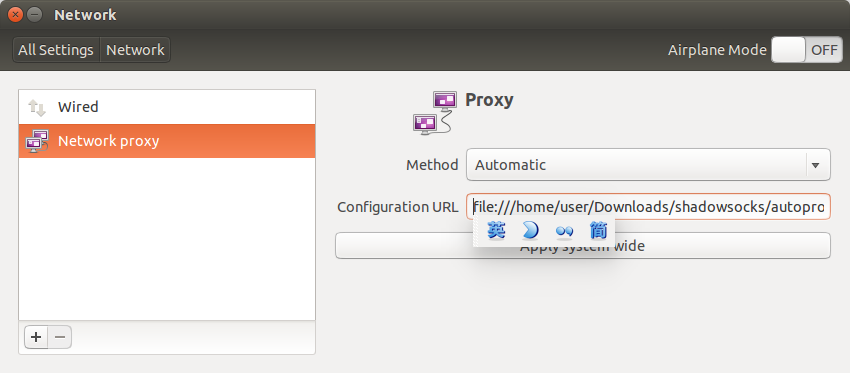
设置全局代理
点击:System settings > Network > Network Proxy,选择 Method 为 Automatic,设置 Configuration URL 为 autoproxy.pac 文件的路径,点击 Apply System Wide。
格式如:file:///home/{user}/Downloads/shadowsocks/autoproxy.pac
5、安装Anaconda:
download the Anaconda installer for Linux and install it:
bash ~/Downloads/Anaconda3-5.0.1-Linux-x86_64.sh配置环境变量:
subl ~/.profile在最后加入:
#Anaconda
export "PATH=/home/vincent/anaconda3/bin:$PATH"
保存后更新环境变量即可使用
source ~/.profile6、安装NodeJS:
https://nodejs.org/en/download/package-manager/#debian-and-ubuntu-based-linux-distributions
download the node-v8.9.4-linux-x64.tar.xz and extra it to right directory:
tar -xf node-v8.9.4-linux-x64.tar.xz ~/Programs/nodejs #解压文件到指定路径配置环境变量:
vi ~/.bashrc在最后加入:
#NODEJS
export PATH="/home/vincent/Programs/node-v8.10.0-linux-x64/bin:$PATH"
# export NODEJS_HOME = "/home/vincent/Programs/node-v8.10.0-linux-x64"
# export $NODEJS_HOME/bin:$PATH
#NODEJS
export NODEJS_HOME=/home/vincent/Programs/nodejs/node-v8.9.4-linux-x64
export $NODEJS_HOME/bin:$PATH
保存后更新环境变量即可使用
source ~/.profilenode --version
v8.9.4
npm --version
5.6.07、安装Git:
sudo apt-get install git8、安装tmux:
sudo apt-get install tmux
sudo apt-get update
安装数据库
安装MySQL:
sudo apt-get update
sudo apt-get install mysql-server
mysql_secure_installation
安装MS SQL Server:
Quickstart: Install SQL Server and create a database on Ubuntu
wget -qO- https://packages.microsoft.com/keys/microsoft.asc | sudo apt-key add -
sudo add-apt-repository "$(wget -qO- https://packages.microsoft.com/config/ubuntu/16.04/mssql-server-2017.list)"
sudo apt-get update
sudo apt-get install -y mssql-server
sudo /opt/mssql/bin/mssql-conf setup
systemctl status mssql-server
Docker
安装Docker
How To Install and Use Docker on Ubuntu 16.04
Docker Compose:
Install Compose on Linux systems
JAVA
https://blog.csdn.net/u014273195/article/details/70854522
Scala
http://www.cnblogs.com/wrencai/p/3867460.html
Spark
https://blog.csdn.net/u010171031/article/details/51849562
Latex
Texlive
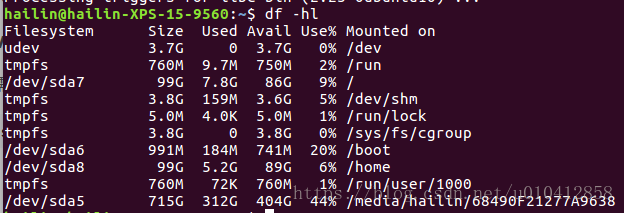
Texlive需要的安装空间较大,需要在根目录预留1.1G的额外空间
sudo apt-get install texlive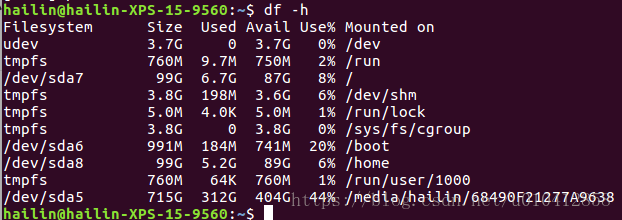
安装Texlive后
升级16.04到18.04
https://linuxconfig.org/how-to-upgrade-to-ubuntu-18-04-lts-bionic-beaver


 917
917

 被折叠的 条评论
为什么被折叠?
被折叠的 条评论
为什么被折叠?
 到【灌水乐园】发言


