


这几天公司没事我也不忙,就简单的对毛玻璃做个简单介绍和使用。
//第一步定义毛玻璃效果
UIBlurEffect * blur = [UIBlurEffect effectWithStyle:UIBlurEffectStyleDark];
UIVisualEffectView * effe = [[UIVisualEffectView alloc]initWithEffect:blur];
effe.frame = CGRectMake(50, 90, self.view.frame.size.width - 100, 400);
//第二步 把要添加的视图加到毛玻璃上
UIButton * btn= [[UIButton alloc]initWithFrame:CGRectMake(50, 50, 100, 100)];
btn.backgroundColor = [UIColor redColor];
[effe addSubview:btn];
[self.view addSubview:effe];
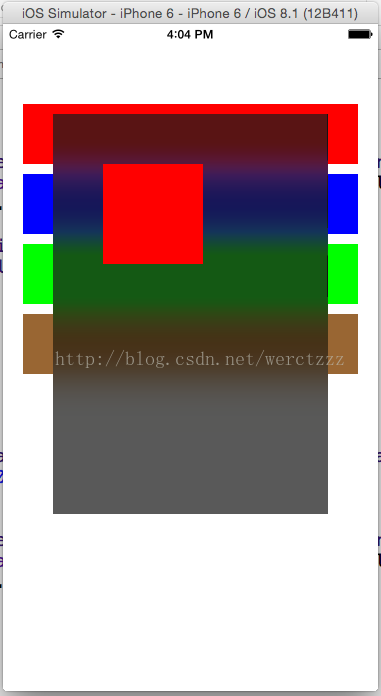
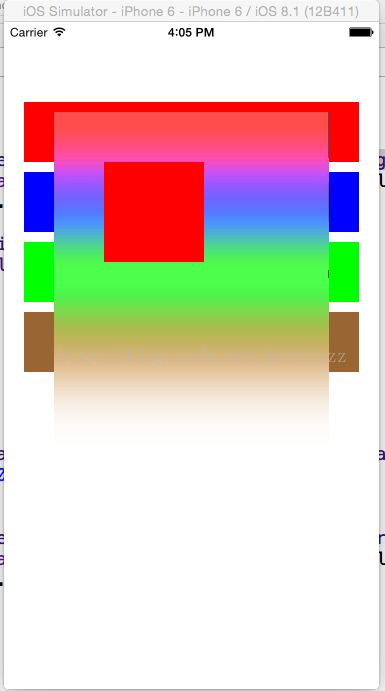
他的效果是枚举,有三种
UIBlurEffectStyleExtraLight
UIBlurEffectStyleLight
UIBlurEffectStyleDark
你想把你的图片模糊也可以这样添加:
// 定义需要毛玻璃化的图片
UIImageView * imageView = [[UIImageView alloc]initWithImage:[UIImage imageNamed:@"xxx.png"]];
imageView .frame = CGRectMake(100, 100, 100, 100);
// 定义毛玻璃效果
UIBlurEffect * blur = [UIBlurEffect effectWithStyle:UIBlurEffectStyleDark];
UIVisualEffectView * effe = [[UIVisualEffectView alloc]initWithEffect:blur];
effe.frame = CGRectMake(50, 90, self.view.frame.size.width - 100, 400);
// 添加毛玻璃
[imageView addSubview:effe];
[self.view addSubview:imageView ];


 1381
1381


 被折叠的 条评论
为什么被折叠?
被折叠的 条评论
为什么被折叠?
 到【灌水乐园】发言


