从视图Master跳转到视图Data,在Data视图中准备好数据,然后从Data视图回到Master视图,这个时候要将Data视图准备好的数据回调到Master视图中,此时有三种方法去实现。此时有四种方法去实现。
方法一:使用全局变量
将Master视图控制器设置为全局变量,直接在Data视图控制器中进行存取。
首先在程序委托AppDelegate.h中声明全局变量:
#import <UIKit/UIKit.h>
#import "Global_MasterViewController.h"
#import "Property_MasterViewController.h"
#import "Delegate_MasterViewController.h"

@interface AppDelegate : UIResponder <UIApplicationDelegate>

@property (strong, nonatomic) UIWindow *window;

@property (strong, nonatomic) UITabBarController *tbc;

@property (strong, nonatomic) Global_MasterViewController *g_mVC; // 定义全局变量

@end- (void)viewDidLoad
{
[super viewDidLoad];
// 标题
self.navigationItem.title = @"Global";
// Modal按钮,点击后跳转到Data视图
CGRect rect = CGRectMake(120.0, 230.0, 80.0, 40.0);
self.modal_button = [UIButton buttonWithType:UIButtonTypeSystem];
self.modal_button.frame = rect;
[self.modal_button setTitle:@"Modal" forState:UIControlStateNormal];
[self.modal_button addTarget:self action:@selector(modalToDataView:) forControlEvents:UIControlEventTouchUpInside];
[self.view addSubview:self.modal_button];
// data标签,用来显示data视图中输入的数据
rect = CGRectMake(100.0, 300.0, 120.0, 40.0);
self.data_label = [[UILabel alloc] initWithFrame:rect];
self.data_label.textAlignment = NSTextAlignmentCenter;
[self.view addSubview:self.data_label];
}
// 跳转到Data视图
-(void)modalToDataView:(id)sender
{
Global_DataViewController *g_dVC = [[Global_DataViewController alloc] init];
g_dVC.modalTransitionStyle = UIModalTransitionStyleCoverVertical;
[self presentViewController:g_dVC animated:YES completion:nil];
}该视图的data标签用于显示Data视图输入的数据。
接着是Global_DataViewController类:
- (void)viewDidLoad
{
    [super viewDidLoad];

    // 文本输入框,用于输入数据
    self.tf = [[UITextField alloc] initWithFrame:CGRectMake(100.0, 200.0, 120.0, 100.0)];
    self.tf.placeholder = @"Input some text";
    [self.view addSubview:self.tf];

    // Dismiss按钮,dismiss当前视图
    self.dismiss_button = [UIButton buttonWithType:UIButtonTypeSystem];
    self.dismiss_button.frame = CGRectMake(130.0, 320.0, 60.0, 40.0);
    [self.dismiss_button setTitle:@"Dismiss" forState:UIControlStateNormal];
    [self.dismiss_button addTarget:self action:@selector(modalBack:) forControlEvents:UIControlEventTouchUpInside];
    [self.view addSubview:self.dismiss_button];
}

// 回到Master视图,并完成数据回调
-(void)modalBack:(id)sender
{
    AppDelegate *appDelegate = [[UIApplication sharedApplication] delegate]; // 通过appDelegate获取全局变量g_mVC
    appDelegate.g_mVC.modalTransitionStyle = UIModalTransitionStyleFlipHorizontal;
    [self dismissViewControllerAnimated:YES completion:^{
        appDelegate.g_mVC.data_label.text = self.tf.text; // 设置g_mVC中标签显示的数据
    }];
}
方法二:使用数据成员
将Master视图控制器设定为Data视图控制器的成员变量,然后可以在Data视图控制器中进行存取。
首先设定Master视图控制器类为Data视图控制器类的成员变量:
@interface Property_DataViewController : UIViewController

@property (strong, nonatomic) UIButton *dismiss_button;

@property (strong, nonatomic) UITextField *tf;

@property (strong, nonatomic) Property_MasterViewController *p_mVC; // 设定Master视图控制器为Data视图控制器的成员变量

@end- (void)viewDidLoad
{
[super viewDidLoad];
// 标题
self.navigationItem.title = @"Property";
// Modal按钮,点击后跳转到Data视图
CGRect rect = CGRectMake(120.0, 230.0, 80.0, 40.0);
self.modal_button = [UIButton buttonWithType:UIButtonTypeSystem];
self.modal_button.frame = rect;
[self.modal_button setTitle:@"Modal" forState:UIControlStateNormal];
[self.modal_button addTarget:self action:@selector(modalToDataView:) forControlEvents:UIControlEventTouchUpInside];
[self.view addSubview:self.modal_button];
// data标签,用来显示data视图中输入的数据
rect = CGRectMake(100.0, 300.0, 120.0, 40.0);
self.data_label = [[UILabel alloc] initWithFrame:rect];
self.data_label.textAlignment = NSTextAlignmentCenter;
[self.view addSubview:self.data_label];
}
// 跳转到Data视图
-(void)modalToDataView:(id)sender
{
Property_DataViewController *p_dVC = [[Property_DataViewController alloc] init];
p_dVC.modalTransitionStyle = UIModalTransitionStyleCoverVertical;
[self presentViewController:p_dVC animated:YES completion:^{
p_dVC.p_mVC = self; // 设定Data视图的master成员变量为self
}];
}
在跳转时必须要设定好Data视图控制器的master成员变量为self。
最后是Property_DataViewController类:
- (void)viewDidLoad
{
[super viewDidLoad];
// 文本输入框,用于输入数据
self.tf = [[UITextField alloc] initWithFrame:CGRectMake(100.0, 200.0, 120.0, 100.0)];
self.tf.placeholder = @"Input some text";
[self.view addSubview:self.tf];
// Dismiss按钮,dismiss当前视图
self.dismiss_button = [UIButton buttonWithType:UIButtonTypeSystem];
self.dismiss_button.frame = CGRectMake(130.0, 320.0, 60.0, 40.0);
[self.dismiss_button setTitle:@"Dismiss" forState:UIControlStateNormal];
[self.dismiss_button addTarget:self action:@selector(modalBack:) forControlEvents:UIControlEventTouchUpInside];
[self.view addSubview:self.dismiss_button];
}
// 跳转到Data视图
-(void)modalBack:(id)sender{
self.p_mVC.modalTransitionStyle = UIModalTransitionStyleFlipHorizontal;
[self dismissViewControllerAnimated:YES completion:^{ self.p_mVC.data_label.text = self.tf.text; // 设置self.p_mVC中标签显示的数据 }];}方法三:使用委托
由于Master视图控制器要使用Data视图控制器中的数据,所以可以在Data视图控制器中声明一个委托,然后Master视图控制器通过实现委托中的方法直接从Data视图控制器中获取数据。
先看看Data视图中委托的声明部分:
// 声明数据回调委托
@protocol DataCallBackDelegate <NSObject>
-(void)willDismissModalView:(id)sender;
@end

@interface Delegate_DataViewController : UIViewController

@property (strong, nonatomic) UIButton *dismiss_button;

@property (strong, nonatomic) UITextField *tf;

@property (weak, nonatomic) id<DataCallBackDelegate> dataDelegate; // 声明数据回调委托作为该类的成员变量,必须设定为weak属性,否则会形成retain cycle

@end@interface Delegate_MasterViewController : UIViewController <DataCallBackDelegate> // confirm to DataCallBackDelegate
@property (strong, nonatomic) UIButton *modal_button;
@property (strong, nonatomic) UILabel *data_label;
@end
- (void)viewDidLoad
{
    [super viewDidLoad];

    // 标题
    self.navigationItem.title = @"Delegate";

    // Modal按钮,点击后跳转到Data视图
    CGRect rect = CGRectMake(120.0, 230.0, 80.0, 40.0);
    self.modal_button = [UIButton buttonWithType:UIButtonTypeSystem];
    self.modal_button.frame = rect;
    [self.modal_button setTitle:@"Modal" forState:UIControlStateNormal];
    [self.modal_button addTarget:self action:@selector(modalToDataView:) forControlEvents:UIControlEventTouchUpInside];
    [self.view addSubview:self.modal_button];

    // data标签,用来显示data视图中输入的数据
    rect = CGRectMake(100.0, 300.0, 120.0, 40.0);
    self.data_label = [[UILabel alloc] initWithFrame:rect];
    self.data_label.textAlignment = NSTextAlignmentCenter;
    [self.view addSubview:self.data_label];
}

// 跳转到Data视图
-(void)modalToDataView:(id)sender
{
    Delegate_DataViewController *d_dVC = [[Delegate_DataViewController alloc] init];
    d_dVC.modalTransitionStyle = UIModalTransitionStyleCoverVertical;
    d_dVC.dataDelegate = self; // 必须设定Data视图控制器的委托为self
    [self presentViewController:d_dVC animated:YES completion:nil];
}

- (void)didReceiveMemoryWarning
{
    [super didReceiveMemoryWarning];
    // Dispose of any resources that can be recreated.
}

#pragma mark -
#pragma mark Data call back delegate

// 实现委托中的方法
-(void)willDismissModalView:(id)sender
{
    Delegate_DataViewController *d_dVC = (Delegate_DataViewController *)sender;
    self.data_label.text = d_dVC.tf.text; // 设置self的标签显示的数据
}
- (void)viewDidLoad
{
    [super viewDidLoad];

    // 文本输入框,用于输入数据
    self.tf = [[UITextField alloc] initWithFrame:CGRectMake(100.0, 200.0, 120.0, 100.0)];
    self.tf.placeholder = @"Input some text";
    [self.view addSubview:self.tf];

    // Dismiss按钮,dismiss当前视图
    self.dismiss_button = [UIButton buttonWithType:UIButtonTypeSystem];
    self.dismiss_button.frame = CGRectMake(130.0, 320.0, 60.0, 40.0);
    [self.dismiss_button setTitle:@"Dismiss" forState:UIControlStateNormal];
    [self.dismiss_button addTarget:self action:@selector(modalBack:) forControlEvents:UIControlEventTouchUpInside];
    [self.view addSubview:self.dismiss_button];
}

// 回到Master视图,并完成数据回调
-(void)modalBack:(id)sender
{
    [self dismissViewControllerAnimated:YES completion:^{
        [self.dataDelegate willDismissModalView:self]; // 调用委托中的方法实现数据回调
    }];
}
在本例中,在Data视图控制器中调用委托方法:
// 回到Master视图,并完成数据回调
-(void)modalBack:(id)sender
{
    [self dismissViewControllerAnimated:YES completion:^{
        [self.dataDelegate willDismissModalView:self]; // 调用委托中的方法实现数据回调
    }];
}
// 实现委托中的方法
-(void)willDismissModalView:(id)sender
{
    Delegate_DataViewController *d_dVC = (Delegate_DataViewController *)sender;
    self.data_label.text = d_dVC.tf.text; // 设置self的标签显示的数据
}
Demo已上传,可以下载看看。
后记:
方法四:注册通知中心
最近看到一个注册通知中心在页面间传值的方法,现在特地写下来做个笔记。
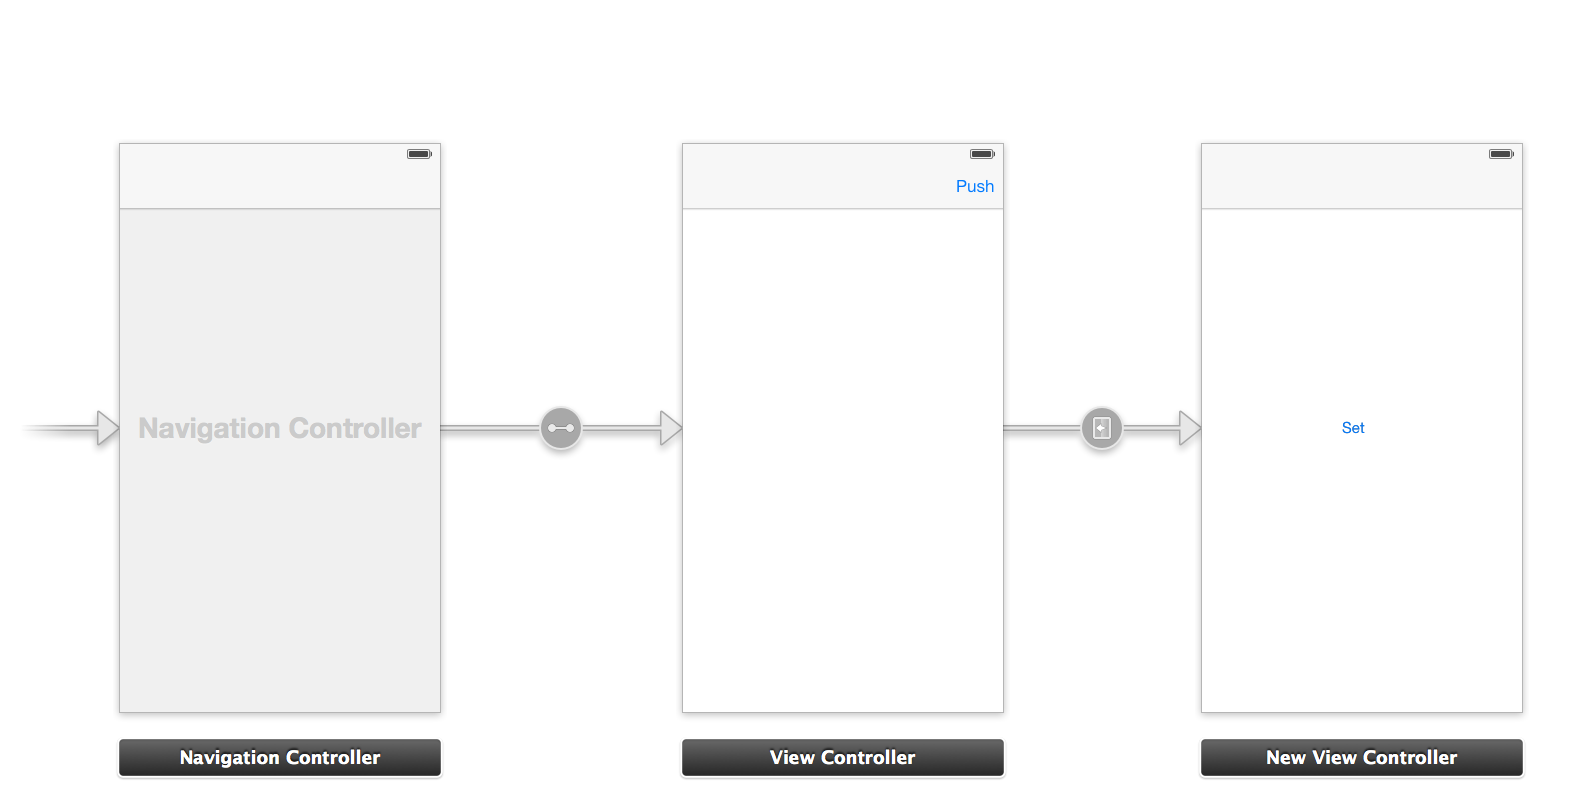
假设有ViewController和NewViewController两个视图控制器,ViewController中有一个变量data,NewViewController中对data的属性值进行设置,并将设置后的值回调到ViewController中。
原理很简单,首先将ViewController注册到通知中心中作为消息观察者,然后在跳转到NewViewController后,在NewViewController中post一个消息,ViewController在收到相应的消息后调用@selector中的方法对变量data的值作出更改。
先看看故事板:
然后是代码。
首先是ViewController类:
#import "ViewController.h"

@interface ViewController ()

@property (nonatomic, strong) NSString *data;

@end

@implementation ViewController
@synthesize data;
@synthesize showData_label;

- (void)viewDidLoad
{
    [super viewDidLoad];

    NSNotificationCenter *notificationCenter = [NSNotificationCenter defaultCenter];
    // 将自己注册到通知中心中
    [notificationCenter addObserver:self                       // 消息观察者:self
                           selector:@selector(setMyData:)      // 收到消息后的处理方法
                               name:@"SetDataOfViewController" // 消息名
                             object:nil];                      // 发送消息的对象,即Poster

    data = nil; // 一开始设置data为空
}

/* 在收到消息后调用该方法 */
- (void)setMyData:(NSNotification *)notification {
    NSString *value = (NSString *)[notification object]; // 获取消息传递的对象
    data = value;

    if (data) {
        showData_label.text = data;
    }
}

- (void)didReceiveMemoryWarning
{
    [super didReceiveMemoryWarning];

    NSNotificationCenter *notificationCenter = [NSNotificationCenter defaultCenter];
    [notificationCenter removeObserver:self];

    self.data = nil;
    self.showData_label = nil;
}

@end
接着是NewViewController类:
#import "NewViewController.h"

@interface NewViewController ()

@end

@implementation NewViewController

- (id)initWithNibName:(NSString *)nibNameOrNil bundle:(NSBundle *)nibBundleOrNil
{
    self = [super initWithNibName:nibNameOrNil bundle:nibBundleOrNil];
    if (self) {
        // Custom initialization
    }
    return self;
}

- (void)viewDidLoad
{
    [super viewDidLoad];
}

- (void)didReceiveMemoryWarning
{
    [super didReceiveMemoryWarning];
    // Dispose of any resources that can be recreated.
}

/* 点击Set按钮后发送的动作 */
- (IBAction)setDataOfViewController:(id)sender {
    NSNotificationCenter *notificationCenter = [NSNotificationCenter defaultCenter];
    [notificationCenter postNotificationName:@"SetDataOfViewController" object:@"ViewController"]; // 向通知中心Post一条名为SetDataViewController的消息,传递的对象为@"View Controller"

    UIAlertView *alertView = [[UIAlertView alloc] initWithTitle:@"Notification Posted" message:nil delegate:nil cancelButtonTitle:@"OK" otherButtonTitles:nil, nil];
    [alertView show];
}

@end
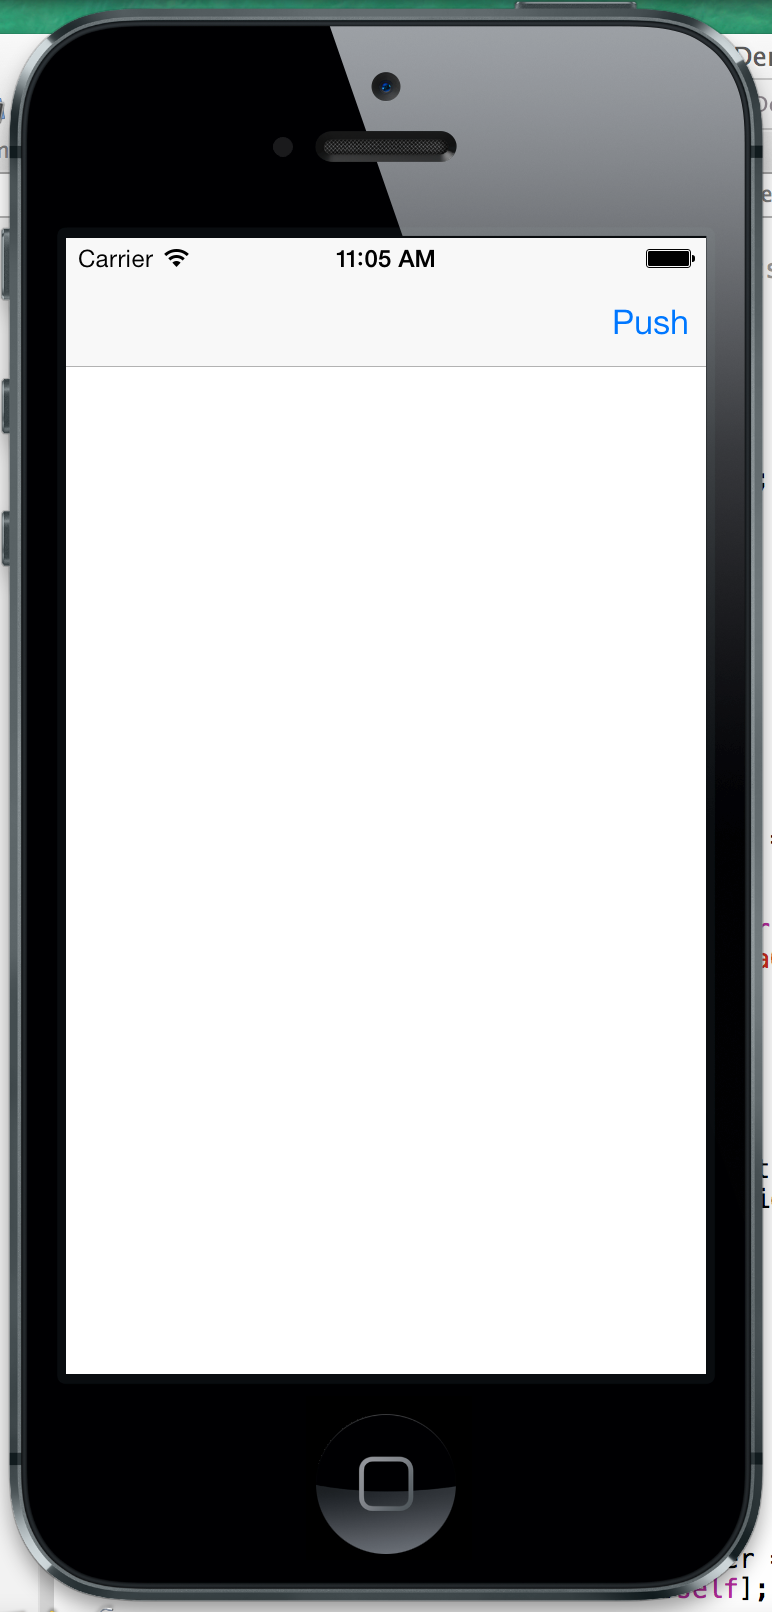
Run看看:
在点击Push按钮后将跳转到NewViewController:
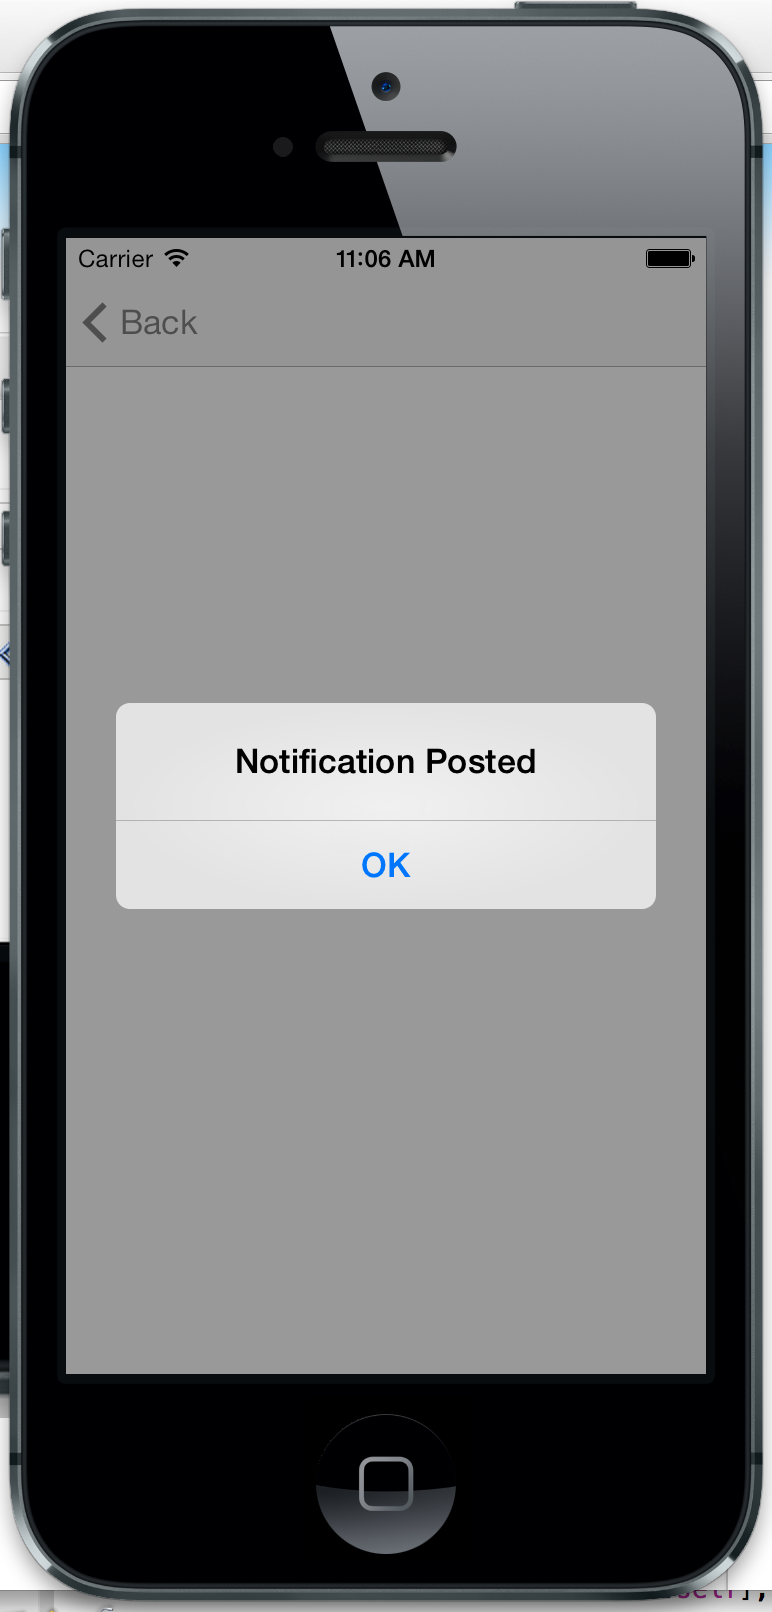
点击Set按钮后,将发送消息并提示成功。
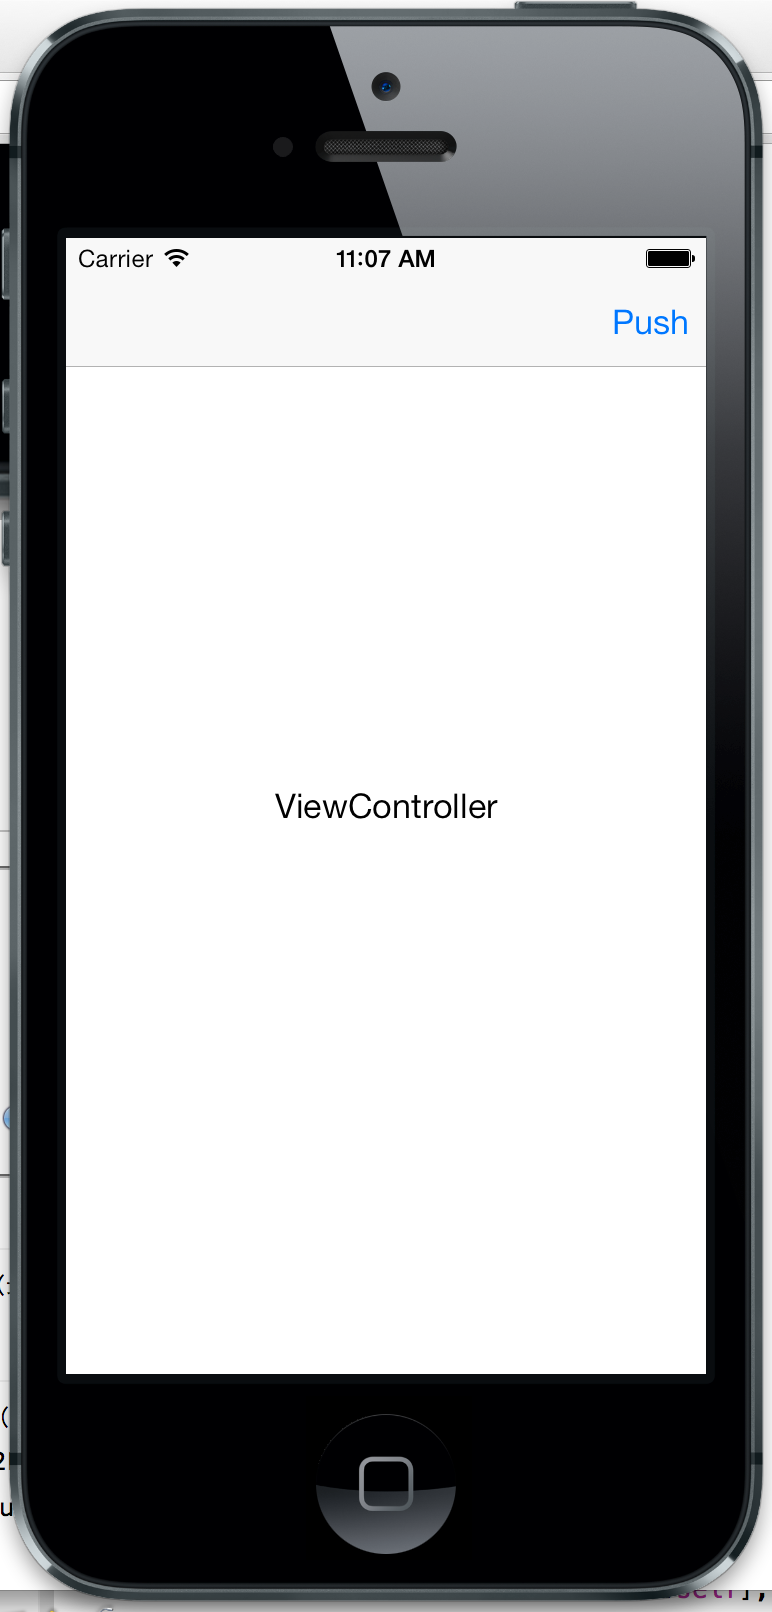
回到ViewController,可以看到:
中间的标签显示我们Post消息时传递的对象:ViewController。
Demo已经补传,可以下载看看。


 973
973

 被折叠的 条评论
为什么被折叠?


