


一、平时的学习和工作中,总会需要标题栏似的导航。此文章自定义的TopBar是继承了Relayout。【不记得是看的谁的博客了。。。】
1、在values目录下新建attrs.xml文件
<?xml version="1.0" encoding="utf-8"?>
<resources>
    <declare-styleable name="MyTopBar">
        <attr name="leftText" format="string"/>
        <attr name="leftTextColor" format="color"/>
        <attr name="leftTextSize" format="dimension"/><!--dimension:尺寸-->

        <attr name="rightText" format="string"/>
        <attr name="rightTextColor" format="color"/>
        <attr name="rightTextSize" format="dimension"/>

        <attr name="titleText" format="string"/>
        <attr name="titleTextSize" format="dimension"/>
        <attr name="titleBackground" format="color|reference"/><!--color|reference : 不仅仅是16进制的颜色,还可以是android引用比如:drawable、color等-->
    </declare-styleable>
</resources>
2、自定义MyTopBar。
public class MyTopBar extends RelativeLayout {
    private Button leftButton;
    private Button rightButton;
    private TextView title;

    private String leftText;
    private int leftColor;
    private float leftTextSize;
    private LayoutParams leftLay;

    private String rightText;
    private int rightColor;
    private float rightTextSize;
    private LayoutParams rightLay;

    private String titleText;
    private Drawable titleColor;
    private float titleTextSize;
    private LayoutParams titleLay;

    // 自定义topbar的监听
    private topBarOnClickLinstener linstener;

    //用来给外界调用左右两个按钮的监听事件
    public interface topBarOnClickLinstener{
        void leftOnClick();
        void rightOnClick();
    }

    public void topBarOnClickLinstener(topBarOnClickLinstener linstener){
        this.linstener = linstener;
    }


    public MyTopBar(final Context context, AttributeSet attrs) {
        super(context, attrs);

        //通过obtainStyledAttributes得到TypedArray
        TypedArray typedArray = context.obtainStyledAttributes(attrs, R.styleable.MyTopBar);

        //从TypedArray中通过key,得到相应的value
        leftText = typedArray.getString(R.styleable.MyTopBar_leftText);
        leftColor = typedArray.getColor(R.styleable.MyTopBar_leftTextColor, 0);
        leftTextSize = typedArray.getDimensionPixelSize(R.styleable.MyTopBar_leftTextSize, 0);

        rightText = typedArray.getString(R.styleable.MyTopBar_rightText);
        rightColor = typedArray.getColor(R.styleable.MyTopBar_rightTextColor, 0);
        rightTextSize = typedArray.getDimensionPixelSize(R.styleable.MyTopBar_rightTextSize, 0);

        titleText = typedArray.getString(R.styleable.MyTopBar_titleText);
        titleColor = typedArray.getDrawable(R.styleable.MyTopBar_titleBackground);
        titleTextSize = typedArray.getDimensionPixelSize(R.styleable.MyTopBar_titleTextSize, 0);

        //记得释放资源
        typedArray.recycle();

        leftLay = new LayoutParams(LayoutParams.WRAP_CONTENT,LayoutParams.WRAP_CONTENT);
        leftLay.addRule(ALIGN_PARENT_LEFT);
        leftButton = new Button(context);
        leftButton.setTextColor(leftColor);
        leftButton.setText(leftText);
        leftButton.setTextSize(leftTextSize);
        leftButton.setLayoutParams(leftLay);

        leftButton.setOnClickListener(new OnClickListener() {
            @Override
            public void onClick(View view) {
                linstener.leftOnClick();
            }
        });

        rightLay = new LayoutParams(LayoutParams.WRAP_CONTENT,LayoutParams.WRAP_CONTENT);
        rightLay.addRule(ALIGN_PARENT_RIGHT);
        rightButton = new Button(context);
        rightButton.setTextColor(rightColor);
        rightButton.setText(rightText);
        rightButton.setTextSize(rightTextSize);
        rightButton.setLayoutParams(rightLay);

        rightButton.setOnClickListener(new OnClickListener() {
            @Override
            public void onClick(View view) {
                linstener.rightOnClick();
            }
        });

        titleLay = new LayoutParams(LayoutParams.WRAP_CONTENT,LayoutParams.MATCH_PARENT);
        titleLay.addRule(CENTER_IN_PARENT);
        title = new Button(context);
        title.setBackground(titleColor);
        title.setText(titleText);
        title.setTextSize(titleTextSize);
        title.setLayoutParams(titleLay);

        setBackgroundColor(context.getResources().getColor(android.R.color.holo_blue_bright));

        addView(leftButton);
        addView(rightButton);
        addView(title);
    }

    public void setVisiable(Button button,boolean flag){
        if (flag){
            button.setVisibility(View.VISIBLE);
        }else{
            button.setVisibility(View.GONE);
        }
    }
}
3、在主Activity的布局中使用自定义的topbar。
<?xml version="1.0" encoding="utf-8"?>
<LinearLayout xmlns:android="http://schemas.android.com/apk/res/android"
    xmlns:tools="http://schemas.android.com/tools"
    xmlns:andy="http://schemas.android.com/apk/res-auto"
    android:layout_width="match_parent"
    android:layout_height="match_parent"
    android:orientation="vertical">

    <LinearLayout
        android:layout_width="match_parent"
        android:layout_height="50dp">

        <com.andy.ytt.andy.myView.MyTopBar
            android:id="@+id/topbar"
            android:layout_width="match_parent"
            android:layout_height="wrap_content"
            andy:leftText="返回"
            andy:leftTextColor="@color/colorPrimary"
            andy:leftTextSize="12sp"
            andy:rightText="更多"
            andy:rightTextColor="@color/colorPrimary"
            andy:rightTextSize="12sp"
            andy:titleText="昨天 今天 明天"
            andy:titleTextSize="15sp"
            >

        </com.andy.ytt.andy.myView.MyTopBar>
    </LinearLayout>
 </LinearLayout >
其中空间中的andy:xxx属性,需要我们自己定义xmlns:andy=”http://schemas.android.com/apk/res-auto”
4、在主Activity中定义我们的MyTopBar,即可使用。
private void initView() {
        myTopBar = (MyTopBar) findViewById(R.id.topbar);
//        Button left = (Button) myTopBar.getChildAt(0);
//        myTopBar.setVisiable(left,false);
        myTopBar.topBarOnClickLinstener(new MyTopBar.topBarOnClickLinstener() {
            @Override
            public void leftOnClick() {
                Toast.makeText(MainActivity.this,"自定义左边的Button",0).show();
            }

            @Override
            public void rightOnClick() {
                Toast.makeText(MainActivity.this,"自定义右边的Button",0).show();
            }
        });
      }
其中myTopBar.topBarOnClickLinstener()就是可以动态实现左右按钮的监听事件。
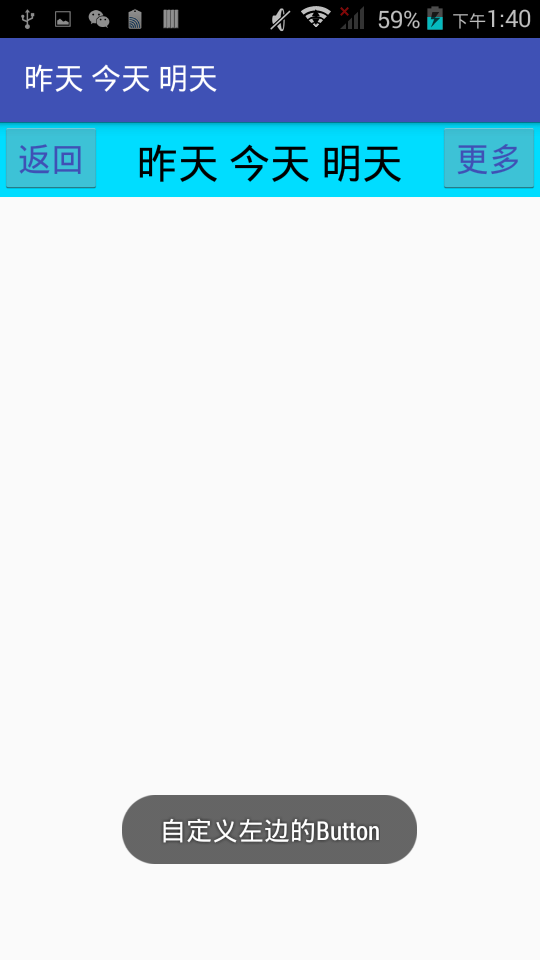
5、效果图


 903
903

 被折叠的 条评论
为什么被折叠?
被折叠的 条评论
为什么被折叠?
 到【灌水乐园】发言


