


首先大家先看一下下面俩个图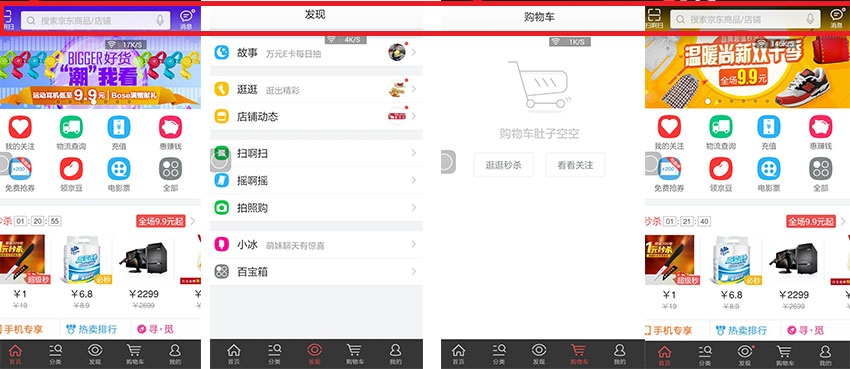

仔细观察我红框标出来的部分,这个标题栏topbar是不是有一些共同点啊,如果让你实现的话,你会如何去做呢,首先你会想到的是我一个个的写出来啊,很简单啊,可是你想一想,如果是一个项目的话,他的这个topbar会有多少个,而往往领导会经常让你去变动,你会有什么感受呢,现在就给大家说一下关于topBar的自定义控件,也就是我们所有的标题栏topbar都用一个,变动的话当然也会变得很简单啦,现在我们就进入正题吧
**首先我们要设计一个要遵循3个步骤
一。设计我们需要的属性(在atts设置)
二。实现一个我们的“View”(自定义一个TopBar)
三。引用我们的View(引用我们的topBar)**
我们的第一步,设计属性
创建一个atts.xml
<?xml version="1.0" encoding="utf-8"?>
<resources>
    <declare-styleable name="Topbar">
        <attr name="title" format="string"/>
        <attr name="titleTextSize" format="dimension"/>
        <attr name="titleTextColor" format="color"/>
        <attr name="leftTextColor" format="color"/>
        <attr name="leftBackgroud" format="reference|color"/>
        <attr name="leftText" format="string"/>
        <attr name="rightTextColor" format="color"/>
        <attr name="rightBackgroud" format="reference|color"/>
        <attr name="rightText" format="string"/>
    </declare-styleable>
第二步自定义一个Topbar.java
当然我们需要一个构造方法去初始化一些东西
public TopBar(final Context context, AttributeSet attrs) {
super(context, attrs);
        // TODO Auto-generated constructor stub
        TypedArray topbar = context.obtainStyledAttributes(attrs, R.styleable.Topbar);
    leftText = topbar.getString(R.styleable.Topbar_leftText);
    leftBackgroud = topbar.getDrawable(R.styleable.Topbar_leftBackgroud);
    leftTextColor = topbar.getColor(R.styleable.Topbar_leftTextColor, 0);

    rightText = topbar.getString(R.styleable.Topbar_rightText);
    rightBackgroud = topbar.getDrawable(R.styleable.Topbar_rightBackgroud);
    rightTextColor = topbar.getColor(R.styleable.Topbar_rightTextColor, 0);

    title = topbar.getString(R.styleable.Topbar_title);
    titleTextColor = topbar.getColor(R.styleable.Topbar_titleTextColor, 0);
    titleTextSize = topbar.getDimension(R.styleable.Topbar_titleTextSize, 0);


    //避免浪费资源  避免由于缓存所引起的错误
    topbar.recycle();

    leftButton =new Button(context);
    rightButton = new Button(context);
    tvTiele = new TextView(context);

    leftButton.setText(leftText);
    leftButton.setBackground(leftBackgroud);
    leftButton.setTextColor(leftTextColor);

    rightButton.setText(rightText);
    rightButton.setBackground(rightBackgroud);
    rightButton.setTextColor(rightTextColor);

    tvTiele.setText(title);
    tvTiele.setTextSize(titleTextSize);
    tvTiele.setTextColor(titleTextColor);
    tvTiele.setGravity(Gravity.CENTER);  //让标题会居中显示


    //给View设置一下颜色
    setBackgroundColor(0xFFF59563);

    leftParams = new LayoutParams(LayoutParams.WRAP_CONTENT,LayoutParams.WRAP_CONTENT);
    //注意一点的是这里的TRUE是RelativeLayout中的一个属性    不是我们通常用的boolean类型中的true false
    leftParams.addRule(RelativeLayout.ALIGN_PARENT_LEFT, TRUE);
    //将LeftButton以leftParams的形式加入到View中
    addView(leftButton,leftParams);

    rightParams = new LayoutParams(LayoutParams.WRAP_CONTENT, LayoutParams.WRAP_CONTENT);
    rightParams.addRule(RelativeLayout.ALIGN_PARENT_RIGHT, TRUE);
    addView(rightButton,rightParams);

    titleParams = new LayoutParams(LayoutParams.WRAP_CONTENT, LayoutParams.MATCH_PARENT);
    titleParams.addRule(RelativeLayout.CENTER_IN_PARENT, TRUE);
    addView(tvTiele,titleParams);
}
第三步,引用我们的topBar
在我们activity_main.xml中
   <RelativeLayout       xmlns:android="http://schemas.android.com/apk/res/android"
<!--   命名一个空间-->        **xmlns:custom="http://schemas.android.com/apk/res-auto"**

        xmlns:tools="http://schemas.android.com/tools"
        android:layout_width="match_parent"
        android:layout_height="match_parent"
         >
    **<com.exampl.TopBar**
        android:layout_width="match_parent"
        android:layout_height="40dp"
        android:id="@+id/topbar"
        custom:leftBackgroud="@drawable/top_theme_blue"
        **custom**:leftText="back"
        **custom**:leftTextColor="#FFFFFF"
        custom:rightBackgroud="@drawable/top_theme_blue"
        **custom**:rightText="More"
        **custom**:rightTextColor="#FFFFFF"
        **custom**:title="自定义标题"
        **custom**:titleTextColor="#123412"
        **custom**:titleTextSize="10sp"
        />

</RelativeLayout>
注意:
1。上面的custom就是上面的自定义的空间,其实就是复制的
xmlns:android=”http://schemas.android.com/apk/res/android”
将android空间换为custom空间,是避免的一些冲突
2。com.exampl.TopBar是精确到你的自定义控件topbar的精确位置(在哪个包中)
现在你会发现我的布局实现啦,但我们的点击事件呢,左右按钮的点击怎么看呢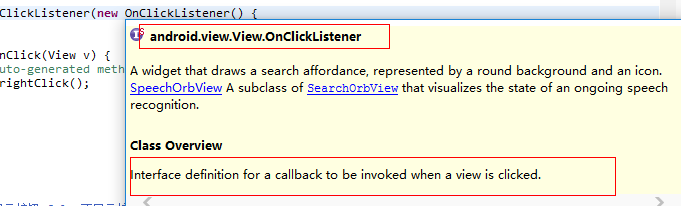
rightButton.setOnClickListener(new OnClickListener() {}仔细观看一下其实这个点击事件就是实现的一个接口,那我们岂不自己创建一个接口就可以,
    private topbarClickListener listener;
        public interface topbarClickListener {
            public void leftClick();
            public void rightClick();
        }
        public void setOnTopbarClickListener(topbarClickListener listener){
            this.listener = listener;
        }
而我们的按钮控制接口调用
//左右按钮的控制
    leftButton.setOnClickListener(new OnClickListener() {
        @Override
        public void onClick(View v) {
            // TODO Auto-generated method stub
            listener.leftClick();
        }
    });
    rightButton.setOnClickListener(new OnClickListener() {

        @Override
        public void onClick(View v) {
            // TODO Auto-generated method stub
            listener.rightClick();
        }
    });
而在我们的MainActivity中只需将
TopBar topbar = (TopBar) findViewById(R.id.topbar);查找到然后直接调用setOnTopbarClickListener方法
即
topbar.setOnTopbarClickListener(new topbarClickListener() {}就可以啦,源码我就上贴了,相信大家仔细看一看就会看懂的,还有就是一点实现按钮控件有时显示有事不显示,其实也很简单,就是在TopBar.java中自定义个方法,用if判断是否显示,然后在MainActivity中调用topbar中的这个方法


 817
817

 被折叠的 条评论
为什么被折叠?
被折叠的 条评论
为什么被折叠?
 到【灌水乐园】发言


