


Ubuntu Setup Guide
如何在外接SSD/NVME上安装Ubuntu系统
Contents
-
[基础准备工作]
-
[重新启动并配置BIOS]
-
[安装Ubuntu, Part 1]
-
[安装Ubuntu, 配置分区表]
-
[安装Ubuntu, Part 2]
-
[配置阿里云源]
基础准备工作
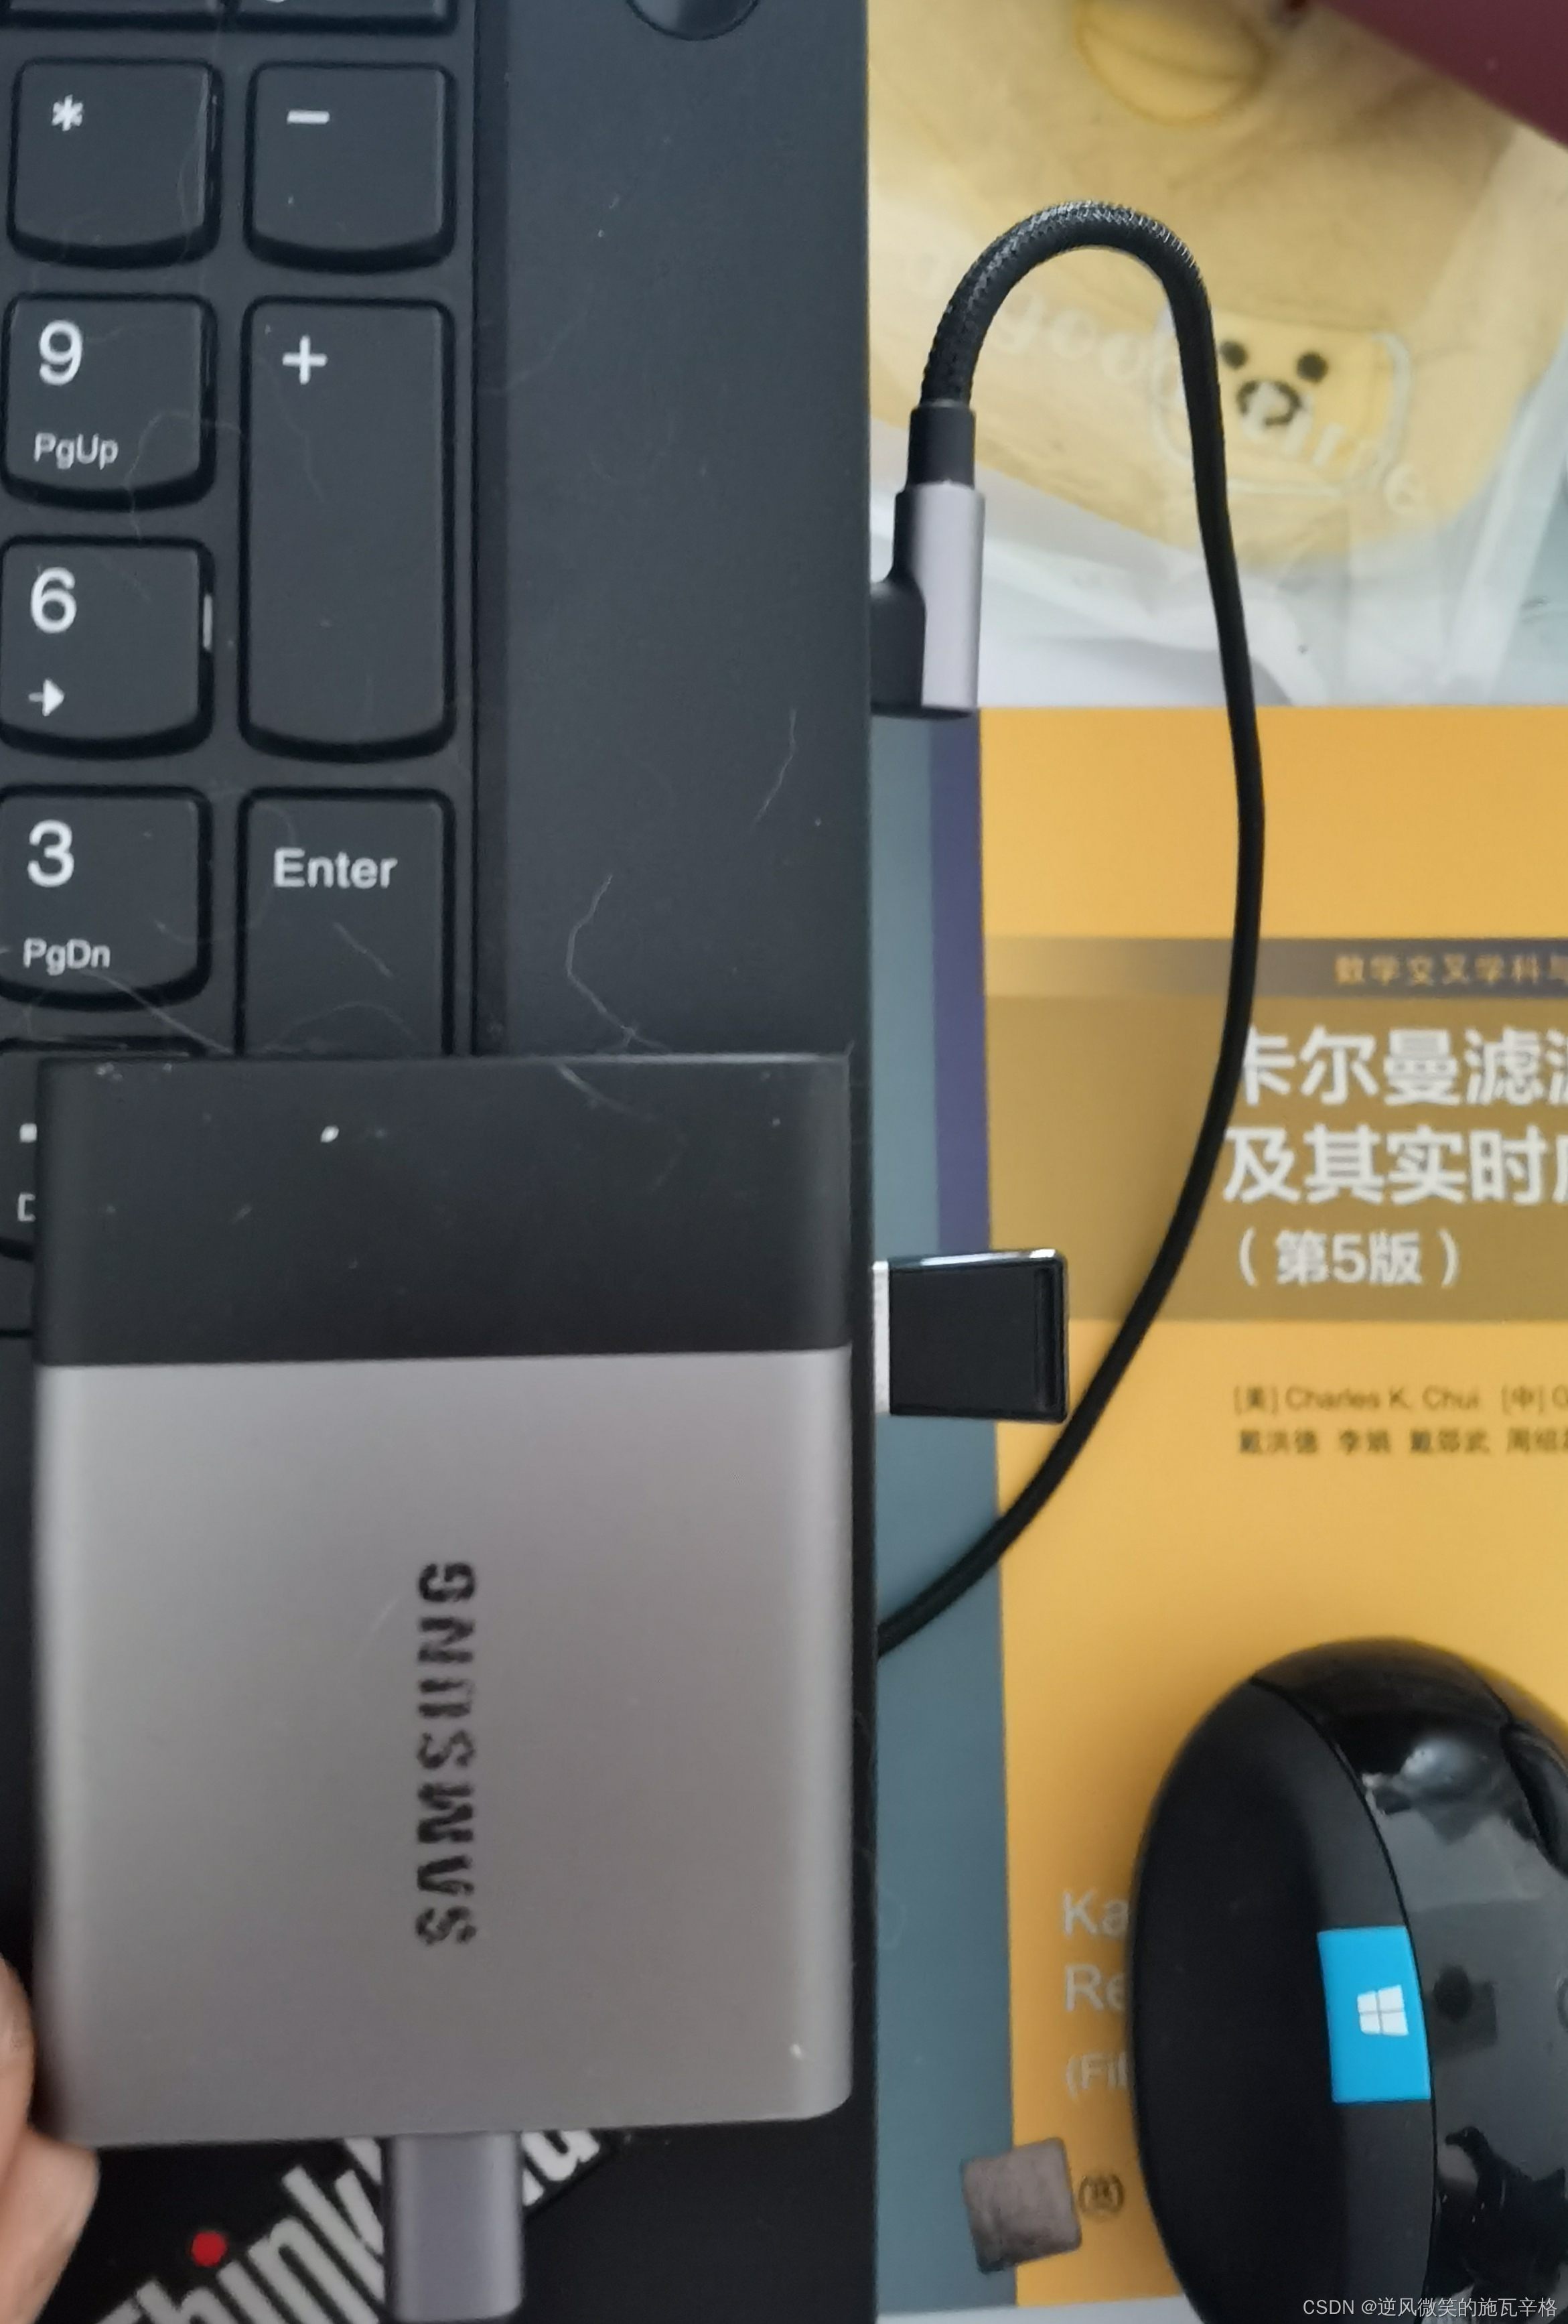
首先, 准备两个硬盘:
-
一个为小容量USB Disk, 用于制作Ubuntu Startup Disk, 作为Ubuntu Installer, 记录设备名称, 此处为SanDisk USB

-
一个为大容量SSD/NVMe Disk, 用于Ubuntu Workspace Disk, 作为Ubuntu Workspace, 此处为SAMSUNG SSD T3

接着, 将两个硬盘, 全部格式化. 格式化时目标文件系统为Linux EXT4. 此处以Ubuntu平台为示例, Windows与Mac用户请自行百度, 两系统均存在类似工具.
最后, 使用工具, 在小容量USB Disk上制作Ubuntu Installer. 此处以Ubuntu平台为示例, Windows与Mac用户请自行百度, 两系统均存在类似工具.
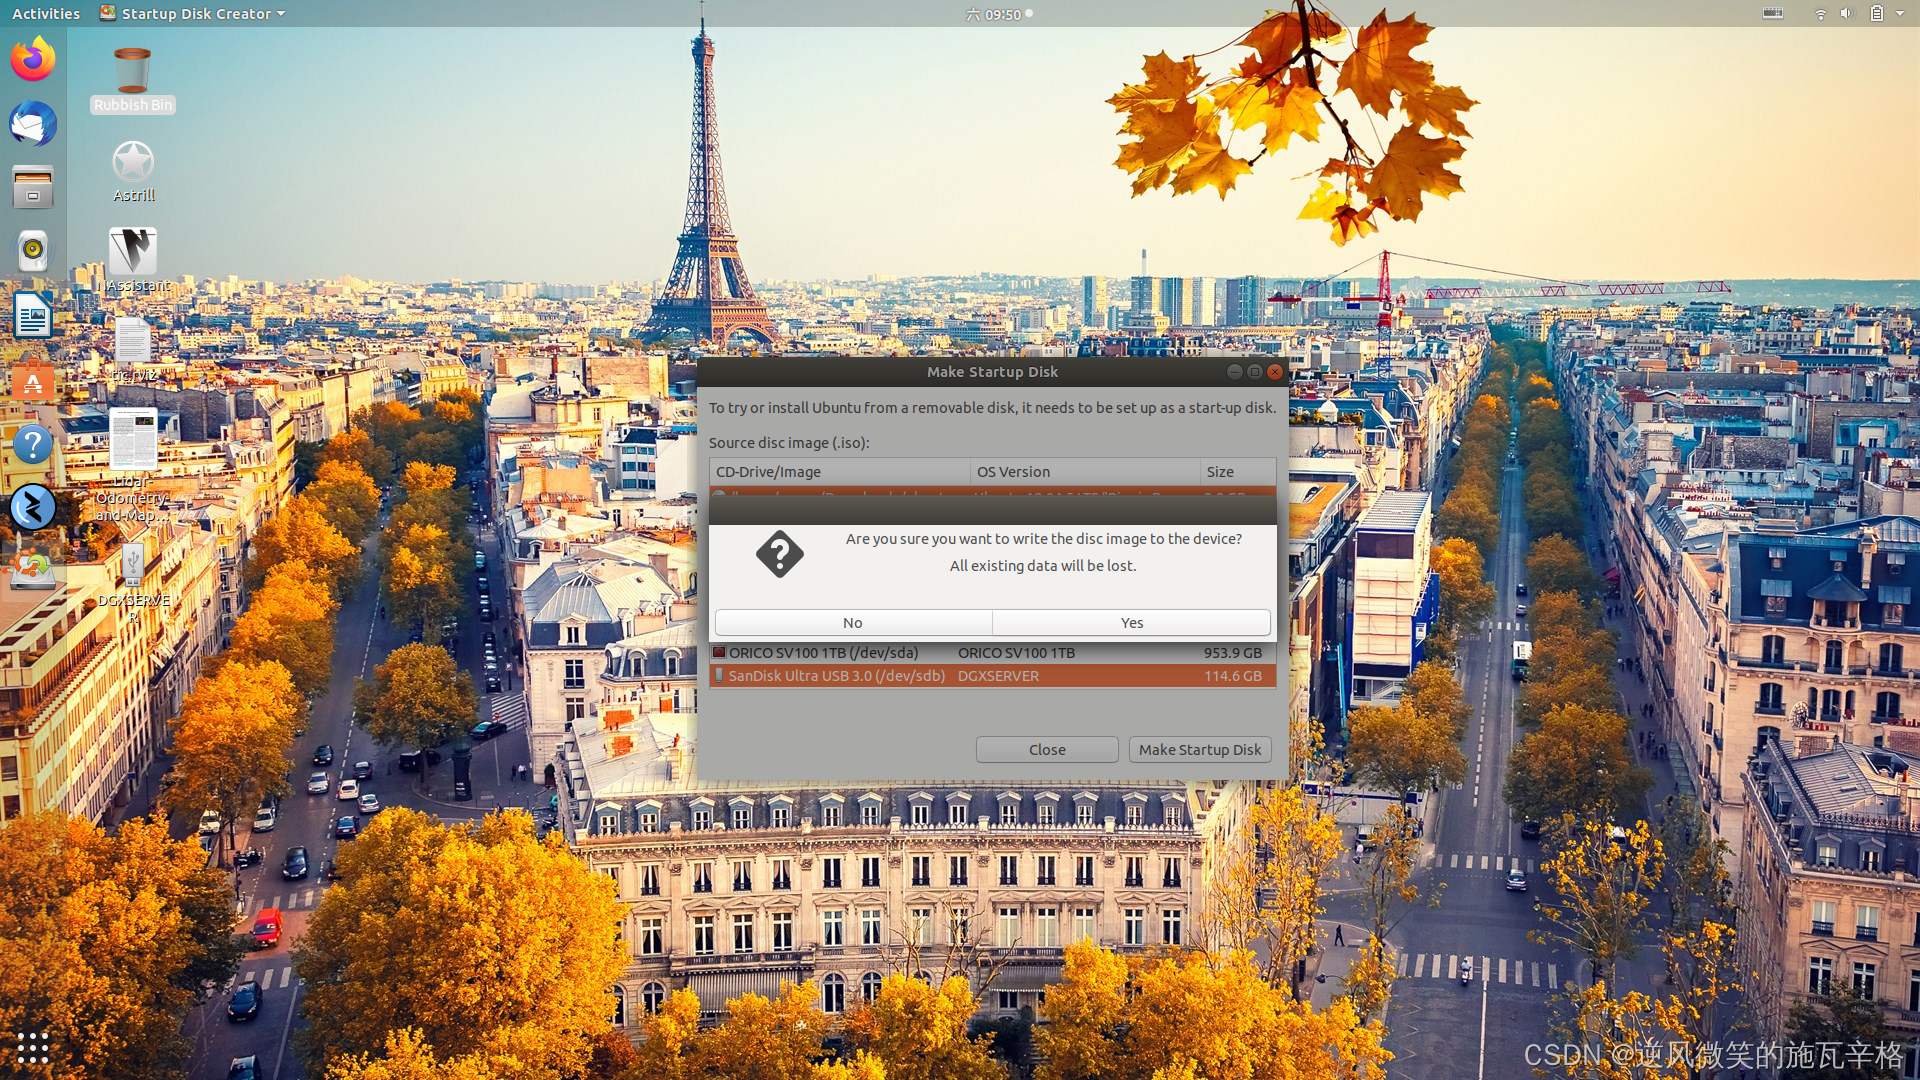
WARNING 请务必仔细检查设备名称!!!确保选择了正确的目标设备!!!否则有可能抹去现有系统盘上的数据
-
启动Creator:

-
选择设备:

-
确认制作:

重新启动, 配置BIOS
在Ubuntu Installer制作完成后, 将上述两USB Disk全部连接PC, 然后重新启动PC. 在系统上电时, 进入BIOS. 进入BIOS的方式和使用设备高度相关, 此处仅作示意
此处目标设备为ThinkPad P73. 在出现OEM Logo时, 按下提示键, 进入BIOS:


选择Boot Config:

将启动优先级调整为USB Device First. 调整结束后:

-
首选的启动媒介为外接USB
-
USB设备名称有2个:
- 其中一个为Ubuntu Installer, SanDisk USB, 它有Bootloader, 能够引导PC进入Ubuntu系统
- 另一个为Ubuntu Workspace, SAMSUNG SSD T3, 它没有Bootloader, 不会引导PC进入Ubuntu系统
-
保存BIOS设置, 重新启动设备, 若配置成功, 应当能看到如下的GRUB界面:

安装Ubuntu
接下来进入Ubuntu安装
选择语言:

选择键盘Layout:
选择No Network Connnection

安装类型选择Normal Installation & Device Drivers

硬盘分区选择Something Else, 自定义分区类型.

创建分区表
接下来进入最重要的环节, 创建Partiton Table
WARNING 请务必仔细检查设备名称!!!确保选择了正确的目标设备!!!否则有可能抹去现有系统盘上的数据
首先, 选择正确的目标设备, 此处为Ubuntu Workspace Disk, SAMSUNG SSD T3, 点击New Partition Table

WARNING 请务必仔细检查设备名称!!!确保选择了正确的目标设备!!!否则有可能抹去现有系统盘上的数据
确认:

执行完成后, Ubuntu Workspace Disk会全部变成Freespace

接下来创建分区. 个人习惯如下, 分区按照创建先后顺序排列:
-
swap, New Partition Type为Primary, Use As为swap, 推荐大小与PC物理内存相同.

-
boot, New Partition Type为Logical, Use As为EXT4 Filesystem, 推荐大小128/256MB.
-
root, New Partition Type为Logical, Use As为EXT4 Filesystem, 推荐大小为剩余的全部Free Space

完成后目标设备上的分区表如下图所示, 点击Install Now, 启动安装:

安装Ubuntu
接下来, 完成剩余的配置, 等待安装成功:
选择区域:

设置设备名, 账号/密码:

等待安装结束:

按照提示重启PC, 完成安装.
配置阿里云源
在设备下电后, 断开Ubuntu Installer与PC的链接, 仅保留Ubuntu Workspace与PC的链接, 启动Ubuntu.
接下来还需要进行最后一步: 配置阿里云源, 更新系统软件. 此处至关重要, 有些设备只有在获取最新驱动后, 才能够正常使用Ubuntu
首先, 打开etc-apt-source.list
sudo gedit /etc/apt/sources.list
删除系统默认配置, 将以下阿里云源配置写入, 保存:
# See http://help.ubuntu.com/community/UpgradeNotes for how to upgrade to
# newer versions of the distribution.
deb http://mirrors.aliyun.com/ubuntu/ bionic main restricted
# deb-src http://mirrors.aliyun.com/ubuntu/ bionic main restricted

## Major bug fix updates produced after the final release of the
## distribution.
# deb-src http://mirrors.aliyun.com/ubuntu/ bionic-updates main restricted

## N.B. software from this repository is ENTIRELY UNSUPPORTED by the Ubuntu
## team. Also, please note that software in universe WILL NOT receive any
## review or updates from the Ubuntu security team.
deb http://mirrors.aliyun.com/ubuntu/ bionic universe
# deb-src http://mirrors.aliyun.com/ubuntu/ bionic universe
# deb-src http://mirrors.aliyun.com/ubuntu/ bionic-updates universe

## N.B. software from this repository is ENTIRELY UNSUPPORTED by the Ubuntu
## team, and may not be under a free licence. Please satisfy yourself as to
## your rights to use the software. Also, please note that software in
## multiverse WILL NOT receive any review or updates from the Ubuntu
## security team.
deb http://mirrors.aliyun.com/ubuntu/ bionic multiverse
# deb-src http://mirrors.aliyun.com/ubuntu/ bionic multiverse
# deb-src http://mirrors.aliyun.com/ubuntu/ bionic-updates multiverse

## N.B. software from this repository may not have been tested as
## extensively as that contained in the main release, although it includes
## newer versions of some applications which may provide useful features.
## Also, please note that software in backports WILL NOT receive any review
## or updates from the Ubuntu security team.
deb http://mirrors.aliyun.com/ubuntu/ bionic-backports main restricted universe multiverse
# deb-src http://mirrors.aliyun.com/ubuntu/ bionic-backports main restricted universe multiverse

## Uncomment the following two lines to add software from Canonical's
## 'partner' repository.
## This software is not part of Ubuntu, but is offered by Canonical and the
## respective vendors as a service to Ubuntu users.
# deb http://archive.canonical.com/ubuntu bionic partner
# deb-src http://archive.canonical.com/ubuntu bionic partner

deb http://mirrors.aliyun.com/ubuntu/ bionic-security main restricted
# deb-src http://mirrors.aliyun.com/ubuntu/ bionic-security main restricted
deb http://mirrors.aliyun.com/ubuntu/ bionic-security universe
# deb-src http://mirrors.aliyun.com/ubuntu/ bionic-security universe
deb http://mirrors.aliyun.com/ubuntu/ bionic-security multiverse
# deb-src http://mirrors.aliyun.com/ubuntu/ bionic-security multiverse
deb http://mirrors.aliyun.com/ubuntu/ bionic-updates multiverse restricted universe main
然后执行系统更新:
sudo apt-get update && sudo apt-get update
配置成功后, 可以看到Packge URL均为阿里云源. 该设置能大幅提升相关依赖安装速度.


 1026
1026


 被折叠的 条评论
为什么被折叠?
被折叠的 条评论
为什么被折叠?
 到【灌水乐园】发言


