转自:
之前在博客《keras系列︱图像多分类训练与利用bottleneck features进行微调(三)》一直在倒腾VGG16的fine-tuning,然后因为其中的Flatten层一直没有真的实现最后一个模块的fine-tuning。
看到github上有一份InceptionV3的fine-tuning并且可以实现。
我看到的keras微调的方式分为以下两种:
fine-tuning方式一:使用预训练网络的bottleneck特征
fine-tuning方式二:要调整权重,并训练
.
整个流程分为以下几个步骤:
- 一、定义函数以及加载模块
- 二、数据准备
- 三、 fine-tuning方式一:使用预训练网络的bottleneck特征
- 四、fine-tuning方式二:要调整权重,并训练
- 五、画图函数
- 六、预测
.
一、定义函数以及加载模块
其中的get_nb_files函数为得到文件数量,个数。
其中,from keras.applications.inception_v3_matt import InceptionV3中,我有自己改,不然就会每次都从网上下载。
import os
import sys
import glob
import argparse
import matplotlib.pyplot as plt
from keras import __version__
from keras.applications.inception_v3_matt import InceptionV3, preprocess_input
from keras.models import Model
from keras.layers import Dense, GlobalAveragePooling2D
from keras.preprocessing.image import ImageDataGenerator
from keras.optimizers import SGD
def get_nb_files(directory):
"""Get number of files by searching directory recursively"""
if not os.path.exists(directory):
return 0
cnt = 0
for r, dirs, files in os.walk(directory):
for dr in dirs:
cnt += len(glob.glob(os.path.join(r, dr + "/*")))
return cnt
- 1
- 2
- 3
- 4
- 5
- 6
- 7
- 8
- 9
- 10
- 11
- 12
- 13
- 14
- 15
- 16
- 17
- 18
- 19
- 20
- 21
- 22
- 23
- 24
- 25
- 26
- 1
- 2
- 3
- 4
- 5
- 6
- 7
- 8
- 9
- 10
- 11
- 12
- 13
- 14
- 15
- 16
- 17
- 18
- 19
- 20
- 21
- 22
- 23
- 24
- 25
- 26
.
二、数据准备
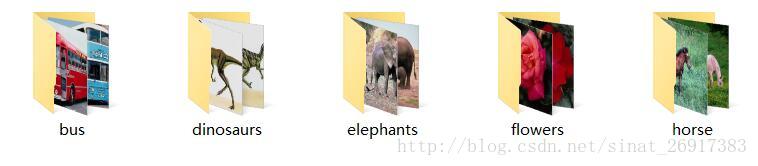
数据放在不同的文件夹下即可,很方便。本文实践的数据是我上次博客的数据《keras系列︱图像多分类训练与利用bottleneck features进行微调(三)》的第二节。
同时原作者在.flow_from_directory函数中,好像漏写了class_mode=’categorical’,一开始导致最后训练的时候,val_acc一直在0.2徘徊。
IM_WIDTH, IM_HEIGHT = 299, 299
FC_SIZE = 1024
NB_IV3_LAYERS_TO_FREEZE = 172
train_dir = '/home/ubuntu/keras/animal5/train'
val_dir = '/home/ubuntu/keras/animal5/validation'
nb_classes= 5
nb_epoch = 3
batch_size = 16
nb_train_samples = get_nb_files(train_dir)
nb_classes = len(glob.glob(train_dir + "/*"))
nb_val_samples = get_nb_files(val_dir)
nb_epoch = int(nb_epoch)
batch_size = int(batch_size)
train_datagen = ImageDataGenerator(
preprocessing_function=preprocess_input,
rotation_range=30,
width_shift_range=0.2,
height_shift_range=0.2,
shear_range=0.2,
zoom_range=0.2,
horizontal_flip=True
)
test_datagen = ImageDataGenerator(
preprocessing_function=preprocess_input,
rotation_range=30,
width_shift_range=0.2,
height_shift_range=0.2,
shear_range=0.2,
zoom_range=0.2,
horizontal_flip=True
)
train_generator = train_datagen.flow_from_directory(
train_dir,
target_size=(IM_WIDTH, IM_HEIGHT),
batch_size=batch_size,class_mode='categorical')
validation_generator = test_datagen.flow_from_directory(
val_dir,
target_size=(IM_WIDTH, IM_HEIGHT),
batch_size=batch_size,class_mode='categorical')
- 1
- 2
- 3
- 4
- 5
- 6
- 7
- 8
- 9
- 10
- 11
- 12
- 13
- 14
- 15
- 16
- 17
- 18
- 19
- 20
- 21
- 22
- 23
- 24
- 25
- 26
- 27
- 28
- 29
- 30
- 31
- 32
- 33
- 34
- 35
- 36
- 37
- 38
- 39
- 40
- 41
- 42
- 43
- 44
- 45
- 46
- 47
- 48
- 49
- 1
- 2
- 3
- 4
- 5
- 6
- 7
- 8
- 9
- 10
- 11
- 12
- 13
- 14
- 15
- 16
- 17
- 18
- 19
- 20
- 21
- 22
- 23
- 24
- 25
- 26
- 27
- 28
- 29
- 30
- 31
- 32
- 33
- 34
- 35
- 36
- 37
- 38
- 39
- 40
- 41
- 42
- 43
- 44
- 45
- 46
- 47
- 48
- 49
.
三、 fine-tuning方式一:使用预训练网络的bottleneck特征
def add_new_last_layer(base_model, nb_classes):
"""
添加最后的层
输入
base_model和分类数量
输出
新的keras的model
"""
x = base_model.output
x = GlobalAveragePooling2D()(x)
x = Dense(FC_SIZE, activation='relu')(x)
predictions = Dense(nb_classes, activation='softmax')(x)
model = Model(input=base_model.input, output=predictions)
return model
def setup_to_transfer_learn(model, base_model):
"""Freeze all layers and compile the model"""
for layer in base_model.layers:
layer.trainable = False
model.compile(optimizer='rmsprop', loss='categorical_crossentropy', metrics=['accuracy'])
base_model = InceptionV3(weights='imagenet', include_top=False)
model = add_new_last_layer(base_model, nb_classes)
setup_to_transfer_learn(model, base_model)
history_tl = model.fit_generator(
train_generator,
nb_epoch=nb_epoch,
samples_per_epoch=nb_train_samples,
validation_data=validation_generator,
nb_val_samples=nb_val_samples,
class_weight='auto')
- 1
- 2
- 3
- 4
- 5
- 6
- 7
- 8
- 9
- 10
- 11
- 12
- 13
- 14
- 15
- 16
- 17
- 18
- 19
- 20
- 21
- 22
- 23
- 24
- 25
- 26
- 27
- 28
- 29
- 30
- 31
- 32
- 33
- 34
- 35
- 36
- 37
- 1
- 2
- 3
- 4
- 5
- 6
- 7
- 8
- 9
- 10
- 11
- 12
- 13
- 14
- 15
- 16
- 17
- 18
- 19
- 20
- 21
- 22
- 23
- 24
- 25
- 26
- 27
- 28
- 29
- 30
- 31
- 32
- 33
- 34
- 35
- 36
- 37
训练时候报错:
main:15: UserWarning: Update your Model call to the Keras 2 API: Model(outputs=Tensor("de..., inputs=Tensor("in...)
没有关系。
有过这样的报错 :
Epoch 1/3
25/25 [==============================] - 37s - loss: 12.6398 - acc: 0.1900 - val_loss: 12.8990 - val_acc: 0.1997
Epoch 2/3
25/25 [==============================] - 34s - loss: 12.8945 - acc: 0.2000 - val_loss: 12.8718 - val_acc: 0.2014
Epoch 3/3
25/25 [==============================] - 34s - loss: 12.8945 - acc: 0.2000 - val_loss: 12.8877 - val_acc: 0.2004
一般是我在设置错了分类时候会出现的情况
出错在:之前少加了class_mode
train_generator = train_datagen.flow_from_directory(
train_dir,
target_size=(IM_WIDTH, IM_HEIGHT),
batch_size=batch_size,class_mode=’categorical’)
.
四、fine-tuning方式二:要调整权重,并训练
那么fine-tuning模式一与模式二区别在于,模式一冻结了base_model所有层,只有新添加的层才能训练,调整权重。但是模式二,在base_model内开放了一部分。
类似的可以看到官方VGG16的两种模式的区别:


第一张图就是模式一,冻结了base_model层;第二张图就是模式二,base_model一些层都开放了。
def setup_to_finetune(model):
"""Freeze the bottom NB_IV3_LAYERS and retrain the remaining top layers.
note: NB_IV3_LAYERS corresponds to the top 2 inception blocks in the inceptionv3 arch
Args:
model: keras model
"""
for layer in model.layers[:NB_IV3_LAYERS_TO_FREEZE]:
layer.trainable = False
for layer in model.layers[NB_IV3_LAYERS_TO_FREEZE:]:
layer.trainable = True
model.compile(optimizer=SGD(lr=0.0001, momentum=0.9), loss='categorical_crossentropy', metrics=['accuracy'])
setup_to_finetune(model)
history_ft = model.fit_generator(
train_generator,
samples_per_epoch=nb_train_samples,
nb_epoch=nb_epoch,
validation_data=validation_generator,
nb_val_samples=nb_val_samples,
class_weight='auto')
model.save(args.output_model_file)
- 1
- 2
- 3
- 4
- 5
- 6
- 7
- 8
- 9
- 10
- 11
- 12
- 13
- 14
- 15
- 16
- 17
- 18
- 19
- 20
- 21
- 22
- 23
- 24
- 25
- 26
- 27
- 28
- 29
- 30
- 31
- 32
- 1
- 2
- 3
- 4
- 5
- 6
- 7
- 8
- 9
- 10
- 11
- 12
- 13
- 14
- 15
- 16
- 17
- 18
- 19
- 20
- 21
- 22
- 23
- 24
- 25
- 26
- 27
- 28
- 29
- 30
- 31
- 32
Epoch 1/3
25/25 [==============================] - 38s - loss: 0.0589 - acc: 0.9850 - val_loss: 0.0084 - val_acc: 0.9986
Epoch 2/3
25/25 [==============================] - 37s - loss: 0.0196 - acc: 0.9925 - val_loss: 0.0150 - val_acc: 0.9965
Epoch 3/3
25/25 [==============================] - 37s - loss: 0.0349 - acc: 0.9875 - val_loss: 0.0101 - val_acc: 0.9979
.
五、画图函数
def plot_training(history):
acc = history.history['acc']
val_acc = history.history['val_acc']
loss = history.history['loss']
val_loss = history.history['val_loss']
epochs = range(len(acc))
plt.plot(epochs, acc, 'r.')
plt.plot(epochs, val_acc, 'r')
plt.title('Training and validation accuracy')
plt.figure()
plt.plot(epochs, loss, 'r.')
plt.plot(epochs, val_loss, 'r-')
plt.title('Training and validation loss')
plt.show()
plot_training(history_ft)
- 1
- 2
- 3
- 4
- 5
- 6
- 7
- 8
- 9
- 10
- 11
- 12
- 13
- 14
- 15
- 16
- 17
- 18
- 1
- 2
- 3
- 4
- 5
- 6
- 7
- 8
- 9
- 10
- 11
- 12
- 13
- 14
- 15
- 16
- 17
- 18
.
六、预测
import sys
import argparse
import numpy as np
from PIL import Image
import requests
from io import BytesIO
import matplotlib.pyplot as plt
from keras.preprocessing import image
from keras.models import load_model
from keras.applications.inception_v3 import preprocess_input
target_size = (229, 229)
def predict(model, img, target_size):
"""Run model prediction on image
Args:
model: keras model
img: PIL format image
target_size: (w,h) tuple
Returns:
list of predicted labels and their probabilities
"""
if img.size != target_size:
img = img.resize(target_size)
x = image.img_to_array(img)
x = np.expand_dims(x, axis=0)
x = preprocess_input(x)
preds = model.predict(x)
return preds[0]
labels = ("cat", "dog")
def plot_preds(image, preds,labels):
"""Displays image and the top-n predicted probabilities in a bar graph
Args:
image: PIL image
preds: list of predicted labels and their probabilities
"""
plt.imshow(image)
plt.axis('off')
plt.figure()
plt.barh([0, 1], preds, alpha=0.5)
plt.yticks([0, 1], labels)
plt.xlabel('Probability')
plt.xlim(0,1.01)
plt.tight_layout()
plt.show()
model = load_model(args.model)
img = Image.open(image)
preds = predict(model, img, target_size)
plot_preds(img, preds)
response = requests.get(image_url)
img = Image.open(BytesIO(response.content))
preds = predict(model, img, target_size)
plot_preds(img, preds)


 733
733


 被折叠的 条评论
为什么被折叠?
被折叠的 条评论
为什么被折叠?
 到【灌水乐园】发言


