


要做到的效果是,A串口给B串口发送消息,B串口接收消息;B串口给A串口发送消息,A串口接收消息,形成实时通信的功能。
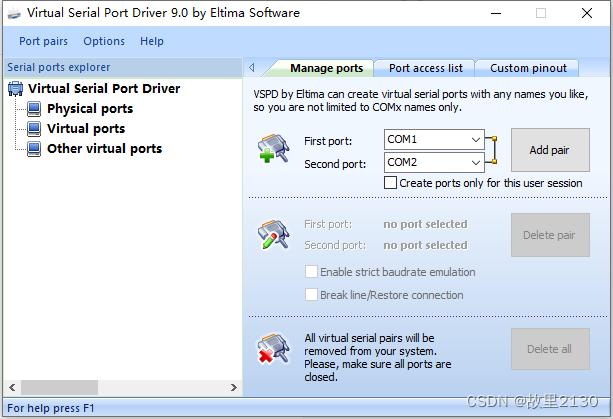
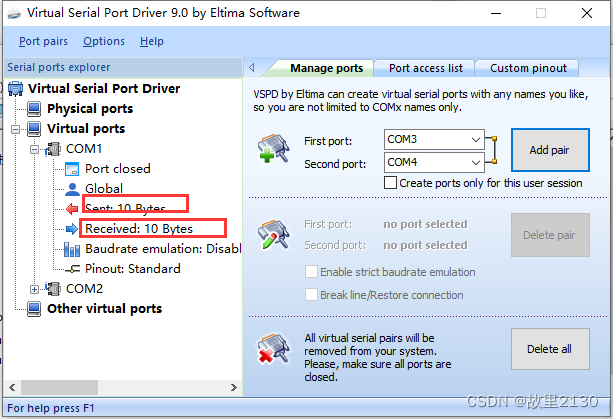
1.安装Configure Virtual Serial Port Driver软件,这个软件可以虚拟出串口。界面是
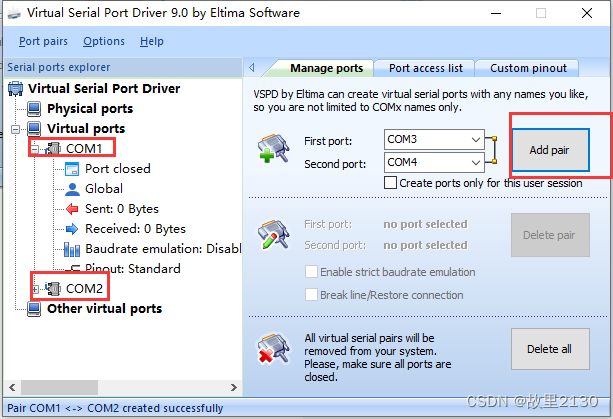
2.点击增加串口按钮,这个相当于创建了COM1和COM2串口,2个串口自动进行了关联
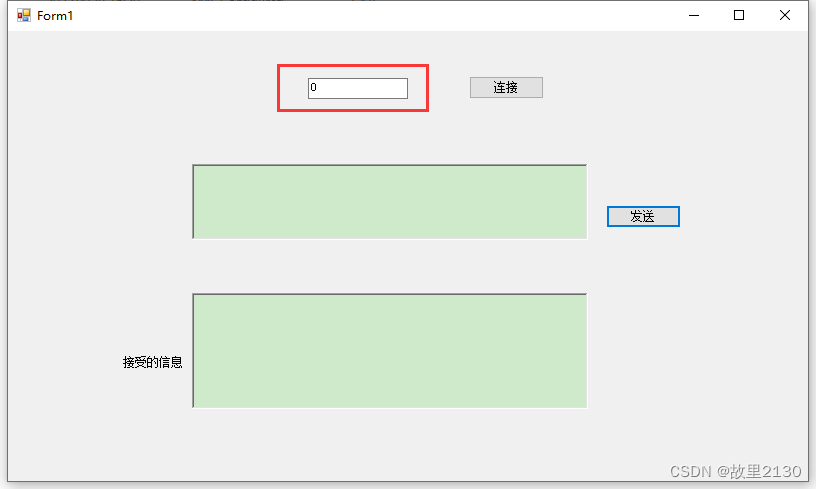
3. 创建一个项目,界面如下

4.界面代码
namespace 串口通信
{
    partial class Form1
    {
        /// <summary>
        /// 必需的设计器变量。
        /// </summary>
        private System.ComponentModel.IContainer components = null;

        /// <summary>
        /// 清理所有正在使用的资源。
        /// </summary>
        /// <param name="disposing">如果应释放托管资源,为 true;否则为 false。</param>
        protected override void Dispose(bool disposing)
        {
            if (disposing && (components != null))
            {
                components.Dispose();
            }
            base.Dispose(disposing);
        }

        #region Windows 窗体设计器生成的代码

        /// <summary>
        /// 设计器支持所需的方法 - 不要修改
        /// 使用代码编辑器修改此方法的内容。
        /// </summary>
        private void InitializeComponent()
        {
            this.components = new System.ComponentModel.Container();
            this.txt_Received = new System.Windows.Forms.RichTextBox();
            this.txt_Msg = new System.Windows.Forms.RichTextBox();
            this.button1 = new System.Windows.Forms.Button();
            this.serialPort = new System.IO.Ports.SerialPort(this.components);
            this.button2 = new System.Windows.Forms.Button();
            this.textBox1 = new System.Windows.Forms.TextBox();
            this.label1 = new System.Windows.Forms.Label();
            this.SuspendLayout();
            //
            // txt_Received
            //
            this.txt_Received.Location = new System.Drawing.Point(184, 262);
            this.txt_Received.Name = "txt_Received";
            this.txt_Received.Size = new System.Drawing.Size(396, 116);
            this.txt_Received.TabIndex = 9;
            this.txt_Received.Text = "";
            //
            // txt_Msg
            //
            this.txt_Msg.Location = new System.Drawing.Point(184, 133);
            this.txt_Msg.Name = "txt_Msg";
            this.txt_Msg.Size = new System.Drawing.Size(396, 76);
            this.txt_Msg.TabIndex = 8;
            this.txt_Msg.Text = "";
            //
            // button1
            //
            this.button1.Location = new System.Drawing.Point(598, 174);
            this.button1.Name = "button1";
            this.button1.Size = new System.Drawing.Size(75, 23);
            this.button1.TabIndex = 7;
            this.button1.Text = "发送";
            this.button1.UseVisualStyleBackColor = true;
            this.button1.Click += new System.EventHandler(this.button1_Click);
            //
            // serialPort
            //
            this.serialPort.DataReceived += new System.IO.Ports.SerialDataReceivedEventHandler(this.serialPort_DataReceived);
            //
            // button2
            //
            this.button2.Location = new System.Drawing.Point(461, 45);
            this.button2.Name = "button2";
            this.button2.Size = new System.Drawing.Size(75, 23);
            this.button2.TabIndex = 11;
            this.button2.Text = "连接";
            this.button2.UseVisualStyleBackColor = true;
            this.button2.Click += new System.EventHandler(this.button2_Click);
            //
            // textBox1
            //
            this.textBox1.Location = new System.Drawing.Point(300, 47);
            this.textBox1.Name = "textBox1";
            this.textBox1.Size = new System.Drawing.Size(100, 21);
            this.textBox1.TabIndex = 10;
            this.textBox1.Text = "0";
            //
            // label1
            //
            this.label1.AutoSize = true;
            this.label1.Location = new System.Drawing.Point(113, 325);
            this.label1.Name = "label1";
            this.label1.Size = new System.Drawing.Size(65, 12);
            this.label1.TabIndex = 12;
            this.label1.Text = "接受的信息";
            //
            // Form1
            //
            this.AutoScaleDimensions = new System.Drawing.SizeF(6F, 12F);
            this.AutoScaleMode = System.Windows.Forms.AutoScaleMode.Font;
            this.ClientSize = new System.Drawing.Size(800, 450);
            this.Controls.Add(this.label1);
            this.Controls.Add(this.txt_Received);
            this.Controls.Add(this.txt_Msg);
            this.Controls.Add(this.button1);
            this.Controls.Add(this.button2);
            this.Controls.Add(this.textBox1);
            this.Name = "Form1";
            this.Text = "Form1";
            this.FormClosing += new System.Windows.Forms.FormClosingEventHandler(this.Form1_FormClosing);
            this.ResumeLayout(false);
            this.PerformLayout();

        }

        #endregion

        private System.Windows.Forms.RichTextBox txt_Received;
        private System.Windows.Forms.RichTextBox txt_Msg;
        private System.Windows.Forms.Button button1;
        private System.IO.Ports.SerialPort serialPort;
        private System.Windows.Forms.Button button2;
        private System.Windows.Forms.TextBox textBox1;
        private System.Windows.Forms.Label label1;
    }
}
5.代码
using System;
using System.Collections.Generic;
using System.ComponentModel;
using System.Data;
using System.Drawing;
using System.Linq;
using System.Text;
using System.Threading.Tasks;
using System.Windows.Forms;

namespace 串口通信
{
    public partial class Form1 : Form
    {
        public Form1()
        {
            InitializeComponent();
        }

        private void button2_Click(object sender, EventArgs e)
        {
            string[] ports = System.IO.Ports.SerialPort.GetPortNames();
            if (ports.Length == 0)
            {
                MessageBox.Show("本机没有串口!");
            }
            Array.Sort(ports);
            serialPort.PortName = ports[Convert.ToInt16(textBox1.Text)];//这里的0,就是COM1,1是COM2。因为电脑创建了2个COM串口
            serialPort.BaudRate = 9600;//波特率
            serialPort.DataBits = 8;//数据位
            serialPort.StopBits = System.IO.Ports.StopBits.One;//停止位
            serialPort.Encoding = System.Text.Encoding.GetEncoding("GB2312");//此行非常重要,解决接收中文乱码的问题

            // 打开串口
            try
            {
                serialPort.Open();
            }
            catch (Exception ex)
            {
                //捕获到异常信息,创建一个新的comm对象,之前的不能用了。
                serialPort = new System.IO.Ports.SerialPort();
                //将异常信息传递给用户。
                MessageBox.Show(ex.Message);
                return;
            }
        }

        private void button1_Click(object sender, EventArgs e)
        {
            string msgOrder = txt_Msg.Text;
            serialPort.Write(msgOrder);
        }

        private void serialPort_DataReceived(object sender, System.IO.Ports.SerialDataReceivedEventArgs e)
        {
            this.Invoke(new EventHandler(UpdateUIText));
        }
        private void UpdateUIText(object s, EventArgs e)
        {
            try
            {
                //必须要阻塞线程一段时间,以免在交易超时的情况下,由于read太快导致读取不完整
                System.Threading.Thread.Sleep(500);
                string txt = serialPort.ReadExisting();
                txt_Received.Text = txt;
            }
            catch (Exception ex)
            {
                MessageBox.Show(ex.Message.ToString());
            }
        }

        private void Form1_FormClosing(object sender, FormClosingEventArgs e)
        {
            try
            {
                if (serialPort != null && serialPort.IsOpen)
                {
                    serialPort.Close();
                    serialPort.Dispose();
                }
            }
            catch (Exception ex)
            {
                //将异常信息传递给用户。
                MessageBox.Show(ex.Message);
                return;
            }
        }
    }
}
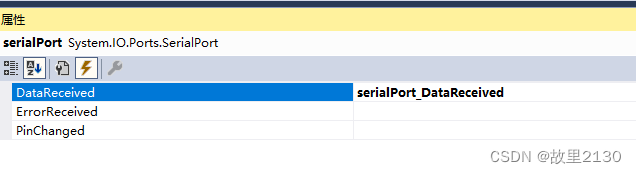
注意:这里要进行串口的事件绑定,用到的控件是![]() 其他控件也一样。
其他控件也一样。
6.生成EXE后,分别启动2个EXE。一个当做A串口,一个当做B串口
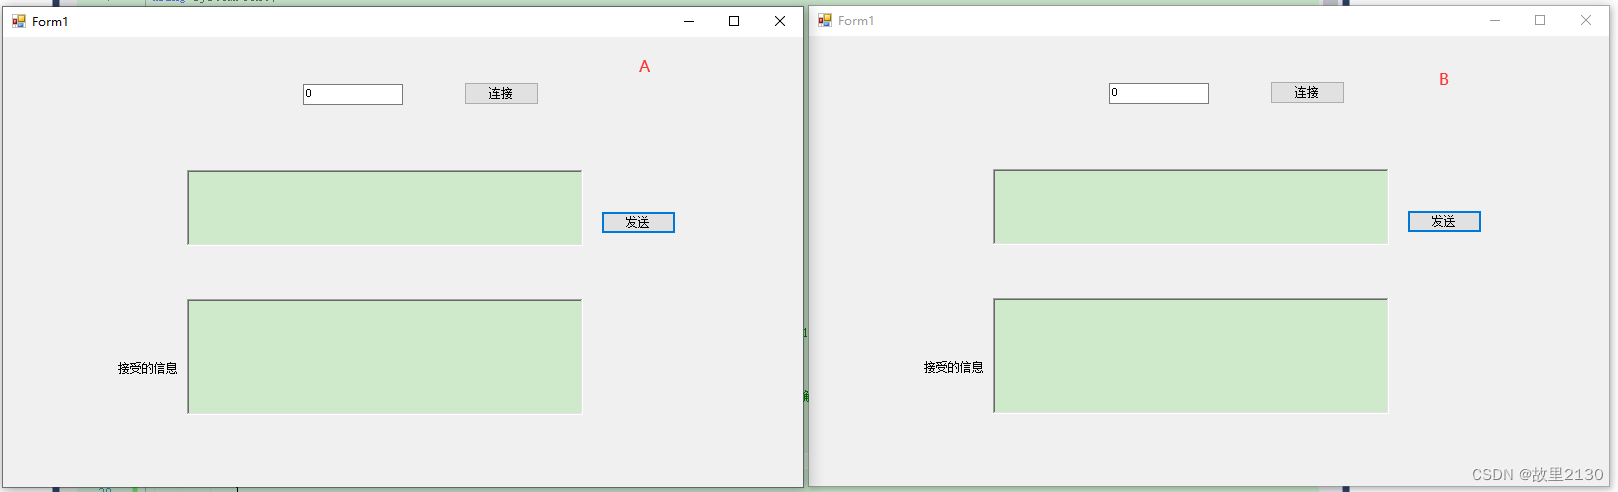
7.效果。A串口写0,B串口写1,分别点击发送。
补充说明 :在Configure Virtual Serial Port Driver软件上,可以看到发送的流量和接收的流量。
完成。
拓展一下
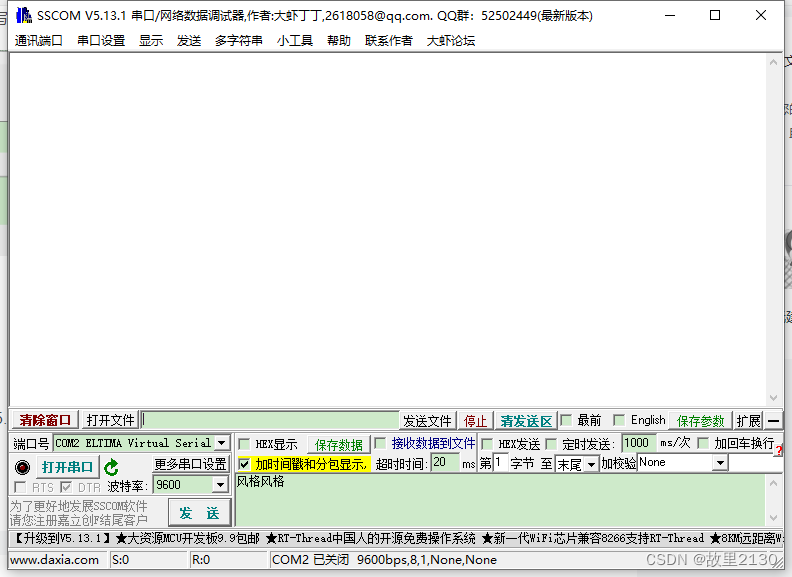
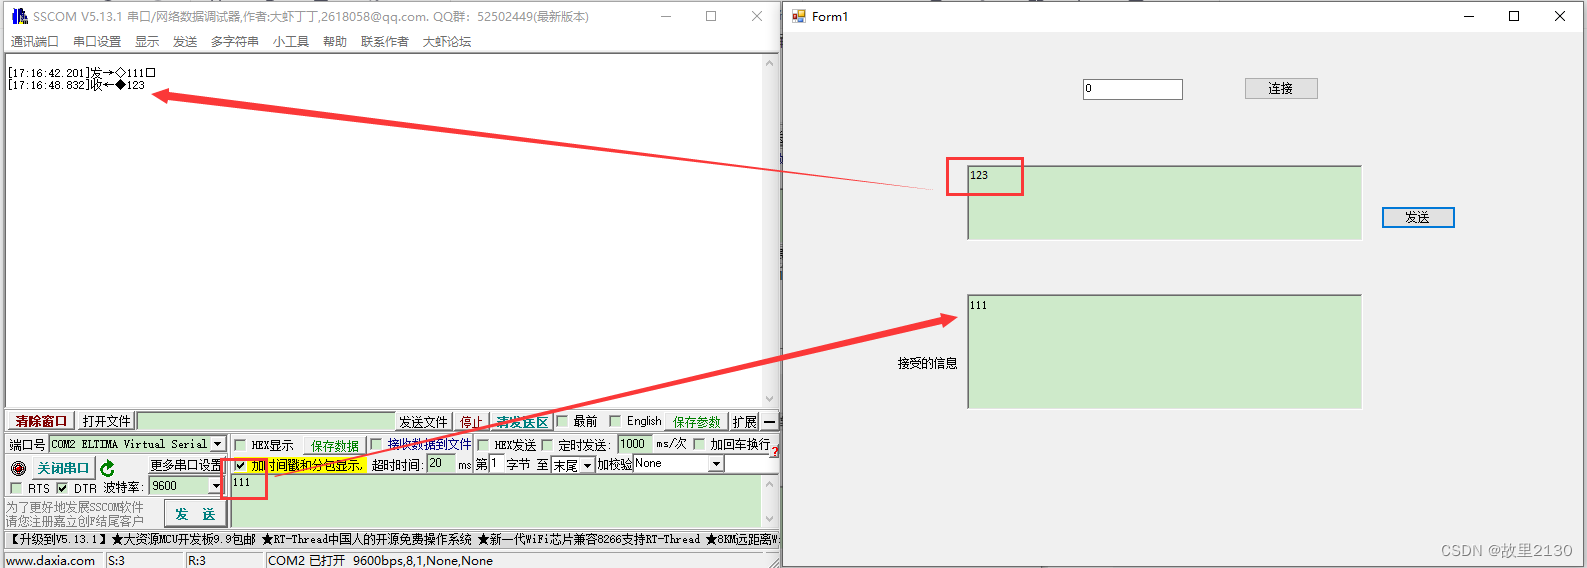
1.可以使用sscom5.13.1.exe这个软件,打开后的界面是
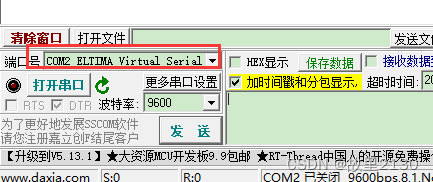
2.可以当作一个发送端进行通信,选择端口COM2,这里选择COM2,那么下面的就选择0,0是COM1
3.打开我们开发的软件,选择0
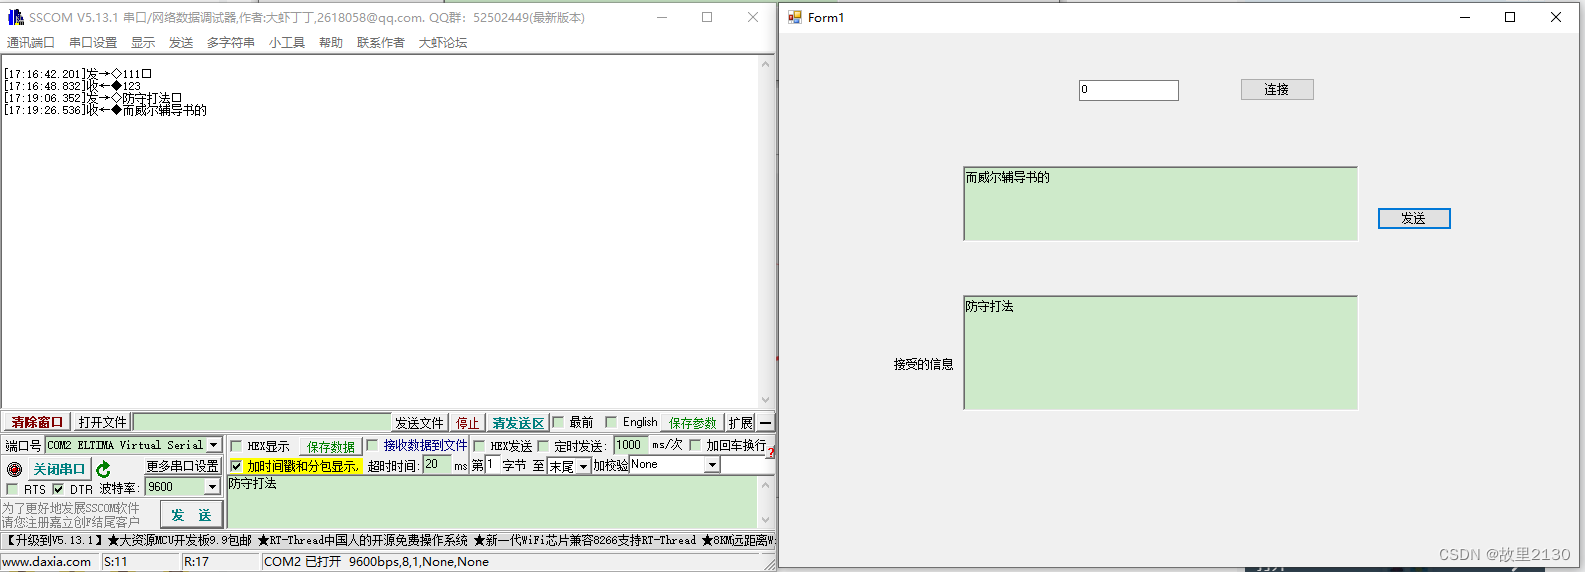
4.最终效果


 1388
1388

 被折叠的 条评论
为什么被折叠?
被折叠的 条评论
为什么被折叠?
 到【灌水乐园】发言


