


导读:
- 不管是刚学习安卓的同学,还是在工作的小伙伴,自定义控件这个点都是非常重要的
- 虽然安卓本身已经有一部分做好的控件,但是实现的功能以及显示效果也是很有限的,那么自定义控件就是我们最好的选择
- 下文是本人学习中总结的内容分享给大家..0.0
本文将以一个自定义组合控件作为例子
配合该老师讲解的视频食用更佳:
http://www.imooc.com/course/programdetail/pid/24
ps: 如果有什么理解错误,欢迎评论指正修改
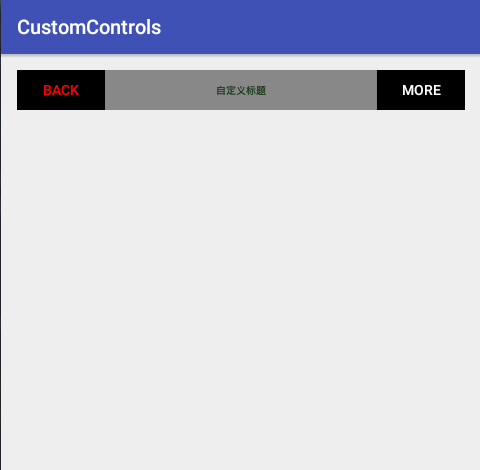
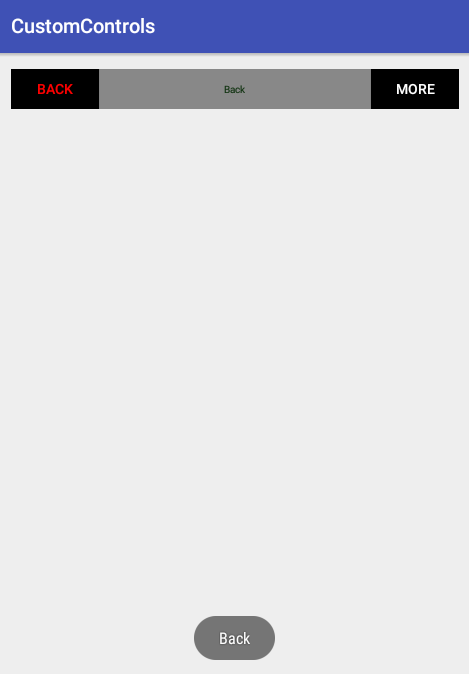
效果图:
点击 “Back” 或 “More” 弹出吐司,并且中间的自定义标题也会变成点击的内容
实现方式:
一般实现自定义控件会有三种方式:
1.继承已有的控件实现 (自定义控件)
2.组合已有的控件实现 (自定义组合控件)
3.完全自定义控件(自定义View)
实现步骤:
一. 在res/Values目录下创建attrs.xml文件,设计需要的属性
| 属性 | 作用 |
|---|---|
| reference | 某一资源ID |
| color | 颜色值 |
| boolean | 布尔值 |
| dimension | 尺寸值 |
| float | 浮点值 |
| integer | 整型值 |
| string | 字符串 |
| fraction | 百分数 |
| enum | 枚举值 (多值选一) |
| flag | 位或运算 (多值组合) |
<!--自定义属性名(自定义就好)-->

    <declare-styleable name="Topbar">
        <!--自定义的属性;属性类型-->
        <attr name="title" format="string"/>
        <attr name="titleTextSize" format="dimension"/>
        <attr name="titleTextColor" format="color"/>
        <attr name="leftTextColor" format="color"/>
        <attr name="leftText" format="string"/>
        <attr name="leftBackground" format="reference|color"/>
        <attr name="rightTextColor" format="color"/>
        <attr name="rightText" format="string"/>
        <!--平常在定义 Background 属性,不仅能通过字节码调用颜色,还能@调用资源文件-->
        <attr name="rightBackground" format="reference|color"/>
    </declare-styleable>
注意:
1.定义一个Background(Drawable属性),设置要 format="reference|color"  因为我们平常在定义Background 不仅能通过字节码调用颜色,还能@调用资源文件

2.attrs.xml 设置好属性以后,系统会在R.styleable 文件中生成 类似 R.styleable.Topbar_leftTextColor 的值,用于 TypedArray 获取attr便签定义的属性

3.enum 或flag 标签
  <attr name="postion" value="enum">
        <enum name="left" value="0"/>
        <enum name="right" value="1"/>
  </attr>

调用:
   typeArray.getInteger(R.styleable_XX,0); 得到对应值的属性
二. 实现一个自定义的”View”(如 自定义类 继承 RelativeLayout)
2.1.实现”View”的构造函数
| 四个构造函数(一般关注前两个即可) | 作用 |
|---|---|
| “view”(Context context) | 常规构造函数(代码中实例化) |
| “view”(Context context,AttributeSet attrs) | 用于在XML中使用,可以指定自定义属性 |
| “view”(Context context, AttributeSet attrs, int defStyleAttr) | 用于在XML中使用,可以指定自定义属性,并指定样式 |
| “view”(Context context, AttributeSet attrs, int defStyleAttr, int defStyleRes) | 用于在XML中使用,可以指定自定义属性,并指定样式及其资源 |
   /**
     * 其他类通过new TopBar() 时被调用
     *
     * @return
     */
    public TopBar(Context context) {
        super(context);

    }

    /**
     * 实现父类View的构造函数
     *
     * @param context
     * @param attrs
     */
    public TopBar(Context context, AttributeSet attrs) {
        super(context, attrs);
        initData(context, attrs);
        //initView(context);
        initView();
        initEvent();
    }
2.2.获取 attrs.xml 自定义的属性
    /**
     *
     *
     * @param context 上下文
     * @param attrs   TopBar(Context context, AttributeSet attrs) 由构造函数传过来
     */
    private void initData(Context context, AttributeSet attrs) {
        TypedArray typedArray = context.obtainStyledAttributes(attrs, R.styleable.Topbar);

        //左侧按钮数据
        leftTextColor = typedArray.getColor(R.styleable.Topbar_leftTextColor, 0);
        leftBackground = typedArray.getDrawable(R.styleable.Topbar_leftBackground);
        leftText = typedArray.getString(R.styleable.Topbar_leftText);

        //右侧按钮数据
        rightTextColor = typedArray.getColor(R.styleable.Topbar_rightTextColor, 0);
        rightBackground = typedArray.getDrawable(R.styleable.Topbar_rightBackground);
        rightText = typedArray.getString(R.styleable.Topbar_rightText);

        //自定义标题数据
        titleTextSize = typedArray.getDimension(R.styleable.Topbar_titleTextSize, 0);
        title = typedArray.getString(R.styleable.Topbar_title);
        titleTextColor = typedArray.getColor(R.styleable.Topbar_titleTextColor, 0);

        //回收,避免浪费资源以及由于避免缓存报的错误
        typedArray.recycle();

        }
2.3.设置控件之间的布局关系(看需求,使用1或2都可以)
1. 用代码构建自定义控件布局
        //addRule() 是 RelativeLayout 特有的Api

        //左侧Button布局
        leftParams = new LayoutParams(ViewGroup.LayoutParams.WRAP_CONTENT, ViewGroup.LayoutParams
                .WRAP_CONTENT);
        leftParams.addRule(RelativeLayout.ALIGN_PARENT_LEFT, TRUE);//居左对齐
        addView(leftButton, leftParams);//将leftButton添加到我们的RelativeLayout 中

        //右侧Button布局
        rightParams = new LayoutParams(ViewGroup.LayoutParams.WRAP_CONTENT, ViewGroup.LayoutParams
                .WRAP_CONTENT);
        rightParams.addRule(RelativeLayout.ALIGN_PARENT_RIGHT, TRUE);//居右对齐
        addView(rightButton, rightParams);//将rightButton添加到我们的RelativeLayout 中

        //自定义标题布局
        titleParams = new LayoutParams(ViewGroup.LayoutParams.WRAP_CONTENT, ViewGroup.LayoutParams
                .MATCH_PARENT);
        titleParams.addRule(RelativeLayout.CENTER_IN_PARENT, TRUE);//居中对齐

        addView(tvTitle, titleParams);//将tvTitle添加到我们的RelativeLayout 中
2. 用打气筒xml文件构建自定义控件布局
       //布局文件,根布局对象,是否作为根布局
        View rootView = View.inflate(getContext(),R.layout.custom_controls, this);

        leftButton = (Button) rootView.findViewById(R.id.btn_left);
        rightButton = (Button) rootView.findViewById(R.id.btn_right);
        tvTitle = (TextView) rootView.findViewById(R.id.tv_title);
2.4.将自定义属性和View绑定并显示出来
         leftButton = new Button(context);
        rightButton = new Button(context);
        tvTitle = new TextView(context);

        //左侧Button
        leftButton.setTextColor(leftTextColor);
        leftButton.setBackground(leftBackground);
        leftButton.setText(leftText);

        //右侧Button
        rightButton.setTextColor(rightTextColor);
        rightButton.setBackground(rightBackground);
        rightButton.setText(rightText);

        //自定义标题
        tvTitle.setTextColor(titleTextColor);
        tvTitle.setText(title);
        tvTitle.setTextSize(titleTextSize);
        tvTitle.setGravity(Gravity.CENTER); //居中显示文本
注意:
1.使用TypedArray typedArray = context.obtainStyledAttributes(attrs, R.styleable.Topbar); 获取属性

记得  typedArray.recycle();  避免浪费资源以及由于避免缓存报的错误

2.获取属性值函数: obtainStyledAttributes

public final TypedArray obtainStyledAttributes(
            AttributeSet set, @StyleableRes int[] attrs, @AttrRes int defStyleAttr,
            @StyleRes int defStyleRes) {
        return getTheme().obtainStyledAttributes(
            set, attrs, defStyleAttr, defStyleRes);
    }

  四个参数的意思分别是:

    set:属性值的集合,一般为第二个构造函数中的attrs

    attrs:我们要获取的属性的资源ID的一个数组

    defStyleAttr:这个是当前Theme中的一个attribute,是指向style的一个引用,当在layout xml中和style中都没有为View指定属性时,会从Theme中这个attribute指向的Style中查找相应的属性值,如果这个参数传入0表示不向Theme中搜索默认值

    defStyleRes:这个也是指向一个Style的资源ID,但是仅在defStyleAttr为0或defStyleAttr不为0但Theme中没有为defStyleAttr属性赋值时起作用

函数返回值:
 TypedArray 是一个类,包含要获取值的一个集合

3.旧版获取属性(通过命名空间,属性名获取):

 Android Studio: String title = attrs.getAttributeValue("http://schemas.android.com/apk/res-auto", "title");
 eclipse:     String title = attrs.getAttributeValue("http://schems.android.com/apk/res/(自定义" View " 的工程包名)", "title");

4.优先级问题
在xml布局文件指定属性,在style文件指定属性,在Theme文件指定属性存在优先级;
-->
在XML中直接指定>在style中指定值>在Activity theme中指定了defStyleAttr(>0)>在Application theme中指定了defStyleAttr(>0)>指定了defStyleRes(>0)>在Activity theme中指定的值>在Application theme中指定的值
三. 在布局文件中引用我们的自定义控件
- 在根布局定义定义xmlns(命名空间) 如:xmlns:app(自定义)=”http://schems.android.com/apk/res-auto”
- 引用我们的自定义控件包名
<RelativeLayout
    android:id="@+id/activity_main"
    xmlns:android="http://schemas.android.com/apk/res/android"
    xmlns:custom="http://schemas.android.com/apk/res-auto"
    xmlns:tools="http://schemas.android.com/tools"
    android:layout_width="match_parent"
    android:layout_height="match_parent"
    android:paddingBottom="@dimen/activity_vertical_margin"
    android:paddingLeft="@dimen/activity_horizontal_margin"
    android:paddingRight="@dimen/activity_horizontal_margin"
    android:paddingTop="@dimen/activity_vertical_margin"
    tools:context="zs.xmx.customcontrols.MainActivity">

    <zs.xmx.customcontrols.TopBar
        android:id="@+id/topbar"
        android:layout_width="match_parent"
        android:layout_height="40dp"
        custom:leftBackground="#000000"
        custom:leftText="Back"
        custom:leftTextColor="#FF0000"
        custom:rightBackground="#000000"
        custom:rightText="More"
        custom:rightTextColor="#FFFFFF"
        custom:title="自定义标题"
        custom:titleTextColor="#123412"
        custom:titleTextSize="10sp"
        />
</RelativeLayout>
注意:
1. xmlns(xml命名空间) 主要用来调用xml文件
2. 在Android Studio 中:xmlns:app(自定义)="http://schems.android.com/apk/res-auto"
3. 在eclipse 中: xmlns:app(自定义)="http://schems.android.com/apk/res/(自定义" View " 的工程包名)"
四. 动态的控制自定义控件
两种方式:
- 接口回调机制实现
在自定义的 “View” 中,写一个方法,让外部类调用
- 接口回调机制方法实现
- 定义一个接口,将我们要实现的方法定义
- 接口回调机制方法实现
public interface topbarClickListener{
    public void leftClick();
    public void rightClick();
}
2.定义我们的接口作为成员变量
private topbarClickListenr listener; - 定义一个方法暴露给调用者,类似button.setOnClickListen(),这样就可以将我们接口里定义的方法以匿名内部类的形式传递进来
  public void setOnTopbarClickListenr(topbarClickListener listener){
       this.listener=listener;
  }
4.在我们原来要操作的逻辑方法改成接口里定义的方法,让外部类实现
//例子:
   button.setOnClickListener(new OnClickListener()){

    @Override

    public void onClick(View v){
       listener.leftClick();
    }
 }
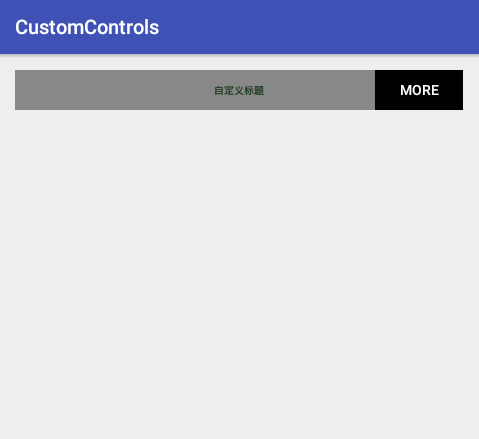
- 在自定义的 “View” 中,写一个方法,让外部类调用
// 例子:(外部类 find 到这个控件,用 . 的方式调用即可)
   public void setLeftIsVisable(boolean flag){
       if(flag){

         leftButton.setVisibility(View.VISIBLE);

       }else{

        leftButton.setVisibility(View.GONE);
       }
   }
总结:
常用的自定义控件基本如文章所示,自定义View后续补上


 2454
2454


 被折叠的 条评论
为什么被折叠?
被折叠的 条评论
为什么被折叠?
 到【灌水乐园】发言


