


1.1 Gradle Build Files in Android
1 settings.gradle
位于根目录,它指明了那些包含在多项目构建中的子项目(Android支持gradle多项目构建)
2 build.gradle(top-level)
位于根目录,在这里添加配置选项会对所有的子项目起效
buildscript {
    repositories {
        jcenter()
    }
    dependencies {
        classpath 'com.android.tools.build:gradle:2.0.0'
    }
}
allprojects {
    repositories {
        jcenter()
    }
}
task clean(type: Delete) {
    delete rootProject.buildDir
}
2.1 buildscript
The Gradle distribution does not include Android functionality by default. Google
provides an Android plug-in for Gradle, which allows easy configuration of Android
projects. The buildscript block in the top-level build file tells Gradle where to
download that plug-in.
大概原意:Gradle默认是没有构建Android项目的功能的;而Google官方提供了一个Android插件给gradle用于简化Android项目的构建配置。buildscript标签配置就是用于说明gradle需要去哪里下载该Android插件,相当于给gradle配置了一个下载的地址
仓库配置
jcenter()-Bintray JCenter Artifactory repository:默认的仓库,该仓库所有的内容都放在CDN上,并使用HTTPS链接,它的速度相对较快
mavenCentral():Maven默认的仓库配置
2.2 allprojects
The allprojects section indicates that the top-level project and any subprojects all
default to using the jcenter() repository to resolve any Java library dependencies.
大概原意:allprojects模块表明顶层项目和其他子项目默认使用jcenter()仓库去下载任何需要的java-lib库
2.3 task clean(简单描述,其他章节再详细介绍)
Gradle允许我们自定义任务(task),并将其跟其他的任务关联起来(DAG)。上边的配置作用是:定义了一个删除的任务,用于删除根目录的build子目录
3 Gradle build file for the app subproject
每个子项目的独立build.gradle文件,用于配置子项目特殊的一些构建属性
apply plugin: 'com.android.application'
android {
    compileSdkVersion 23
    buildToolsVersion "23.0.3"
    defaultConfig {
        applicationId "com.kousenit.myandroidapp"
        minSdkVersion 19
        targetSdkVersion 23
        versionCode 1
        versionName "1.0"
    }
    buildTypes {
        release {
            minifyEnabled false
            proguardFiles getDefaultProguardFile('proguard-android.txt'),'proguard-rules.pro'
        }
    }
}
dependencies {
    compile fileTree(dir: 'libs', include:['*.jar'])
    testCompile 'junit:junit:4.12'
    compile 'com.android.support:appcompat-v7:23.3.0'
}
3.1 apply
The apply functionality in Gradle adds the Android plug-in to the build system,which enables the android section Domain Specific Language (DSL) configuration.
大概原意:apply功能将Android插件添加到整个构建系统中,使其支持Android部分领域特定语言
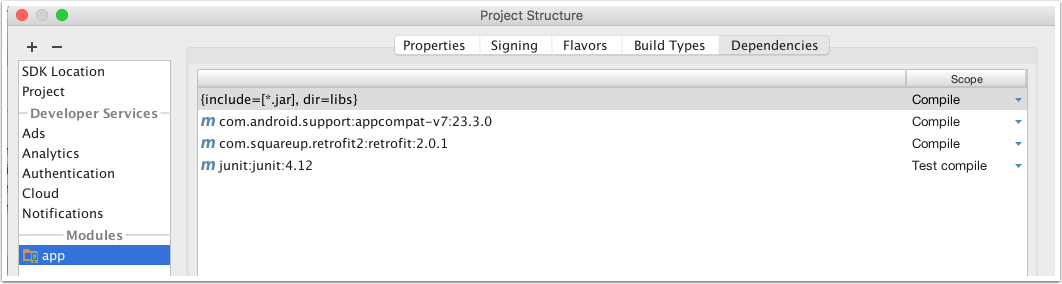
3.2 dependencies
compile fileTree(dir: ‘libs’, include:[‘*.jar’]):
libs路径下的所有.jar文件都被添加到编译类路径下
testCompile ‘junit:junit:4.12’:下载4.12版的junit,用于进行单元测试
compile ‘com.android.support:appcompat-v7:23.3.0’:下载23.3.0版本的appcompat-v7,作为其中一个编译的依赖库
1.2 Configure SDK Versions and Other Defaults
The top-level Android build file adds the Android plug-in for Gradle to your project,via the buildscript block. Module build files “apply” the plug-in, which adds an android block to the Gradle DSL.
大概原意:根目录的buildscript模块将Android插件添加到构建系统中,子目录中的build.gradle使用该插件将android作用块添加到Gradle-DSL,在该作用块中你可以为每个子项目配置特殊的构建属性
1 android
android作用块是Android-DSL的入口,在这里需要使用compileSdkVersion指定编译的目标版本,使用build
ToolsVersion指定构建工具的版本
2 defaultConfig作用块几个属性
2.1 applicationId
该应用的包名
2.2 minSdkVersion
该应用支持的最低版本的SDK
2.3 targetSdkVersion
该应用支持的目标版本的SDK
2.4 versionCode
通常用于应用升级
Prior to the switch to Gradle, the minSdkVersion and buildToolsVersion properties
were specified in the Android Manifest as attributes of a tag. That
approach is now deprecated, as the values there are overridden by the values in the
Gradle build file.大意:AndroidManifest中使用配置的minSdkVersion和buildToolsVersion属性会被build.gradle中的配置覆盖
3 compileOptions
配置该app使用的JDK版本
1.3 Executing Gradle Builds from the Command Line
The purpose of the Gradle wrapper is to allow a client to run Gradle without having
to install it first. The wrapper uses the gradle-wrapper.jar and the gradle-
wrapper.properties files in the gradle/wrapper folder in the application root to start the
process.
大概原意:Gradle wrapper的作用是让客户端在没有安装Gradle的情况下也能运行gradle脚本;其使用gradle-wrapper.jar和gradle-wrapper.properties文件来运行程序
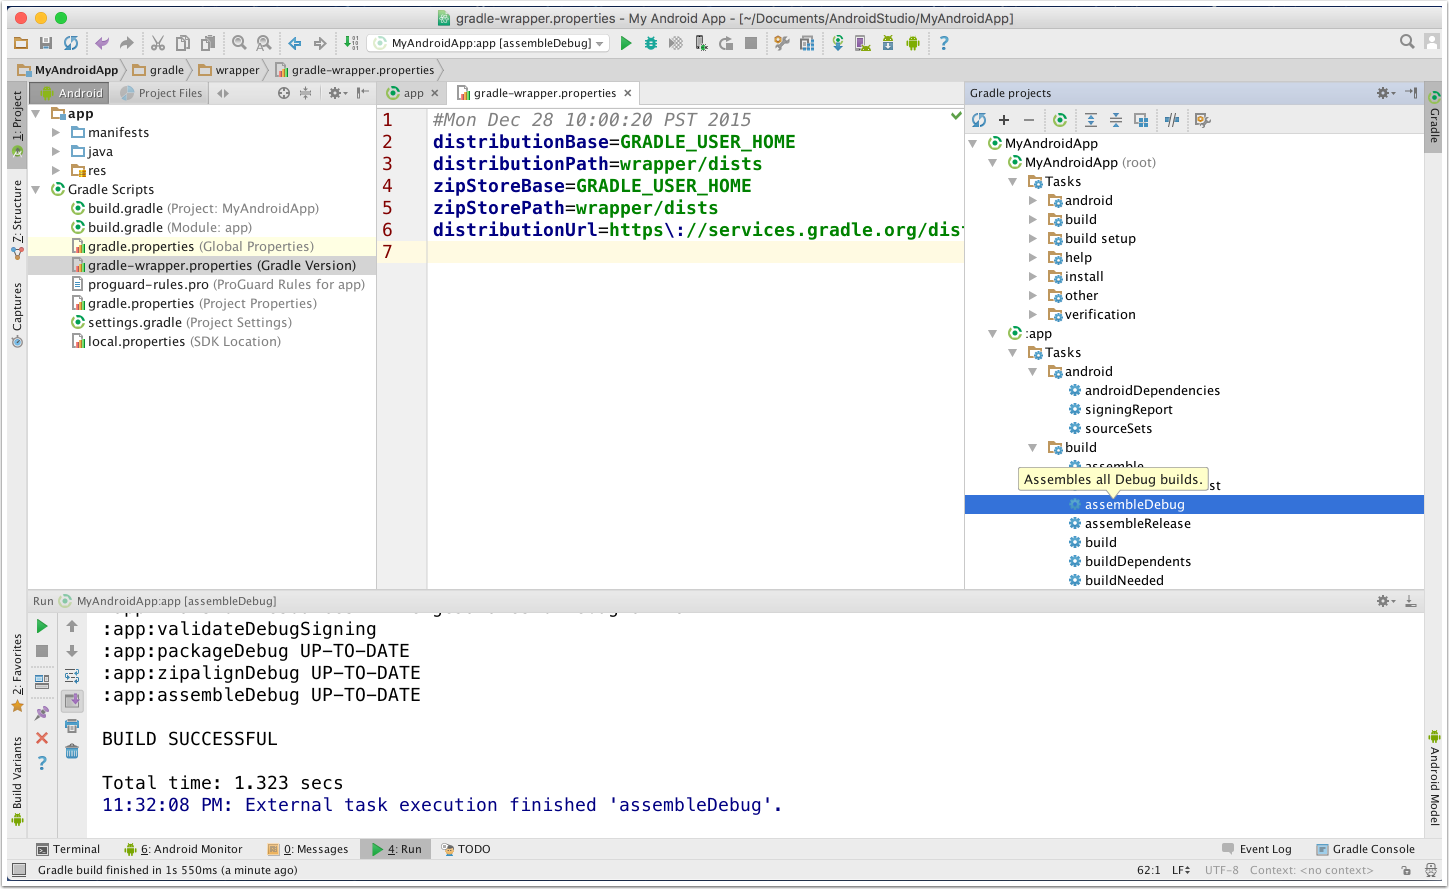
1 gradle-wrapper.properties
#Mon Dec 28 10:00:20 PST 2015
distributionBase=GRADLE_USER_HOME
distributionPath=wrapper/dists
zipStoreBase=GRADLE_USER_HOME
zipStorePath=wrapper/dists
distributionUrl=https\://services.gradle.org/distributions/gradle-2.10-all.zip
1.1 The distributionUrl property indicates that the wrapper will download and install version 2.10 of Gradle:将下载2.10版本的gradle-wrapper
1.2 the Gradle distribution will be cached in
the zipStorePath folder under the zipStoreBase directory and then be available for
all subsequent executions of Gradle tasks:第一次下载后将会把wrapper缓存在zipStorePath目录下,以后将会适用于所有的gradle任务(即以后的task将会默认使用缓存中的wrapper)
2 Additional features and command-line flags
2.1
// 多个同名的task,只会执行一次
Executing more than one task
> ./gradlew lint assembleDebug
Note that repeating the same task name only executes it once.
2.2
// 可使用-x来排除不需要执行的task
> ./gradlew assembleDebug -x lintDebug
Excluding the lintDebug task
2.3
// 可使用缩略的字符串执行,但必须保证缩略的字符串没有歧义
> ./gradlew anDep
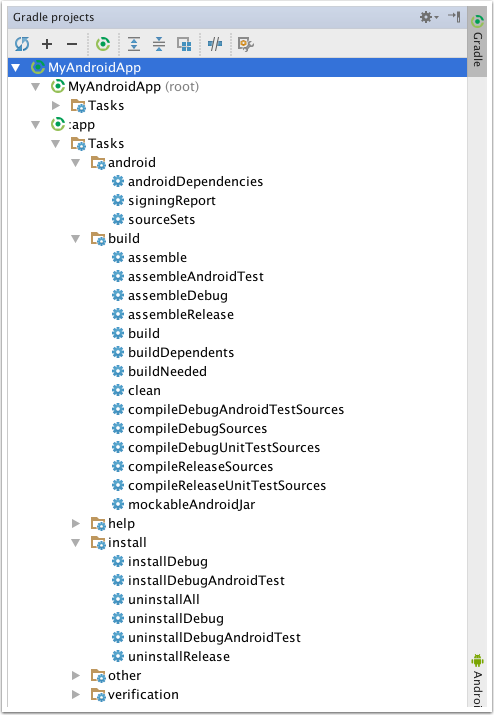
Not enough letters to be unique1.4 Executing Gradle Builds from Android Studio
To execute a particular task, double-click the entry in the Gradle window.双击下图的某个选项就可执行
常用命令
terminal查看进度
1.5 Adding Java Library Dependencies
gradle支持多种不同方式的依赖引用
1.1 The full syntax for a dependency calls out the group, name, and version numbers explicitly
testCompile group: 'junit', name: 'junit',version: '4.12'1.2 精简方式
testCompile 'junit:junit:4.12'1.3 版本号是可变的
testCompile 'junit:junit:4.+'This tells Gradle that any version of JUnit greater than or equal to 4.0 is required to
compile the project’s tests. While this works, it makes the build less deterministic and
therefore less reproducible. Explicit version numbers also protect you from changes
in later versions of a particular API.
1.4 添加多个引用资源
If you want to add a set of files to a configuration without adding them to a reposi‐
tory, you can use the files or fileTree syntax inside the dependencies block
dependencies {
compile files('libs/a.jar', 'libs/b.jar')
compile fileTree(dir: 'libs', include: '*.jar')
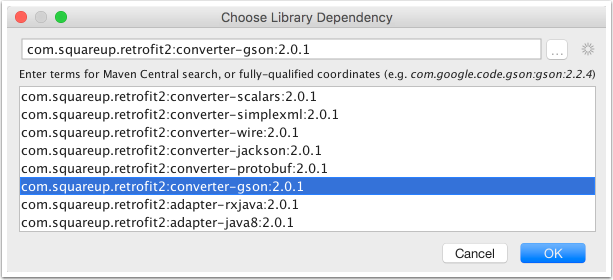
}1.6 Adding Library Dependencies Using Android Studio
1 dependencies列表
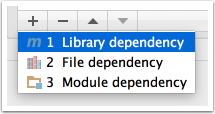
2 添加界面
3 搜索界面
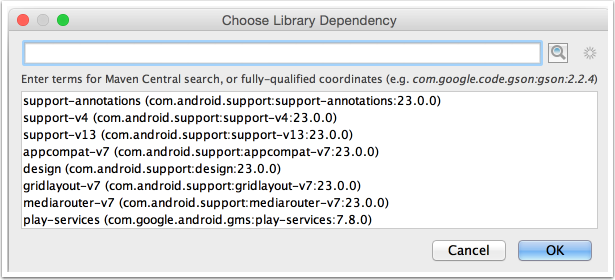
4 搜索结果界面
1.7 Configuring Repositories
1
JCenter():https://jcenter.bintray.com
2
mavenCentral():http://repo1.maven.org/maven2
3 Any Maven repository can be added to the default list using a maven argument with a url block
repositories {
    maven {
        url 'http://repo.spring.io/milestone'
    }
}
4 Password-protected repositories use a credentials block (设置帐号密码)
repositories {
    maven {
        credentials {
            username 'username'
            password 'password'
        }
        url 'http://repo.mycompany.com/maven2'
    }
}
5 If you have files on the local filesystem, you can use a directory as a repository with the flatDir syntax
repositories {
    flatDir {
        dirs 'lib'
    }
}


 414
414

 被折叠的 条评论
为什么被折叠?
被折叠的 条评论
为什么被折叠?
 到【灌水乐园】发言


